> ## Documentation Index
> Fetch the complete documentation index at: https://notes.kodekloud.com/llms.txt
> Use this file to discover all available pages before exploring further.
# Solution Admission Controllers
> This article explains solutions for the admission controllers lab, detailing steps, commands, and configuration snippets.
In this lesson, we will walk through the solutions for the admission controllers lab, explaining each step and providing the necessary commands and configuration snippets.
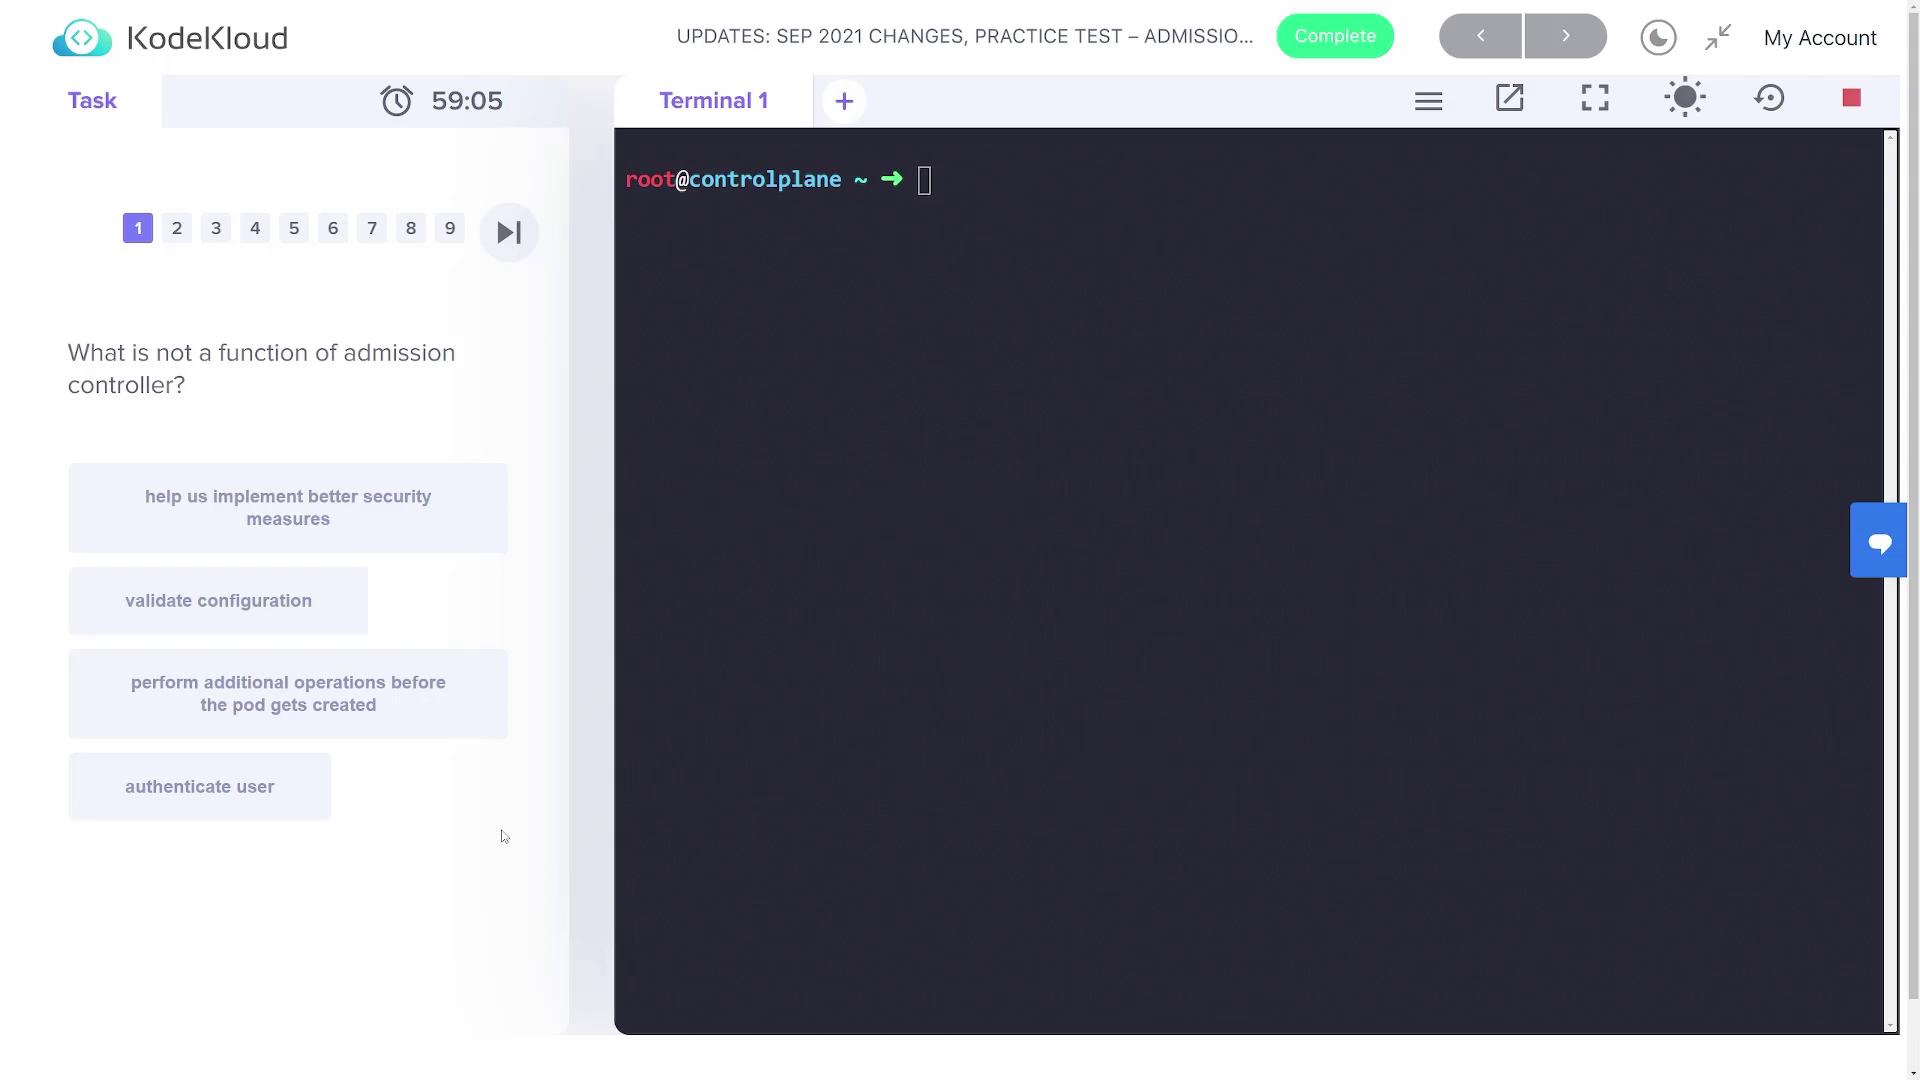
## Understanding Admission Controller Functions
For the first question, you need to determine which option is NOT a function of admission controllers. The correct answer is **"authenticate users"** because admission controllers operate after authentication has already taken place; they do not handle user authentication.
```bash theme={null}
root@controlplane ~ []
```
## Verifying Enabled Admission Controllers
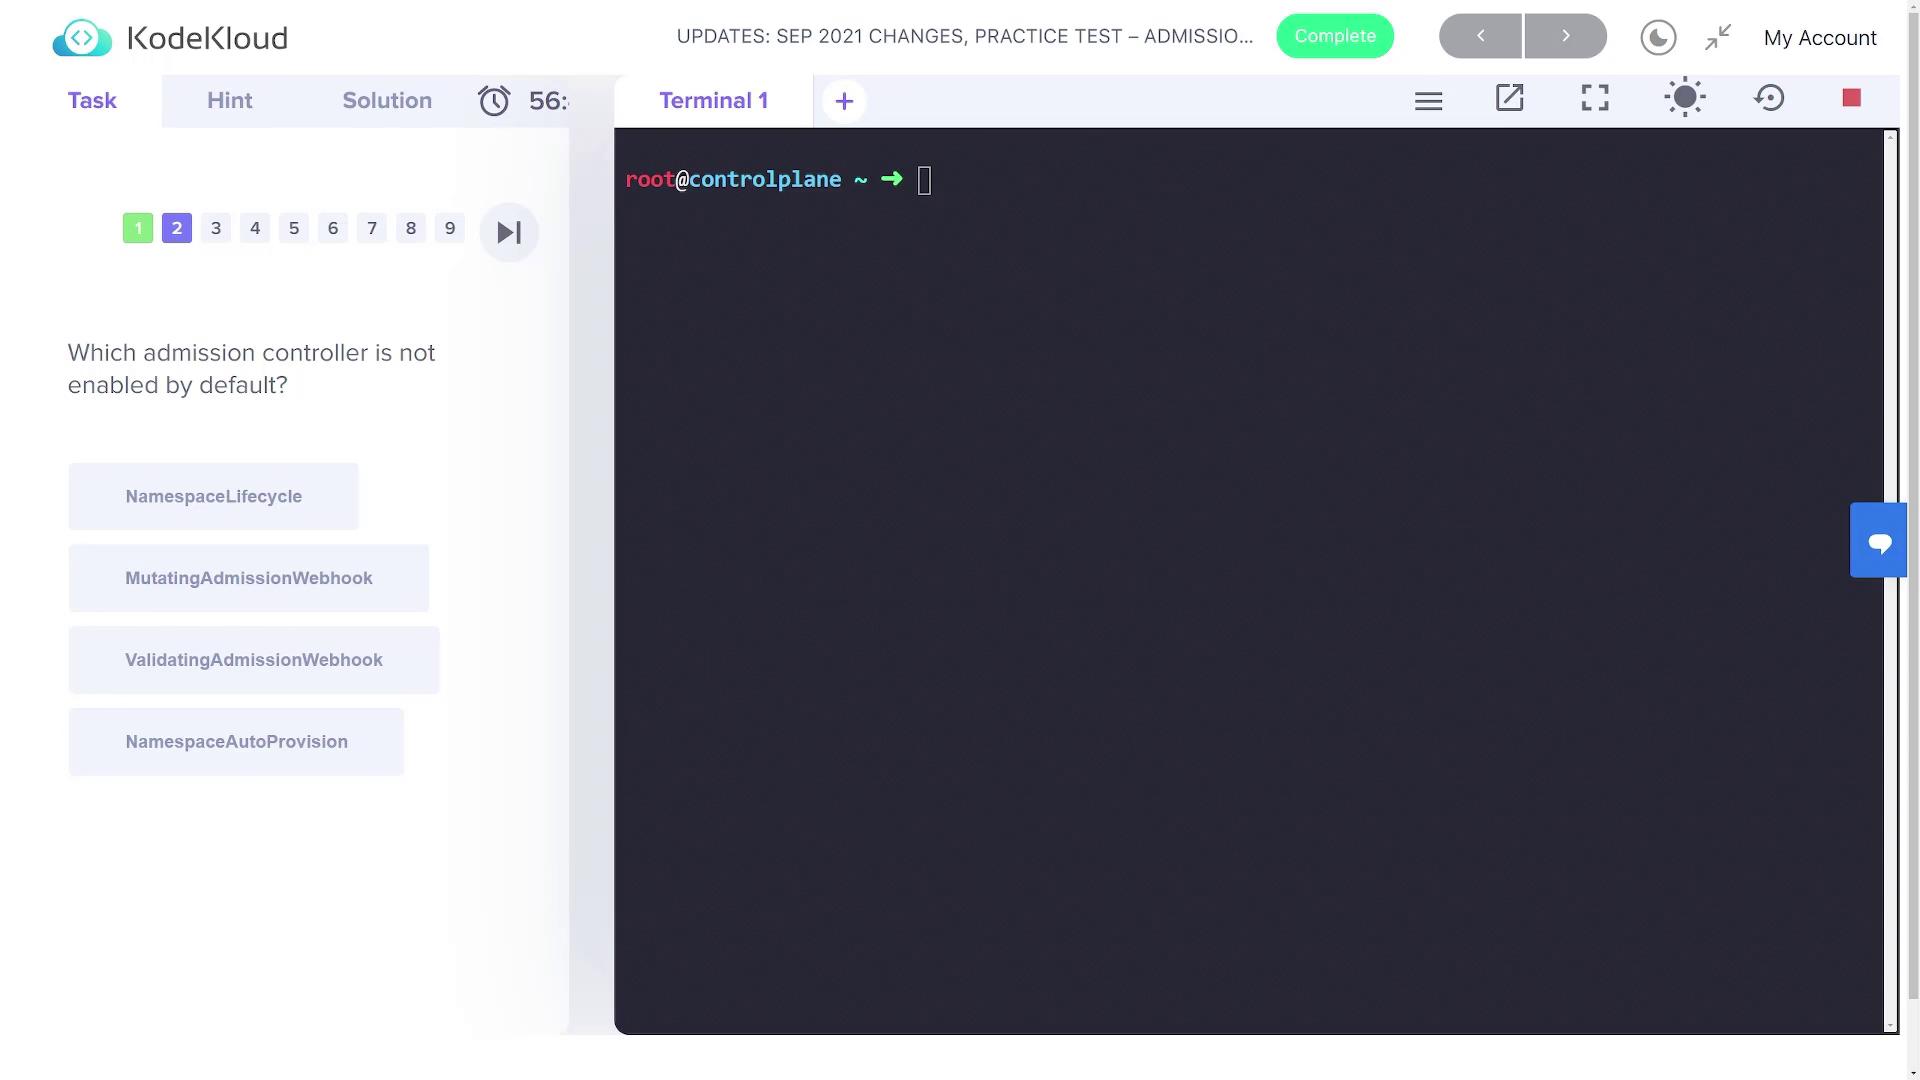
The next question asks which admission controller is not enabled by default. To find out, start by listing the pods in the `kube-system` namespace using the following command:
```bash theme={null}
root@controlplane ~ ➜ kubectl get pods -n kube-system
NAME READY STATUS RESTARTS AGE
coredns-74ff55c5b-88v8r 1/1 Running 0 38m
coredns-74ff55c5b-tng7p 1/1 Running 0 38m
etcd-controlplane 1/1 Running 0 38m
kube-apiserver-controlplane 1/1 Running 0 38m
kube-controller-manager-controlplane 1/1 Running 0 38m
kube-flannel-ds-wzlpx 1/1 Running 0 38m
kube-proxy-hccb9 1/1 Running 0 38m
kube-scheduler-controlplane 1/1 Running 0 38m
```
Next, run this command to check the enabled admission plugins:
```bash theme={null}
root@controlplane ~ ➜ kubectl exec -it kube-apiserver-controlplane -n kube-system -- kube-apiserver -h | grep 'enable-admission-pl'
```
The output lists default enabled plugins like `NamespaceLifecycle`, `LimitRanger`, `ServiceAccount`, among others. Notice that **"namespace auto-provision"** is not listed. Also, verifying the enabled webhooks gives you the following output:
```bash theme={null}
root@controlplane ~ ➜ kubectl exec -it kube-apiserver-controlplane -n kube-system -- kube-apiserver -h | grep 'enable-admission-plugins'
--enable-admission-plugins strings admission plugins that should be enabled in addition to default enabled ones (NamespaceLifecycle, LimitRanger, ServiceAccount, TaintNodesByCondition, Priority, DefaultTolerationSeconds, DefaultStorageClass, StorageObjectInUseProtection, PersistentVolumeClaimResize, VolumeClasses, CertificateApproval, CertificateSigning, CertificateSubjectRestrictions, DefaultIngressClass, DefaultTolerations, CertificateExemption, DefaultIngressClass, MutatingAdmissionWebhook, ValidatingAdmissionWebhook, ResourceQuota).
```
Since "namespace auto-provision" is missing from the default list, it is the correct answer for the question.
## Identifying Explicitly Enabled Admission Controllers
The following question asks which admission controller is enabled in the cluster but is generally disabled by default. You can inspect the kube-apiserver configuration file located at `/etc/kubernetes/manifests/kube-apiserver.yaml` to determine the enabled plugins. Use your preferred text editor or run the following search command:
```bash theme={null}
root@controlplane ~ ➜ grep 'enable-admission-plugins' /etc/kubernetes/manifests/kube-apiserver.yaml
```
A snippet from the configuration file might appear as follows:
```yaml theme={null}
apiVersion: v1
kind: Pod
metadata:
annotations:
kubeadm.kubernetes.io/kube-apiserver.advertise-address.endpoint: 10.49.219.9:6443
creationTimestamp: null
labels:
component: kube-apiserver
tier: control-plane
name: kube-apiserver
namespace: kube-system
spec:
containers:
- command:
- kube-apiserver
- --advertise-address=10.49.219.9
- --allow-privileged=true
- --authorization-mode=Node,RBAC
- --client-ca-file=/etc/kubernetes/pki/ca.crt
- --enable-admission-plugins=NodeRestriction
- --enable-bootstrap-token-auth=true
- --etcd-cafile=/etc/kubernetes/pki/etcd/ca.crt
- --etcd-certfile=/etc/kubernetes/pki/apiserver-etcd-client.crt
- --etcd-keyfile=/etc/kubernetes/pki/apiserver-etcd-client.key
- --etcd-servers=https://127.0.0.1:2379
- --insecure-port=0
- --kubelet-client-certificate=/etc/kubernetes/pki/apiserver-kubelet-client.crt
- --kubelet-client-key=/etc/kubernetes/pki/apiserver-kubelet-client.key
- --kubelet-preferred-address-types=InternalIP,ExternalIP,Hostname
- --proxy-client-cert-file=/etc/kubernetes/pki/front-proxy-client.crt
```
In this configuration, the `NodeRestriction` admission controller is explicitly enabled, despite normally being disabled.
By inspecting the kube-apiserver configuration, you can verify which admission controllers are enabled and adjust your settings accordingly.
## Enabling Namespace Auto Provision
The next task is to create an NGINX pod in the "blue" namespace. However, the lab specifies that the "blue" namespace has not been created yet. Attempting to run the following command:
```bash theme={null}
root@controlplane ~ ➜ kubectl run nginx --image nginx --rm
```
results in an error because the **exists admission controller** rejects requests for non-existent namespaces.
To automatically create the namespace during pod creation, enable the `NamespaceAutoProvision` admission controller. Edit the `/etc/kubernetes/manifests/kube-apiserver.yaml` file and update the `--enable-admission-plugins` flag. Insert `NamespaceAutoProvision` after `NodeRestriction` (separated by a comma). The updated configuration should look similar to this:
```yaml theme={null}
apiVersion: v1
kind: Pod
metadata:
annotations:
kubeadm.kubernetes.io/kube-apiserver.advertise-address.endpoint: 10.49.219.9:6443
creationTimestamp: null
labels:
component: kube-apiserver
tier: control-plane
name: kube-apiserver
namespace: kube-system
spec:
containers:
- command:
- kube-apiserver
- --advertise-address=10.49.219.9
- --allow-privileged=true
- --authorization-mode=Node,RBAC
- --client-ca-file=/etc/kubernetes/pki/ca.crt
- --enable-admission-plugins=NodeRestriction,NamespaceAutoProvision
- --enable-bootstrap-token-auth=true
- --etcd-cafile=/etc/kubernetes/pki/etcd/ca.crt
- --etcd-certfile=/etc/kubernetes/pki/apiserver-etcd-client.crt
- --etcd-keyfile=/etc/kubernetes/pki/apiserver-etcd-client.key
- --etcd-servers=https://127.0.0.1:2379
- --insecure-port=0
- --kubelet-client-certificate=/etc/kubernetes/pki/apiserver-kubelet-client.crt
- --kubelet-client-key=/etc/kubernetes/pki/apiserver-kubelet-client.key
- --kubelet-preferred-address-types=InternalIP,ExternalIP,Hostname
- --proxy-client-cert-file=/etc/kubernetes/pki/front-proxy-client.crt
```
After saving and allowing the API server to restart, create the NGINX pod in the blue namespace:
```bash theme={null}
root@controlplane ~ ➜ kubectl run nginx --image nginx -n blue
pod/nginx created
root@controlplane ~ ➜ kubectl get ns
NAME STATUS AGE
blue Active 7s
default Active 50m
kube-node-lease Active 50m
kube-public Active 50m
kube-system Active 50m
```
As you can see, the **blue namespace** is automatically created due to the enabled `NamespaceAutoProvision` admission controller.
## Disabling the Default Storage Class Controller
The final task is to disable the default storage class admission controller. To do this, update the `/etc/kubernetes/manifests/kube-apiserver.yaml` file by adding the `--disable-admission-plugins` flag on a new line immediately after the enabled plugins. For example:
```yaml theme={null}
apiVersion: v1
kind: Pod
metadata:
annotations:
kubeadm.kubernetes.io/kube-apiserver.advertise-address.endpoint: 10.49.219.9:6443
labels:
component: kube-apiserver
tier: control-plane
name: kube-apiserver
namespace: kube-system
spec:
containers:
- command:
- kube-apiserver
- --advertise-address=10.49.219.9
- --allow-privileged=true
- --authorization-mode=Node,RBAC
- --client-ca-file=/etc/kubernetes/pki/ca.crt
- --enable-admission-plugins=NodeRestriction,NamespaceAutoProvision
- --disable-admission-plugins=DefaultStorageClass
- --enable-bootstrap-token-auth=true
- --etcd-cafile=/etc/kubernetes/pki/etcd/ca.crt
- --etcd-certfile=/etc/kubernetes/pki/apiserver-etcd-client.crt
- --etcd-keyfile=/etc/kubernetes/pki/apiserver-etcd-client.key
- --etcd-servers=https://127.0.0.1:2379
- --insecure-port=0
- --kubelet-client-certificate=/etc/kubernetes/pki/apiserver-kubelet-client.crt
- --kubelet-client-key=/etc/kubernetes/pki/apiserver-kubelet-client.key
- --kubelet-preferred-address-types=InternalIP,ExternalIP,Hostname
- --proxy-client-cert-file=/etc/kubernetes/pki/front-proxy-client.crt
```
Once the API server restarts, validate the changes by inspecting the running process with a command like:
```bash theme={null}
ps -ef | grep kube-apiserver
```
This command will list both the enabled and disabled admission plugins.
With these steps, you have successfully completed the admission controllers lab by understanding plugin functions, verifying defaults, enabling automatic namespace creation, and disabling unwanted admission controllers.