> ## Documentation Index
> Fetch the complete documentation index at: https://notes.kodekloud.com/llms.txt
> Use this file to discover all available pages before exploring further.
# Demo Run experiment Task IO stress
> This article provides a walkthrough for creating an AWS Fault Injection Simulator experiment to inject I/O stress on ECS Fargate tasks.
In this walkthrough, we’ll create an AWS Fault Injection Simulator (FIS) experiment template to inject I/O stress on an ECS Fargate task. ECS Fargate offers a serverless compute engine for container workloads on Amazon ECS or EKS, eliminating the need to manage EC2 instances. By the end of this tutorial, you’ll know how to configure an FIS template to target Fargate tasks, apply I/O load, and monitor the impact in real time.
* An existing ECS Fargate service with tasks prefixed by `pay-for-adoption`
* IAM role for FIS (e.g., `AWSFISRole`) with `fis.amazonaws.com` trust and necessary permissions
* CloudWatch log group (e.g., `FIS-experiments`) for experiment logs
## Table of Contents
* [Step 1: Create a New Experiment Template](#step-1-create-a-new-experiment-template)
* [Step 2: Define the I/O Stress Action](#step-2-define-the-i-o-stress-action)
* [Step 3: Configure the Target](#step-3-configure-the-target)
* [Step 4: Assign IAM Role and Enable Logging](#step-4-assign-iam-role-and-enable-logging)
* [Step 5: Review and Launch](#step-5-review-and-launch)
* [References](#references)
***
## Step 1: Create a New Experiment Template
1. Sign in to the AWS Console and go to **AWS Fault Injection Simulator (FIS)** > **Experiment templates**.
2. Click **Create experiment template**, then confirm your AWS account.
3. Fill in the basic details:
* **Name**: `ecs-fargate-io-stress-test` (optional)
* **Description**:
```text theme={null}
ECS Fargate I/O stress test
```
4. Leave other settings at their defaults and proceed to the **Actions** section.
## Step 2: Define the I/O Stress Action
1. Under **Actions**, click **Add action**.
2. For **Action name**, enter:
```text theme={null}
ecs-fargate-io-stress-test
```
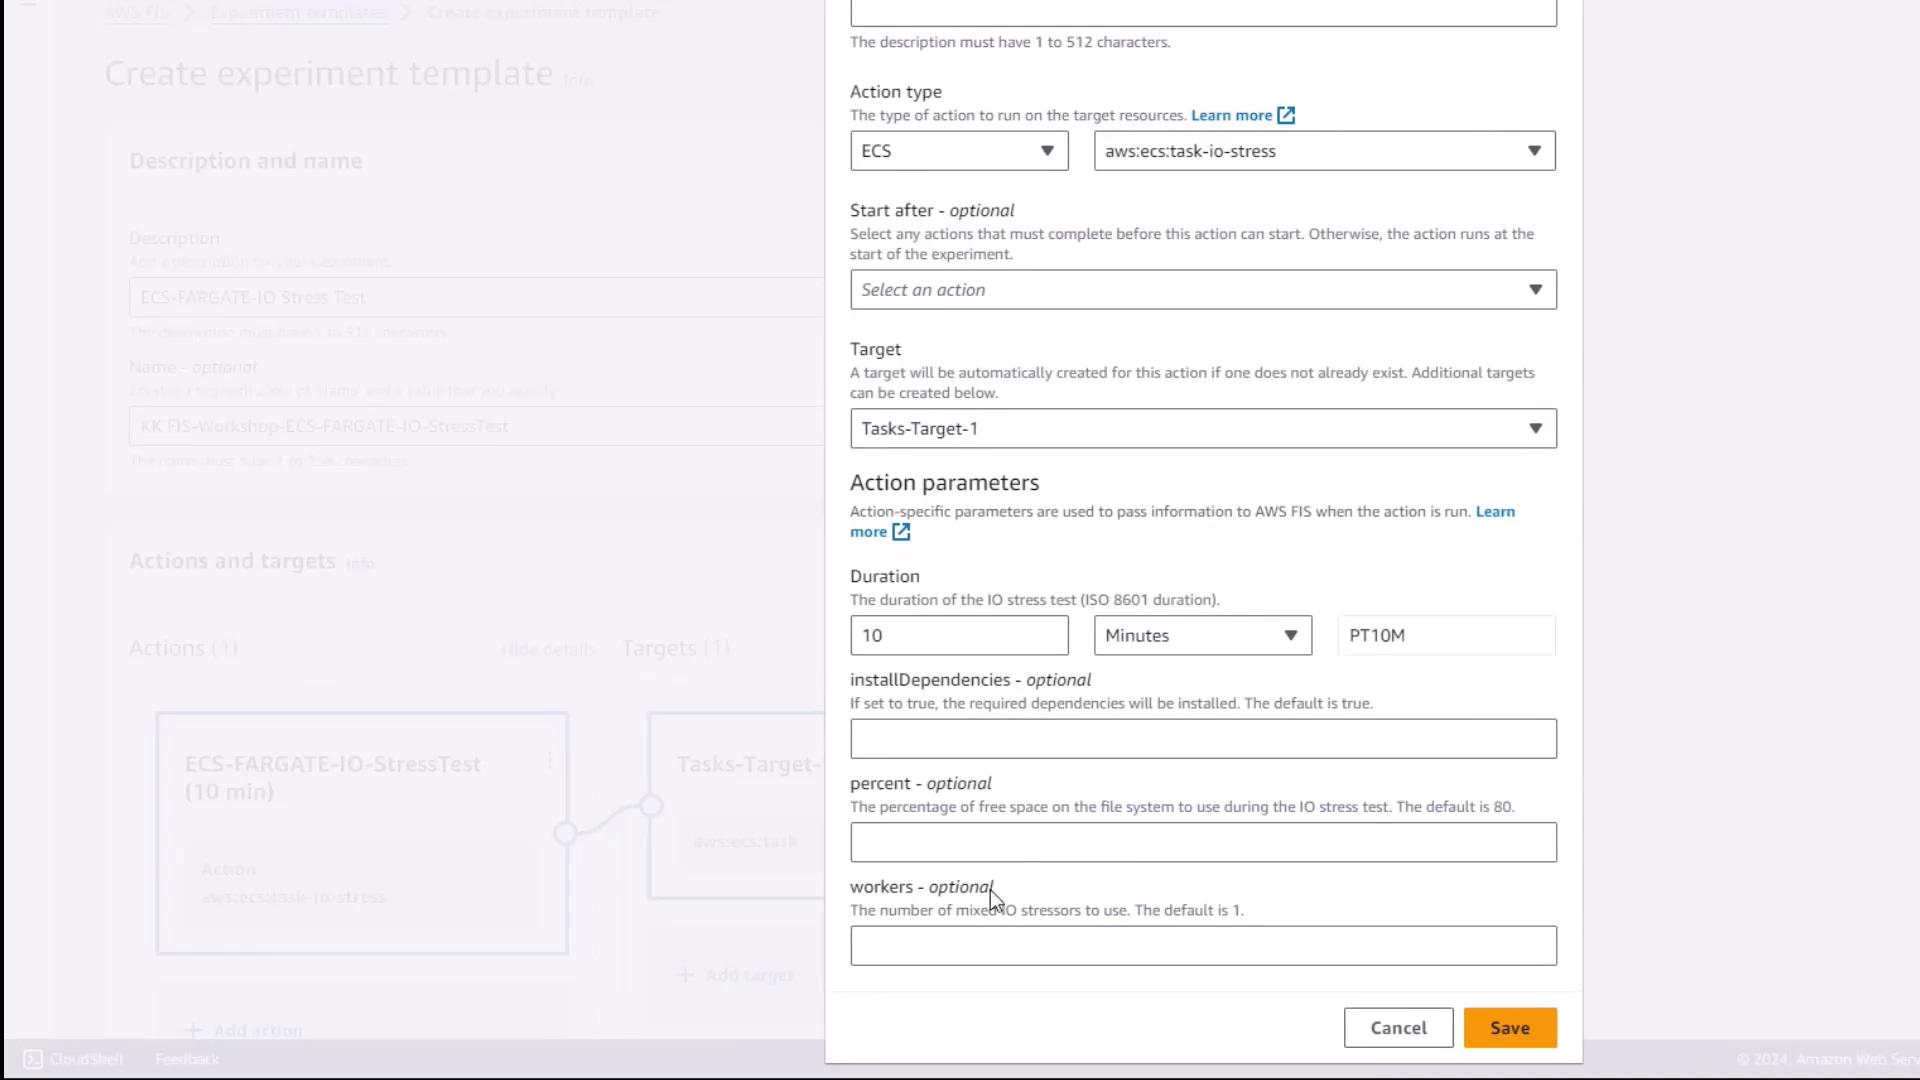
3. Select **AWS ECS Task I/O stress** as the **Action type**.
4. Configure action parameters:
| Parameter | Value | Description |
| ---------- | ---------- | --------------------------------------- |
| Duration | 10 minutes | Total time to run the I/O stress |
| Workers | (default) | Number of parallel I/O workers |
| Task count | (default) | Percentage or number of tasks to affect |
5. Click **Save**.
## Step 3: Configure the Target
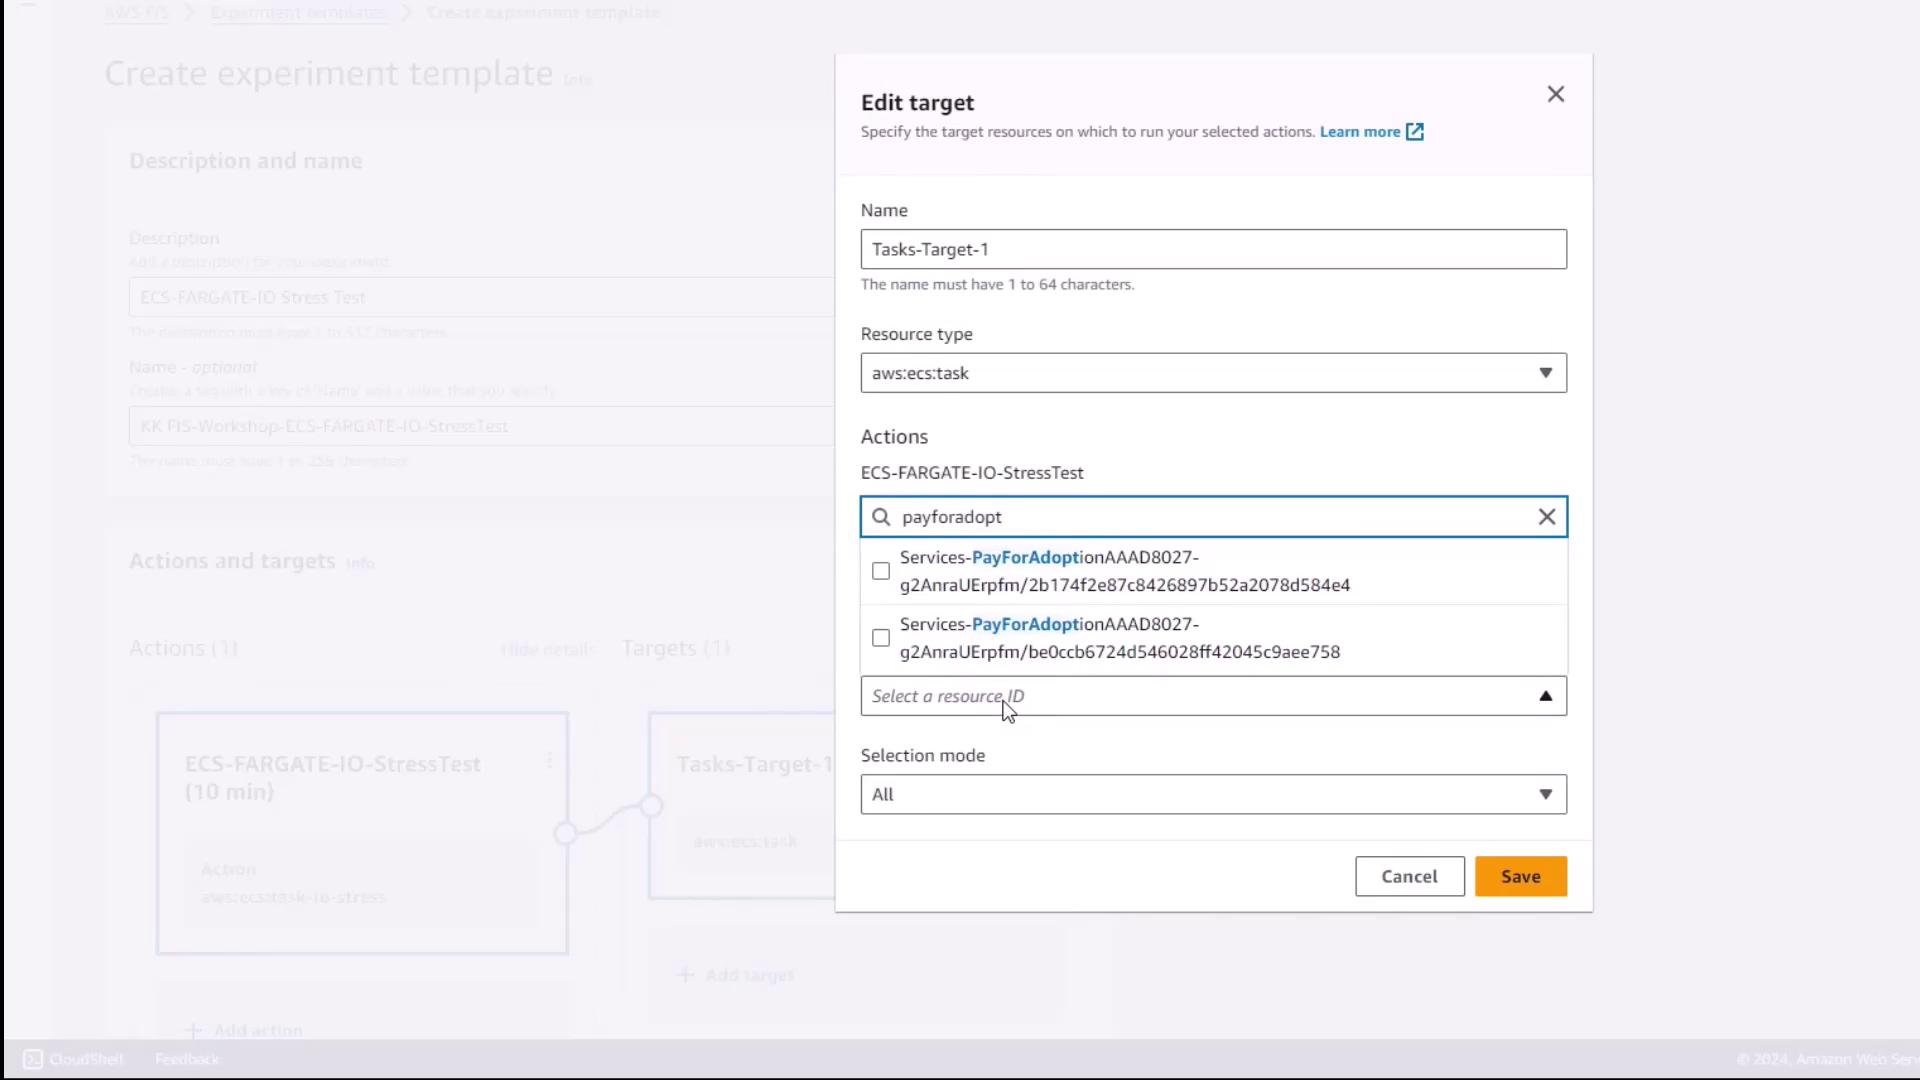
1. Scroll to **Targets** and choose **Add target**.
2. Set **Resource type** to `ecs:Task`.
3. Under **Target method**, pick **Resource ID**.
4. In the filter box, enter the prefix `pay-for-adoption` to find matching tasks.
5. Select both ECS Fargate tasks from the results.
6. Keep **Selection mode** as **All** (to target every matching task).
7. Click **Save**.
## Step 4: Assign IAM Role and Enable Logging
1. Under **Experiment role**, choose your IAM role for FIS (e.g., `AWSFISRole`).
2. In **Logs**, select **Send logs to CloudWatch Logs** and choose the log group `FIS-experiments`.
3. Click **Create experiment template** to finalize.
Ensure your IAM role has permissions for both FIS actions and CloudWatch logging. Missing permissions can cause experiment failures.
## Step 5: Review and Launch
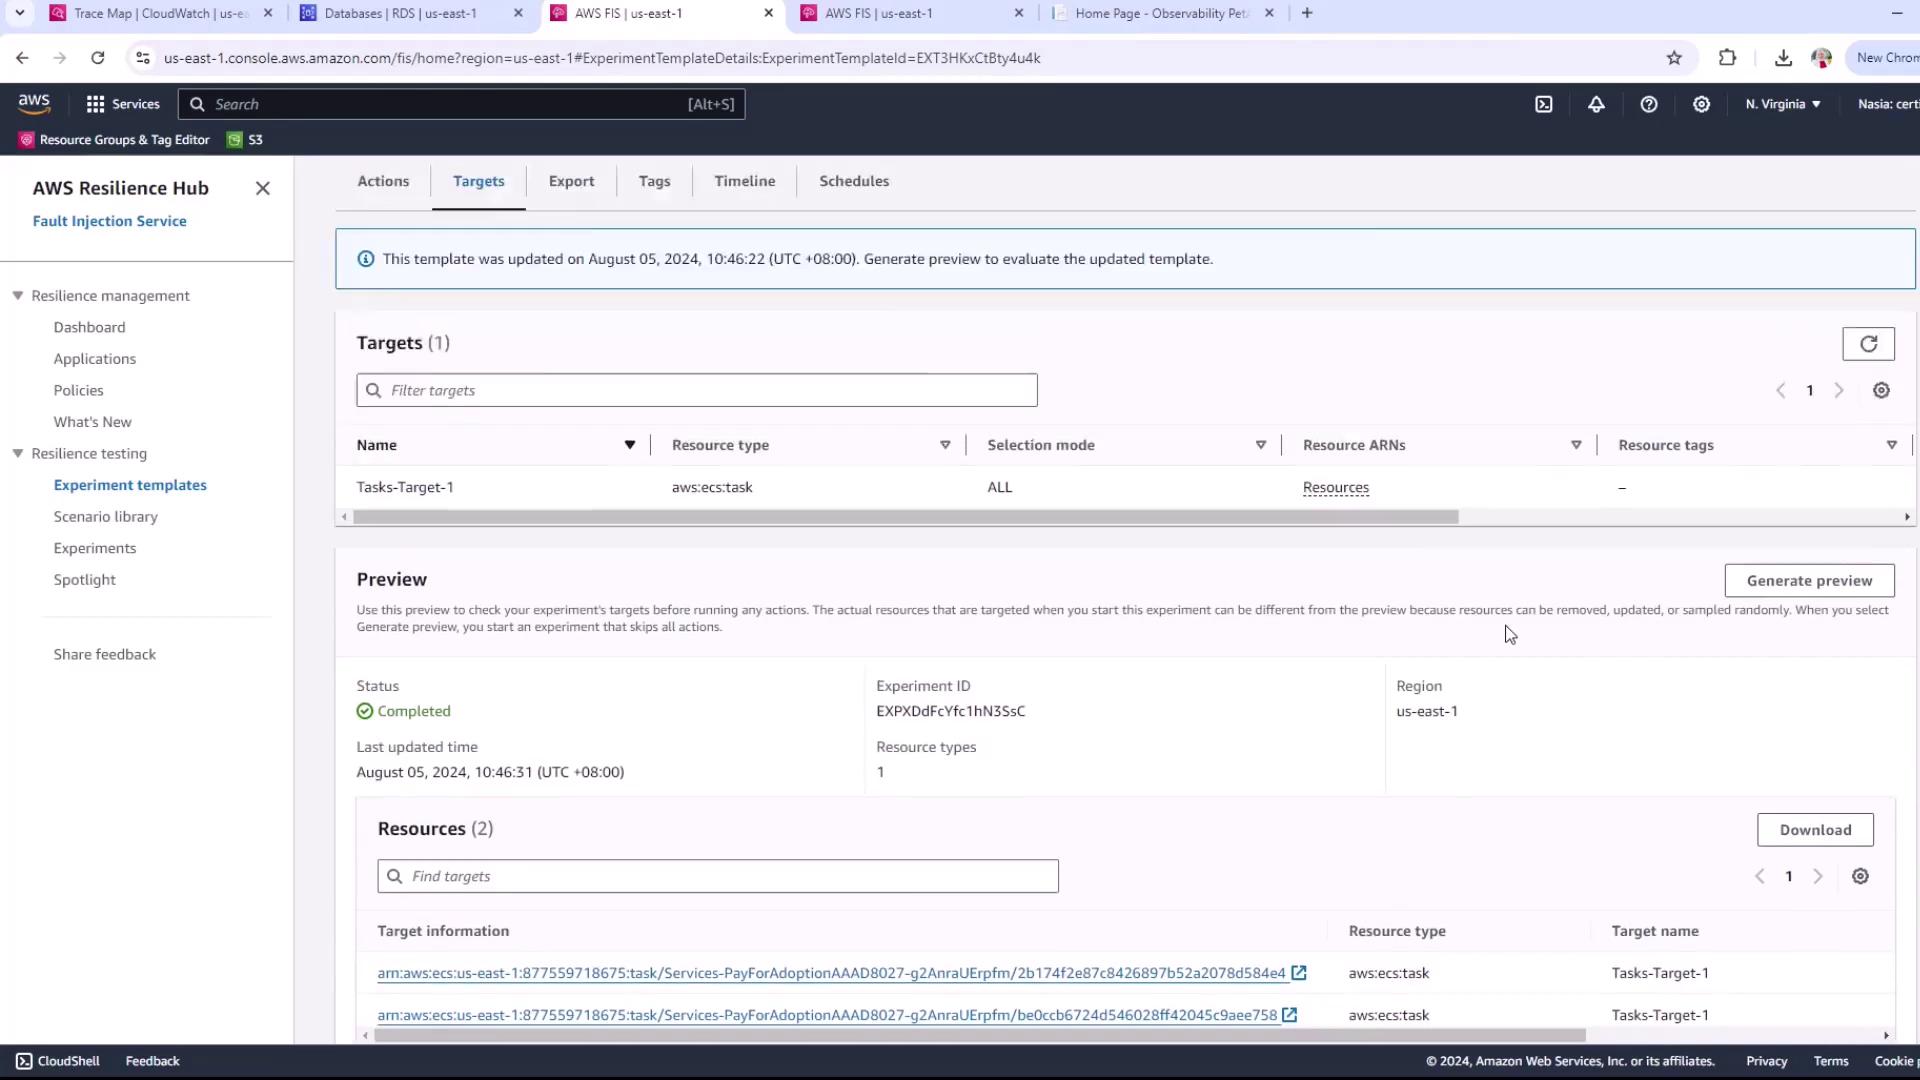
1. On the template summary page, verify:
* The action name and parameters
* The target tasks
* The experiment role and log configuration
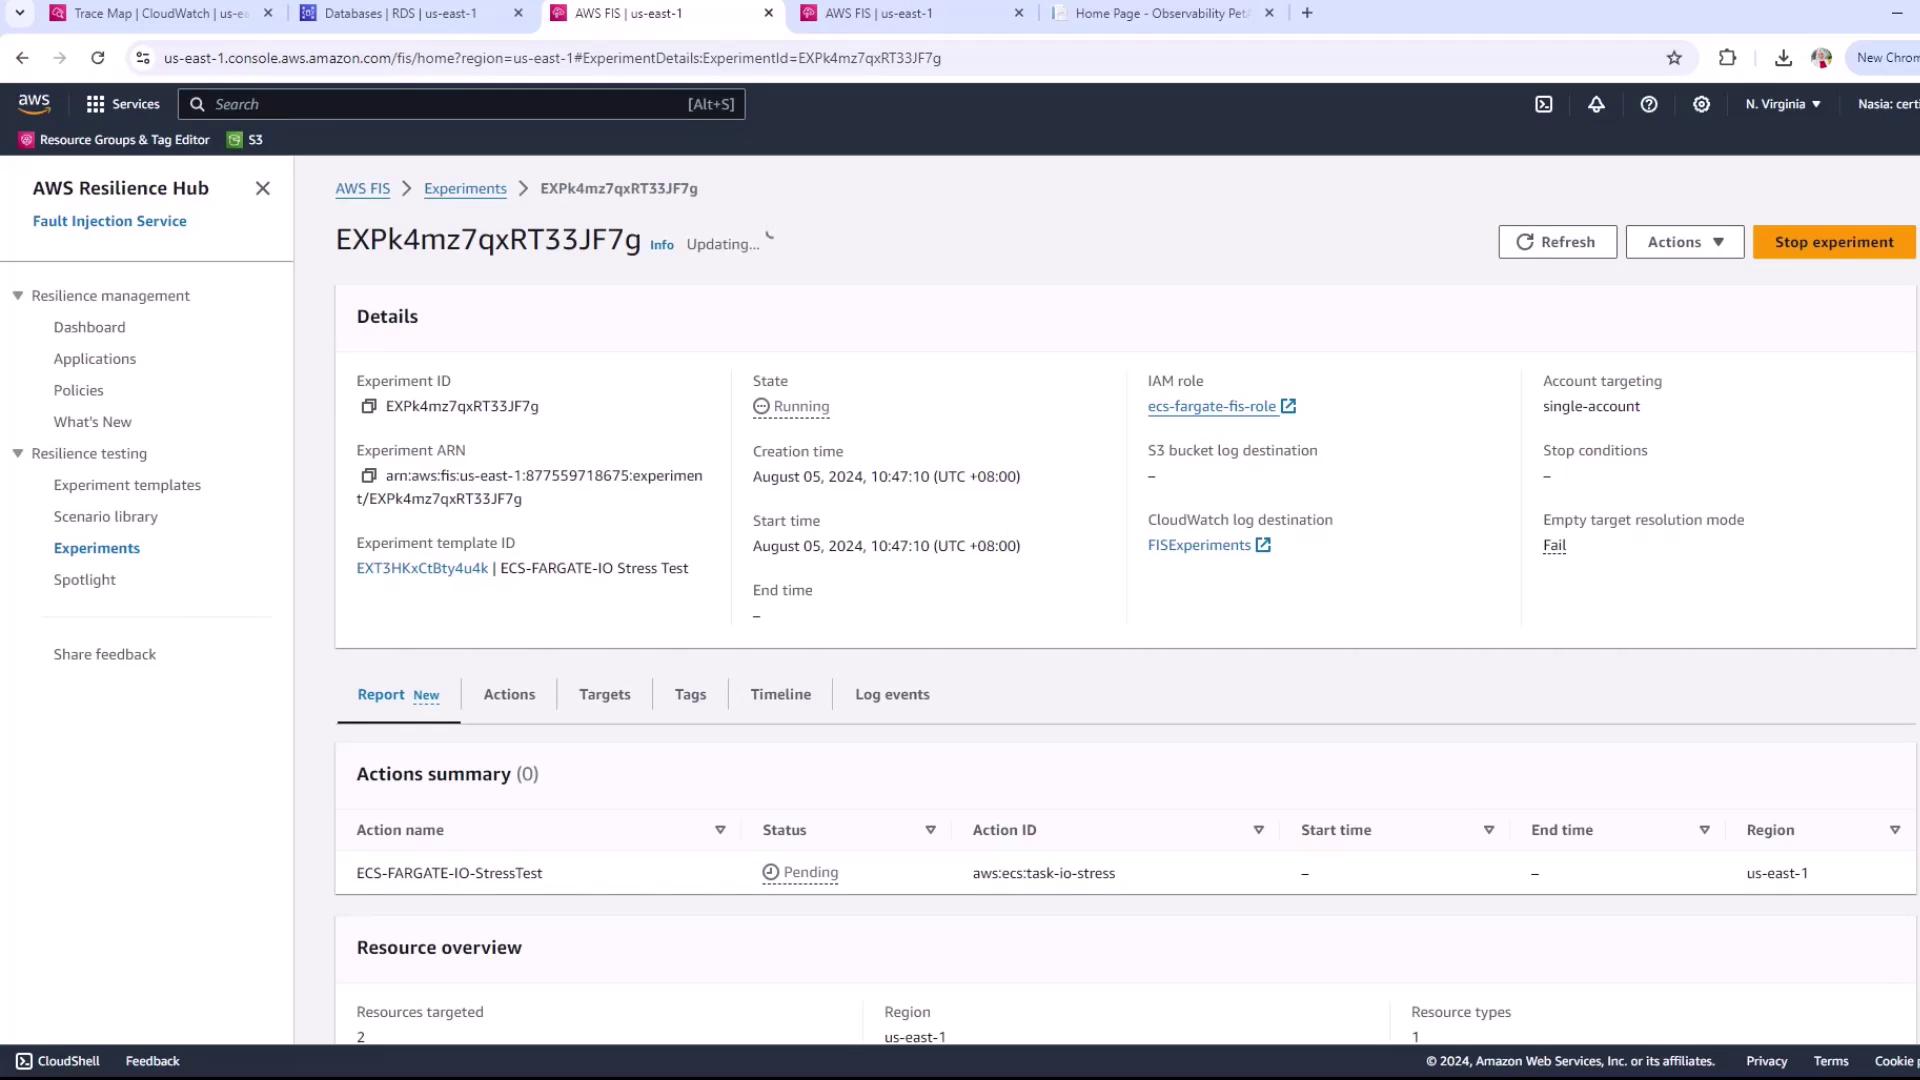
2. Click **Start experiment**.
3. Monitor the state switch to **Running**.
After starting, switch to the **AWS FIS dashboard** to track progress and view metrics like CPU usage, memory, and I/O throughput in real time.
Use these insights to analyze how I/O stress impacts your application’s performance and resilience.
## References
* [AWS Fault Injection Simulator Documentation](https://docs.aws.amazon.com/fis/latest/userguide/)
* [Amazon ECS Fargate](https://docs.aws.amazon.com/AmazonECS/latest/developerguide/AWS_Fargate.html)
* [AWS IAM Roles](https://docs.aws.amazon.com/IAM/latest/UserGuide/id_roles.html)