> ## Documentation Index
> Fetch the complete documentation index at: https://notes.kodekloud.com/llms.txt
> Use this file to discover all available pages before exploring further.
# Demo Azure Synapse Analytics
> Step-by-step guide for provisioning an Azure Synapse Analytics workspace, covering creation, security configuration, deployment, and exploration of resources.
Welcome to this step-by-step guide for provisioning an **Azure Synapse Analytics** workspace. Azure Synapse unifies data integration, enterprise data warehousing, and big data analytics into a single service. In this tutorial, you’ll learn how to:
* Create a Synapse workspace with Data Lake Storage Gen2
* Configure security, encryption, and networking
* Review and deploy the workspace
* Explore the resources in Synapse Studio
Let’s get started!
***
## 1. Creating a Synapse Workspace
1. Sign in to the [Azure portal](https://portal.azure.com/) and search for **Azure Synapse Analytics**.
2. On the overview page, click **+ Create**.
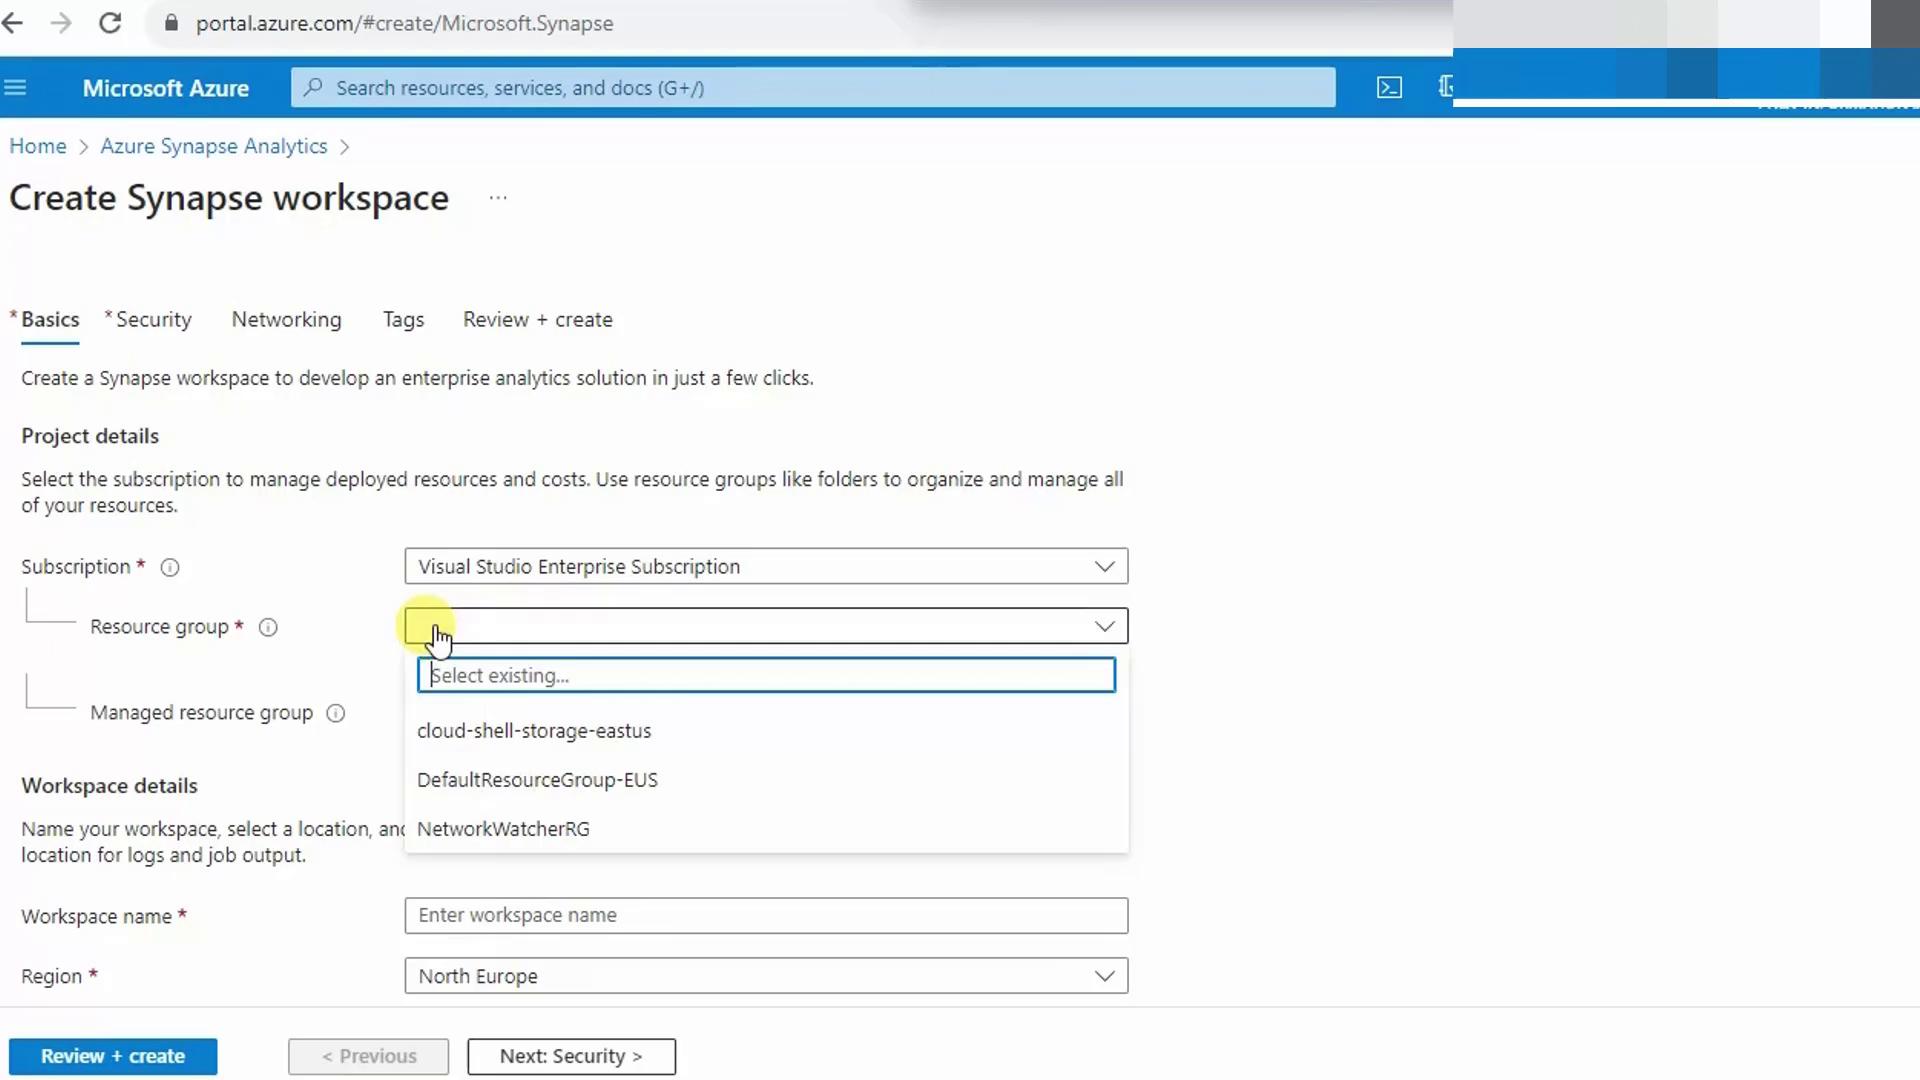
3. Under **Basics**, choose your subscription and an existing resource group.
* The workspace resource itself will live here.
* Supporting services (storage, Data Factory) are placed in a managed resource group. You may name it or let Azure auto-generate one.
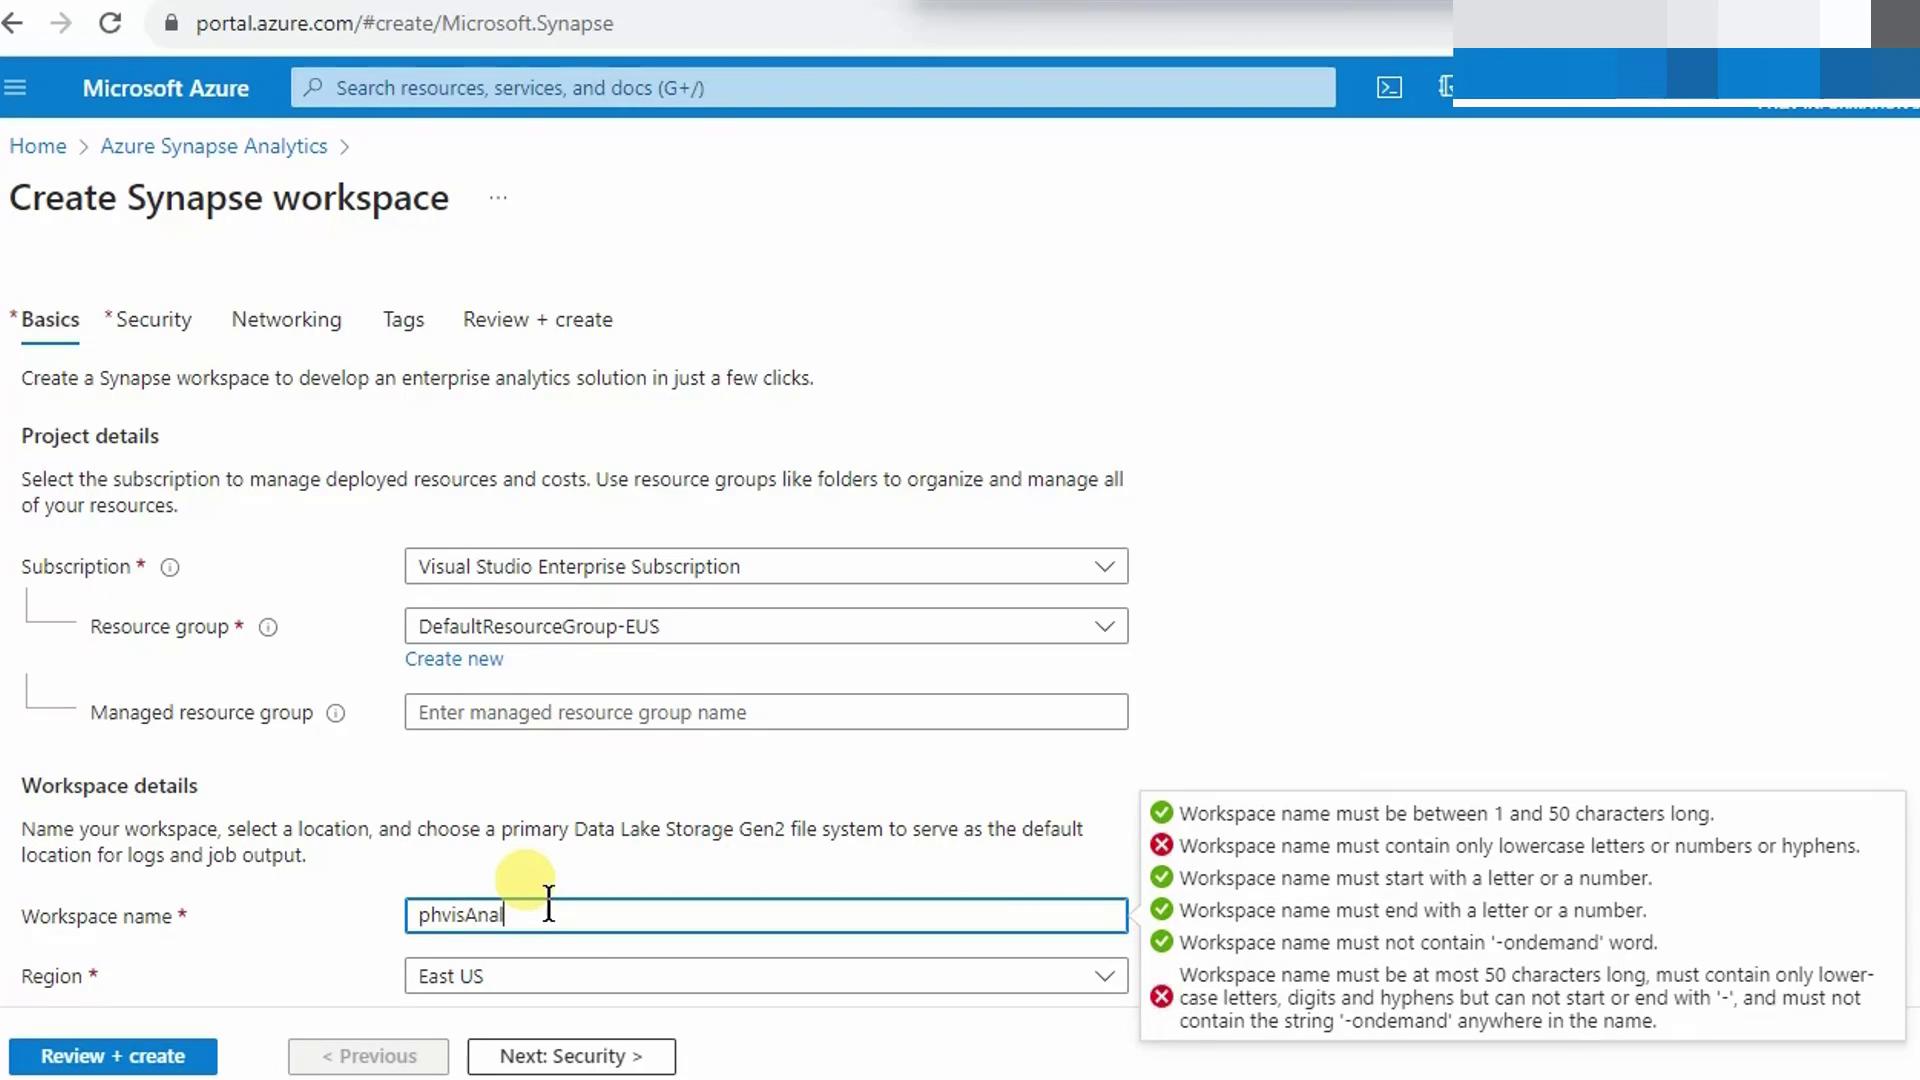
4. Enter a unique workspace name (e.g., `phvisanalysis`) in lowercase and select a Region (e.g., **East US**).
5. For **Data Lake Storage Gen2**, either pick an existing account or click **Create new** to provision one with the required hierarchical namespace.
Azure Synapse requires hierarchical namespace on your storage account. Letting the wizard create it ensures this setting is enabled automatically.
6. When you create storage, provide a name like `phvsynapseaccount`. This hosts your Data Lake containers.
7. Since Synapse also leverages Azure Files, click **File system** and add another account such as `phvsynfiles`.
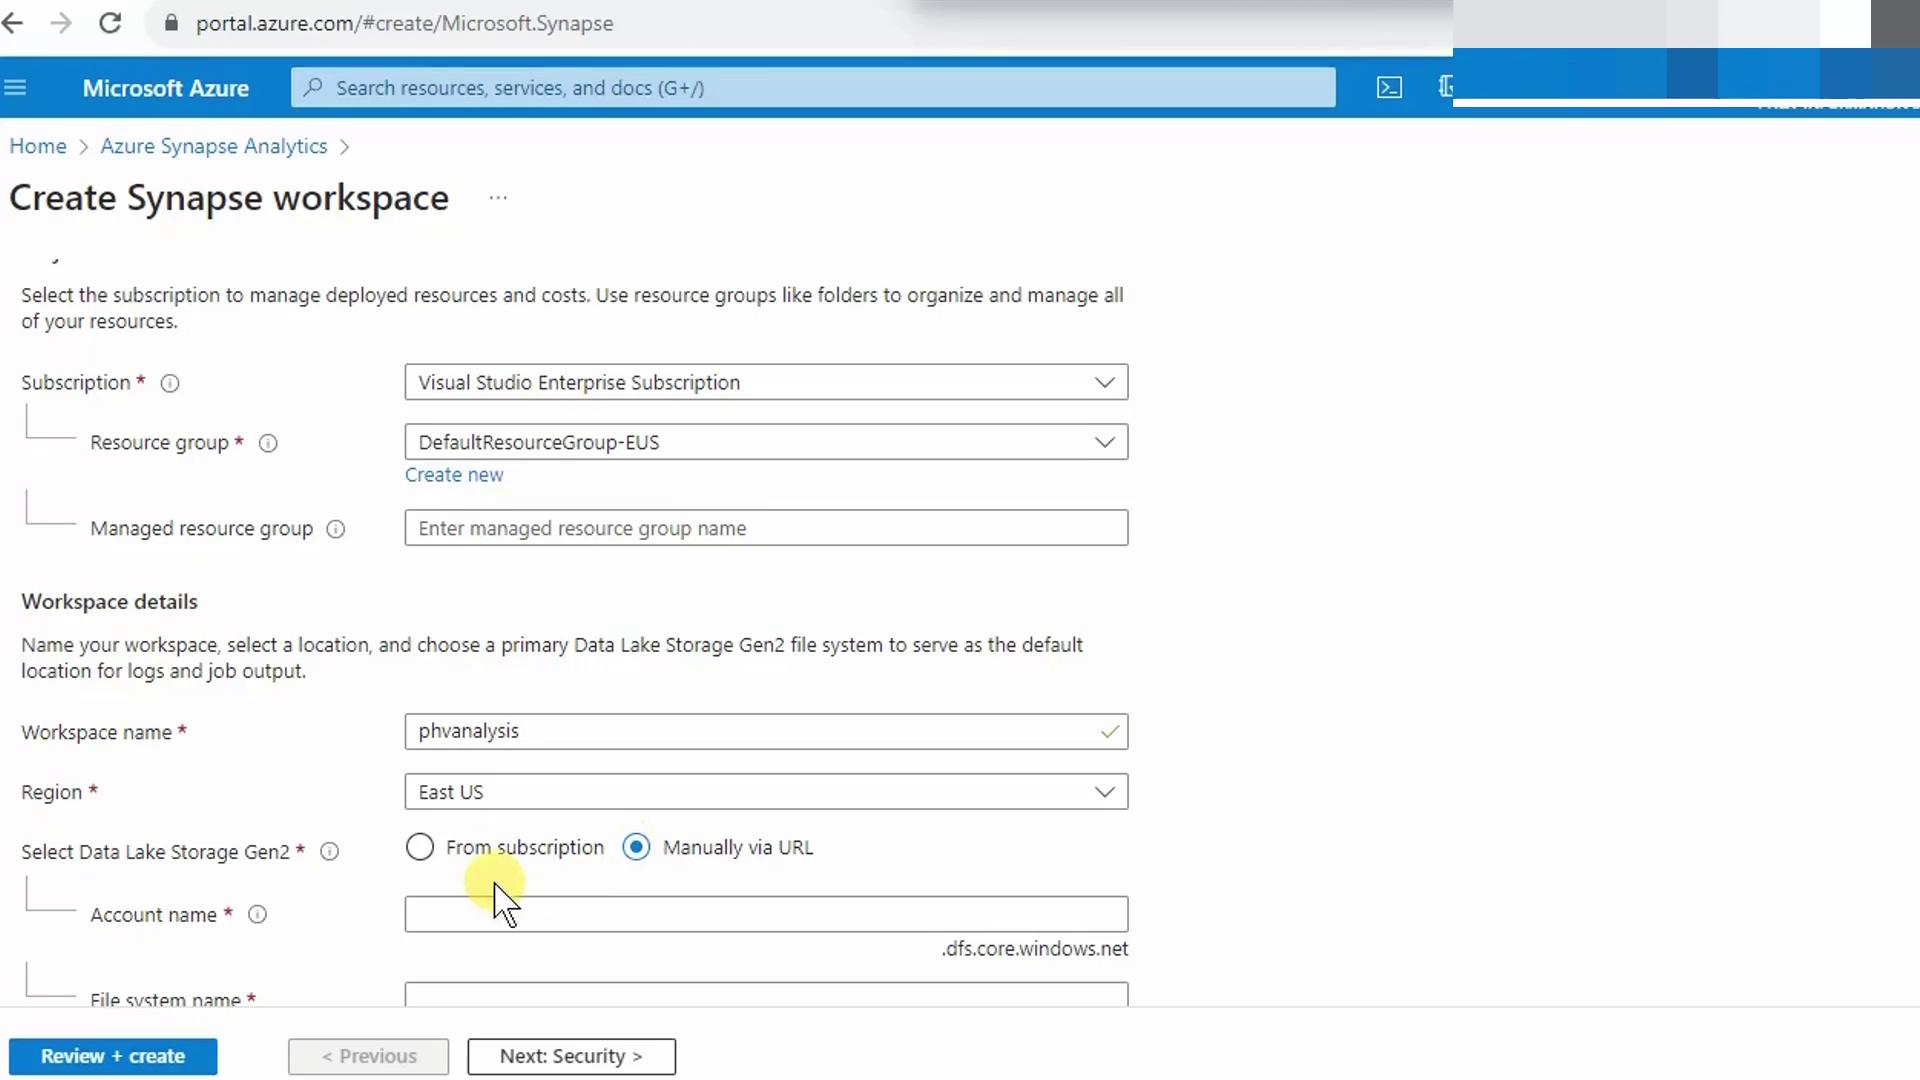
The wizard handles hierarchical namespace, access permissions, and resource linking, simplifying setup. If you need to grant additional users access later, assign Storage Blob Data roles on those accounts.
8. Scroll down to review the summary where Synapse automatically links to your new Data Lake Storage Gen2 accounts.
 ***
## 2. Security and Authentication
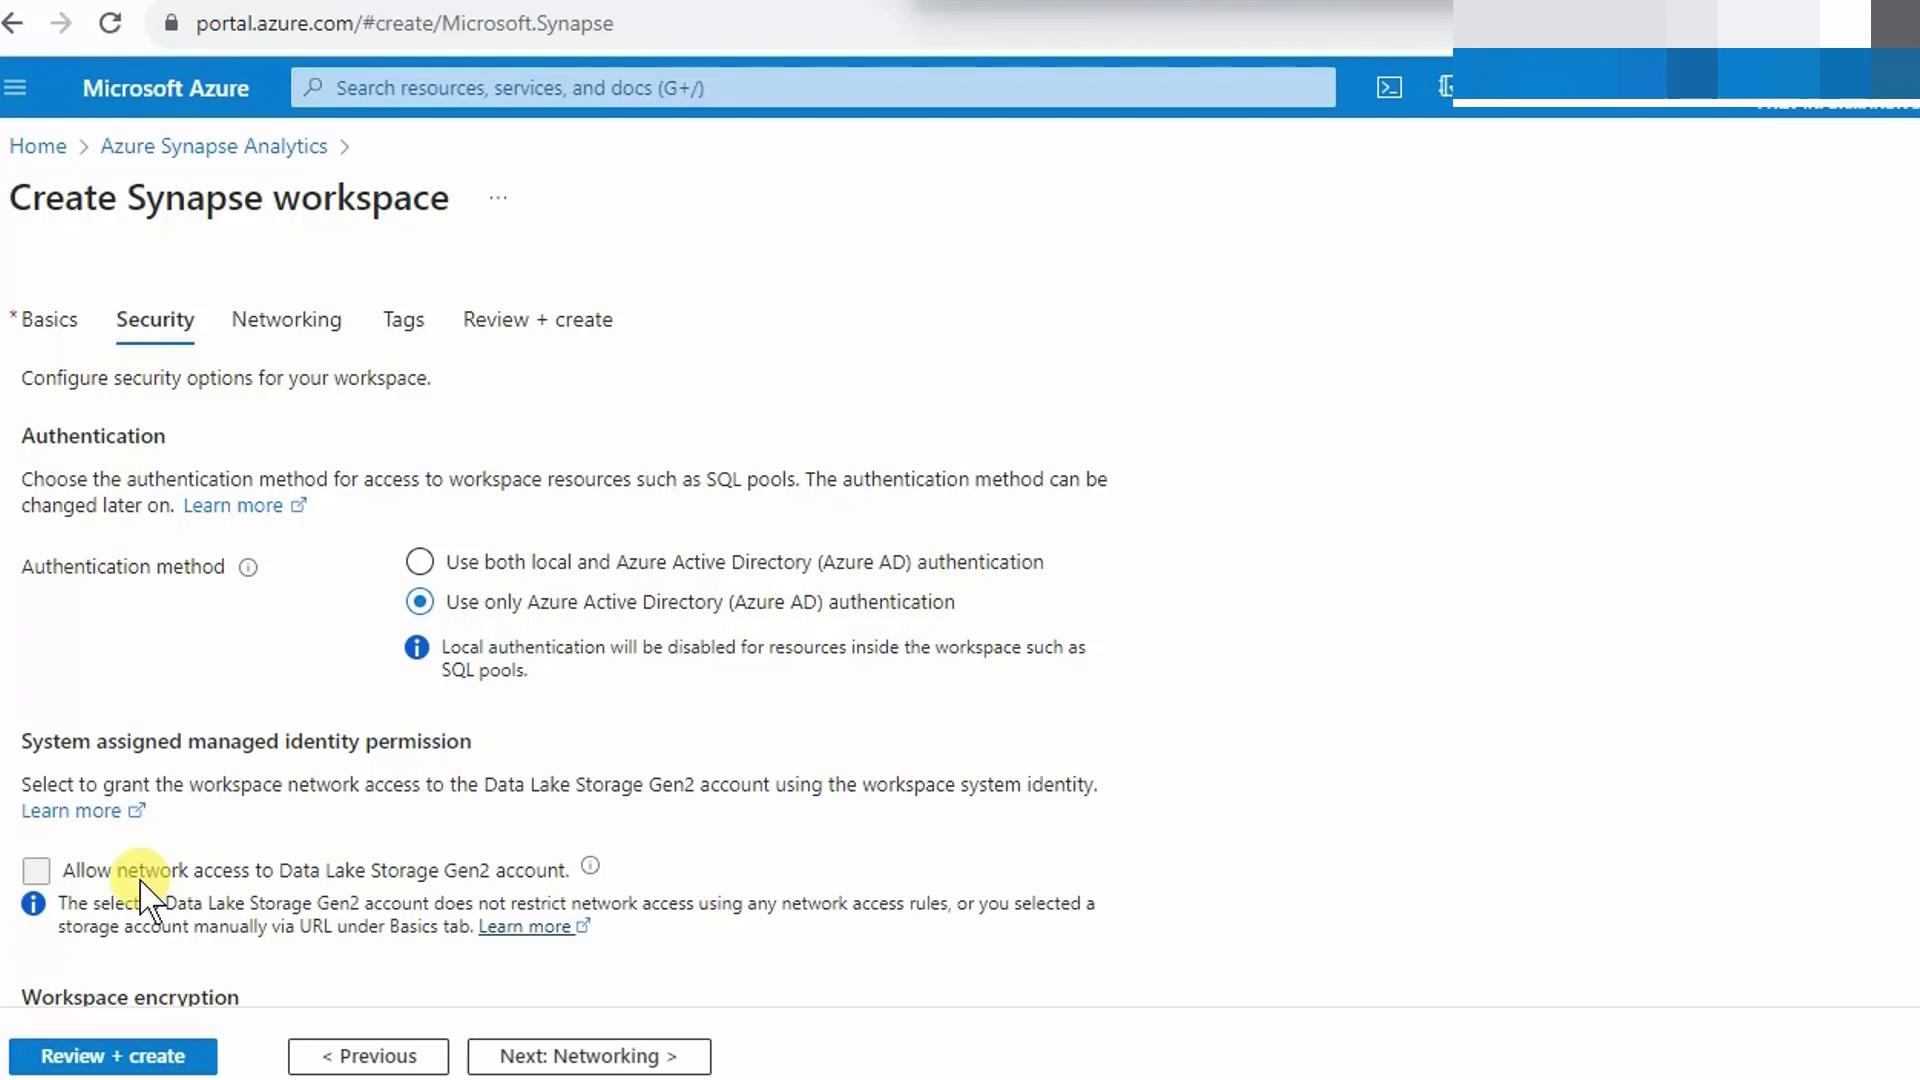
Switch to the **Security** tab to configure identity and network controls:
* **Authentication**
* Enable **Azure Active Directory (AAD)** for centralized, secure access.
* Optionally allow local SQL authentication if needed.
* **Network Access**
* By default, all IP ranges are allowed.
* You can restrict to specific IPs or Virtual Network rules later.
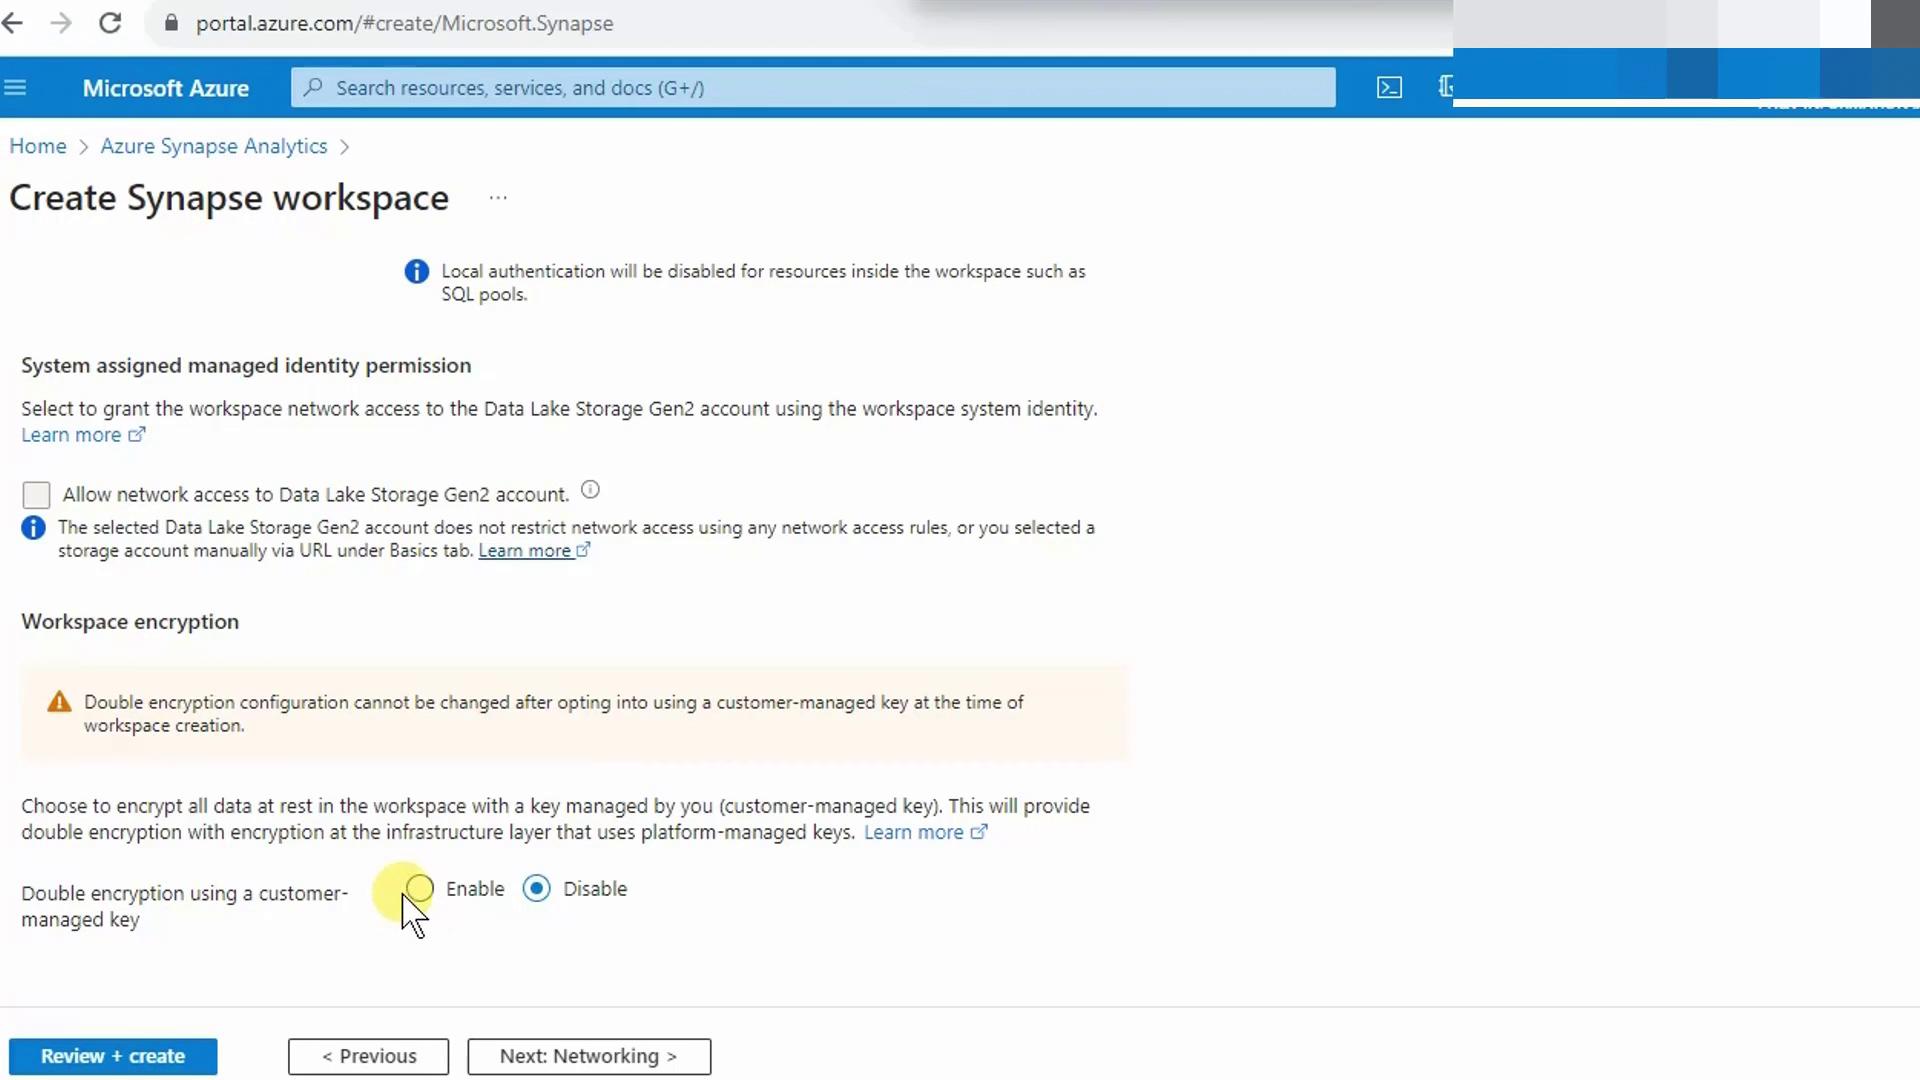
Below, you’ll find **Encryption** settings:
* **Microsoft-managed keys** are selected by default for data at rest.
* To use **Customer-managed keys**, click **Enable**, then choose your Key Vault and key.
Once the workspace is created, you cannot switch encryption between Microsoft-managed and customer-managed keys.
***
## 3. Review, Create, and Deploy
1. Skip the **Networking** tab for now (you can integrate a Virtual Network later).
2. Click **Review + create**.
3. After validation completes successfully, select **Create**.
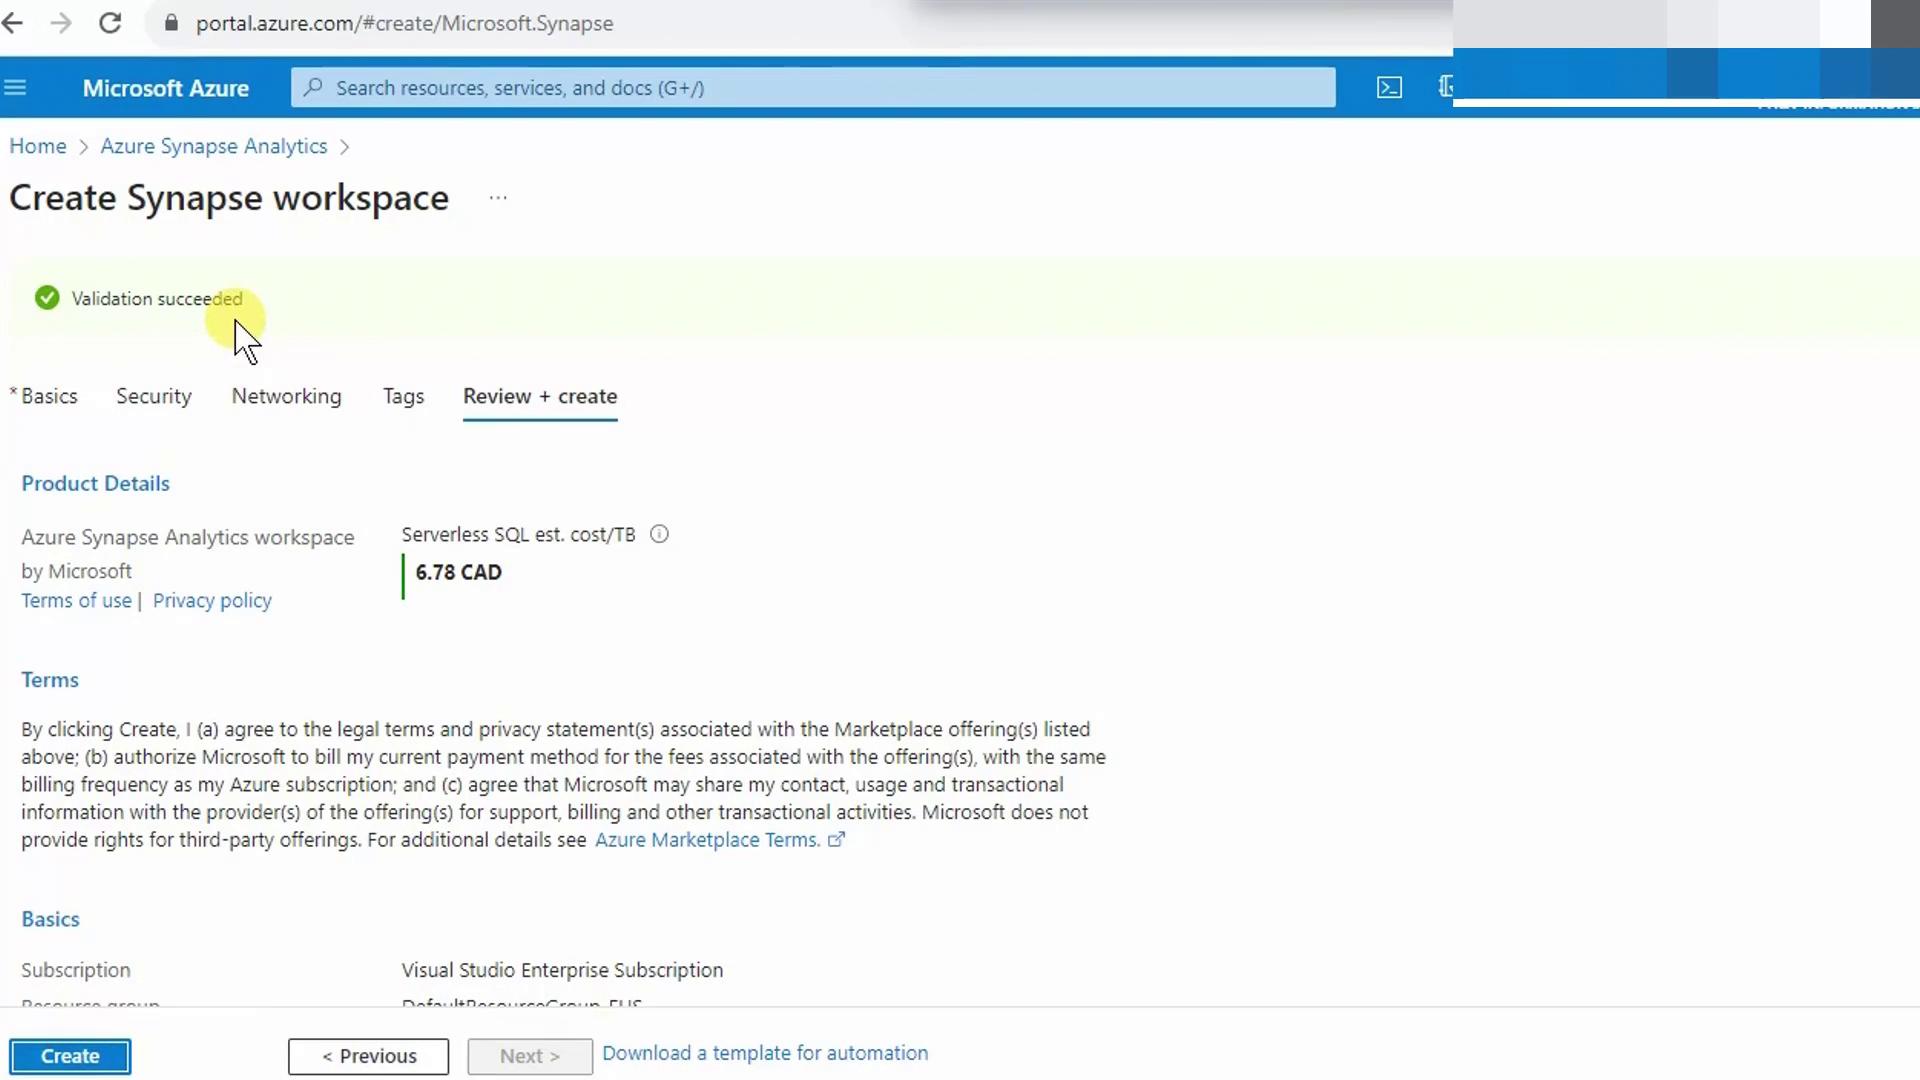
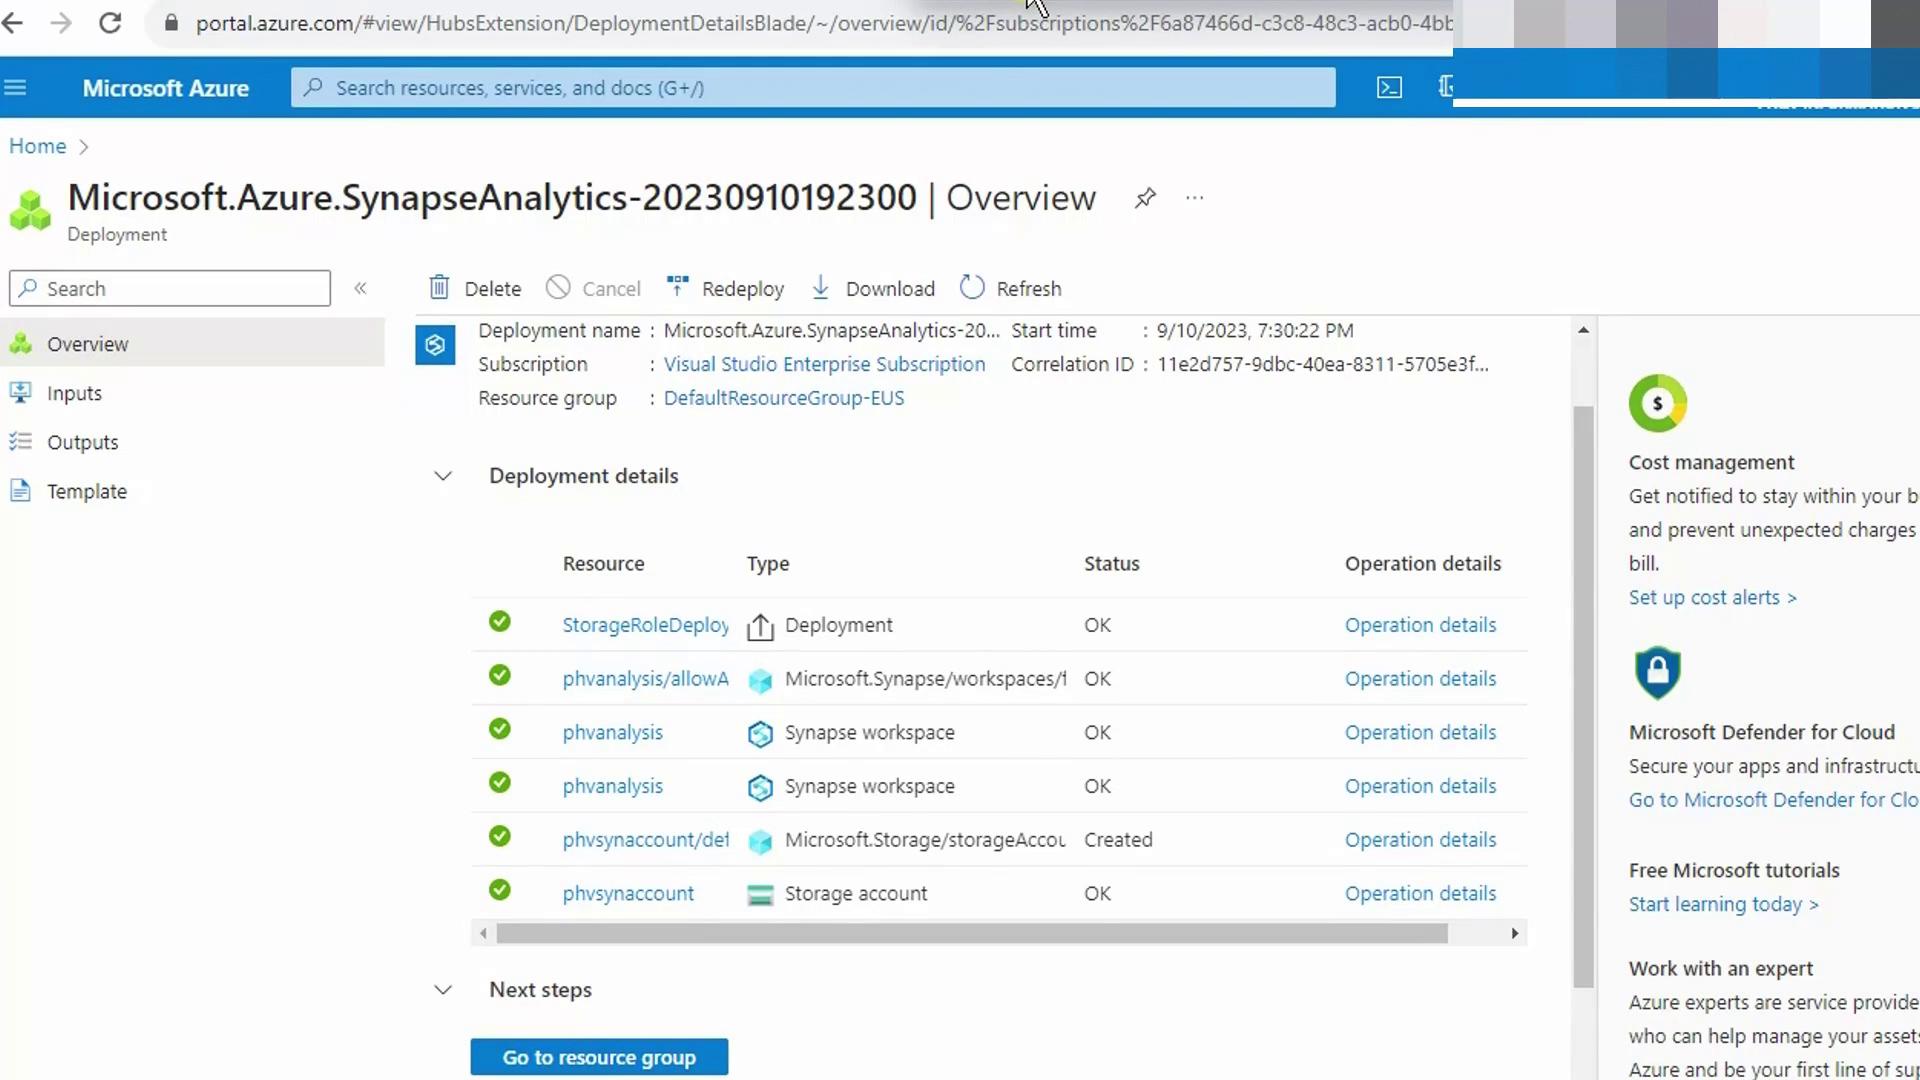
Deployment typically takes 5–10 minutes. Once finished, navigate to your managed resource group to inspect all created components.
***
## 4. Exploring Your Workspace
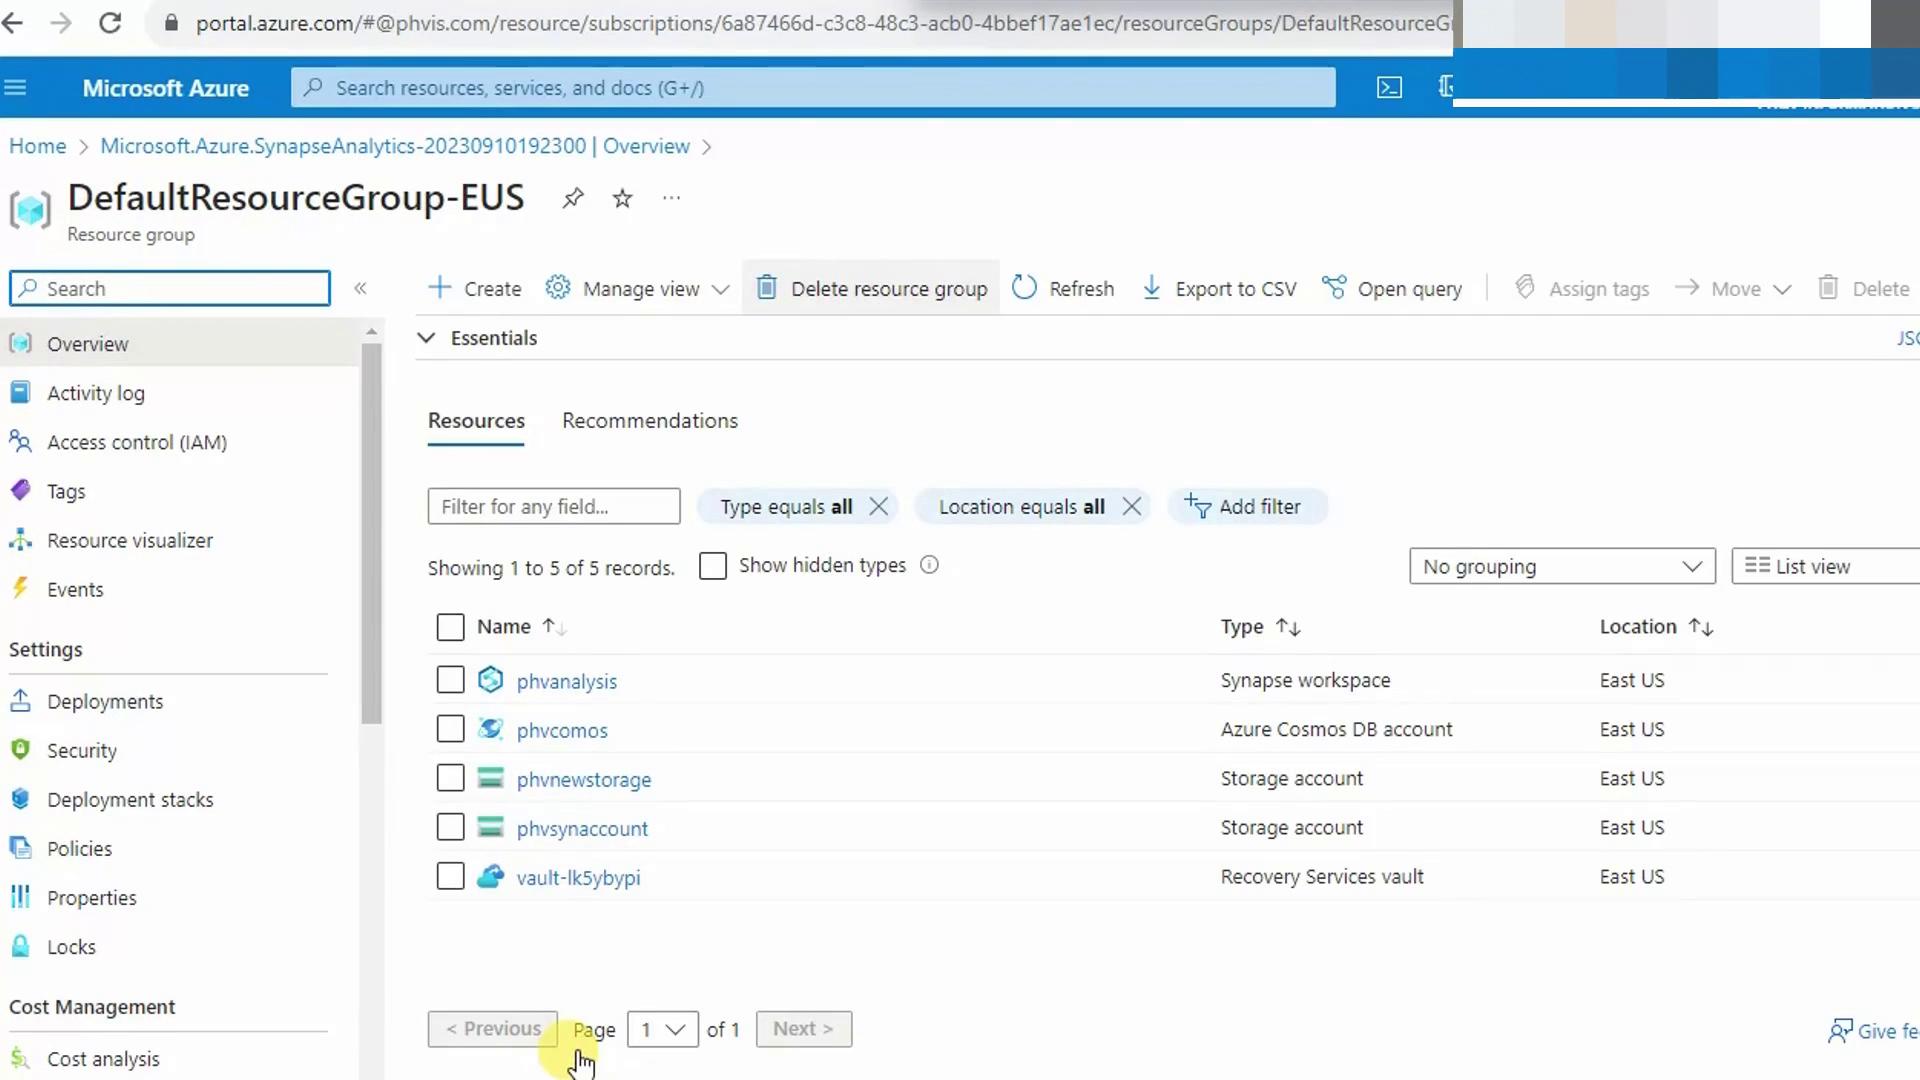
Open the managed resource group (e.g., **DefaultResourceGroup-EUS**):
| Resource | Purpose |
| ---------------------------------- | ------------------------------------------ |
| Synapse Workspace | Core analytics environment |
| Managed Azure Cosmos DB | Data Explorer for log and time series data |
| Storage Account: phvsynapseaccount | Data Lake Storage Gen2 |
| Storage Account: phvsynfiles | Azure Files for intermediate operations |
| Recovery Services vault | Backup and disaster recovery |
### Accessing Synapse Studio
1. Click your **Synapse Workspace** to launch **Synapse Studio**.
2. In the **Develop** hub, you can create:
* SQL on-demand scripts
* Dedicated SQL pool queries
* Spark notebooks
* Data Factory pipelines
3. Use the **Manage** hub to link additional services or update credentials.
4. Monitor job runs and pipeline status in the **Monitor** hub.
Congratulations! You’ve successfully set up an Azure Synapse Analytics workspace and explored its core components.
***
## Links and References
* [Azure Synapse Analytics Documentation](https://learn.microsoft.com/azure/synapse-analytics/)
* [Data Lake Storage Gen2 Overview](https://learn.microsoft.com/azure/storage/blobs/data-lake-storage-introduction)
* [Azure Storage RBAC Roles](https://learn.microsoft.com/azure/role-based-access-control/built-in-roles#storage-roles)
* [Azure Key Vault for Customer-Managed Keys](https://learn.microsoft.com/azure/key-vault/general/overview)
***
## 2. Security and Authentication
Switch to the **Security** tab to configure identity and network controls:
* **Authentication**
* Enable **Azure Active Directory (AAD)** for centralized, secure access.
* Optionally allow local SQL authentication if needed.
* **Network Access**
* By default, all IP ranges are allowed.
* You can restrict to specific IPs or Virtual Network rules later.

Below, you’ll find **Encryption** settings:
* **Microsoft-managed keys** are selected by default for data at rest.
* To use **Customer-managed keys**, click **Enable**, then choose your Key Vault and key.
Once the workspace is created, you cannot switch encryption between Microsoft-managed and customer-managed keys.

***
## 3. Review, Create, and Deploy
1. Skip the **Networking** tab for now (you can integrate a Virtual Network later).
2. Click **Review + create**.
3. After validation completes successfully, select **Create**.

Deployment typically takes 5–10 minutes. Once finished, navigate to your managed resource group to inspect all created components.

***
## 4. Exploring Your Workspace
Open the managed resource group (e.g., **DefaultResourceGroup-EUS**):
| Resource | Purpose |
| ---------------------------------- | ------------------------------------------ |
| Synapse Workspace | Core analytics environment |
| Managed Azure Cosmos DB | Data Explorer for log and time series data |
| Storage Account: phvsynapseaccount | Data Lake Storage Gen2 |
| Storage Account: phvsynfiles | Azure Files for intermediate operations |
| Recovery Services vault | Backup and disaster recovery |

### Accessing Synapse Studio
1. Click your **Synapse Workspace** to launch **Synapse Studio**.
2. In the **Develop** hub, you can create:
* SQL on-demand scripts
* Dedicated SQL pool queries
* Spark notebooks
* Data Factory pipelines
3. Use the **Manage** hub to link additional services or update credentials.
4. Monitor job runs and pipeline status in the **Monitor** hub.
Congratulations! You’ve successfully set up an Azure Synapse Analytics workspace and explored its core components.
***
## Links and References
* [Azure Synapse Analytics Documentation](https://learn.microsoft.com/azure/synapse-analytics/)
* [Data Lake Storage Gen2 Overview](https://learn.microsoft.com/azure/storage/blobs/data-lake-storage-introduction)
* [Azure Storage RBAC Roles](https://learn.microsoft.com/azure/role-based-access-control/built-in-roles#storage-roles)
* [Azure Key Vault for Customer-Managed Keys](https://learn.microsoft.com/azure/key-vault/general/overview)