> ## Documentation Index
> Fetch the complete documentation index at: https://notes.kodekloud.com/llms.txt
> Use this file to discover all available pages before exploring further.
# Demo Create Cosmos DB Account
> Learn to provision an Azure Cosmos DB account, configure a NoSQL database, enable global distribution, and insert your first document using Data Explorer.
In this lesson, you’ll learn how to provision an Azure Cosmos DB account, configure a NoSQL database and container, enable global distribution, and insert your first document using the Data Explorer. By the end, you’ll understand Cosmos DB’s core concepts and be ready to build globally distributed applications.
***
## 1. Create an Azure Cosmos DB Account
1. In the Azure portal, type **Cosmos DB** in the search bar and select **Azure Cosmos DB**.
2. Click **Create Azure Cosmos DB account**.
3. Under **API**, choose **Azure Cosmos DB for NoSQL**:
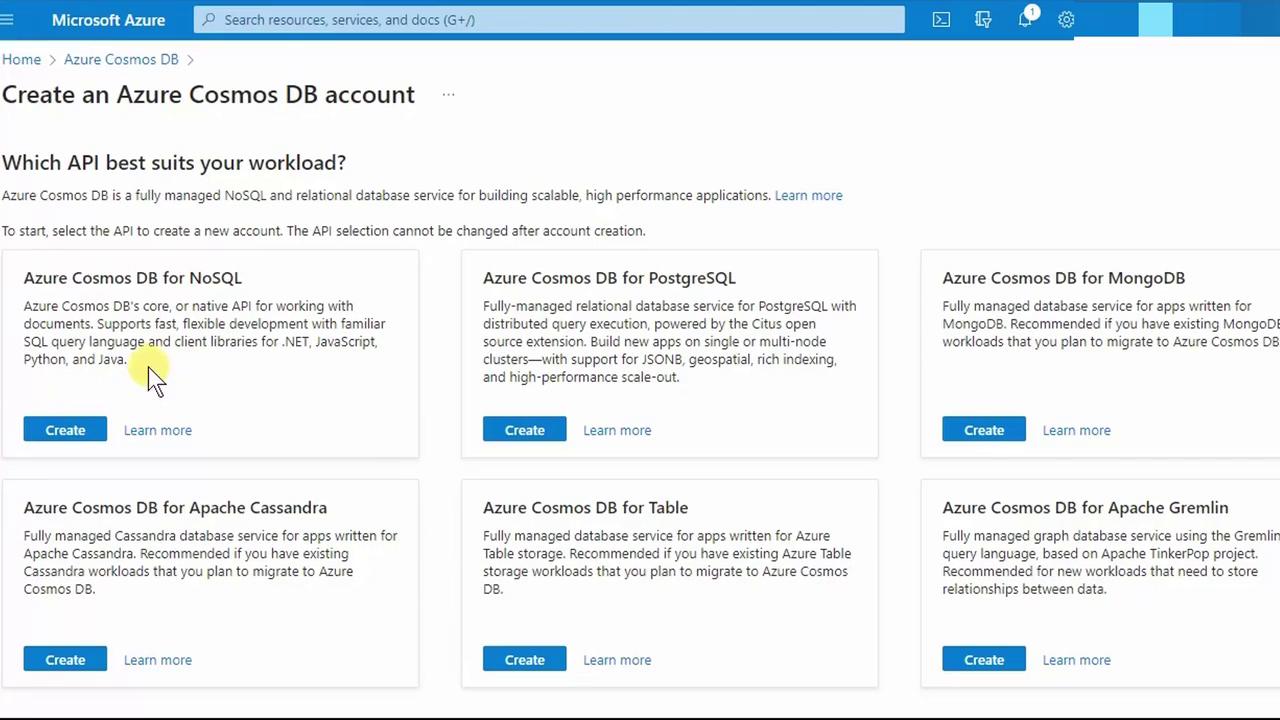
4. Click **Create** and fill out the **Basics** tab:
* **Subscription**: Select your Azure subscription
* **Resource group**: Pick an existing group or create a new one, e.g., *MyResourceGroup*
* **Account Name**: Enter a unique name (e.g., `phvcosmos`)
* **Region**: Choose the nearest region (e.g., East US)
***
## 2. Choose Capacity Mode
Cosmos DB offers two billing models. Select the mode that best fits your workload:
| Capacity Mode | Billing Model | Ideal For |
| ---------------------- | ----------------------- | --------------------------------- |
| Provisioned throughput | Request Units (RUs/sec) | Predictable performance workloads |
| Serverless | Pay per request | Infrequent or bursty traffic |
1. Under **Capacity mode**, pick **Provisioned throughput**.
2. Enable the free tier discount (if eligible).
3. Optionally **Limit total throughput** to prevent unexpected RU charges.
Limiting throughput helps you stay within budget by capping the maximum RUs your account can consume.
***
## 3. Configure Global Distribution
1. Switch to the **Global distribution** tab.
2. Toggle **Multi-region writes** (allows writes in all regions).
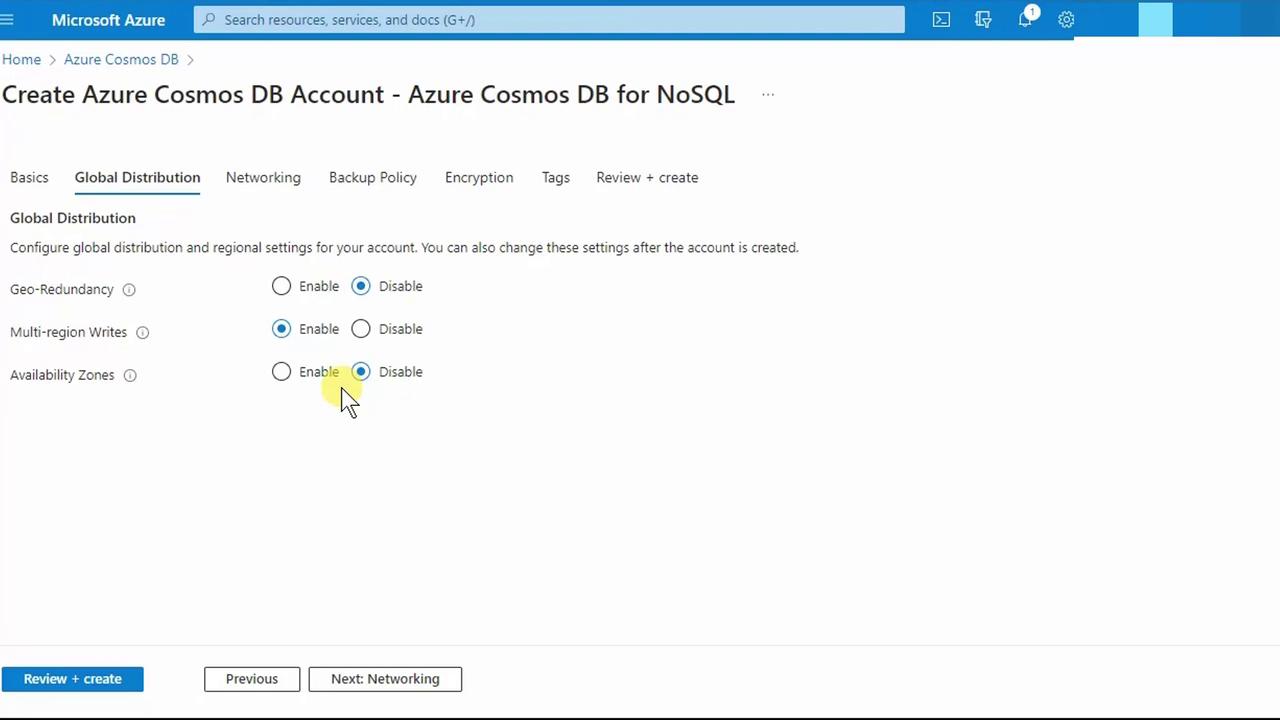
3. Click **Review + create**.
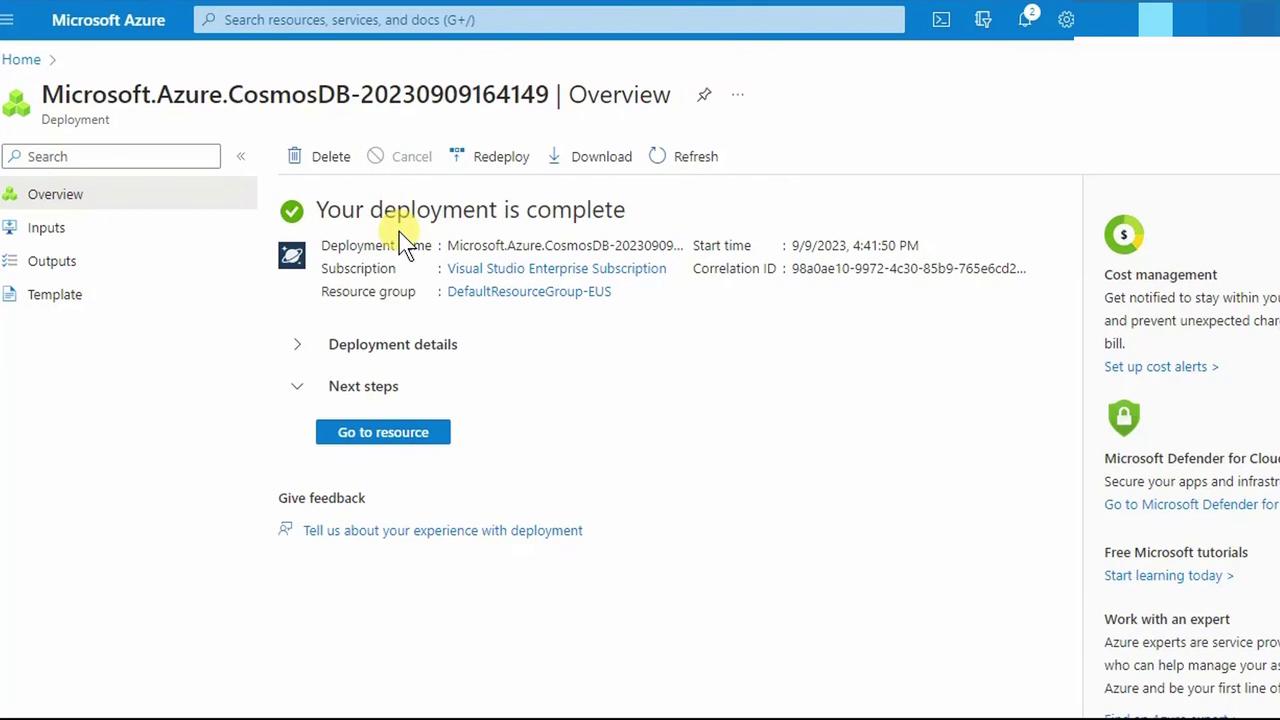
4. After validation passes, click **Create**. Deployment may take a few minutes.
***
## 4. Add a Container
1. Go to your new account’s **Overview** page and click **+ Create Container**.
2. By default:
* Database ID: **items**
* Container ID: **items**
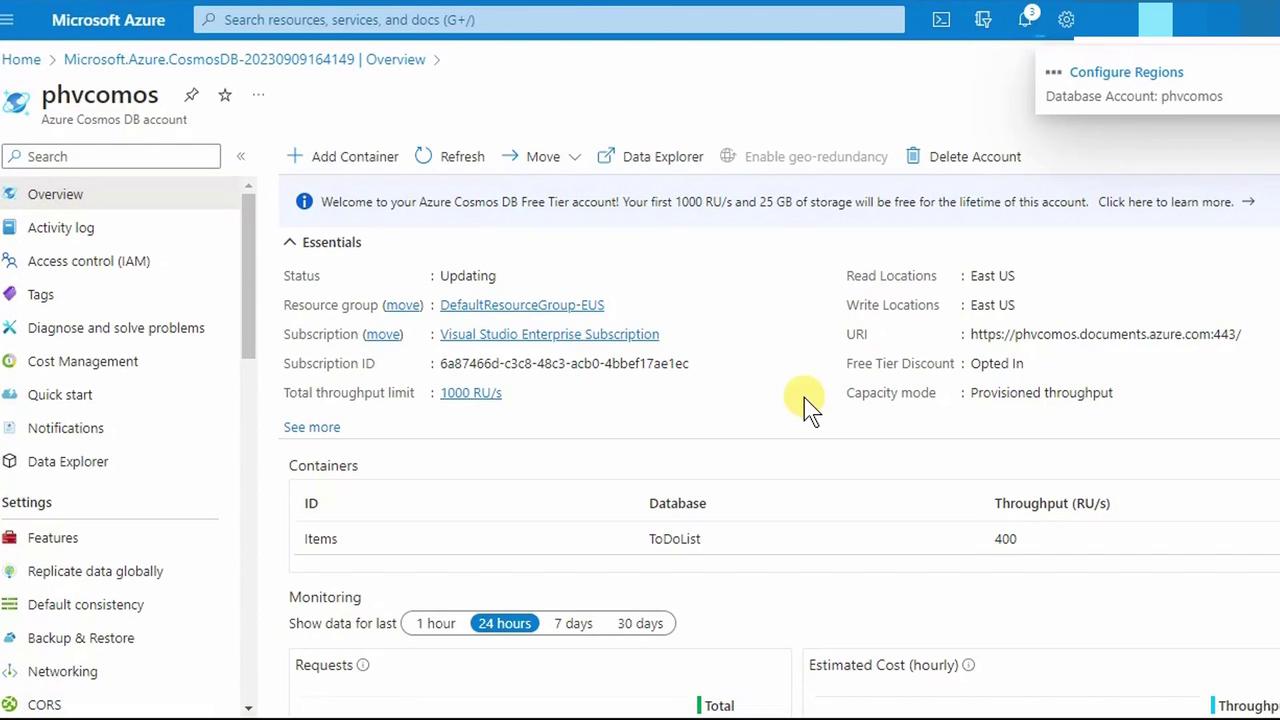
* Throughput: 400 RUs/sec on the container (1,000 RUs/sec at the account level)
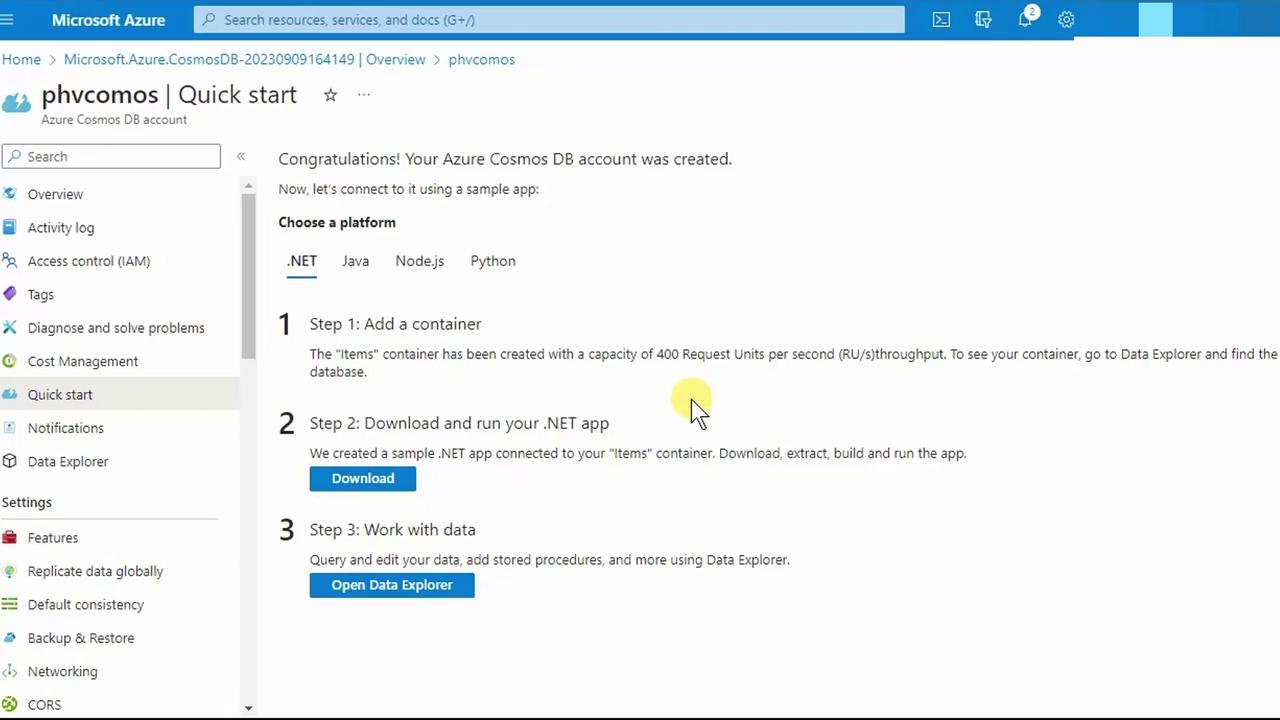
You can also download sample apps in .NET, Java, Node.js, or Python, or use **Data Explorer** to explore and manage data.
***
## 5. Configure Global Replication
1. Under **Settings**, select **Replicate data globally**.
2. On the world map, click to add a secondary region (e.g., Canada Central).
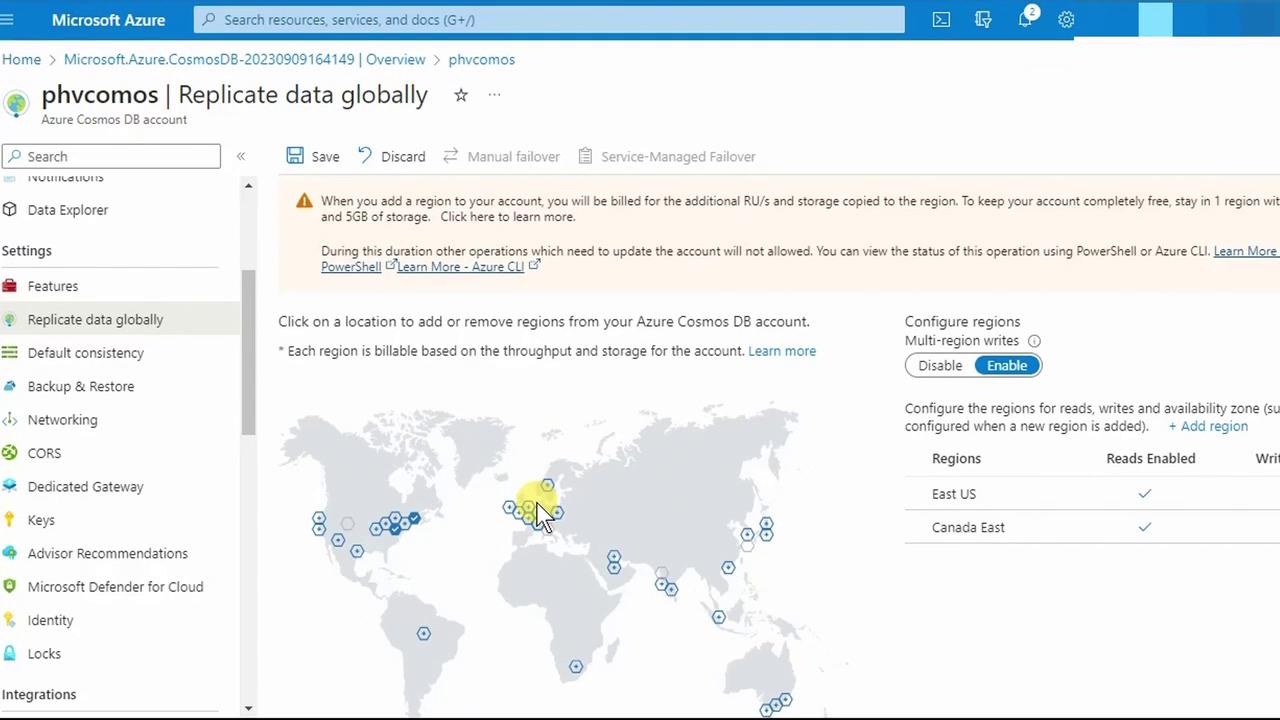
Adding regions with **Multi-region writes** multiplies RU consumption across each region. Ensure your account-level RU quota covers all selected regions, or adjust your throughput accordingly.
### Geo-redundancy vs. Multi-region Writes
* **Multi-region writes**: Clients can write to any configured region.
* **Geo-redundancy**: Maintains a passive standby region for automatic failover.
You may enable both if you require active-active writes and automatic failover.
3. Click **Save**. Back in **Overview**, you’ll now see all configured regions:
***
## 6. Explore Data Explorer
1. In the portal menu, choose **Data Explorer** (or press Ctrl + F and search for it).

2. Expand your **items** database and container.

3. Click **New Item**. Replace the default JSON:
```json theme={null}
{
"id": "replace_with_new_document_id"
}
```
with:
```json theme={null}
{
"CustomerId": 1,
"FirstName": "Peter",
"LastName": "Vogel"
}
```
4. Press **Save**. Cosmos DB augments your document with system properties:
```json theme={null}
{
"CustomerId": 1,
"FirstName": "Peter",
"LastName": "Vogel",
"id": "3a0585fd-1202-4855-91ef-5077ca6c263c",
"_rid": "VRJWANGK1u0BAAAAAAAAAA==",
"_self": "dbs/VRJWAA==/colls/VRJWANGK1u0=/docs/VRJWANGK1u0BAAAAAAAAAA==/",
"_etag": "\"b002c1f-0000-0100-0000-64fcd0bf0000\"",
"_attachments": "attachments/",
"_ts": 1694292751
}
```
Key system properties:
* **\_etag**: Concurrency control
* **\_ts**: Last-modified timestamp
***
Congratulations! You have successfully created an Azure Cosmos DB account, configured a NoSQL database and container, set up global distribution, and inserted your first document. For more details, see the [Azure Cosmos DB documentation](https://docs.microsoft.com/azure/cosmos-db/).