> ## Documentation Index
> Fetch the complete documentation index at: https://notes.kodekloud.com/llms.txt
> Use this file to discover all available pages before exploring further.

# Demo Containers

> This guide teaches how to create and manage Azure Blob Containers, including setting up a Storage Account and managing access and uploads.

In this guide, you’ll learn how to create and configure a Storage Account in Azure, set up a Blob Container, manage access, upload blobs, and view container properties. We’ll walk through each step with screenshots from the Azure portal and best practices for production environments.

## Prerequisites

* An active Azure subscription
* Contributor or Owner access to create resources
* Basic familiarity with Azure Portal navigation
<Frame>
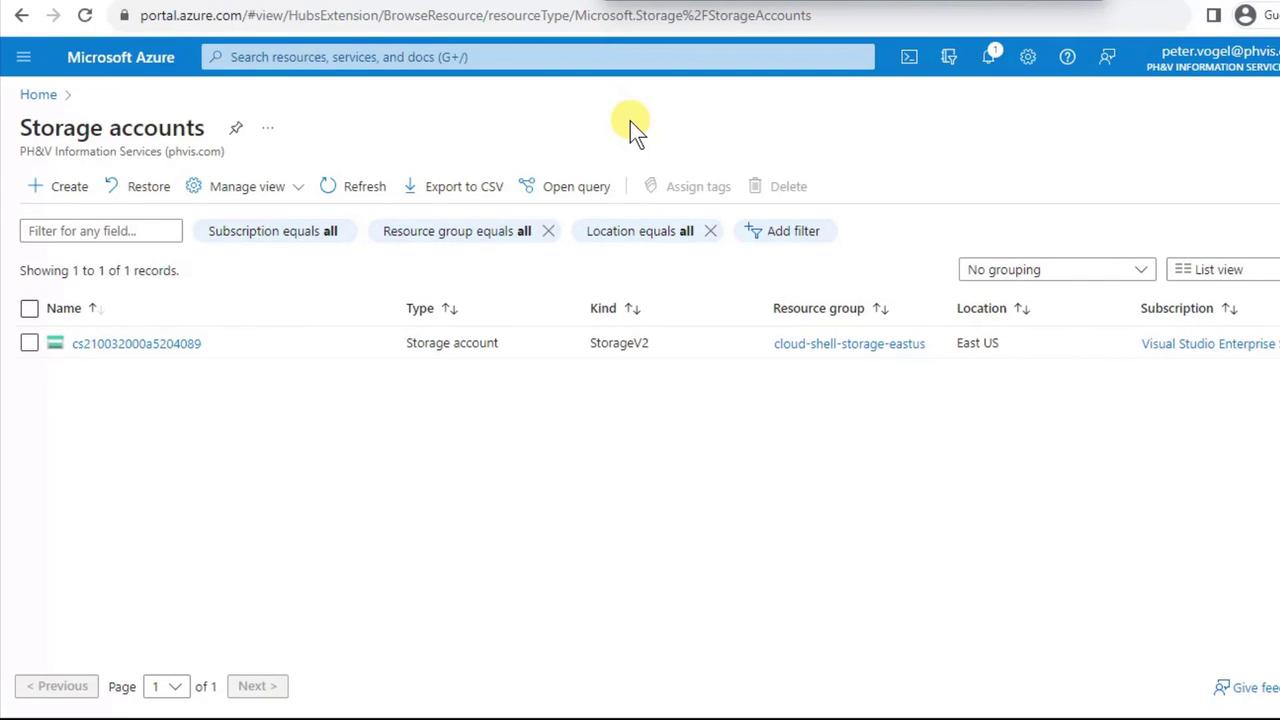
  ![The image shows a Microsoft Azure portal page displaying a list of storage accounts, with one storage account listed under the "Storage accounts" section.](https://kodekloud.com/kk-media/image/upload/v1752872962/notes-assets/images/DP-900-Microsoft-Azure-Data-Fundamentals-Demo-Containers/azure-portal-storage-accounts-list.jpg)
</Frame>

***

## 1. Create a Storage Account

1. Navigate to **Storage accounts** in the Azure portal and click **+ Create**.
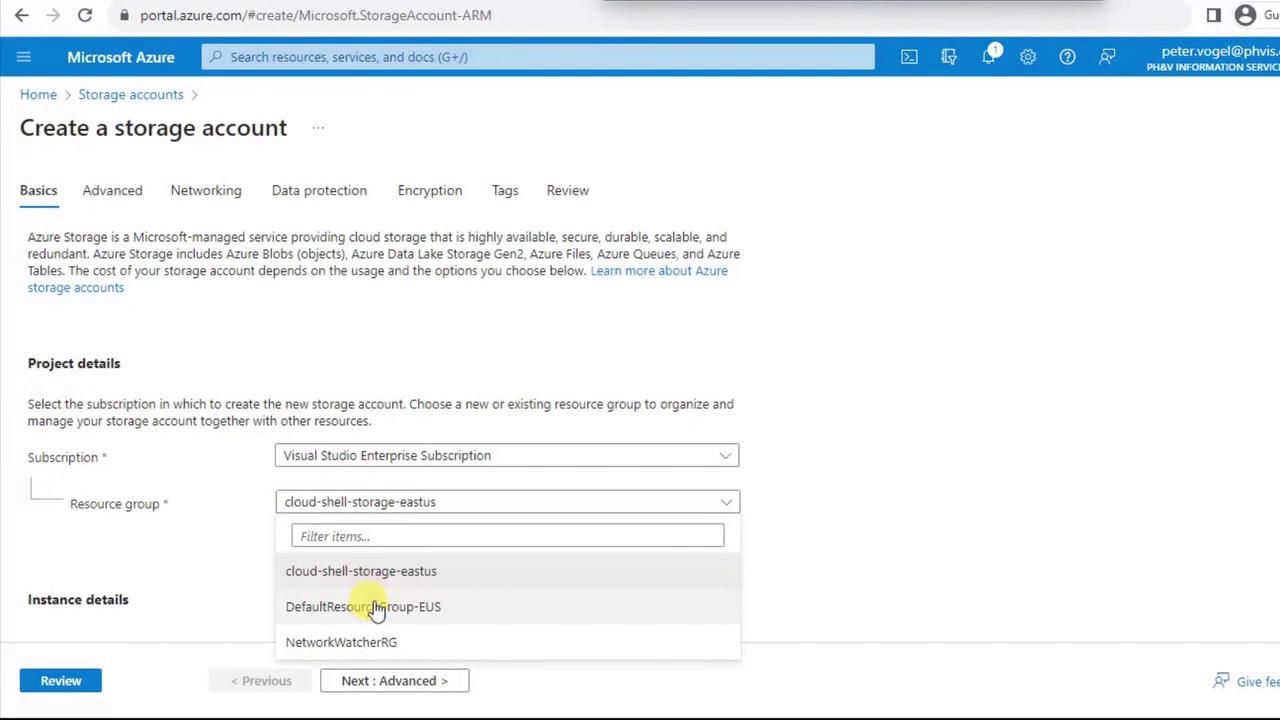
2. On the **Basics** tab:
   * Select your **Subscription**.
   * Choose or create a **Resource group** (e.g., `EUS`).
   * Enter a globally unique name (lowercase, no spaces), for example:
     ```text theme={null}
     phvissstorage
     ```
<Frame>
  ![The image shows a Microsoft Azure portal page for creating a storage account, with options to select a subscription and resource group. The "Basics" tab is active, and a dropdown menu for resource groups is visible.](https://kodekloud.com/kk-media/image/upload/v1752872964/notes-assets/images/DP-900-Microsoft-Azure-Data-Fundamentals-Demo-Containers/azure-portal-storage-account-creation.jpg)
</Frame>

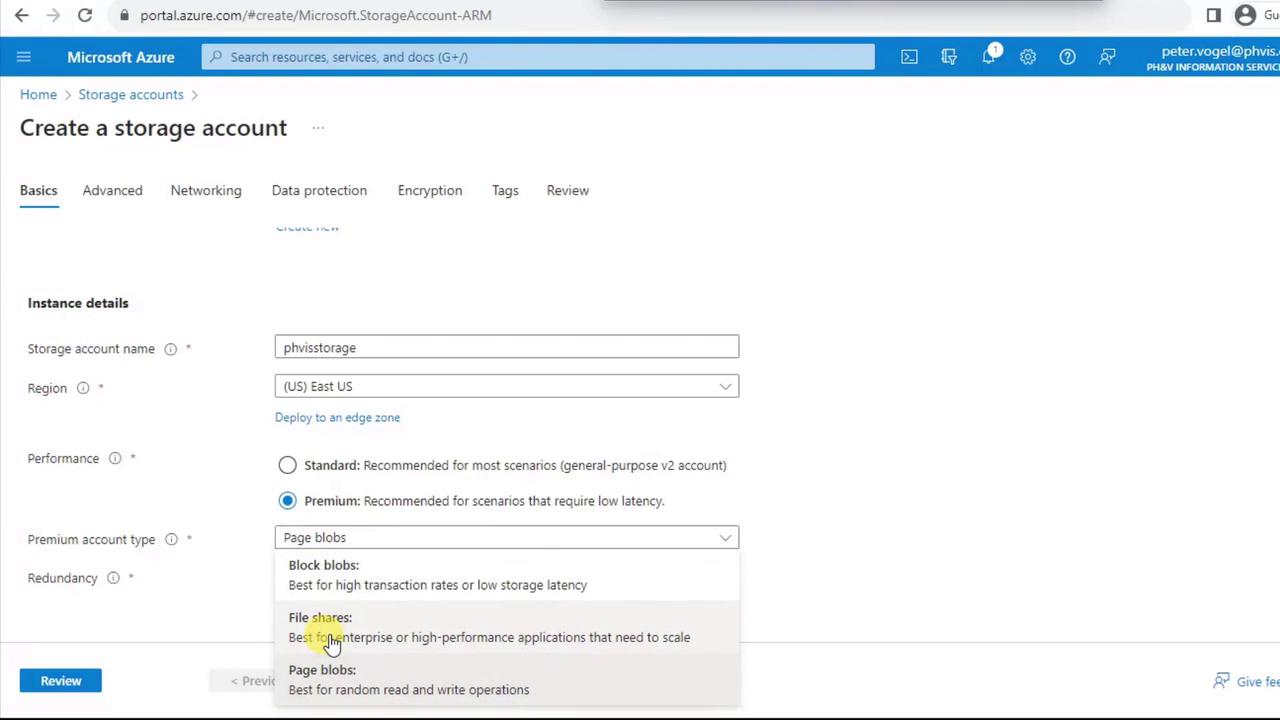
3. Under **Performance**, select **Premium**. Then choose **Block blobs** for optimized object storage.
<Frame>
  ![The image shows a Microsoft Azure portal interface for creating a storage account, with options for instance details, region, performance, and premium account type. A dropdown menu is open, displaying options for different types of storage, such as block blobs, file shares, and page blobs.](https://kodekloud.com/kk-media/image/upload/v1752872965/notes-assets/images/DP-900-Microsoft-Azure-Data-Fundamentals-Demo-Containers/azure-portal-storage-account-creation-2.jpg)
</Frame>

4. In **Replication**, Premium Block Blobs support only:
   | Replication Option              | Description                                            |
   | ------------------------------- | ------------------------------------------------------ |
   | Locally redundant storage (LRS) | Three copies within a single datacenter.               |
   | Zone-redundant storage (ZRS)    | Copies spread across availability zones in the region. |
   > Select **Locally redundant storage (LRS)** for single-region durability.

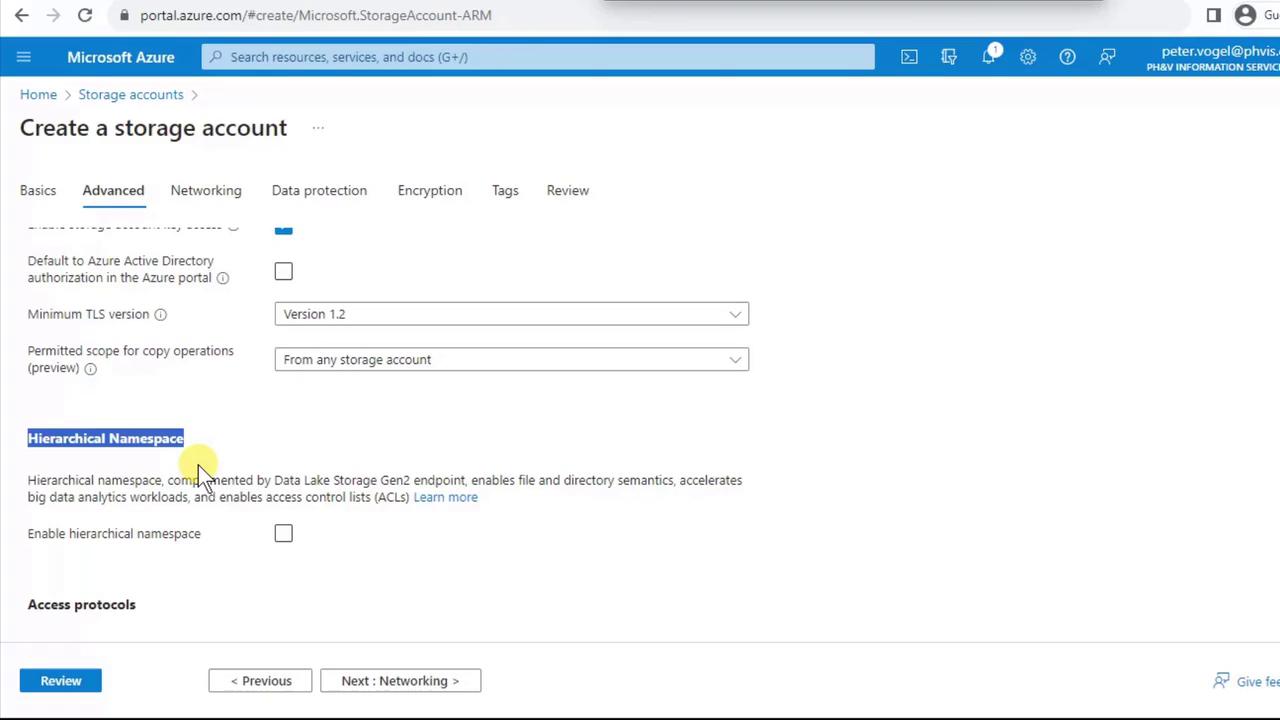
5. Switch to the **Advanced** tab to review settings like **Hierarchical namespace** (required for Data Lake Storage Gen2).
<Frame>
  ![The image shows a Microsoft Azure portal interface for creating a storage account, specifically on the "Advanced" tab, with options for configuring settings like TLS version and hierarchical namespace.](https://kodekloud.com/kk-media/image/upload/v1752872965/notes-assets/images/DP-900-Microsoft-Azure-Data-Fundamentals-Demo-Containers/azure-portal-storage-account-advanced-tab.jpg)
</Frame>

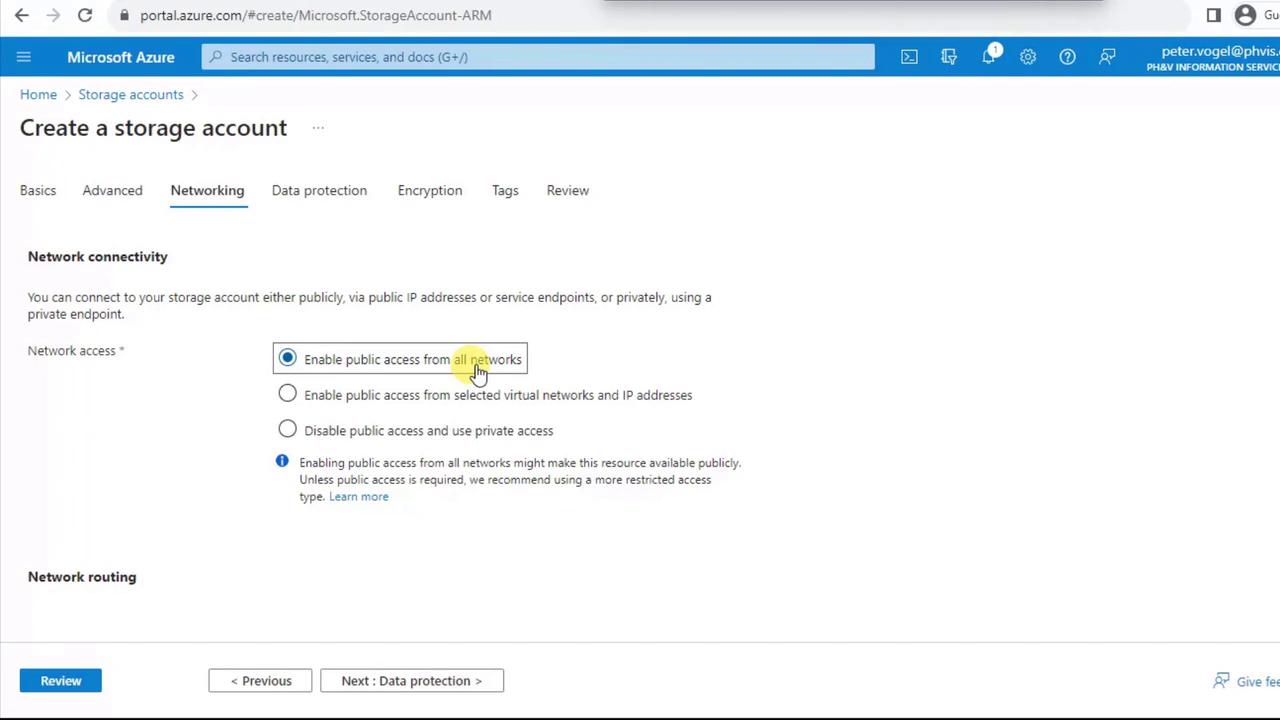
6. Under **Networking**, choose **Enable public access from all networks** to allow authenticated access from any location.
<Frame>
  ![The image shows a Microsoft Azure portal screen for creating a storage account, specifically on the "Networking" tab, where network access options are being configured.](https://kodekloud.com/kk-media/image/upload/v1752872966/notes-assets/images/DP-900-Microsoft-Azure-Data-Fundamentals-Demo-Containers/azure-portal-storage-account-networking.jpg)
</Frame>

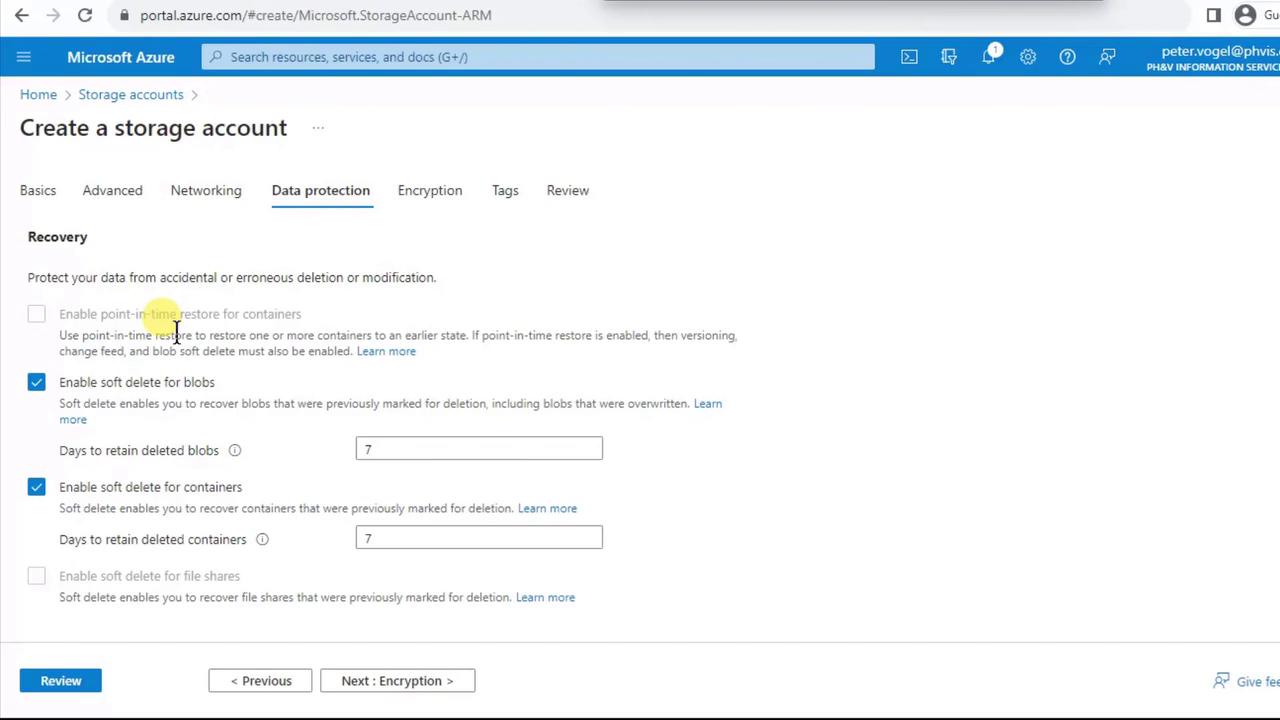
7. On **Data Protection**, note that Premium accounts have soft delete enabled by default (7-day retention). Point-in-time restore isn’t available for Premium. You can also enable versioning and immutability policies.
<Frame>
  ![The image shows a Microsoft Azure portal page for creating a storage account, specifically focusing on the "Data protection" settings, including options for enabling point-in-time restore and soft delete for blobs and containers.](https://kodekloud.com/kk-media/image/upload/v1752872967/notes-assets/images/DP-900-Microsoft-Azure-Data-Fundamentals-Demo-Containers/azure-portal-storage-account-data-protection.jpg)
</Frame>

8. For **Encryption**, choose between Microsoft-managed keys or customer-managed keys in Azure Key Vault. The default is Microsoft-managed.

<Frame>
  ![The image shows a Microsoft Azure portal screen for creating a storage account, specifically on the "Encryption" tab, where options for encryption type and support for customer-managed keys are being configured.](https://kodekloud.com/kk-media/image/upload/v1752872968/notes-assets/images/DP-900-Microsoft-Azure-Data-Fundamentals-Demo-Containers/azure-portal-storage-account-encryption.jpg)
</Frame>

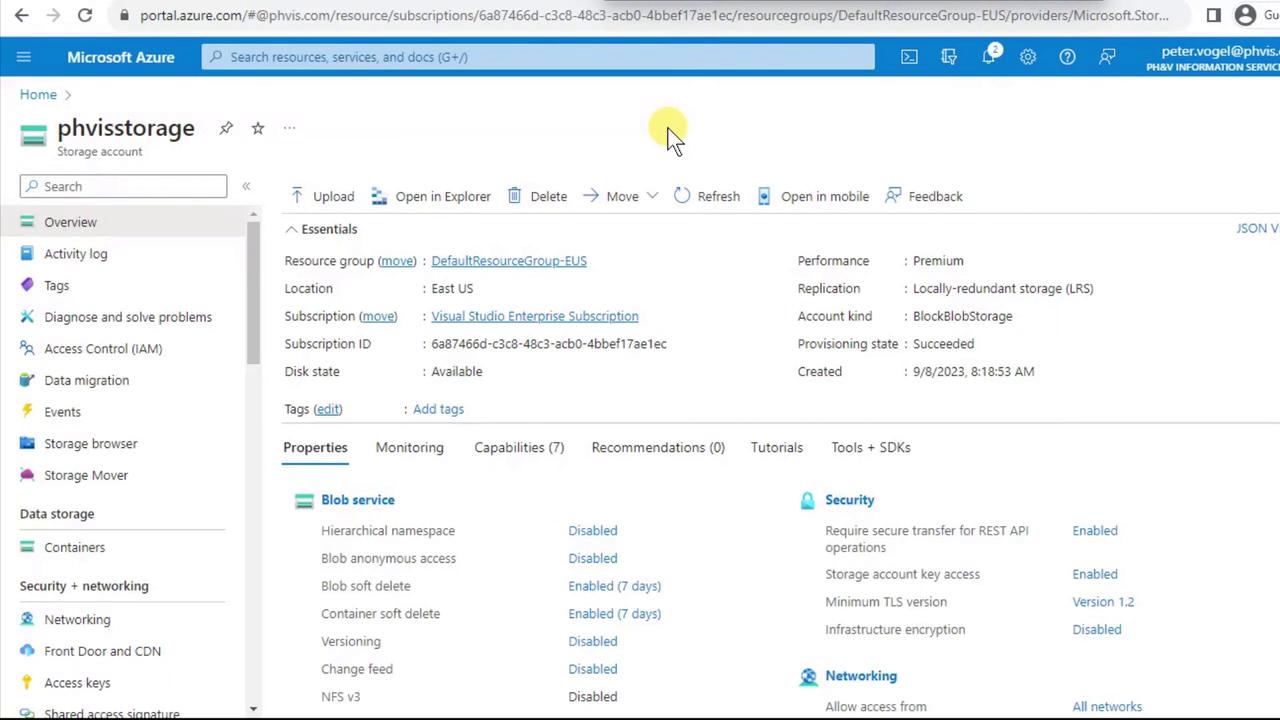
9. Click **Review + create**, validate your settings, and then **Create**. Wait for deployment to complete.
<Frame>
  ![The image shows a Microsoft Azure portal interface displaying details of a storage account named "phvissstorage," including its resource group, location, subscription, and various properties related to performance, security, and networking.](https://kodekloud.com/kk-media/image/upload/v1752872970/notes-assets/images/DP-900-Microsoft-Azure-Data-Fundamentals-Demo-Containers/azure-portal-storage-account-details.jpg)
</Frame>

***

## 2. Create a Blob Container

1. Open your newly created storage account and click **Containers** under **Data storage**.
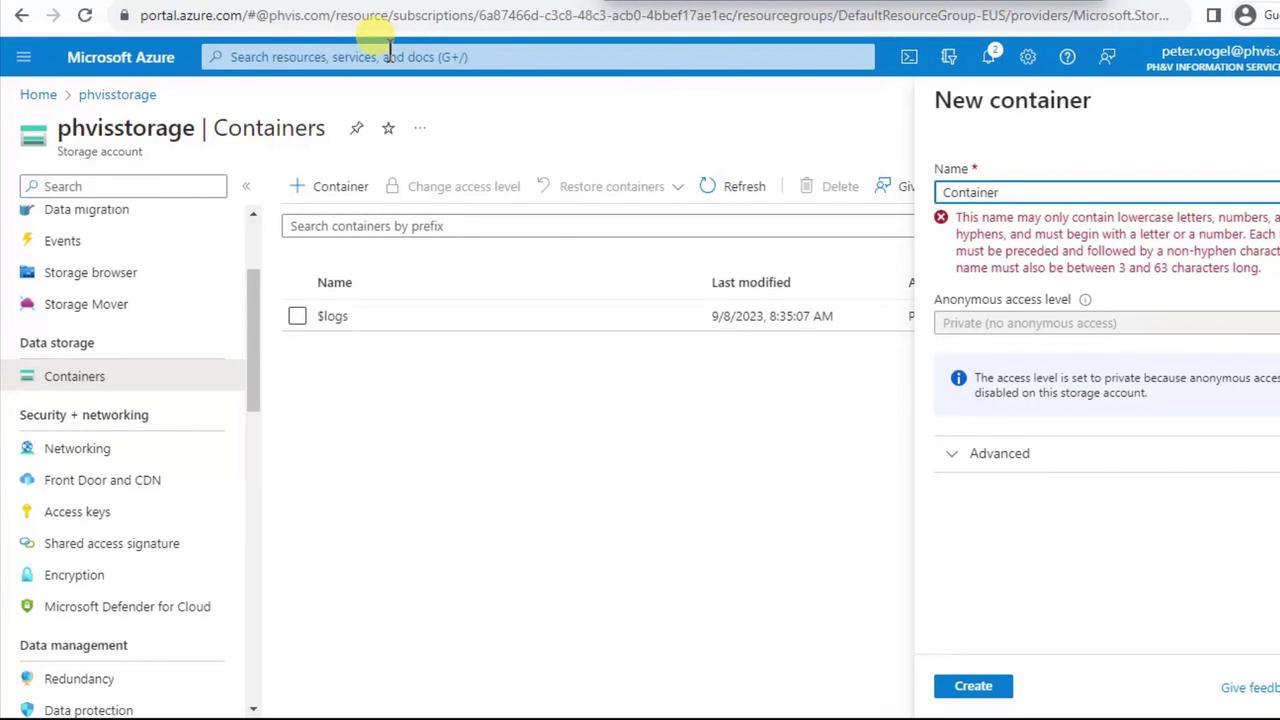
2. Click **+ Container**, enter a lowercase name (e.g., `cs`), then **Create**.

<Callout icon="lightbulb" color="#1CB2FE">
  Container names must be 3–63 characters, lowercase letters and numbers only, without special characters or spaces.
</Callout>

<Frame>
  ![The image shows a Microsoft Azure portal interface for managing storage containers. It includes a section for creating a new container with specific naming rules and access level settings.](https://kodekloud.com/kk-media/image/upload/v1752872971/notes-assets/images/DP-900-Microsoft-Azure-Data-Fundamentals-Demo-Containers/azure-portal-storage-containers-interface.jpg)
</Frame>

***

## 3. Assign Access Roles

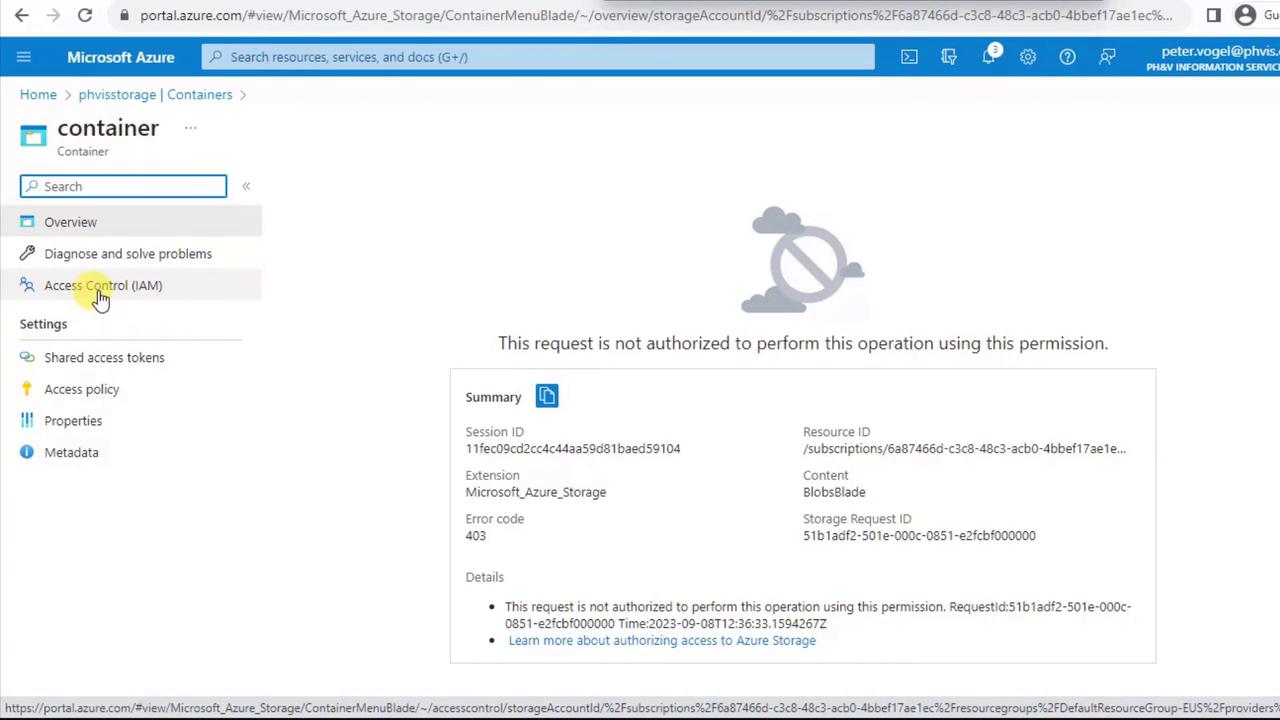
If you try to browse or upload without proper permissions, you’ll encounter a **403 Forbidden** error.

<Callout icon="triangle-alert" color="#FF6B6B">
  Error code 403 indicates you need the **Storage Blob Data Contributor** role (or higher) to modify container contents. Assign this role at the storage account or container scope.
</Callout>

<Frame>
  ![The image shows a Microsoft Azure portal page with an error message stating that the request is not authorized to perform the operation due to insufficient permissions, displaying error code 403.](https://kodekloud.com/kk-media/image/upload/v1752872972/notes-assets/images/DP-900-Microsoft-Azure-Data-Fundamentals-Demo-Containers/azure-portal-error-403-permissions.jpg)
</Frame>

***

## 4. Upload a Blob

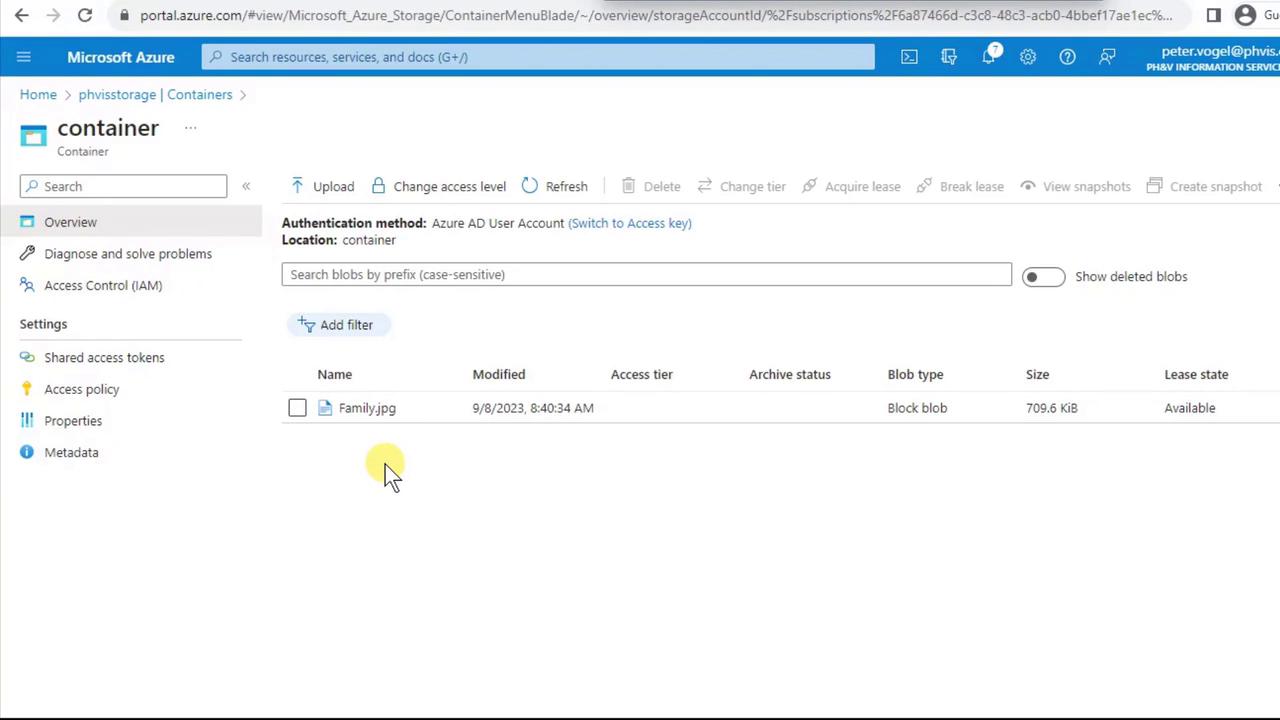
1. Inside your container, click **Upload**.
2. Select a local file (e.g., `Family.jpg`) and click **Upload**.
3. After uploading, you’ll see the blob listed along with its metadata:
<Frame>
  ![The image shows a Microsoft Azure storage container interface with a file named "Family.jpg" listed, including details like modification date, size, and blob type.](https://kodekloud.com/kk-media/image/upload/v1752872974/notes-assets/images/DP-900-Microsoft-Azure-Data-Fundamentals-Demo-Containers/azure-storage-container-family-file-details.jpg)
</Frame>

***

## 5. View Container Properties

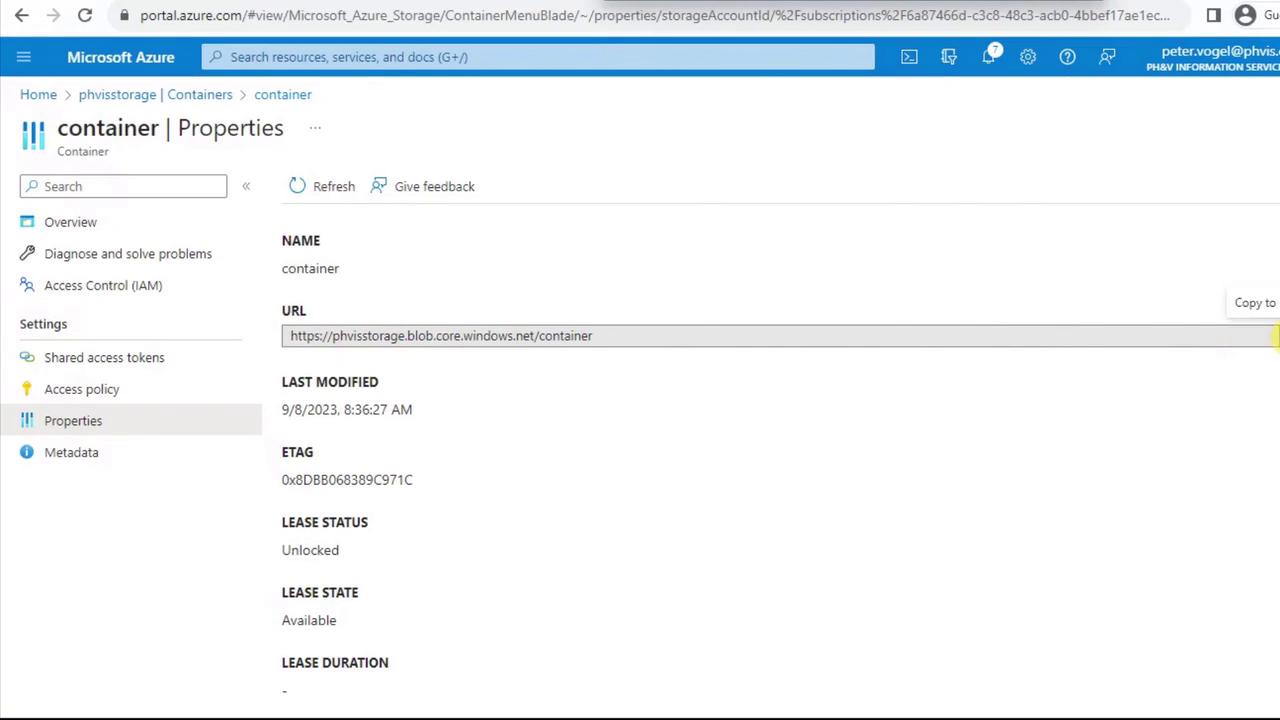
To programmatically access your blobs, you need the container’s URL and metadata:

1. From the container menu, select **Properties**.
2. Copy the **URL**, review the **ETag**, lease status, and other details.
<Frame>
  ![The image shows the properties page of a container in Microsoft Azure, displaying details such as the container's name, URL, last modified date, ETag, lease status, and lease state.](https://kodekloud.com/kk-media/image/upload/v1752872975/notes-assets/images/DP-900-Microsoft-Azure-Data-Fundamentals-Demo-Containers/azure-container-properties-page-details.jpg)
</Frame>

***

## 6. Update Storage Account Configuration

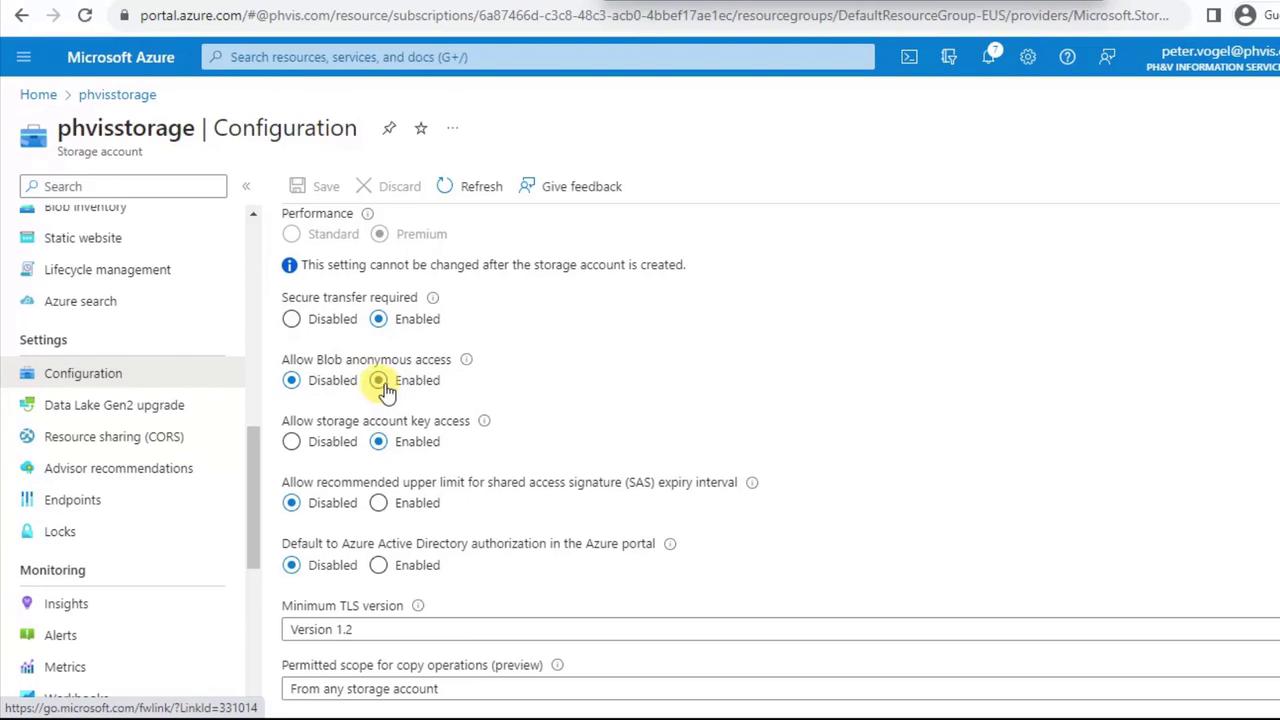
At any time, you can revisit **Configuration** on the storage account to modify settings:

* **Secure transfer** requirement
* **Blob anonymous access** (allow read without authentication)
* Storage account key access

Enable **Allow Blob anonymous access** if you want public, read-only access to your blobs (subject to network rules), then click **Save**.
<Frame>
  ![The image shows a configuration page for a storage account in Microsoft Azure, displaying various settings such as secure transfer, blob anonymous access, and storage account key access.](https://kodekloud.com/kk-media/image/upload/v1752872976/notes-assets/images/DP-900-Microsoft-Azure-Data-Fundamentals-Demo-Containers/azure-storage-account-configuration-settings.jpg)
</Frame>

***

## Next Steps & References

* Explore [Azure Storage documentation](https://docs.microsoft.com/azure/storage/) for advanced scenarios.
* Learn about [RBAC roles for Azure Storage](https://docs.microsoft.com/azure/storage/common/storage-auth-aad-rbac) to secure your data.
* Automate deployments with [Azure CLI](https://docs.microsoft.com/cli/azure/storage/account) or [Terraform](https://registry.terraform.io/providers/hashicorp/azurerm/latest/docs/resources/storage_account).

That completes the walkthrough for creating a storage account, configuring blob containers, and managing blobs in Azure Storage.

<CardGroup>
  <Card title="Watch Video" icon="video" cta="Learn more" href="https://learn.kodekloud.com/user/courses/dp-900-microsoft-azure-data-fundamentals/module/e229086c-adc3-444d-a6da-f77b41067675/lesson/6b14ad53-c3a4-4d66-8ae6-2b92e84aafd1" />
</CardGroup>
