> ## Documentation Index
> Fetch the complete documentation index at: https://notes.kodekloud.com/llms.txt
> Use this file to discover all available pages before exploring further.
# Demo Table Storage
> Learn to create and manage Table Storage in Azure for structured, non-relational data.
In this walkthrough, you’ll learn how to create and manage Table Storage in an Azure Storage account. Table Storage offers a NoSQL key-value store that’s ideal for structured, non-relational data.
## Prerequisites
* An active Azure subscription
* A standard Storage account (supports blobs, files, queues, and tables)
* Contributor or Storage Table Data Owner role on the storage account
## 1. Create a New Table
1. Sign in to the [Azure portal](https://portal.azure.com) and open your storage account.
2. In the left menu, select **Tables** under **Data storage** to view the table namespace.
3. Click **+ Table**, enter **SalesOrders**, and then click **OK**.
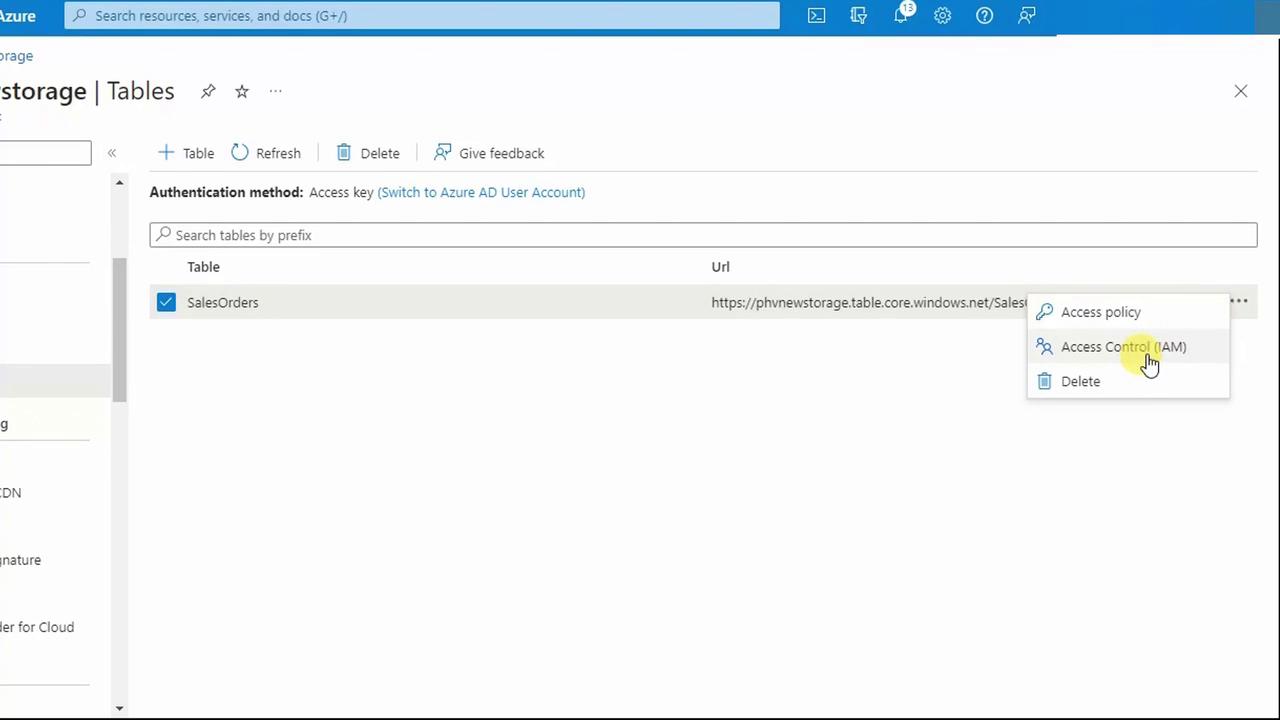
A single storage account provides one table namespace. Within it, you can create multiple tables (for example, `SalesOrders`, `Inventory`, or `Customers`) for logical separation.
## 2. Explore the Storage Browser
To manage all your storage resources in one place:
1. From the storage account menu, click **Storage Browser**.
2. You’ll see containers, file shares, queues, and tables listed together.

## 3. Add an Entity to Your Table
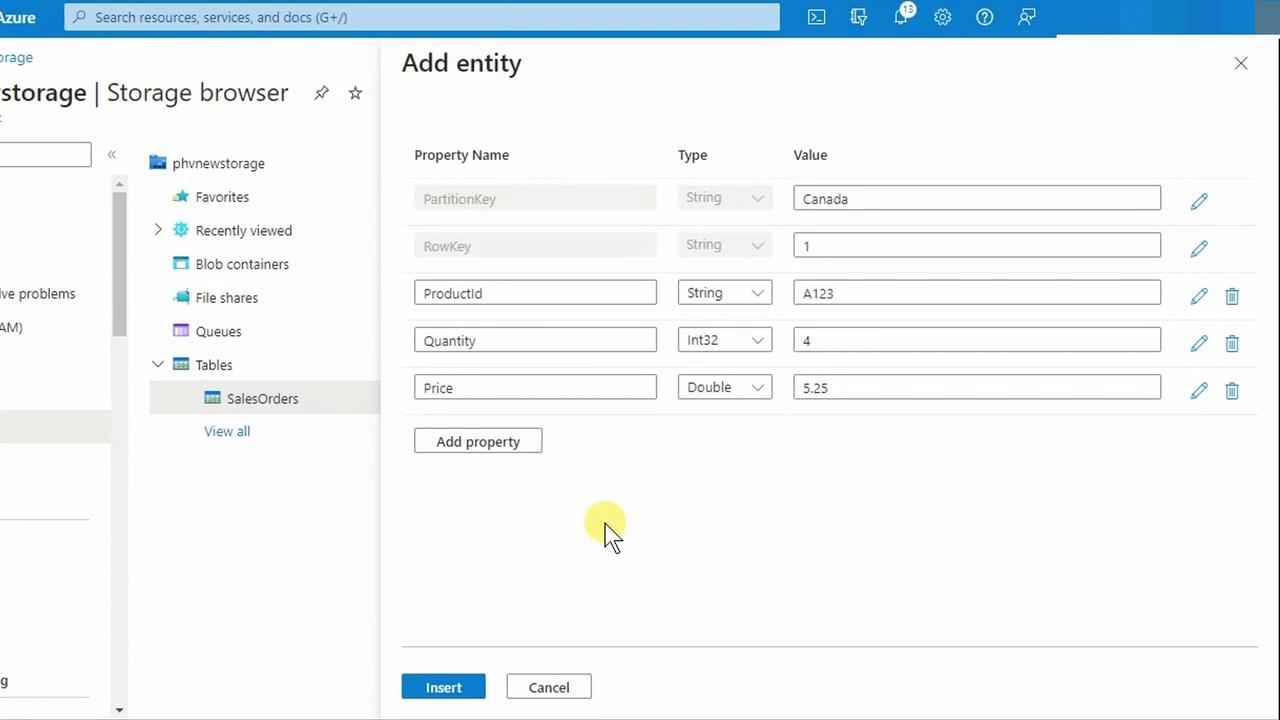
1. In **Storage Browser**, choose **Tables** then select **SalesOrders**.
2. Click **Add Entity** at the top of the table view.
Every entity requires two system keys:
* **PartitionKey**: Groups related entities for performance and scalability.
* **RowKey**: Uniquely identifies an entity within a partition.
Avoid duplicate `PartitionKey`+`RowKey` combinations, or your insert will fail with a conflict error.
### Configure Your Entity
| Property | Type | Value |
| ------------ | ------ | ------ |
| PartitionKey | String | Canada |
| RowKey | String | 1 |
| ProductId | String | A123 |
| Quantity | Int32 | 4 |
| Price | Double | 5.25 |
After entering these values, click **Insert**.
## 4. View and Verify Your Data
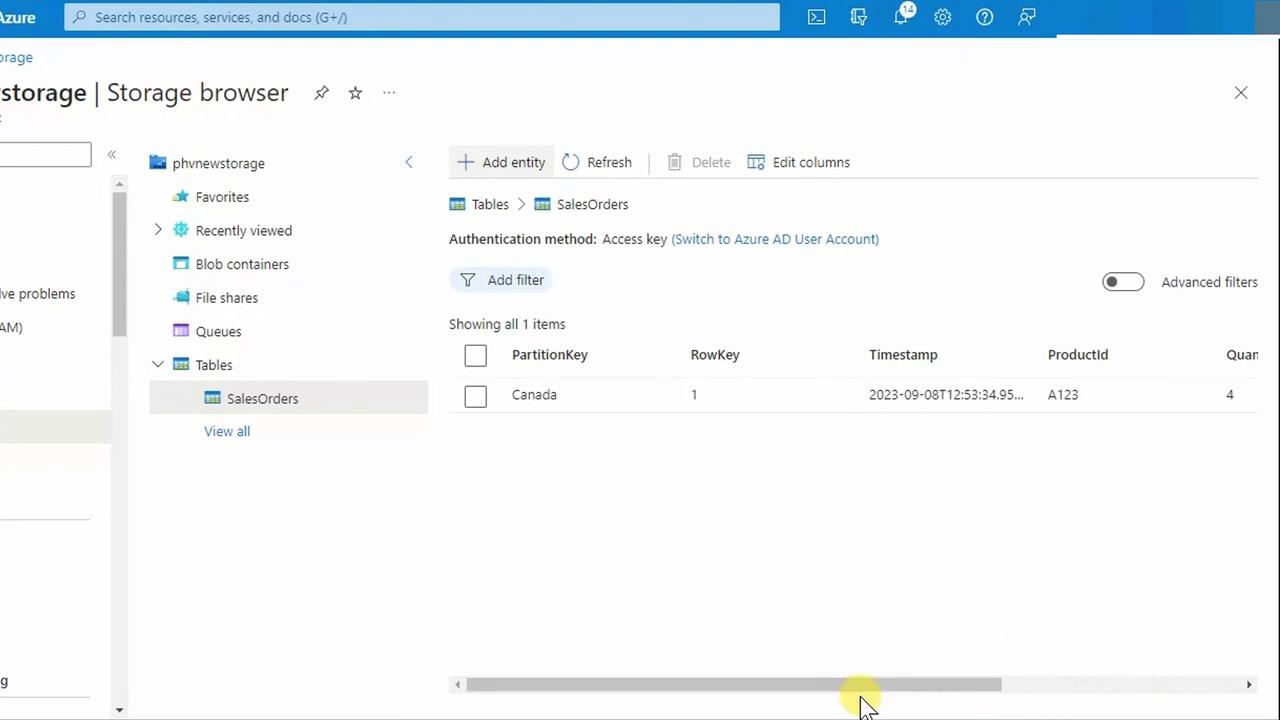
Once inserted, the entity appears in the table grid. You can scroll horizontally to see all columns, including the automatically assigned **Timestamp**.
If the portal interface feels limited, try [Azure Storage Explorer](https://azure.microsoft.com/en-us/features/storage-explorer/) for a desktop experience with more powerful browsing and management capabilities.
## Next Steps
* Query your table using the Azure SDKs or REST API
* Implement batch inserts and deletes for bulk operations
* Monitor table metrics and optimize partition strategies
## References
* [Azure Table Storage overview](https://learn.microsoft.com/azure/storage/tables/table-storage-overview)
* [Azure Storage Explorer](https://azure.microsoft.com/en-us/features/storage-explorer/)
* [Table service REST API](https://learn.microsoft.com/rest/api/storageservices/table-service-rest-api)
* [Azure portal documentation](https://learn.microsoft.com/azure/azure-portal/)