> ## Documentation Index
> Fetch the complete documentation index at: https://notes.kodekloud.com/llms.txt
> Use this file to discover all available pages before exploring further.
# Demo Setting Up DNS Server
> This guide demonstrates how to configure a multi-node DNS setup with two nameservers and one webserver acting as a client.
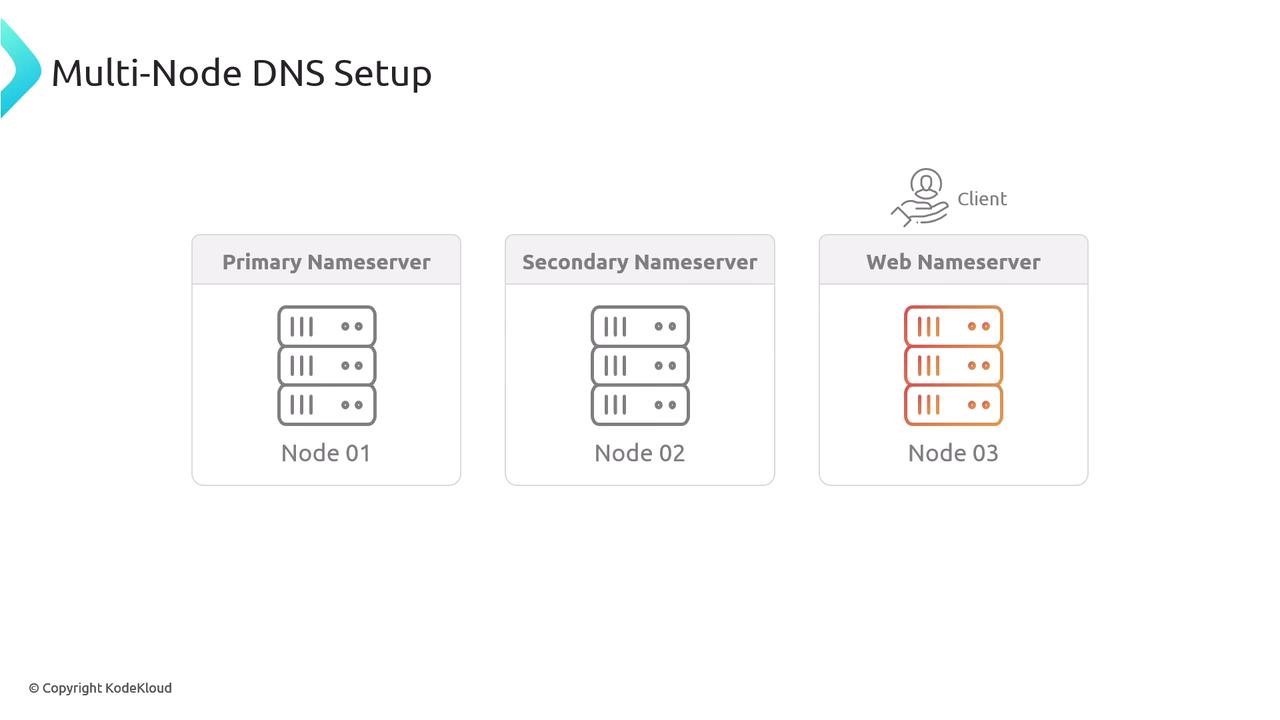
In this guide, we will demonstrate how to configure a multi-node DNS setup consisting of two nameservers and one webserver that also acts as a client. The configuration details are as follows:
• node-01: Primary nameserver\
• node-02: Secondary nameserver\
• node-03: Webserver running an application (and acting as a client)
Below is an illustration of the multi-node DNS setup:
***
## Primary Nameserver Setup (node-01)
Begin by installing and configuring BIND9 on node-01, which will serve as the primary nameserver.
### 1. Install and Start BIND9
Start the BIND9 service:
```bash theme={null}
sudo systemctl start bind9
```
### 2. Configure the Zone File
Edit the zone configuration file (typically `named.conf.local`) to specify the zone information. In this example, our domain is `multinode.kodekloud.lab` and its zone file is stored in `/etc/bind`. The configuration should indicate that node-01 is the primary (master) server for the zone:
```plaintext theme={null}
zone "multinode.kodekloud.lab" {
type master;
file "/etc/bind/db.multinode.kodekloud.lab";
};
```
Gather the IP addresses for node-01 and node-02 before updating the zone file. These IP addresses will be used within the zone file.
### 3. Verify IP Addresses
Run the following commands to check the IP addresses of node-01 and node-02:
```bash theme={null}
# Starting the named service if not already running
sudo systemctl start named
# Editing configuration and zone file
sudo vi /etc/bind/named.conf.local
sudo vi /etc/bind/db.multinode.kodekloud.lab
# Checking IP addresses:
ping node01
ping node02
```
Example output for node01:
```bash theme={null}
PING node01 (192.5.84.8) 56(84) bytes of data.
64 bytes from node01 (192.5.84.8): icmp_seq=1 ttl=64 time=0.029 ms
```
And for node02:
```bash theme={null}
PING node02 (192.5.84.10) 56(84) bytes of data.
64 bytes from node02 (192.5.84.10): icmp_seq=1 ttl=64 time=0.035 ms
```
### 4. Create the Zone File
Create the file `/etc/bind/db.multinode.kodekloud.lab` with the following content. This file sets the Start of Authority (SOA) record, NS records, and A records for node01, node02, and node03:
```plaintext theme={null}
$TTL 604800
@ IN SOA node01.multinode.kodekloud.lab. admin.multinode.kodekloud.lab. (
1 ; Serial
604800 ; Refresh
86400 ; Retry
2419200 ; Expire
604800 ) ; Negative Cache TTL
@ IN NS node01.multinode.kodekloud.lab.
@ IN NS node02.multinode.kodekloud.lab.
node01 IN A 192.5.84.8
node02 IN A 192.5.84.10
node03 IN A 192.5.84.12
```
### 5. Restart and Verify
After saving the zone file, restart the BIND9 service:
```bash theme={null}
sudo systemctl reload bind9
```
You can test the DNS resolution by querying the domain using the local nameserver:
```bash theme={null}
# Test resolution using ping
ping node02
ping node03
# Querying with dig
dig @localhost multinode.kodekloud.lab
```
This should return the SOA along with the NS records, confirming that node-01 is correctly serving as the primary nameserver.
***
## Secondary Nameserver Configuration (node-02)
Next, configure node-02 as the secondary (slave) nameserver.
### 1. Install BIND9 on node-02
SSH into node-02 and start the BIND9 service:
```bash theme={null}
ssh node02
sudo systemctl start bind9
```
### 2. Confirm the Primary Server's IP
From node-02, verify the IP address of node-01:
```bash theme={null}
ping node01
```
### 3. Configure the Secondary Zone
Edit the `named.conf.local` file on node-02 to declare it as a secondary nameserver. Use node-01's IP (192.5.84.8) as the master:
```plaintext theme={null}
zone "multinode.kodekloud.lab" {
type slave;
file "/var/cache/bind/db.multinode.kodekloud.lab";
masters { 192.5.84.8; };
};
```
Save the file and reload BIND9:
```bash theme={null}
sudo systemctl reload bind9
```
### 4. Configure Zone Transfer on the Primary (node-01)
Ensure that the `named.conf.options` file on node-01 allows transfers to node-02. An example configuration:
```plaintext theme={null}
options {
directory "/var/cache/bind";
allow-transfer { 192.5.84.10; };
recursion yes;
allow-recursion { any; };
listen-on { any; };
};
```
Reload the service after making changes:
```bash theme={null}
sudo systemctl reload bind9
```
### 5. Test the Secondary Setup
Verify node-02's configuration by querying for zone data:
```bash theme={null}
# Query using dig on node-02 itself
dig @localhost multinode.kodekloud.lab
# Test full zone transfer using AXFR if permitted
dig @192.5.84.10 multinode.kodekloud.lab AXFR
```
If the zone transfer is successful, node-02 should return all the zone records.
***
## Webserver (node-03) Configuration
Now, configure node-03 as the webserver and set it up to work with DNS.
### 1. Set Up Nginx on node-03
SSH into node-03, install Nginx, and start the service:
```bash theme={null}
ssh node03
sudo systemctl start nginx
curl localhost
```
A successful response should display the default Nginx welcome page.
### 2. Add a CNAME Record for the Webserver
Update the zone file on the primary nameserver (node-01) by adding a CNAME record for the webserver. SSH into node-01 again and open the zone file `/etc/bind/db.multinode.kodekloud.lab` to include the following record:
```plaintext theme={null}
$TTL 604800
@ IN SOA node01.multinode.kodekloud.lab. admin.multinode.kodekloud.lab. (
1 ; Serial
604800 ; Refresh
86400 ; Retry
2419200 ; Expire
604800 ) ; Negative Cache TTL
@ IN NS node01.multinode.kodekloud.lab.
@ IN NS node02.multinode.kodekloud.lab.
node01 IN A 192.5.84.8
node02 IN A 192.5.84.10
node03 IN A 192.5.84.12
www IN CNAME node03.multinode.kodekloud.lab.
```
After saving the updated file, reload BIND9:
```bash theme={null}
sudo systemctl reload bind9
```
### 3. Update DNS Settings on node-03
On node-03, update the `/etc/resolv.conf` file to use node-01’s IP as the primary nameserver. An example `resolv.conf` might look like:
```plaintext theme={null}
search us-central1-a.c.kk-lab-prod.internal c.kk-lab-prod.internal google.internal
nameserver 172.25.0.1
options ndots:0
```
### 4. Verify DNS Resolution
Finally, validate the full setup on node-03 by running:
```bash theme={null}
curl www.multinode.kodekloud.lab
```
A successful output displaying the Nginx welcome page HTML confirms that the DNS resolution across both nameservers is working correctly.
***
Through these detailed steps, you have successfully set up a multi-node DNS configuration with a primary nameserver (node-01), a secondary nameserver (node-02), and a webserver (node-03) hosting an Nginx service with a CNAME record pointing to it. This setup ensures reliable DNS resolution across your multi-node environment.