DevOps Interview Preparation Course
Jenkins and CICD
Jenkins Question 2
When working with Jenkins in a multi-node environment, it's crucial to understand the process of integrating a new agent into the Jenkins master. In this guide, we'll cover how to add an agent (commonly known as "slave" or "follower") and provide tips for answering interview questions related to this implementation.
Terminology Clarification
While the term "follower" might be encountered, the correct terminology is "agent" or "slave." This guide uses "agent" for clarity.
Adding a New Agent to the Jenkins Master
To add a new agent, follow these steps:
Access the Jenkins Dashboard
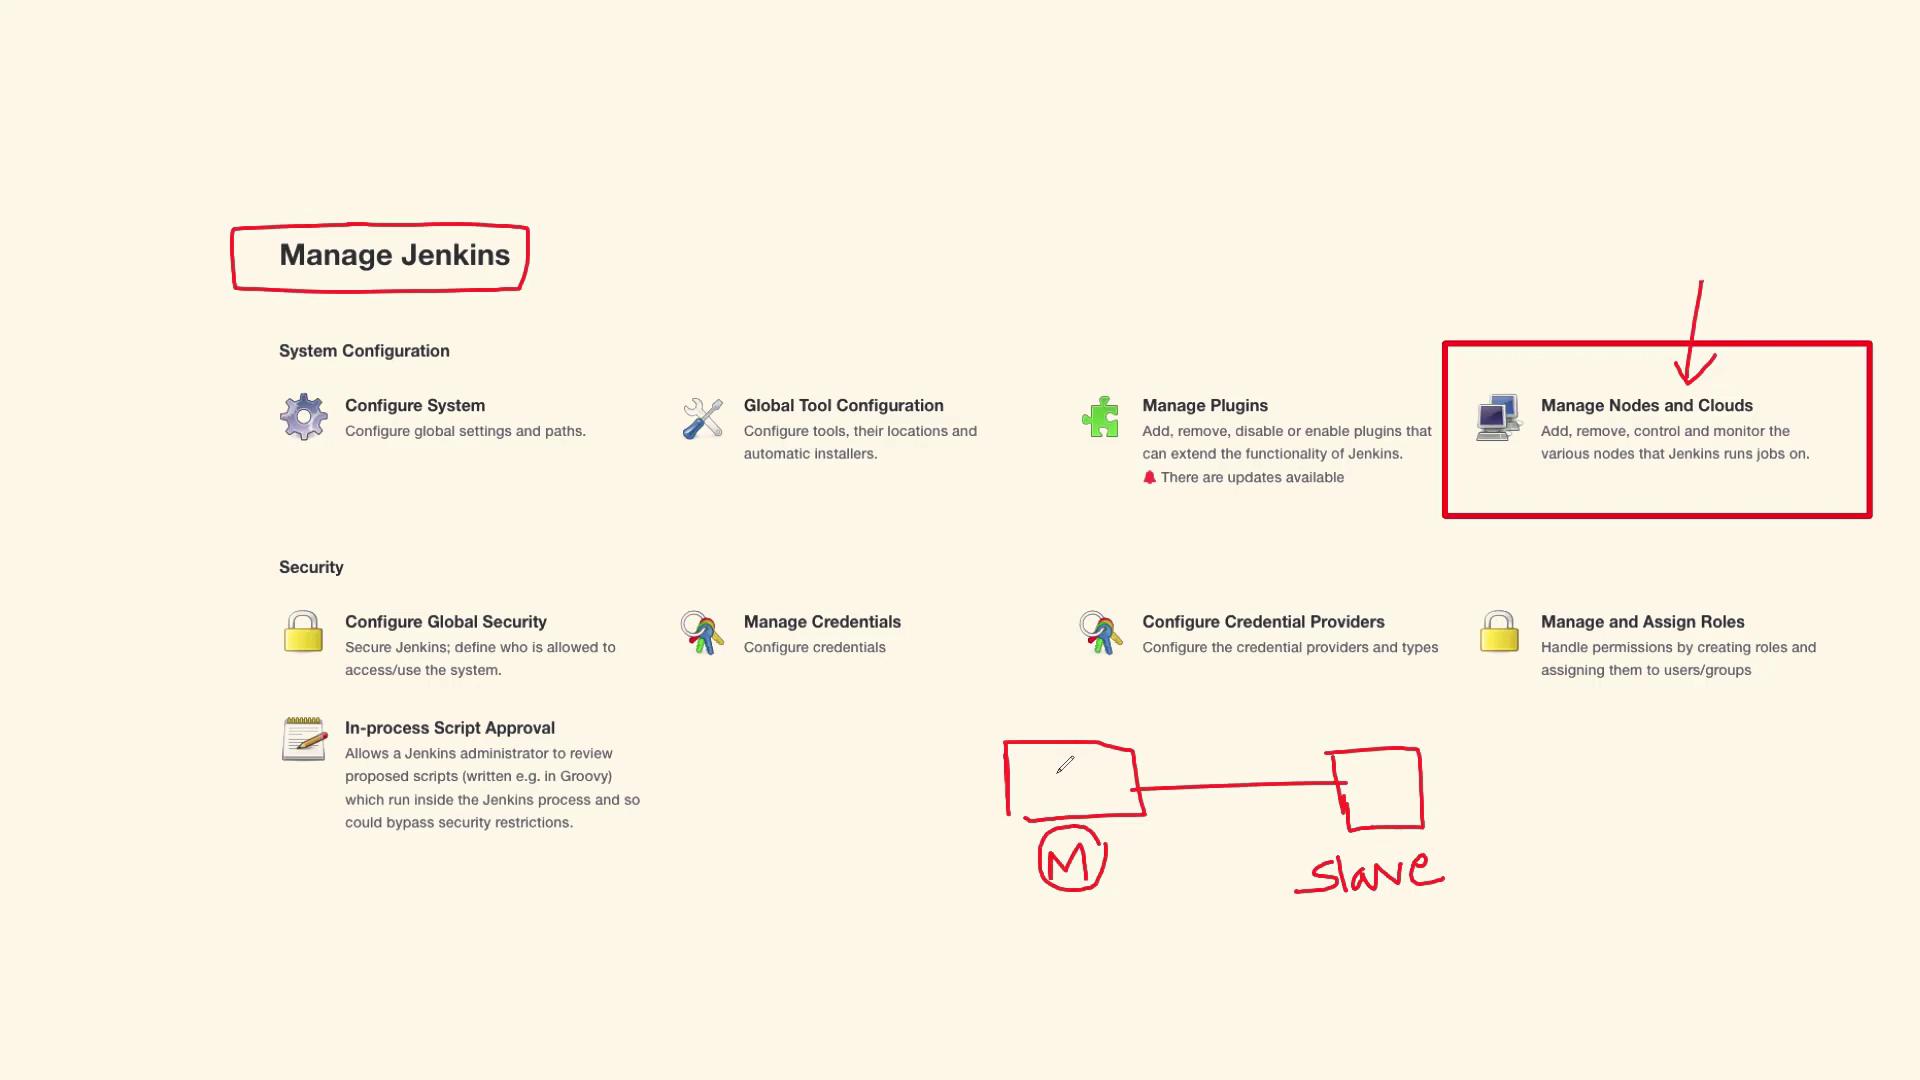
Log in to your Jenkins dashboard and navigate to the Manage Jenkins section.Manage Nodes and Clouds
Click on Manage Nodes and Clouds. This section allows you to register new nodes by entering essential details such as the agent's IP address, username, password, and other required configurations.Register the Agent
After inputting the necessary details, the agent will register with the Jenkins master automatically, effectively expanding your build and deployment capabilities.
Diagram: Manage Jenkins Dashboard
Understanding the Master-Agent Architecture
Employing a multi-node setup in Jenkins provides several benefits:
- Enhanced Scalability: A single Jenkins node can become a bottleneck. Adding more agents distributes the workload, improving performance.
- High Availability: A multi-node environment ensures that your production pipelines remain resilient even if one node fails.
- Dynamic Provisioning: Besides manual configuration, Jenkins can dynamically provision agents using auto-scaling groups provided by various cloud services.
Table: Jenkins Multi-Node Benefits
| Benefit | Description | Example |
|---|---|---|
| Scalability | Distributes the build workload across multiple agents | Increased parallel job executions |
| High Availability | Ensures continuous service by avoiding single points of failure | Redundancy in production pipelines |
| Dynamic Provisioning | On-demand agent creation via cloud auto-scaling methods | Integration with AWS Auto Scaling or Kubernetes |
How to Answer Multi-Node Jenkins Setup Questions in an Interview
When asked about configuring a multi-node Jenkins environment, a well-rounded response could be:
"I have successfully utilized Jenkins in a multi-node configuration to ensure high availability and scalability for our production pipelines. The process involves logging into Jenkins, navigating to the Manage Nodes and Clouds option under Manage Jenkins, and entering the required details for the new agent. After configuration, the agent registers with the master, thereby extending our build capabilities. Although the specific steps may vary, my experience with both manual and automated agent provisioning using cloud services has been extensive and effective in production environments."
Diagram: Manage Jenkins Dashboard Options

Final Note
This guide provides a step-by-step approach to integrating new agents into a Jenkins multi-node setup. Understanding this process enhances your scalability options and ensures high availability in production environments.
Thank you for reading! For more information on Jenkins and other CI/CD tools, make sure to explore additional resources on topics like Jenkins Documentation and Kubernetes Basics.
Watch Video
Watch video content