This lesson explores Kubernetes pod eviction and disk space management in a 10-node cluster to prevent node overload.
Welcome to this lesson on Kubernetes pod eviction and disk space management.In this session, we will explore managing disk space in a 10-node Kubernetes cluster where each node has 500 GB of disk space. We address a critical question: If a node reaches high disk utilization—around 85%—can Kubernetes automatically evict pods and redeploy them on a healthier node to prevent complete node overload? This mechanism ensures that if a node’s disk usage approaches 100%, only the impacted pods are evicted rather than rendering the node unusable.
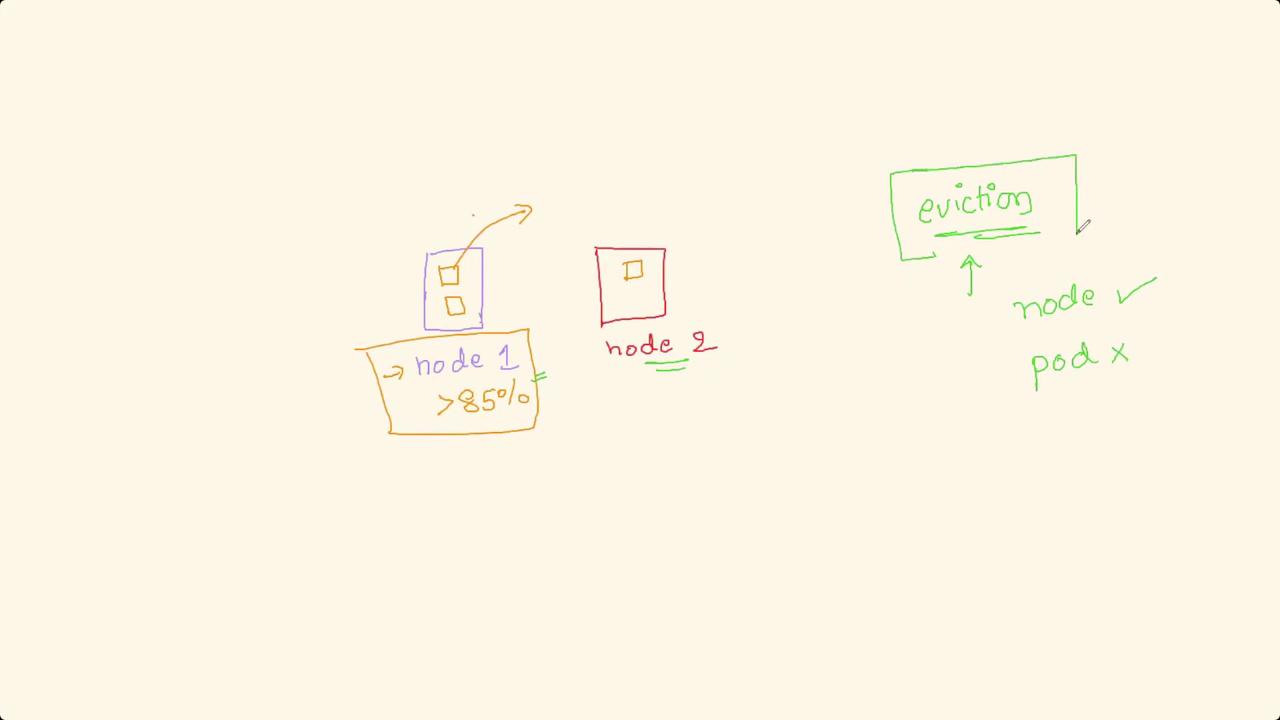
The answer is yes. Kubernetes can manage this scenario through pod eviction policies configured at the node level via the Kubelet. The Kubelet monitors each node’s resource utilization and, when thresholds are breached, selectively evicts pods based on internal algorithms and the Quality of Service (QoS) classification of each pod. This strategy prevents the node from being saturated while allowing the pods to be rescheduled on nodes with sufficient available resources.Imagine a simplified scenario with two nodes:
Node 1: Hosts two pods. When its disk utilization exceeds 85%, rather than shutting down the entire node, the pods are gracefully evicted.
Node 2: Receives the evicted pods if it has enough resources available.
Pod eviction is driven by an internal algorithm that prioritizes pods with lower QoS. These pods receive a grace period to exit gracefully. If they fail to terminate in time, they are forcefully evicted to reclaim essential resources.
Kubelet employs two categories of eviction thresholds: eviction hard and eviction soft. The eviction hard thresholds trigger immediate pod eviction when resource limits are breached, whereas eviction soft thresholds allow a grace period before taking action. The example below demonstrates how you can configure these settings on a node:
Eviction Hard Thresholds: The node triggers pod eviction immediately if the available memory drops below 500 Mi, or if node filesystem availability is under 10%, inodes free are less than 5%, or image filesystem availability falls below 15%.
Eviction Soft Thresholds: This setting provides a grace period of 1 minute and 30 seconds before evicting pods when available memory is below 1 Gi, node filesystem availability is under 15%, inodes free drop below 10%, or image filesystem availability is less than 20%.
The Kubelet continuously monitors these metrics and, upon detecting threshold breaches, sends termination signals to selected pods. The pods are expected to shut down gracefully during the configured grace period; if not, they are forcefully terminated to free resources and maintain node health.
Keep in mind that enabling automatic eviction is not a permanent solution to resource constraints. It is essential to implement robust monitoring and alerting systems to diagnose and resolve the underlying issues causing high resource usage.
This configuration is especially useful when new deployments inadvertently cause pods to consume more disk space than anticipated, potentially degrading node performance and impacting other pods.That concludes this lesson. Thank you for reading, and we look forward to seeing you in the next lesson.For further reading, check out these resources: