This guide explores building, packaging, and documenting Java applications, highlighting automation with tools like Ant, Maven, and Gradle.
In this guide, we explore the process of building a Java application—from writing and compiling source code to packaging it into a distributable format and generating documentation. We will also demonstrate how build tools automate these processes. The following sections outline a straightforward build process and then discuss more complex workflows using tools such as Ant, Maven, and Gradle.
Run the compiled code using the Java Virtual Machine (JVM).
Consider the source file, MyClass.java:
Copy
public class MyClass { public static void main(String[] args) { System.out.println("Hello World"); }}
To compile this file, run:
Copy
javac MyClass.java
This command produces a bytecode file named MyClass.class. To execute the application, use:
Copy
java MyClass
The output will be:
Copy
Hello World
Java source code is transformed into bytecode via the compilation process. The JVM then executes these low-level instructions. You might also inspect the bytecode instructions, as shown below:
This sequence represents instructions that enable Java applications to remain cross-platform. As long as a system has a compatible JVM, compiled code can run anywhere.
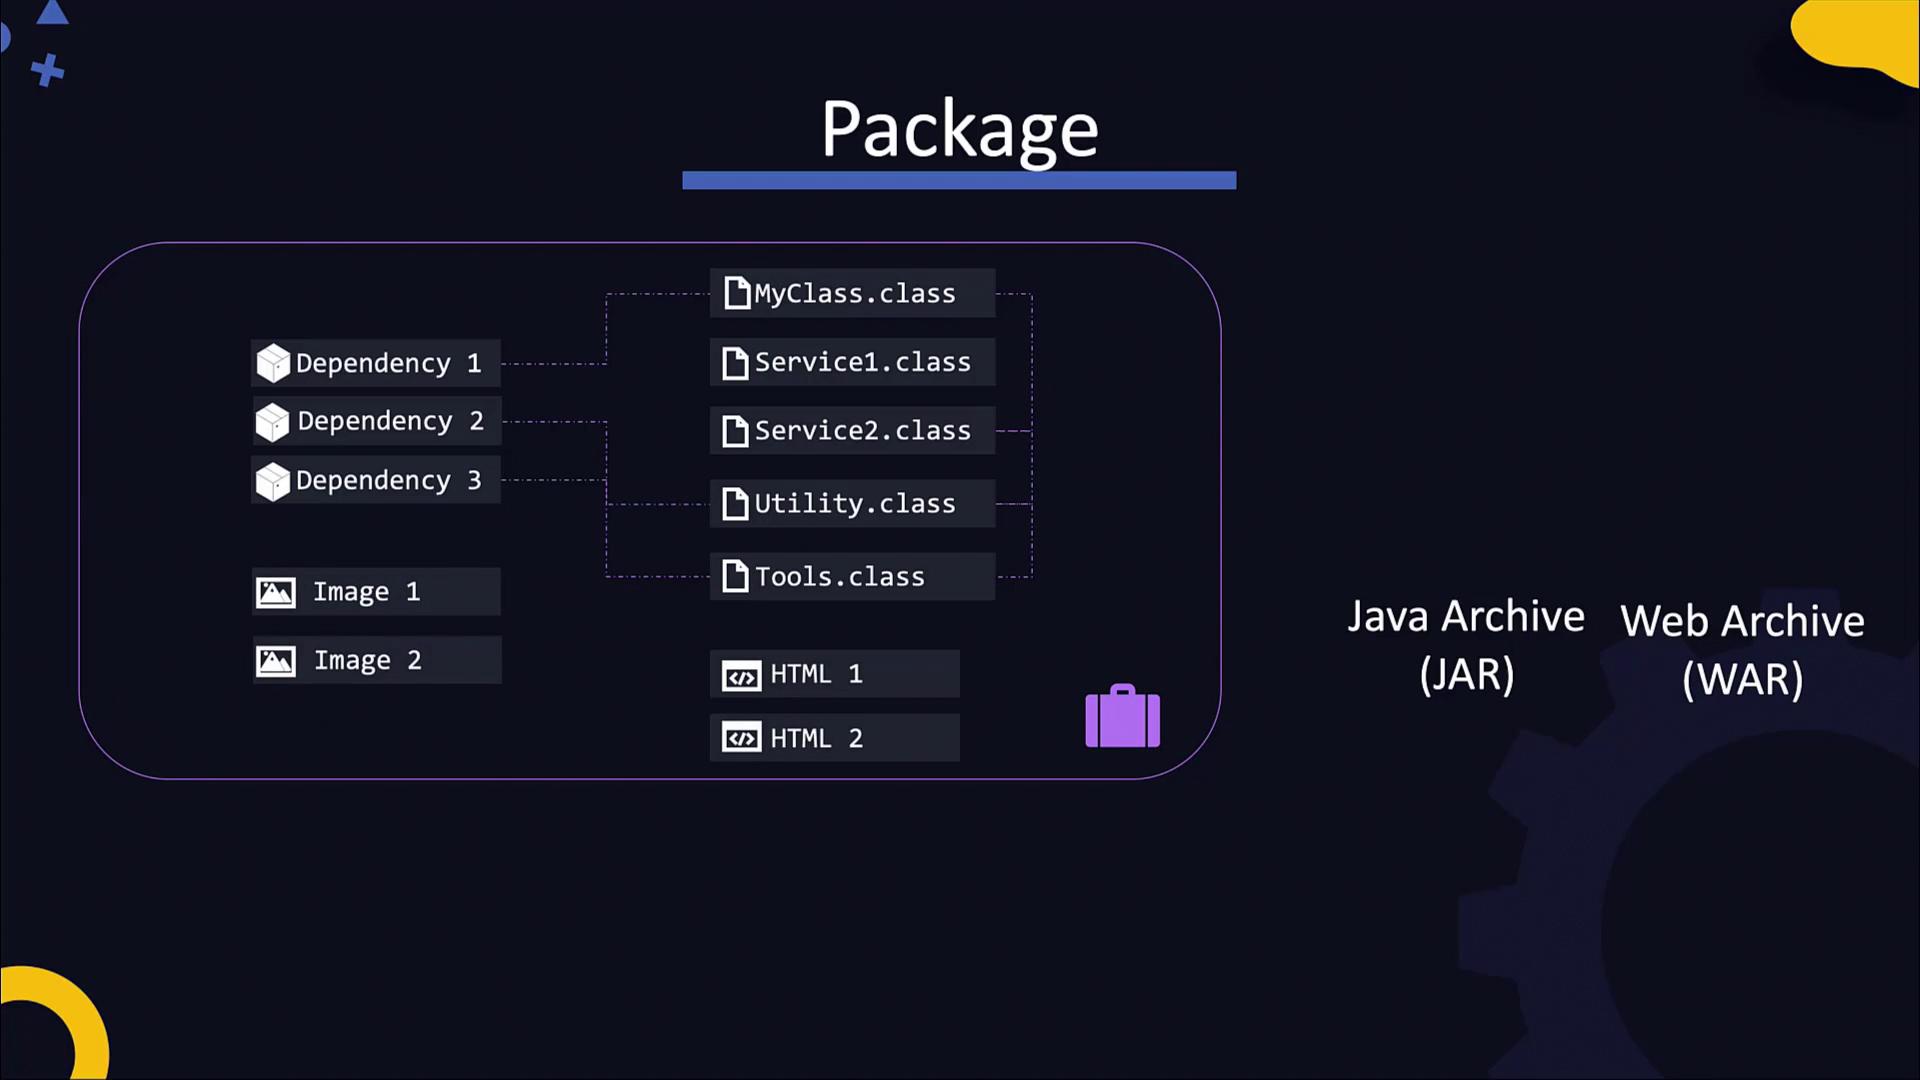
Complex applications often include multiple class files along with external dependencies and resources. For distribution, these files are packaged into an archive file. Typically, applications are packaged into a JAR (Java Archive) file, while web applications might be packaged into a WAR (Web Archive) file containing static assets like HTML, images, and CSS.To package the application into a JAR file, run:
Copy
jar cf MyApp.jar MyClass.class Service1.class Service2.class ...
This command creates the MyApp.jar file and automatically generates a manifest file at META-INF/manifest.mf with metadata about the package. The manifest can also specify the application’s entry point using the Main-Class attribute.To execute the JAR file directly, use:
The essential build process for a Java application can be summarized in the following commands:
Copy
javac MyClass.javajar cf MyClass.jar [list of classes and resources]javadoc -d doc MyClass.java
For small projects, performing these steps manually works well. However, as projects grow with more files, dependencies, and team members, automating these tasks becomes necessary.
Ant is a popular build tool that uses an XML configuration file to define various build targets such as compile, document, and package. Below is an example of an Ant build script (build.xml):
Modern Java projects use build tools like Maven, Gradle, or Ant to simplify the build process by using configuration files. Below are details on Maven and Gradle.
Gradle is another robust build automation tool that often uses a Gradle wrapper for simplified usage. Here is an example Gradle configuration snippet that includes the Docker plugin:
In summary, this guide covered the fundamentals of building a Java application. We walked through writing source code, compiling it into bytecode, and packaging it into a JAR file with metadata. We also demonstrated how to generate documentation using Javadoc and highlighted the advantages of automating builds with tools like Ant, Maven, and Gradle.
Understanding these build processes is an essential step toward mastering advanced DevOps practices, such as continuous integration and containerization.
Happy coding, and be sure to experiment with these build processes in your development environment!