> ## Documentation Index
> Fetch the complete documentation index at: https://notes.kodekloud.com/llms.txt
> Use this file to discover all available pages before exploring further.
# MySQL
> Learn the fundamentals of MySQL, including installation, configuration, basic commands, and user management for effective database management.
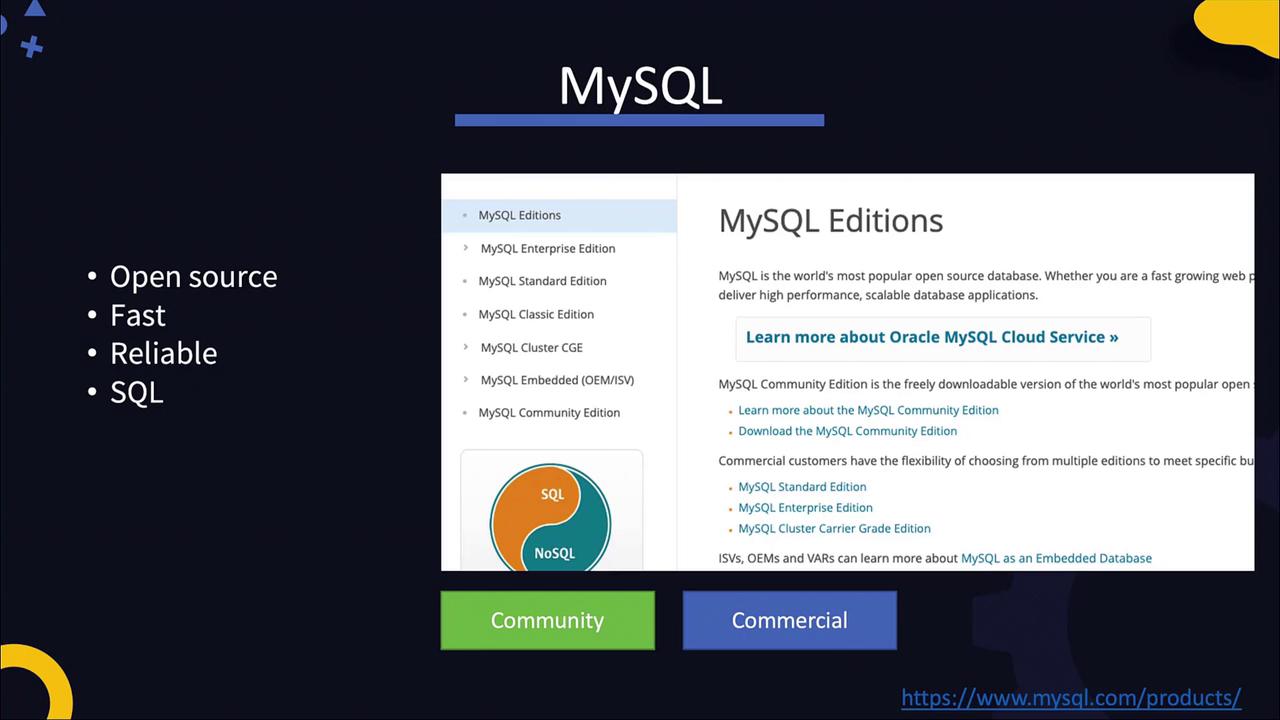
In this article, you will learn the fundamentals of MySQL, a popular open-source database renowned for its speed, reliability, and SQL-based data storage. We'll walk through the installation process, initial configuration, connecting with the MySQL client, and executing basic commands and queries. MySQL is trusted by many high-profile websites, including Facebook, Google, and YouTube.
There are two main editions of MySQL: the free Community Edition and a suite of commercial editions designed for enterprises.
## Installing MySQL
To install MySQL on your system, follow these steps:
1. **Download the RPM Package:**\
Retrieve the MySQL RPM package from the [MySQL downloads page](https://dev.mysql.com/downloads/).
2. **Install the Repository:**\
Install the repository using the RPM command. Then, install the MySQL server using the `yum` package manager.
3. **Start the MySQL Service:**\
Once installed, MySQL is configured as a service. Start the server and check its status.
Execute the following commands in your terminal:
```bash theme={null}
wget https://dev.mysql.com/get/mysql80-community-release-el7-3.noarch.rpm
rpm -ivh mysql80-community-release-el7-3.noarch.rpm
yum install mysql-server
service mysqld start
service mysqld status
```
The expected output should indicate that the service is active. For example:
```plaintext theme={null}
Redirecting to /bin/systemctl status mysqld.service
● mysqld.service - MySQL Server
Loaded: loaded (/usr/lib/systemd/system/mysqld.service; enabled; vendor preset: disabled)
Active: active (running) since Thu 2020-03-19 17:57:44 UTC; 1min 12s ago
Docs: man:mysqld(8)
Process: 4135 ExecStartPre=/usr/bin/mysqld_pre_systemd (code=exited, status=0/SUCCESS)
Main PID: 4211 (mysqld)
Status: "Server is operational"
Group: /system.slice/mysqld.service
└─4211 /usr/sbin/mysqld
```
In production environments, ensure to create dedicated users and groups, and configure additional security settings. Always refer to the [official documentation](https://dev.mysql.com/doc/) for advanced configurations.
## Viewing MySQL Logs
MySQL logs, located at `/var/log/mysqld.log`, provide essential information about the server’s startup, version, and listening port (default is 3306). You can view the log by running:
```bash theme={null}
cat /var/log/mysqld.log
```
A sample log excerpt might look like this:
```plaintext theme={null}
2020-03-19T17:57:37.375709Z 0 [System] [MY-013169] [Server] /usr/sbin/mysqld (mysqld 8.0.19) initializing of server in progress as process 4162
2020-03-19T17:57:39.467035Z 5 [Note] A temporary password is generated for root@localhost: g/io%pFE77m
2020-03-19T17:57:41.582829Z 0 [System] [MY-010161] [Server] /usr/sbin/mysqld (mysqld 8.0.19) starting as process 4211
2020-03-19T17:57:43.188267Z 0 [Warning] [MY-010068] [Server] CA certificate ca.pem is self signed.
2020-03-19T17:57:44.021602Z 0 [System] [MY-010931] [Server] /usr/sbin/mysqld: ready for connections. Version: '8.0.19' socket: '/var/lib/mysql/mysql.sock' port: 3306 MySQL Community Server - GPL.
2020-03-19T17:57:44.245102Z 0 [System] [MY-011323] [Server] X Plugin ready for connections. Socket: '/var/run/mysqld/mysqld.sock' bind-address: '::' port: 33060
2020-03-19T18:04:21.190127Z 8 [Warning] [MY-013360] [Server] Plugin sha256_password reported: 'sha256_password' is deprecated and will be removed in a future release. Please use caching_sha2_password instead
```
## Connecting to MySQL
After installation, MySQL automatically generates a temporary root password logged in `/var/log/mysqld.log`. Use this password to connect via the MySQL client. For example:
```bash theme={null}
mysql -u root -pg/io%pFE77m
```
Using a password directly on the command line can be insecure. Proceed with caution and consider using alternative methods to secure your credentials.
Once connected, you will see a welcome message similar to the following:
```plaintext theme={null}
mysql: [Warning] Using a password on the command line interface can be insecure.
Welcome to the MySQL monitor. Commands end with ; or \g.
Your MySQL connection id is 11
Server version: 8.0.19
Type 'help;' or '\h' for help. Type '\c' to clear the current input statement.
mysql>
```
## Changing the Root Password
At the MySQL prompt, change the default root password by running:
```sql theme={null}
ALTER USER 'root'@'localhost' IDENTIFIED BY 'MyNewPass4!';
```
For additional hardening, it is recommended to run the "mysql\_secure\_installation" script from the Linux shell.
## Basic Database Operations
Once you are authenticated, you can create and manage databases. Here are some common tasks:
### Displaying Databases
To list the internal databases installed by MySQL, use:
```sql theme={null}
SHOW DATABASES;
```
Sample output:
```plaintext theme={null}
+--------------------+
| Database |
+--------------------+
| information_schema |
| mysql |
| performance_schema |
| sys |
+--------------------+
4 rows in set (0.00 sec)
```
### Creating a New Database
Create a new database called "school":
```sql theme={null}
CREATE DATABASE school;
```
Select the "school" database:
```sql theme={null}
USE school;
```
### Creating Tables
Create a table named "persons" with columns for name, age, and location:
```sql theme={null}
CREATE TABLE persons
(
Name VARCHAR(255),
Age INT,
Location VARCHAR(255)
);
```
Insert a record into the "persons" table:
```sql theme={null}
INSERT INTO persons VALUES ("John Doe", 45, "New York");
```
View the data in the table:
```sql theme={null}
SELECT * FROM persons;
```
Expected output:
```plaintext theme={null}
+----------+-----+------------+
| name | age | location |
+----------+-----+------------+
| John Doe | 45 | New York |
+----------+-----+------------+
1 row in set (0.00 sec)
```
Verify table creation within the "school" database:
```sql theme={null}
SHOW TABLES;
```
Sample output:
```plaintext theme={null}
+--------------------+
| Tables_in_school |
+--------------------+
| persons |
+--------------------+
1 row in set (0.00 sec)
```
## User Management and Authorization
For security and best practices in production, avoid using the root account for application access. Instead, create additional users with restricted privileges.
### Creating a New User
To create a user (e.g., "john") who connects from localhost:
```sql theme={null}
CREATE USER 'john'@'localhost' IDENTIFIED BY 'MyNewPass4!';
```
For remote connections, specify the host IP address or use `%` to allow connections from any system:
```sql theme={null}
CREATE USER 'john'@'192.168.1.10' IDENTIFIED BY 'MyNewPass4!';
```
```sql theme={null}
CREATE USER 'john'@'%' IDENTIFIED BY 'MyNewPass4!';
```
Connect as the new user:
```bash theme={null}
mysql -u john -pMyNewPass4!
```
### Granting Permissions
To authorize the user with appropriate privileges, use the GRANT command. For example, to allow user "john" to run SELECT queries on the `persons` table in the "school" database:
```sql theme={null}
GRANT SELECT ON school.persons TO 'john'@'%';
```
Grant multiple permissions in one command, such as SELECT and UPDATE on the `persons` table:
```sql theme={null}
GRANT SELECT, UPDATE ON school.persons TO 'john'@'%';
```
To grant privileges on all tables within the "school" database:
```sql theme={null}
GRANT SELECT, UPDATE ON school.* TO 'john'@'%';
```
Granting all privileges should be done carefully. Use:
```sql theme={null}
GRANT ALL PRIVILEGES ON *.* TO 'john'@'%';
```
only when absolutely necessary.
To view the grants for a specific user:
```sql theme={null}
SHOW GRANTS FOR 'john'@'localhost';
```
Sample output:
```plaintext theme={null}
+------------------------------------------------+
| Grants for john@localhost |
+------------------------------------------------+
| GRANT USAGE ON *.* TO 'john'@'localhost' |
| GRANT SELECT ON `school`.`persons` TO 'john'@'localhost' |
+------------------------------------------------+
2 rows in set (0.00 sec)
```
## Summary
By following these steps, you have:
* Installed and started the MySQL server.
* Connected to MySQL using the client utility.
* Changed the default root password.
* Created a new database and table.
* Inserted and queried data.
* Managed user creation and permissions.
Practice these commands in your environment to build a solid foundation for managing MySQL databases and preparing for more advanced topics, such as integrating web servers with databases and implementing multi-tier application security.
For further details, refer to the [MySQL Documentation](https://dev.mysql.com/doc/).