This article explores remote Git repositories, their setup, and how they facilitate collaboration among developers.
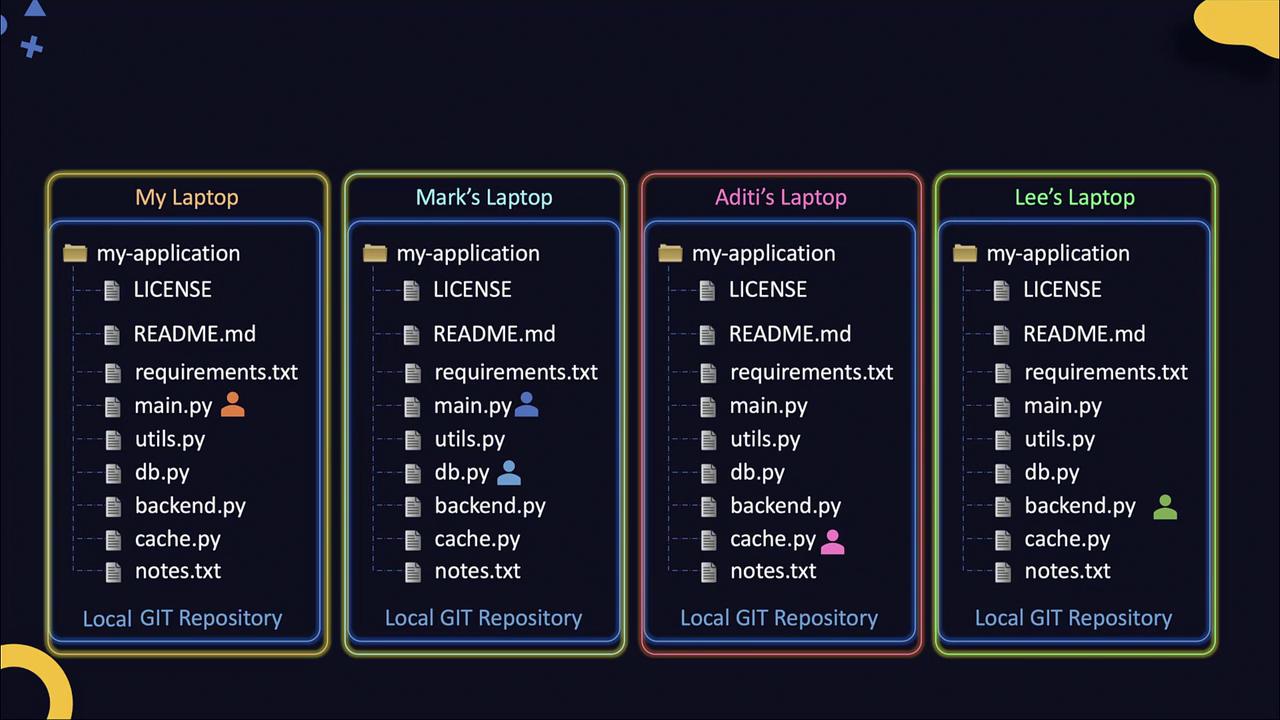
In this lesson, we continue our discussion on Git by exploring remote repositories. Previously, we covered initializing a local Git repository—one that exists on your individual system. While each developer works on their own local repository containing specific parts of an application, collaborative development requires a centralized location where everyone can merge their changes. This centralized location is the remote Git repository.Imagine you are updating the main file on your laptop, while Mark modifies the main and DB files, Aditi works on the cache file, and Lee enhances the back-end module. A remote Git repository, hosted either on your private network or over the internet, serves as the central hub where all these changes are pushed and merged.
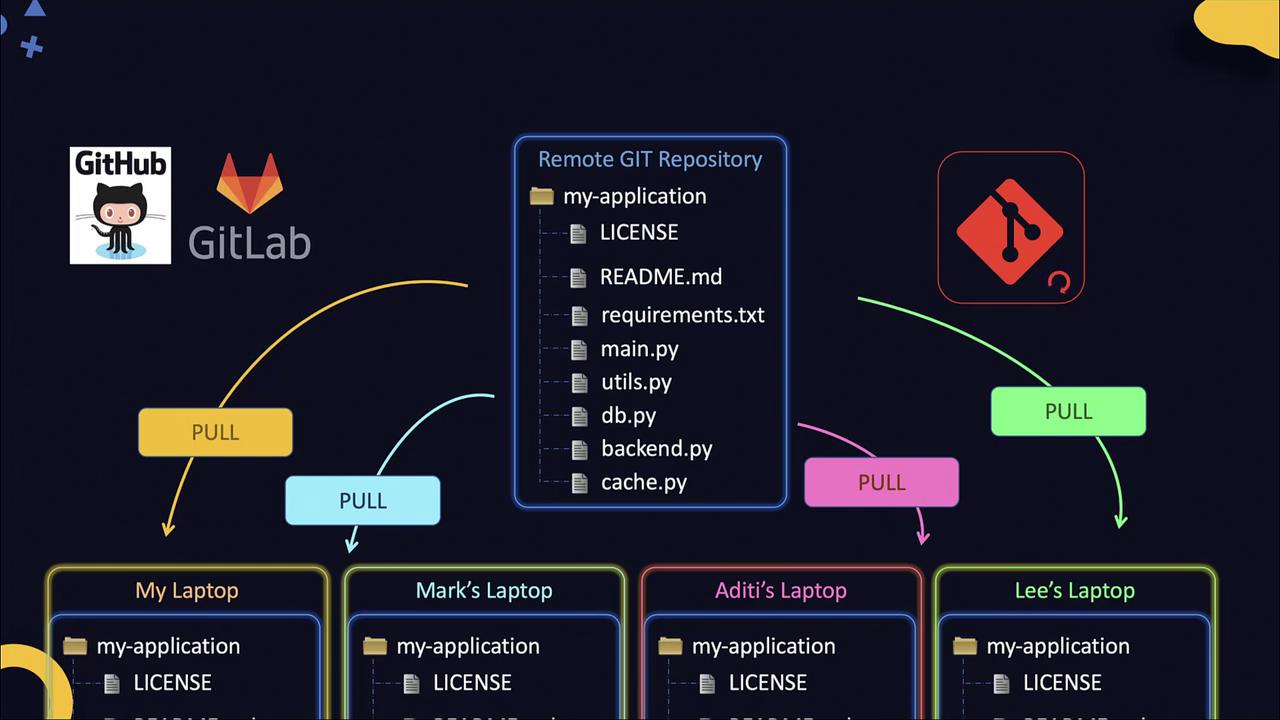
The illustration above shows multiple developers working independently on their local repositories. When they’re ready to integrate their updates, each developer pushes their changes to a shared remote repository.
In this diagram, changes from different developers are pushed to a common remote repository. Git attempts to merge the changes automatically, but if two developers modify the same line in the same file, a merge conflict occurs.
If you encounter a merge conflict, you’ll need to resolve it manually before the changes can be successfully integrated.
After resolving conflicts and merging all changes, each developer can update their local repository by pulling the latest version, ensuring everyone works with the most current code.
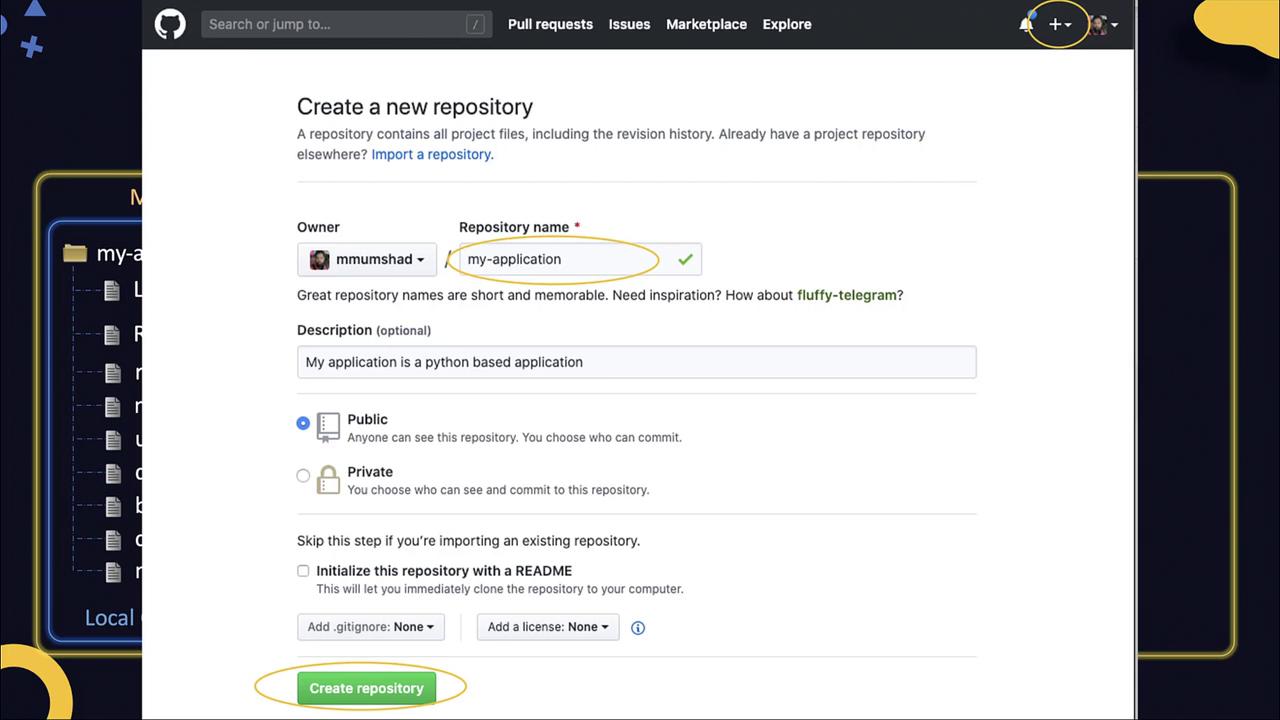
Remote repositories can be set up in various ways. One approach is to host your own Git server by installing Git on a designated system and running the built-in Git daemon. Alternatively, you can use publicly hosted services such as GitHub or GitLab, which offer both free public repositories and private repository options for internal use.
For example, when you create a repository on GitHub, you can select whether to keep your repository public or private. Each repository on GitHub is assigned a unique URL that serves as the connection link for your local repository.
If you’re the primary developer with the application source code, follow these steps to turn your project into a Git repository:
Copy
git initgit add .git commit -m "Initial Commit"
Next, create a remote repository on GitHub using their web interface. Once created, copy its unique URL. Then, connect your local repository to the remote repository with the following command:
Finally, push your local changes to the remote repository. Since the remote branch doesn’t yet exist, use the —set-upstream option to establish a connection between your local branch (by default, “master”) and the remote branch:
Copy
git push -u github master
Using descriptive names like “github” for your remote is especially useful when managing multiple remote repositories.
Cloning downloads the entire repository and automatically configures a connection to the remote (named “origin” by default). As changes are made, developers can synchronize their local copy with the remote repository using the pull command:
Copy
git pull
To view all the configured remotes, run:
Copy
git remote -v
This command lists all the remote connections associated with your repository.
The difference between local and remote Git repositories.
How remote repositories enable effective collaboration among multiple developers.
Setting up a remote repository on platforms like GitHub or GitLab.
How to initialize a local repository and push changes to a remote server.
Cloning repositories and pulling updates to ensure everyone works with the latest code.
Practice these steps to boost your version control skills. In upcoming lessons, you’ll delve into end-to-end projects that demonstrate advanced Git workflows and effective multi-developer collaboration.Thank you for joining this tutorial—happy coding!