> ## Documentation Index
> Fetch the complete documentation index at: https://notes.kodekloud.com/llms.txt
> Use this file to discover all available pages before exploring further.
# Jenkins Introduction
> This article provides an introduction to Jenkins, covering its setup, features, and plugin installation for continuous integration and delivery.
In this lesson, we’ll dive into Jenkins—an open-source automation server—and walk through the post-installation setup. You’ll learn how to verify the service, retrieve the initial admin password, unlock Jenkins, install plugins, and complete the setup wizard.
## What is Jenkins?
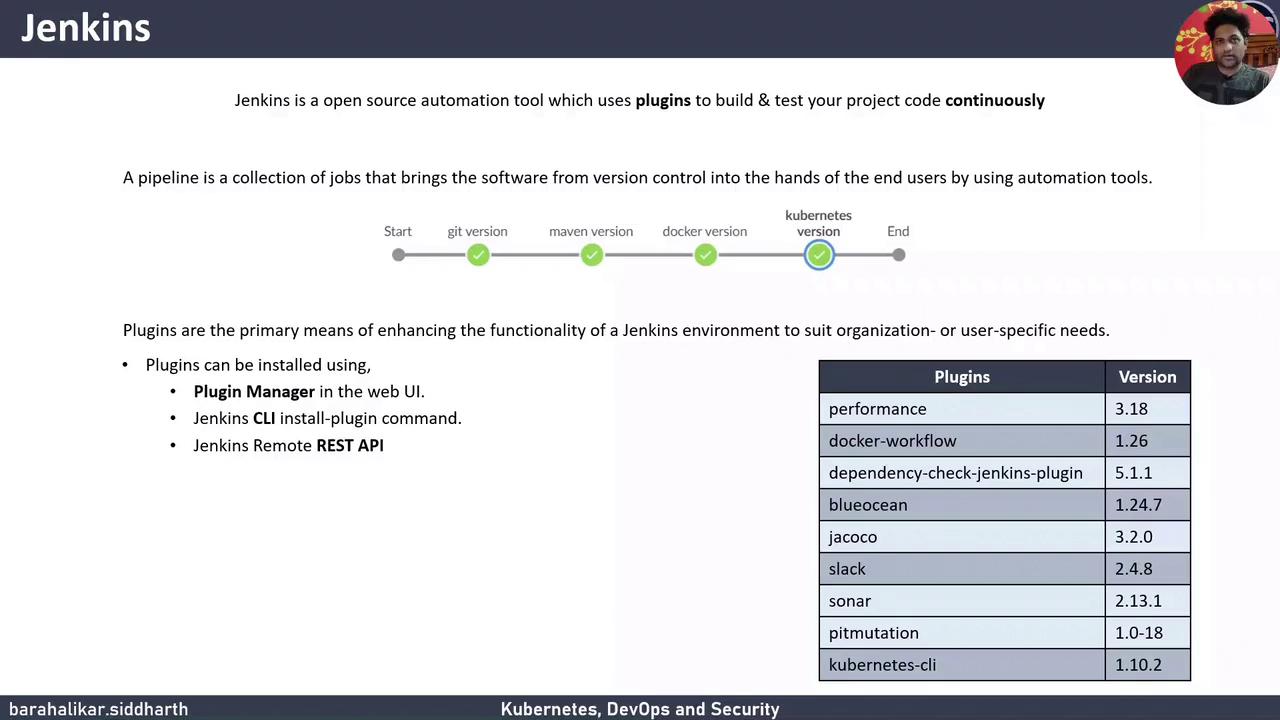
Jenkins is a leading open-source automation server for continuous integration and delivery (CI/CD). It leverages a rich plugin ecosystem to build, test, and deploy your applications automatically. Jenkins supports multiple project types:
* **Freestyle**: Classic build jobs
* **Multi-configuration**: Matrix builds across multiple environments
* **Multibranch Pipeline**: Auto-discovers branches with `Jenkinsfile`
* **Simple Pipeline**: Defines build steps in code
Throughout this course, we’ll focus on a *Simple Pipeline*, which uses a collection of scripted jobs to automate software delivery from version control to production.
Jenkins plugins can be installed via:
| Installation Method | Description |
| ---------------------------- | -------------------------------------------------- |
| Plugin Manager (UI) | Browse and install from the Jenkins dashboard |
| Jenkins CLI | Use `java -jar jenkins-cli.jar` to install plugins |
| Remote REST API (Automation) | Script plugin installation using REST calls |
Automating plugin installation with the Remote REST API ensures consistent environments, especially in Infrastructure as Code workflows.
***
## 1. Verifying the Jenkins Service
On your VM, Jenkins runs on port 8080 by default. Verify the service status:
```bash theme={null}
sudo systemctl status jenkins
```
Expected output:
```text theme={null}
● jenkins.service - LSB: Start Jenkins at boot time
Loaded: loaded (/etc/init.d/jenkins; generated)
Active: active (exited) since Tue 2021-06-15 05:07:43 UTC; 1h 39min ago
```
***
## 2. Accessing the Jenkins Web UI
Open your browser and navigate to:
```text theme={null}
http://:8080
```
If you changed the default port in your install script, adjust the URL accordingly.
On first access, Jenkins prompts for the initial admin password. Retrieve it from the VM:
```bash theme={null}
sudo cat /var/lib/jenkins/secrets/initialAdminPassword
```
Copy the output and paste it into the **Unlock Jenkins** screen.
***
## 3. Installing Suggested Plugins
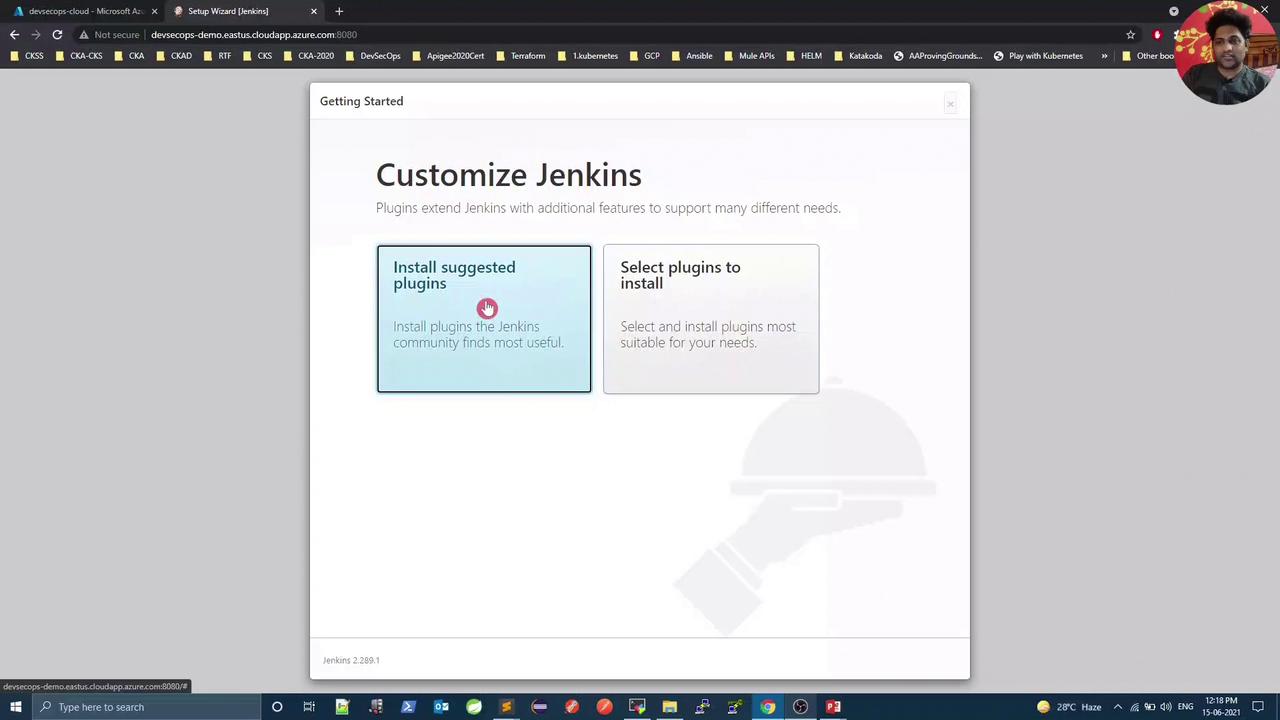
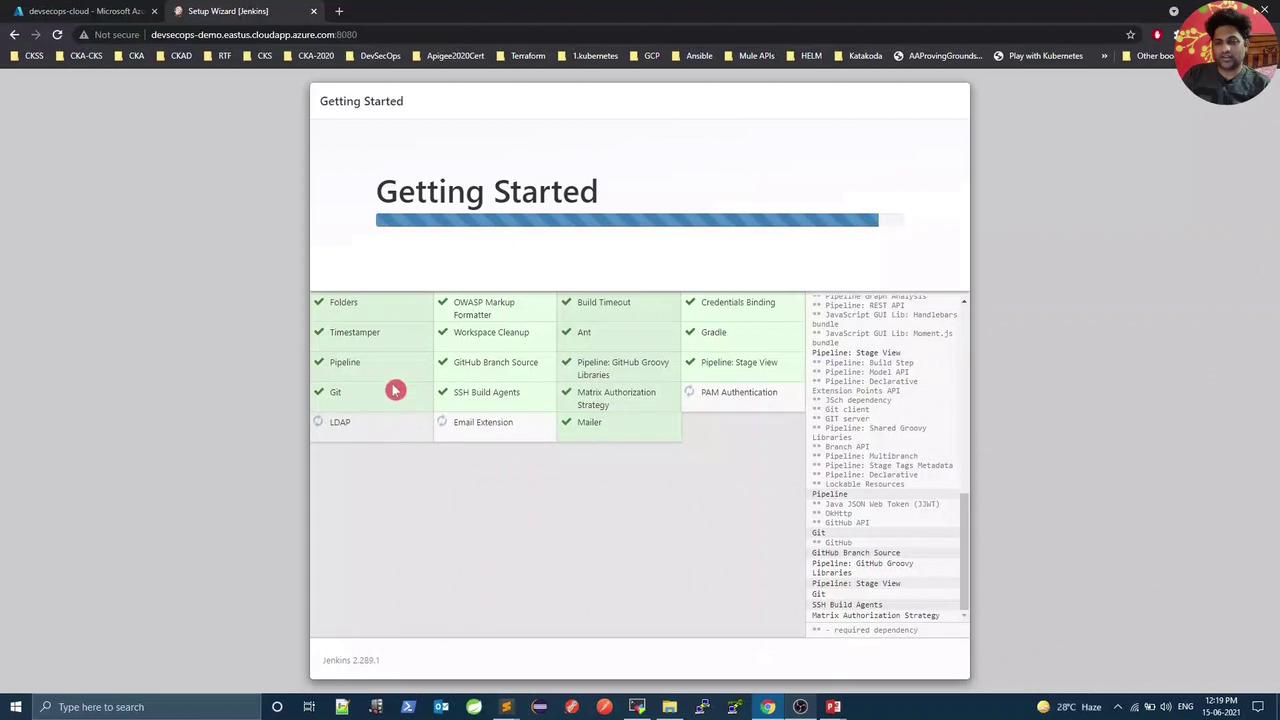
After unlocking Jenkins, select **Install suggested plugins** to set up common integrations such as Git, Pipeline, and folders. This bulk installation simplifies your initial configuration.
Depending on your network and VM resources, this step may take several minutes.
***
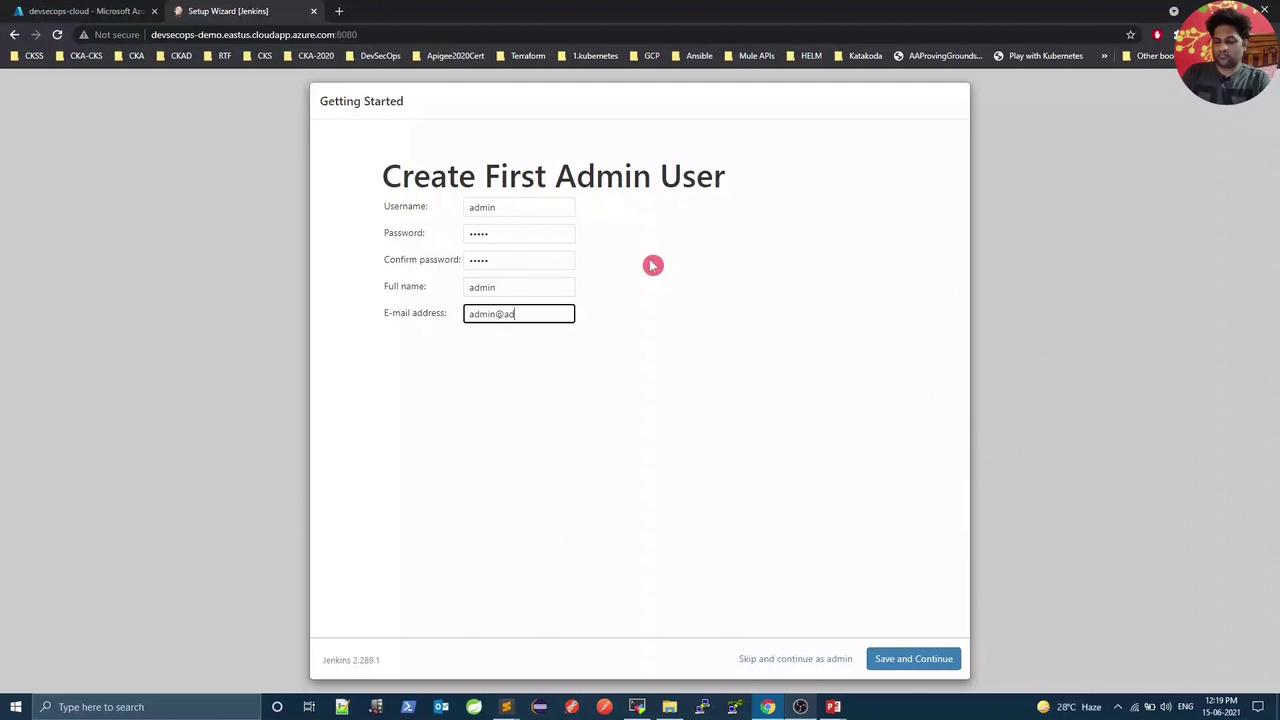
## 4. Creating the First Admin User
Once the plugins are in place, Jenkins prompts you to create an admin account. Provide:
* **Username**
* **Password**
* **Full name**
* **Email address**
Save your new credentials to proceed.
***
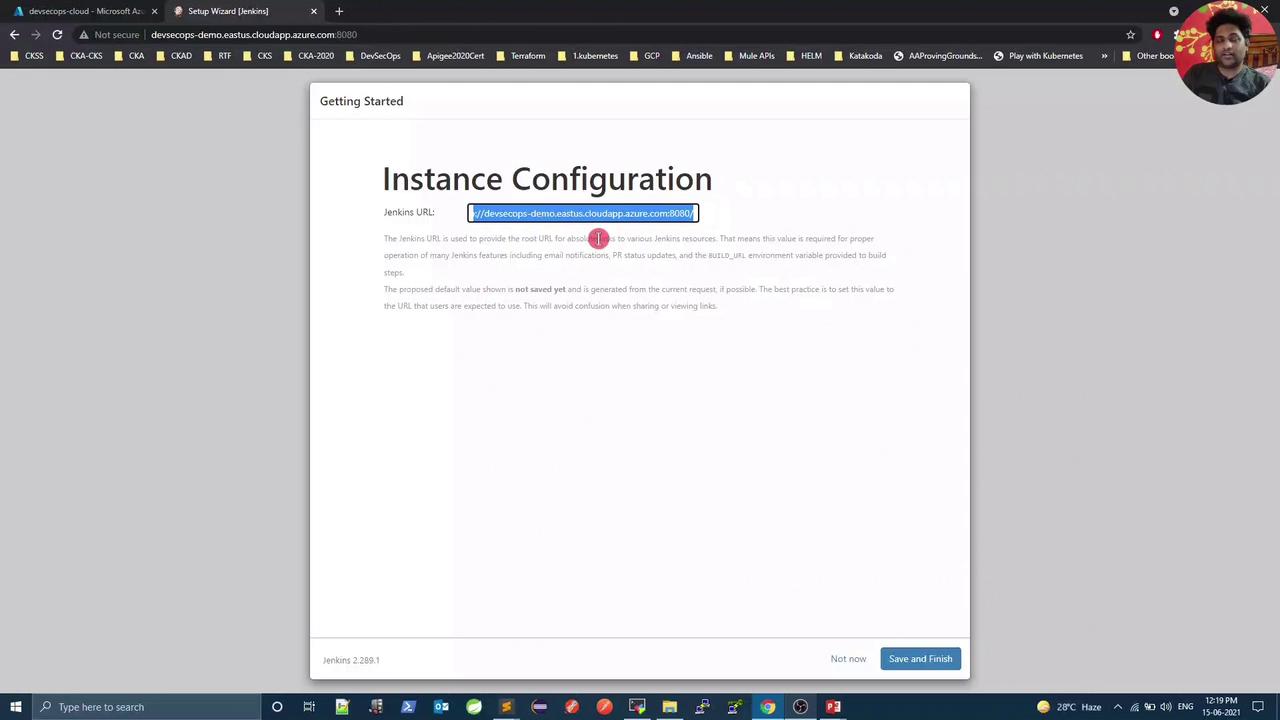
## 5. Configuring the Jenkins Instance URL
Set the Jenkins URL used by external systems (e.g., Git webhooks). Enter your VM’s DNS name or static IP, then save.
***
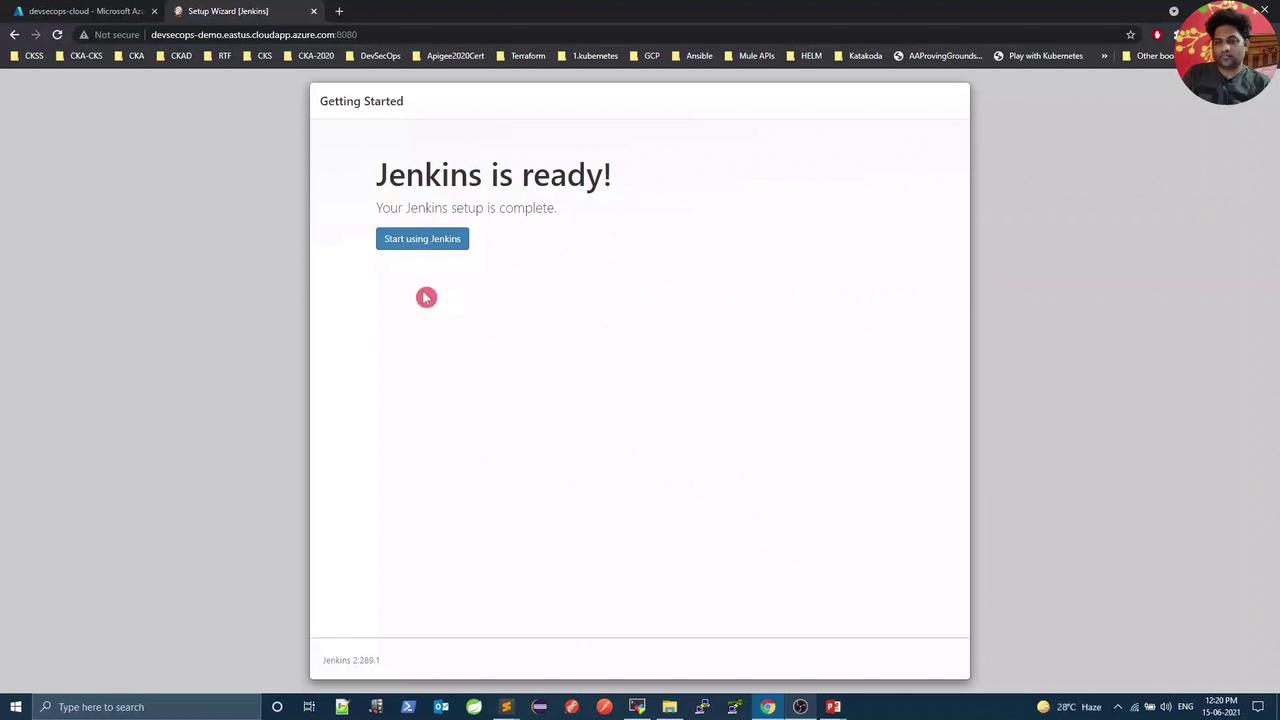
## 6. Completing the Setup
With the URL configured, click **Start using Jenkins** to finish the wizard.
***
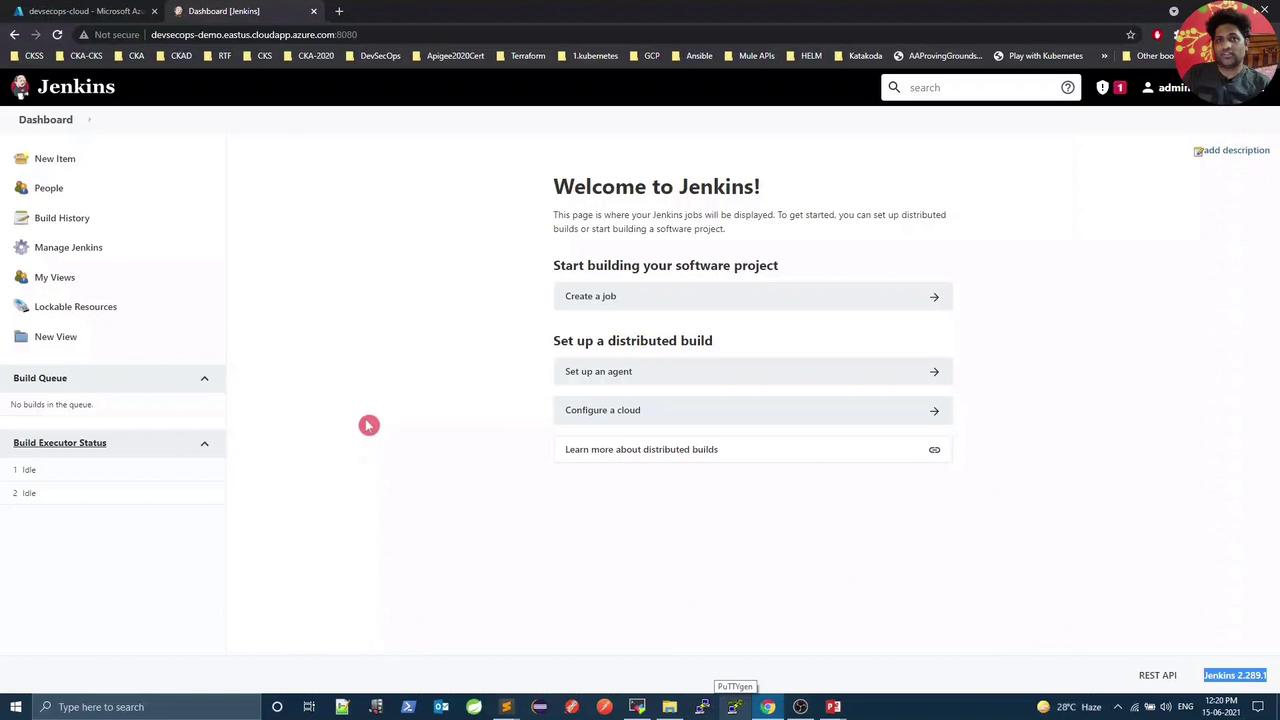
## 7. Exploring the Jenkins Dashboard
You’ve arrived at the Jenkins dashboard (version 2.289.1). From here, you can:
* Create and configure new pipelines
* Manage credentials and plugins
* Set up distributed builds
Later in this course, we’ll automate the installation of nine essential plugins using the Remote REST API script.
***
## Links and References
* [Jenkins Documentation](https://www.jenkins.io/doc/)
* [Jenkins REST API](https://www.jenkins.io/doc/book/using/remote-access-api/)
* [CI/CD with Jenkins](https://www.jenkins.io/solutions/cicd/)