> ## Documentation Index
> Fetch the complete documentation index at: https://notes.kodekloud.com/llms.txt
> Use this file to discover all available pages before exploring further.
# Demo Vault Helm Installation
> This tutorial covers installing HashiCorp Vault on Kubernetes using Helm, including prerequisites, deployment steps, and accessing the Vault UI.
In this tutorial, you’ll learn what HashiCorp Vault is, explore various installation methods, and perform a hands-on deployment of Vault in a Kubernetes cluster using the official Helm chart.
## What Is Vault?
Vault is a centralized secrets management tool designed for securely storing and accessing sensitive data such as:
* **Credentials** for authenticating users or services
* **Encryption keys** for data encryption and decryption
* **API tokens**, TLS certificates, and other secret types
Vault offers:
* A unified REST API for secret management
* Fine-grained access control with policies
* Detailed audit logging of all operations
For more, visit the [HashiCorp Vault Documentation](https://www.vaultproject.io/docs).
## Installation Methods
You can install Vault using one of the following approaches:
| Method | Description | Example Command |
| --------------------- | ------------------------------------------- | ------------------------------------------- |
| Linux Package Manager | Install via APT or Yum on supported distros | `sudo apt-get install vault` |
| Precompiled Binary | Download and place in your `PATH` | `wget https://releases.hashicorp.com/vault` |
| Build from Source | Clone the repo and compile yourself | `go build github.com/hashicorp/vault` |
For production, run Vault in a highly available configuration across multiple hosts. Use a durable storage backend like Consul or AWS S3.
### Installing via APT (Ubuntu/Debian)
```bash theme={null}
curl -fsSL https://apt.releases.hashicorp.com/gpg | sudo apt-key add -
sudo apt-add-repository "deb [arch=amd64] https://apt.releases.hashicorp.com $(lsb_release -cs) main"
sudo apt-get update && sudo apt-get install vault
```
## Deploying Vault with Helm
We’ll deploy Vault into Kubernetes using the official Helm chart. Ensure you have:
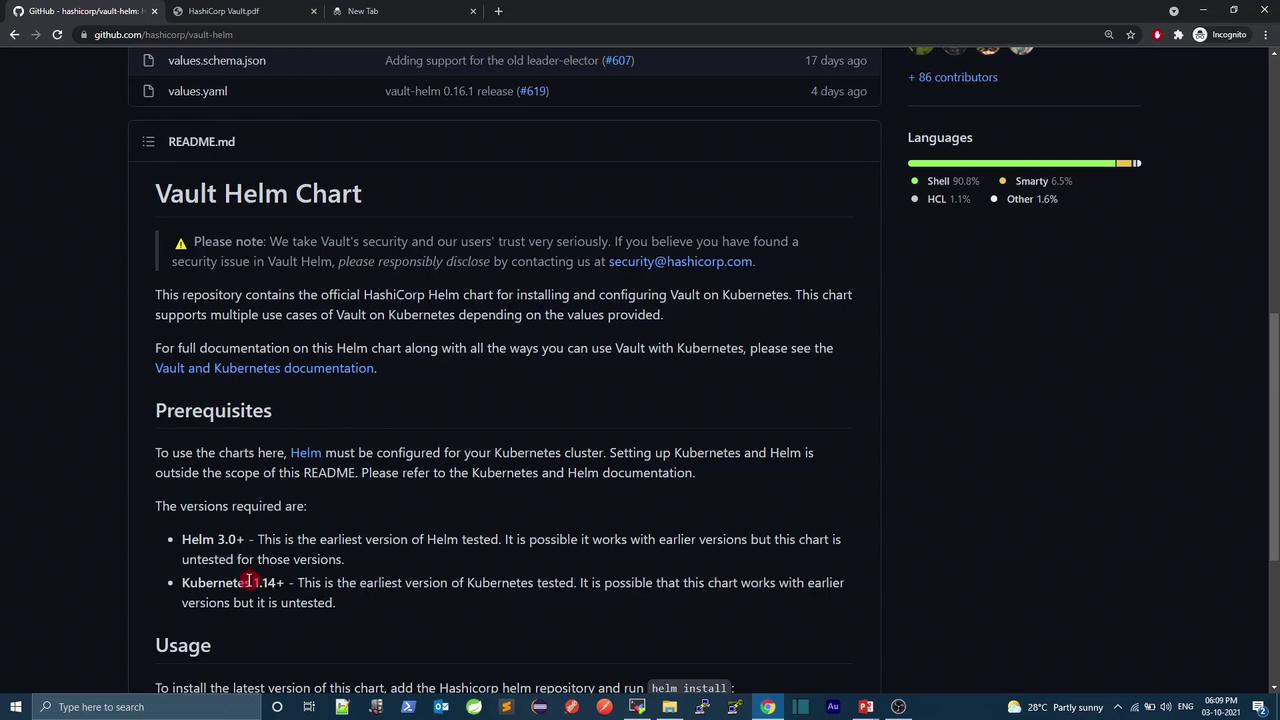
* Kubernetes ≥1.14
* Helm 3.x installed
* `kubectl` configured to access your cluster
### 1. Add the HashiCorp Helm Repository
```bash theme={null}
helm repo add hashicorp https://helm.releases.hashicorp.com
helm repo update
```
### 2. Review the Vault Helm Chart
Check the chart’s prerequisites and usage on GitHub:
### 3. Inspect Default Configuration
View the excerpt from `values.yaml`:
```yaml theme={null}
# values.yaml (excerpt)
ui:
enabled: false
serviceType: ClusterIP
serviceNodePort: null
server:
dataStorage:
enabled: true
size: 10Gi
```
In this demo, we’ll:
* Enable the Vault UI
* Expose the UI via `NodePort`
* Disable persistent storage (for demo purposes)
### Prerequisites Check
```bash theme={null}
# Verify Kubernetes
kubectl version --short
# Verify Helm
helm version --short
```
## Step by Step: Deploying to a Dedicated Namespace
1. **Create and switch to the `demo` namespace:**
```bash theme={null}
kubectl create namespace demo
kubectl config set-context --current --namespace=demo
```
2. **Install the Vault chart with custom settings:**
```bash theme={null}
helm install vault hashicorp/vault --version 0.16.1 \
--set ui.enabled=true \
--set ui.serviceType=NodePort \
--set server.dataStorage.enabled=false
```
3. **Verify Kubernetes resources:**
```bash theme={null}
kubectl get all
```
Wait until the `vault-0` pod and related components are in the `Running` state:
```bash theme={null}
kubectl get pods
```
## Checking Vault Status
Once the pods are running, access the Vault pod and check its seal status:
```bash theme={null}
kubectl exec -it vault-0 -- vault status
```
You should see output similar to:
```text theme={null}
Key Value
--- -----
Seal Type shamir
Sealed true
Version 1.8.3
Cluster Name vault-cluster
```
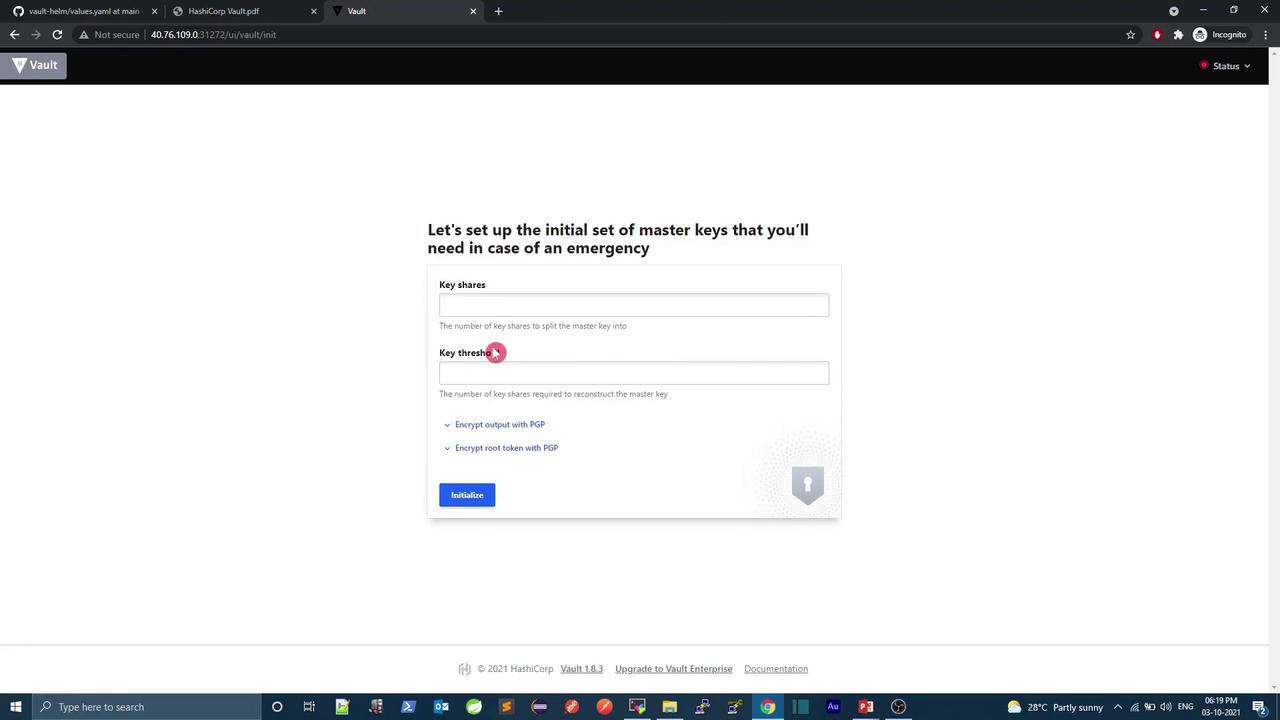
Vault is sealed by default. You must initialize and unseal it using key shares and a threshold. These steps can be done via CLI or the UI.
## Accessing the Vault UI
The Vault UI is exposed on a NodePort (e.g., 31272). Open your browser to:
```text theme={null}
http://:31272
```
You will be prompted to set up master keys and a root token:
***
## References
* [Vault Helm Chart on GitHub](https://github.com/hashicorp/vault-helm)
* [HashiCorp Vault Documentation](https://www.vaultproject.io/docs)
* [Kubernetes Documentation](https://kubernetes.io/docs/)