> ## Documentation Index
> Fetch the complete documentation index at: https://notes.kodekloud.com/llms.txt
> Use this file to discover all available pages before exploring further.
# Demo Falco UI HELM
> This guide explains how to extend Falco alerts with Falco Sidekick and visualize them using a Web UI on a Kubernetes cluster.
In this guide, you’ll learn how to extend Falco alerts using [Falco Sidekick](https://github.com/falcosecurity/falco-sidekick) and visualize them with a Web UI. We’ll cover installing Falco Sidekick via [Helm](https://helm.sh) on a Kubernetes cluster and configuring notifications (e.g., Slack, Teams, Datadog).
Falco Sidekick is a companion project that delivers Falco events to multiple endpoints—stdout, files, gRPC, shell commands, HTTP, and UIs. Enabling its Web UI lets you explore alerts in real time.
***
## Table of Contents
1. [Prerequisites](#prerequisites)
2. [Falco Sidekick Overview](#falco-sidekick-overview)
3. [Installing Helm 3](#installing-helm-3)
4. [Deploying Falco with Sidekick](#deploying-falco-with-sidekick)
5. [Verifying the Installation](#verifying-the-installation)
6. [Accessing the Falco Sidekick UI](#accessing-the-falco-sidekick-ui)
7. [Triggering an Alert](#triggering-an-alert)
8. [Next Steps](#next-steps)
9. [Links and References](#links-and-references)
***
## Prerequisites
* A running Kubernetes cluster
* `kubectl` configured for your cluster
* `helm` CLI installed locally
***
## Falco Sidekick Overview
Falco Sidekick extends Falco’s native alerting by routing events to various destinations:
| Destination | Protocol | Configuration Key |
| --------------- | --------- | --------------------------------------- |
| Web UI | HTTP | `falcosidekick.webui.enabled` |
| Slack | HTTP POST | `falcosidekick.config.slack.webhookurl` |
| Microsoft Teams | HTTP POST | `falcosidekick.config.teams.webhookurl` |
| Datadog | HTTP POST | `falcosidekick.config.datadog.apiKey` |
| gRPC | gRPC | `falcosidekick.config.grpc.*` |
| Shell Command | Shell | `falcosidekick.config.shell.command` |
| File | File | `falcosidekick.config.file.filename` |
***
## Installing Helm 3
Helm is the Kubernetes package manager. To install Helm 3:
```bash theme={null}
export VERIFY_CHECKSUM=false
curl https://raw.githubusercontent.com/helm/helm/master/scripts/get-helm-3 | bash
helm version
```
Expected output:
```console theme={null}
version.BuildInfo{Version:"v3.x.x", GitCommit:"...", GitTreeState:"clean", GoVersion:"go1.x.x"}
```
***
## Deploying Falco with Sidekick
1. Create the `falco` namespace:
```bash theme={null}
kubectl create namespace falco
```
2. Add the Falco Security Helm repo:
```bash theme={null}
helm repo add falcosecurity https://falcosecurity.github.io/charts
helm repo update
```
3. Install Falco with Sidekick and the Web UI:
Replace the placeholder webhook URL with your actual Slack (or Teams/Datadog) endpoint.
```bash theme={null}
helm install falco falcosecurity/falco \
--namespace falco \
--set falcosidekick.enabled=true \
--set falcosidekick.webui.enabled=true \
--set falcosidekick.config.slack.webhookurl="https://hooks.slack.com/services/XXXX/YYYY/ZZZZ"
```
***
## Verifying the Installation
Check Helm releases and Kubernetes resources:
```bash theme={null}
helm ls -n falco
kubectl -n falco get all
```
Sample output:
```console theme={null}
NAME NAMESPACE REVISION UPDATED STATUS CHART APP VERSION
falco falco 1 2021-07-01 12:34:56 UTC deployed falco-1.XX.0 0.29.0
NAME TYPE CLUSTER-IP PORT(S) AGE
service/falco-falcosidekick ClusterIP 10.0.0.123 2801/TCP 1m
service/falco-falcosidekick-ui ClusterIP 10.0.0.124 2802/TCP 1m
NAME READY STATUS AGE
daemonset.apps/falco 1/1 Running 1m
deployment.apps/falco-falcosidekick 2/2 Running 1m
deployment.apps/falco-falcosidekick-ui 1/1 Running 1m
```
By default, the UI service is `ClusterIP`. To expose it:
```bash theme={null}
kubectl -n falco edit service falco-falcosidekick-ui
# Change `type: ClusterIP` to `type: NodePort` and save.
kubectl -n falco get service falco-falcosidekick-ui
```
***
## Accessing the Falco Sidekick UI
Open your browser at:
```text theme={null}
http://:/ui
```
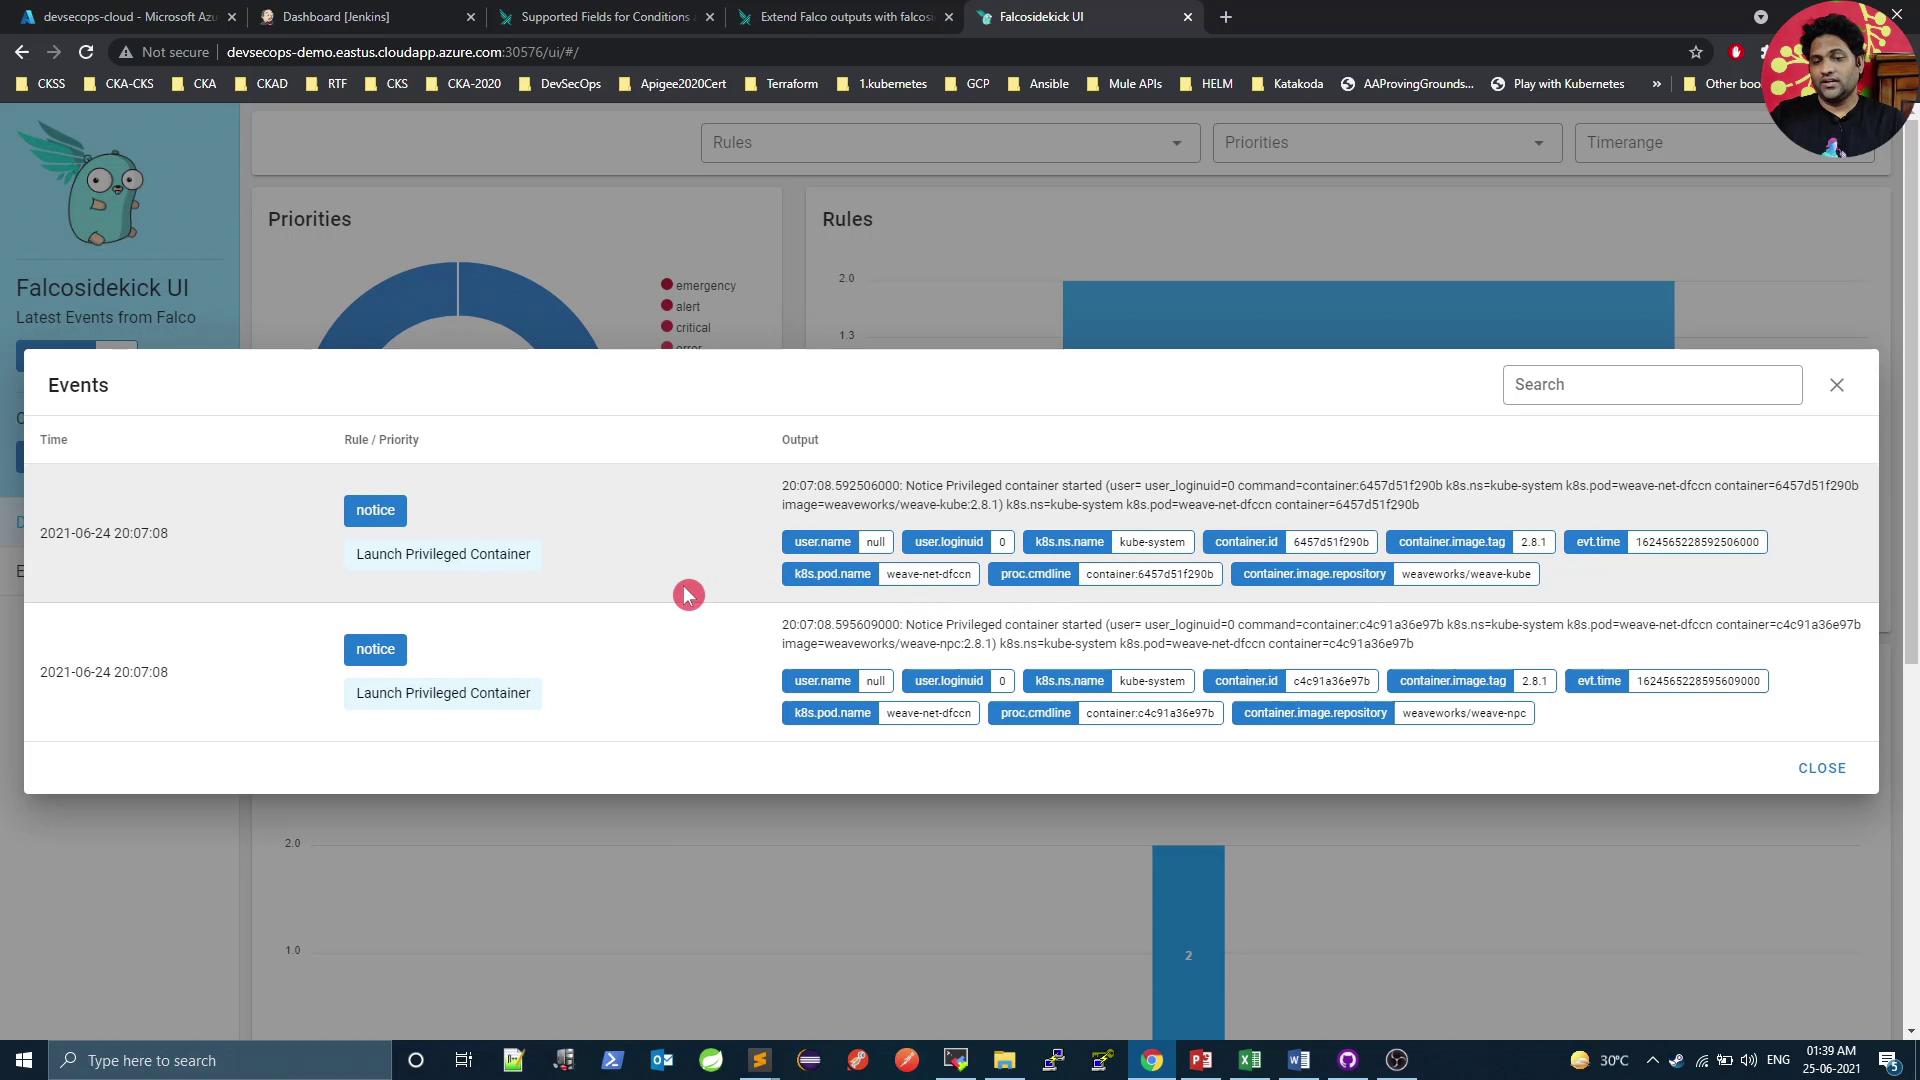
The UI launches with default alerts for privileged container launches.
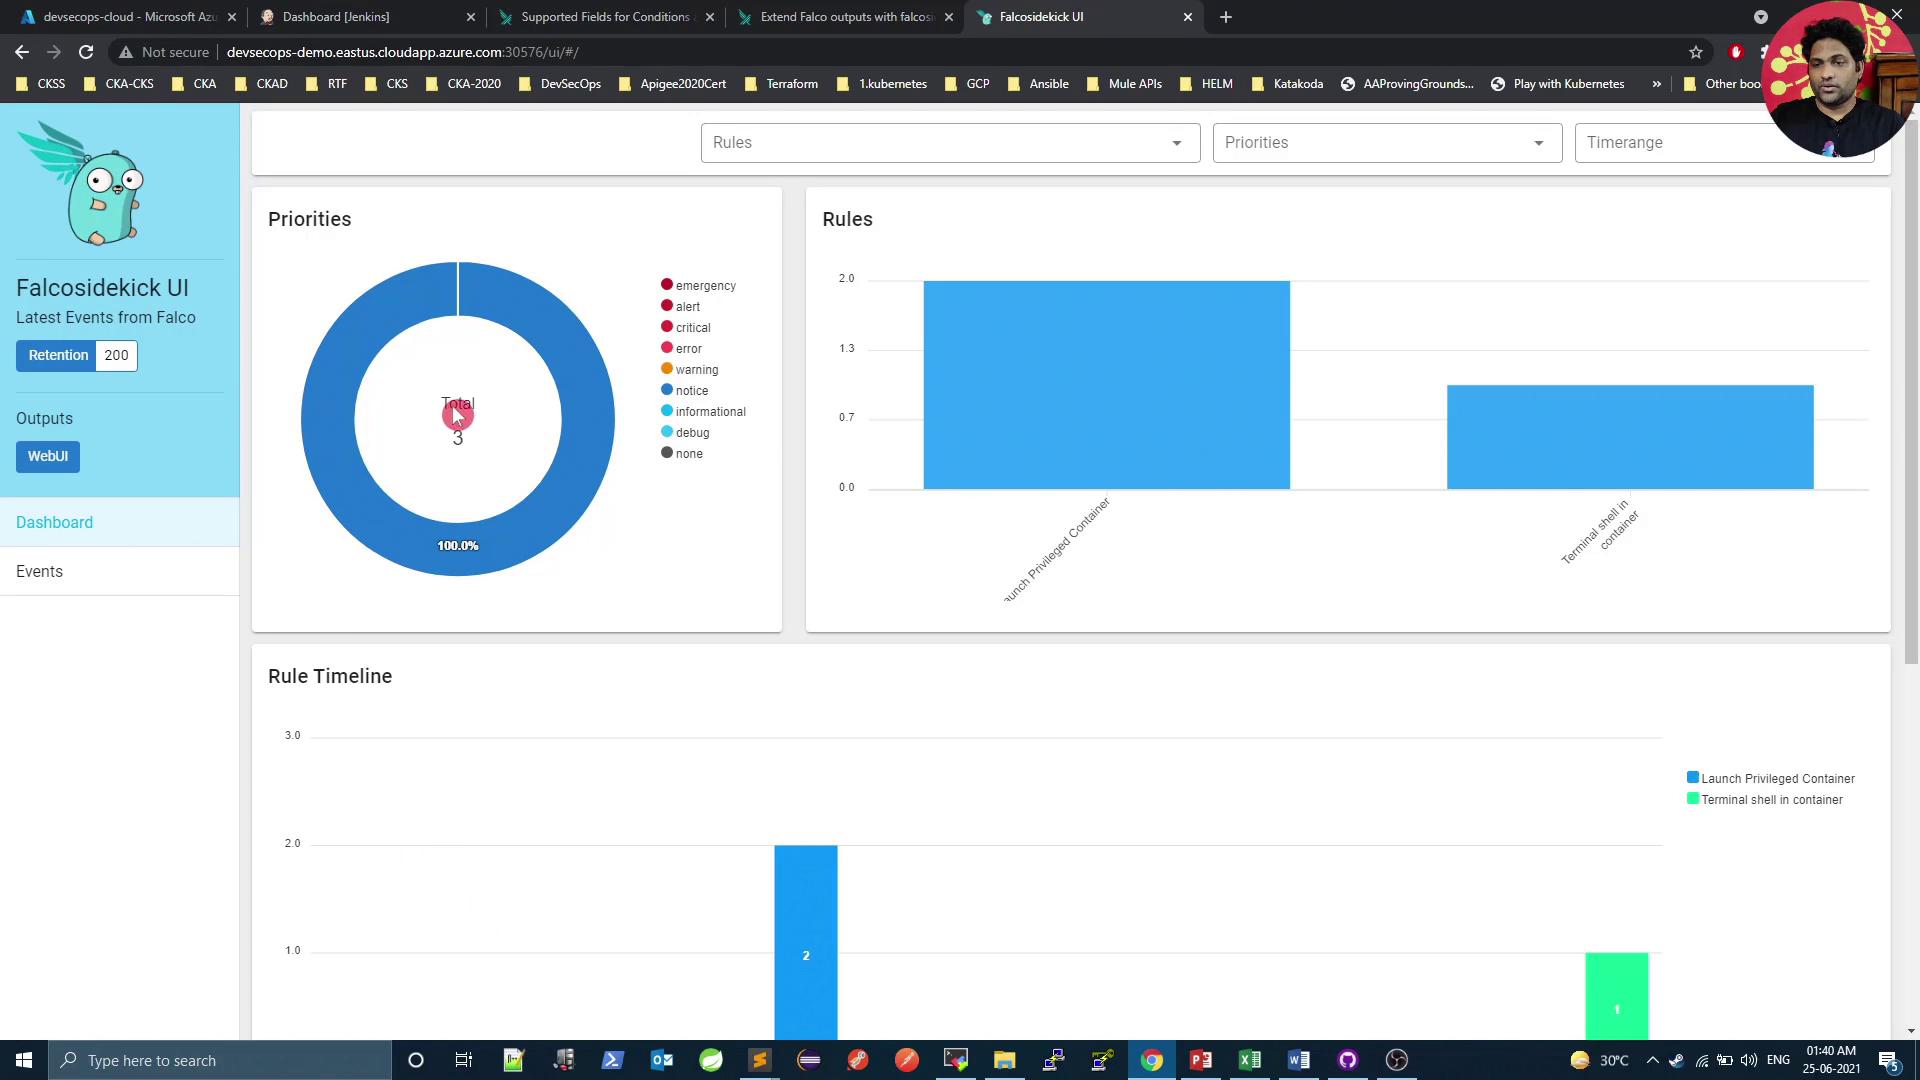
The dashboard provides charts for event priorities and rule counts:
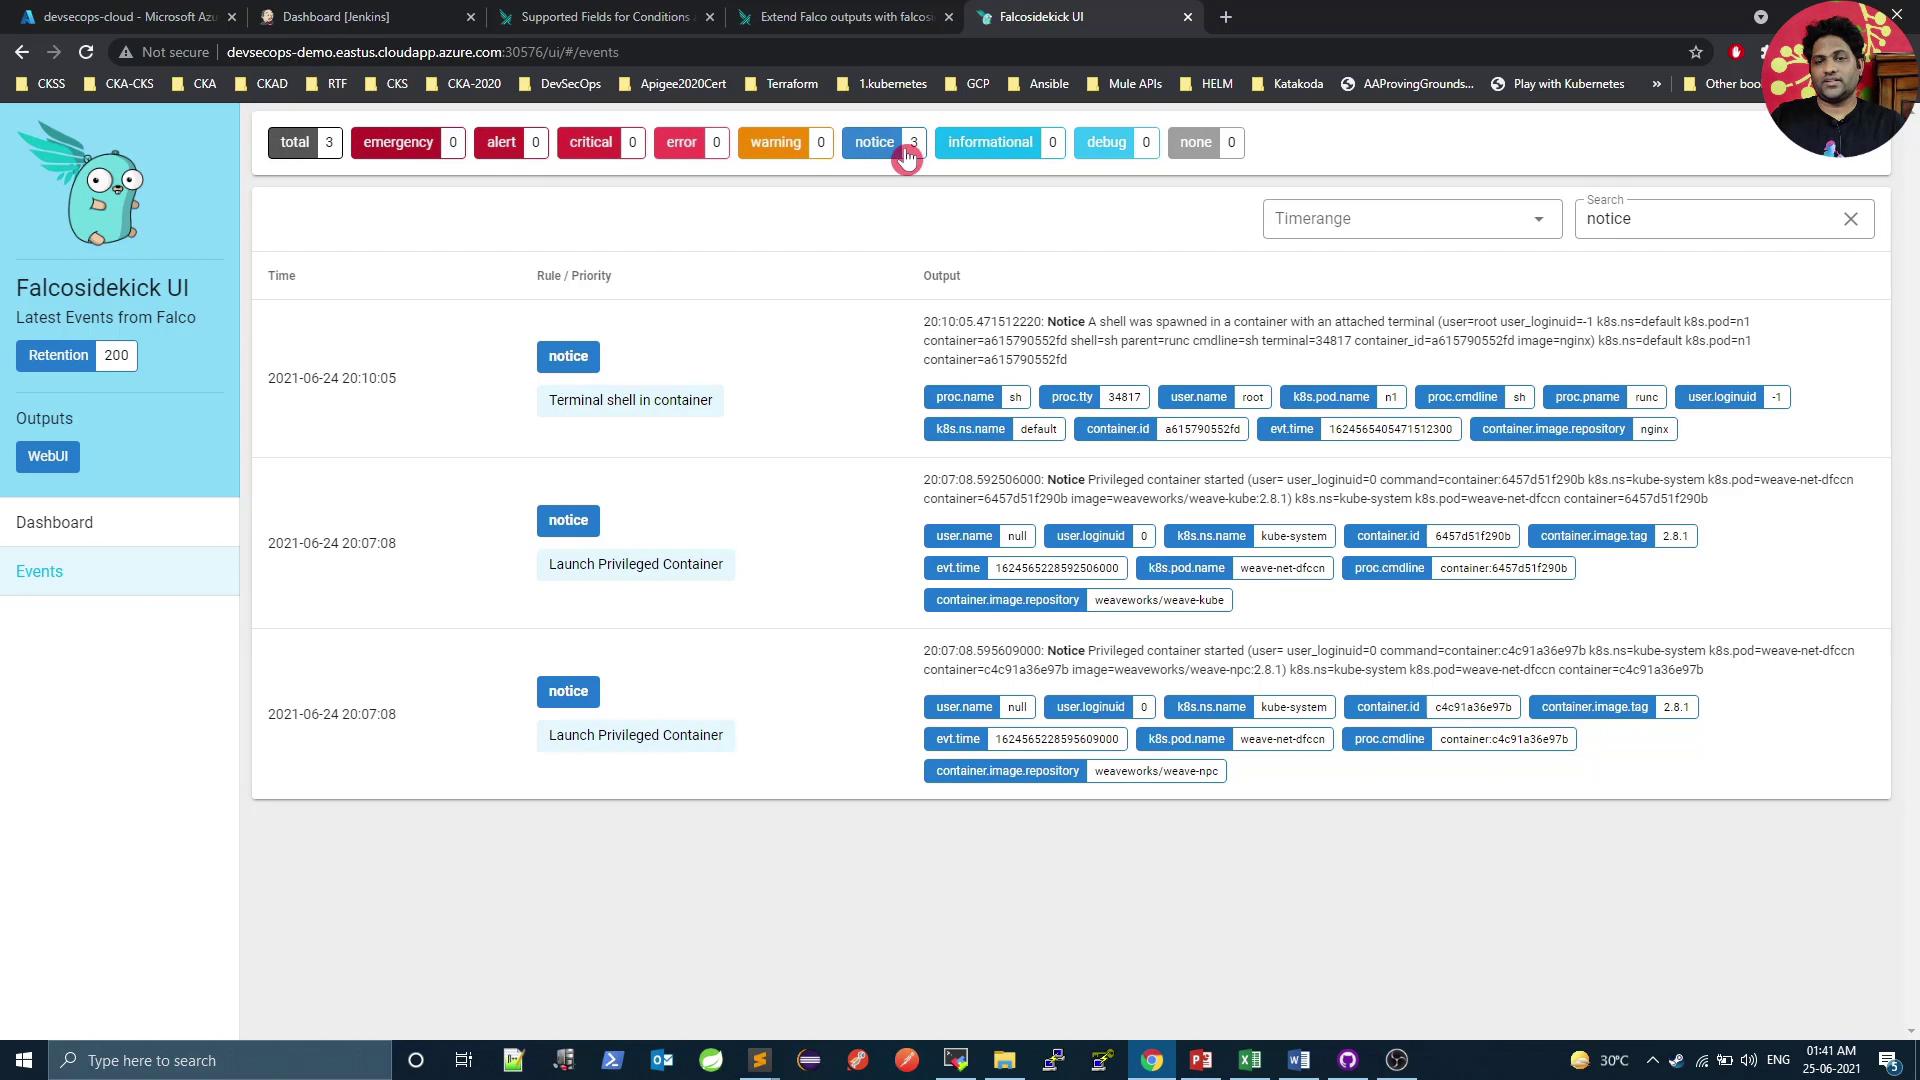
On the **Events** tab, you can filter by severity and drill into individual alerts:
***
## Triggering an Alert
Generate a new Falco event by executing a shell in any pod:
```bash theme={null}
kubectl exec -it n1 -n istio-system -- sh
# Run a command, then exit
exit
```
Refresh the UI to see the new alert.
***
## Next Steps
In the next article, we’ll configure Sidekick to send alerts to a Slack channel. Reinstall Falco with your Slack webhook:
```bash theme={null}
kubectl delete release falco -n falco
helm install falco falcosecurity/falco \
--namespace falco \
--set falcosidekick.enabled=true \
--set falcosidekick.webui.enabled=true \
--set falcosidekick.config.slack.webhookurl="https://hooks.slack.com/services/XXXX/YYYY/ZZZZ"
```
***
## Links and References
* [Falco Documentation](https://falco.org/docs/)
* [Falco Sidekick GitHub](https://github.com/falcosecurity/falco-sidekick)
* [Helm Charts for Falco](https://falcosecurity.github.io/charts)
* [Kubernetes Official Docs](https://kubernetes.io/docs/)
* [Slack Incoming Webhooks](https://api.slack.com/messaging/webhooks)