> ## Documentation Index
> Fetch the complete documentation index at: https://notes.kodekloud.com/llms.txt
> Use this file to discover all available pages before exploring further.
# Docker EE UCP Client Bundle
> This guide explains how to configure the Universal Control Plane client bundle on your local machine for Docker CLI interaction with a UCP cluster.
In this guide, you'll configure the Universal Control Plane (UCP) client bundle on your local machine to interact with a UCP cluster through the Docker CLI.
## 1. Exploring the UCP Documentation
Start by reviewing the official Docker Engine Enterprise (EE) and UCP docs:
1. Visit the Docker Engine Enterprise documentation.[1]
2. Under **Product Manuals**, select **Docker Enterprise**.
3. Click **Universal Control Plane** → **Access UCP**.
4. Follow the **CLI-Based Access** instructions to obtain the UCP client bundle.
With UCP, you continue using the Docker CLI by downloading a bundle that contains the necessary certificates and environment scripts.
## 2. Downloading the UCP Client Bundle
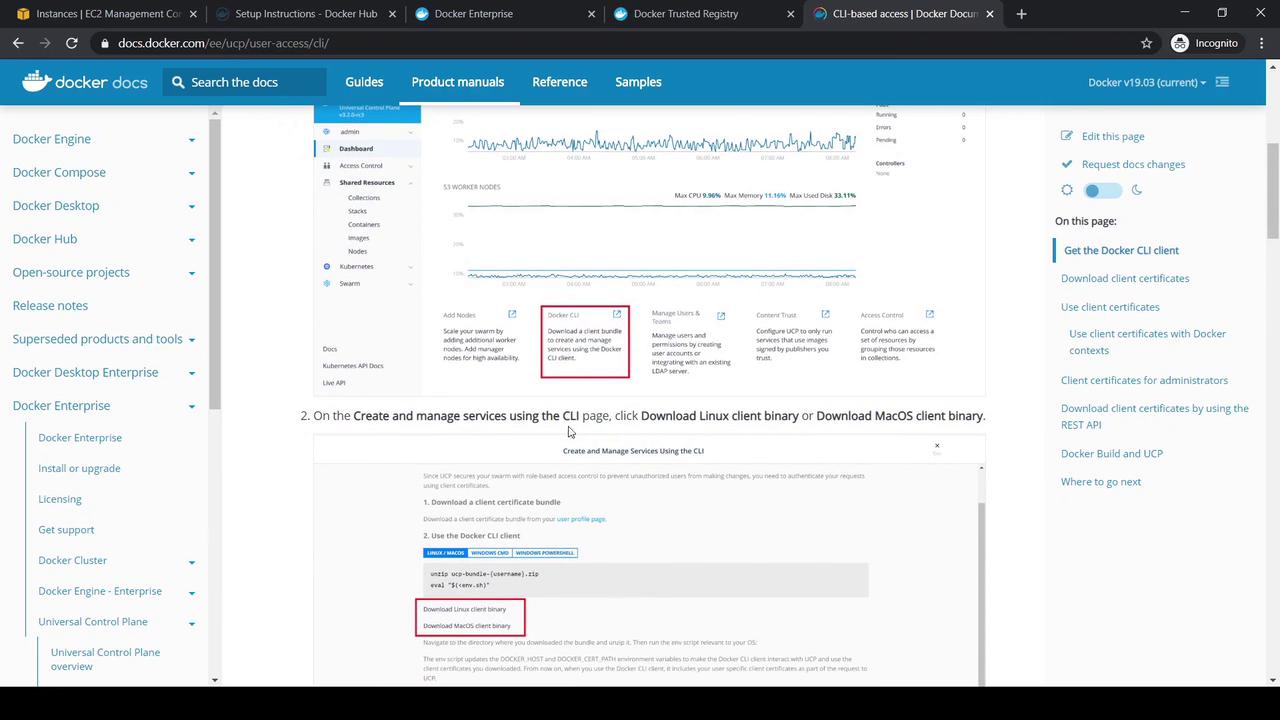
1. In your UCP console dashboard, locate the **Docker CLI** section and click **Download**.
2. Choose the Linux or macOS binary.
3. Under **My Profile** (your admin user), download the client certificates ZIP.
```bash theme={null}
unzip ucp-bundle-{username}.zip
eval "$(env.sh)"
```
Keep your client certificates secure. Do not commit them into version control.
Back in the UCP dashboard, click **New Client Bundle** to generate and download your personalized bundle. You should now have:
* `docker` CLI binary
* `ucp-bundle-{username}.zip`
## 3. Setting Up a Remote Client
For this example, we provisioned a CentOS host on AWS named `Yogesh Client Bundle Test`. Transfer both the Docker CLI binary and the UCP client bundle (e.g., via WinSCP), then:
```bash theme={null}
# On the remote host
mkdir -p ~/client-bundle
unzip ucp-bundle-{username}.zip -d ~/client-bundle
cd ~/client-bundle
```
Here's an example public key from the bundle:
```plaintext theme={null}
-----BEGIN PUBLIC KEY-----
MIGeMA0GCSqGSIb3DQEBAQUAA4GNADCB
9M7C1cfPReZIrCrypItIh4V127f1UARf78B8iWa/2HZfSmKx24QDyCFRDoA=
-----END PUBLIC KEY-----
```
Your private keys and certificates grant full access to your UCP cluster. Handle them with care.
## 4. Configuring Environment Variables
Execute the provided environment script to set Docker CLI variables:
```bash theme={null}
cd ~/client-bundle
eval "$(env.sh)"
```
Verify your environment settings:
| Variable | Description | Example |
| ------------------ | ------------------------------------ | -------------------------- |
| DOCKER\_HOST | UCP manager endpoint | `tcp://172.31.32.217:443` |
| DOCKER\_CERT\_PATH | Path to client certificates and keys | `/home/user/client-bundle` |
```bash theme={null}
echo $DOCKER_HOST
# If needed, switch to the private IP
export DOCKER_HOST=tcp://172.31.32.217:443
echo $DOCKER_HOST
echo $DOCKER_CERT_PATH
# /home/user/client-bundle
```
## 5. Verifying Connectivity
Ensure your CLI can communicate with UCP:
```bash theme={null}
docker node ls
# ID HOSTNAME STATUS AVAILABILITY MANAGER STATUS ENGINE VERSION
# vpns18n5tj7c59rcx4t26oz06 dtrnode Ready Active Active 19.03.5
# g2gzfa9lrijoyg7atl2avveu6r * ucpmanager Ready Active Leader 19.03.5
docker service ls
```
If both commands succeed, your Docker CLI is correctly configured to manage UCP.
## 6. Deploying a Test Application
Create a simple HTTP service on port 83:
```bash theme={null}
docker service create \
--name kodekloudtest \
--publish 83:80 \
httpd:alpine
```
Check the task status:
```bash theme={null}
docker service ps kodekloudtest
# ID NAME IMAGE NODE DESIRED STATE CURRENT STATE
# 1yatpy8tm6gi kodekloudtest.1 httpd:alpine ucpworker Running Running 2 minutes ago
```
Visit `http://:83` in your browser. You should see the default Apache welcome page. The service also appears under **Swarm** in the UCP console.
## 7. Cleaning Up
Remove the test service:
```bash theme={null}
docker service rm kodekloudtest
```
Refresh the UCP console; the `kodekloudtest` service will be gone.
***
## References
[1]: https://docs.docker.com/ee/engine/ "Docker Engine Enterprise Documentation"
[Universal Control Plane]: https://docs.docker.com/ee/ucp/ "UCP Docs"
[Docker Hub]: https://hub.docker.com/