> ## Documentation Index
> Fetch the complete documentation index at: https://notes.kodekloud.com/llms.txt
> Use this file to discover all available pages before exploring further.
# Demo Example Voting Application
> This article provides a guide on deploying a voting application using Docker, covering its architecture, source code, and multi-container deployment.
Welcome to this detailed guide on the example voting application from the Docker Samples GitHub repository (located under the "example-voting-app" directory). In this article, we will review the application's architecture, explore the source code, and deploy the application using Docker. We will also extend the deployment using Docker Compose and Docker Swarm stacks for a more robust, multi-container environment.
***
## Application Overview and Architecture
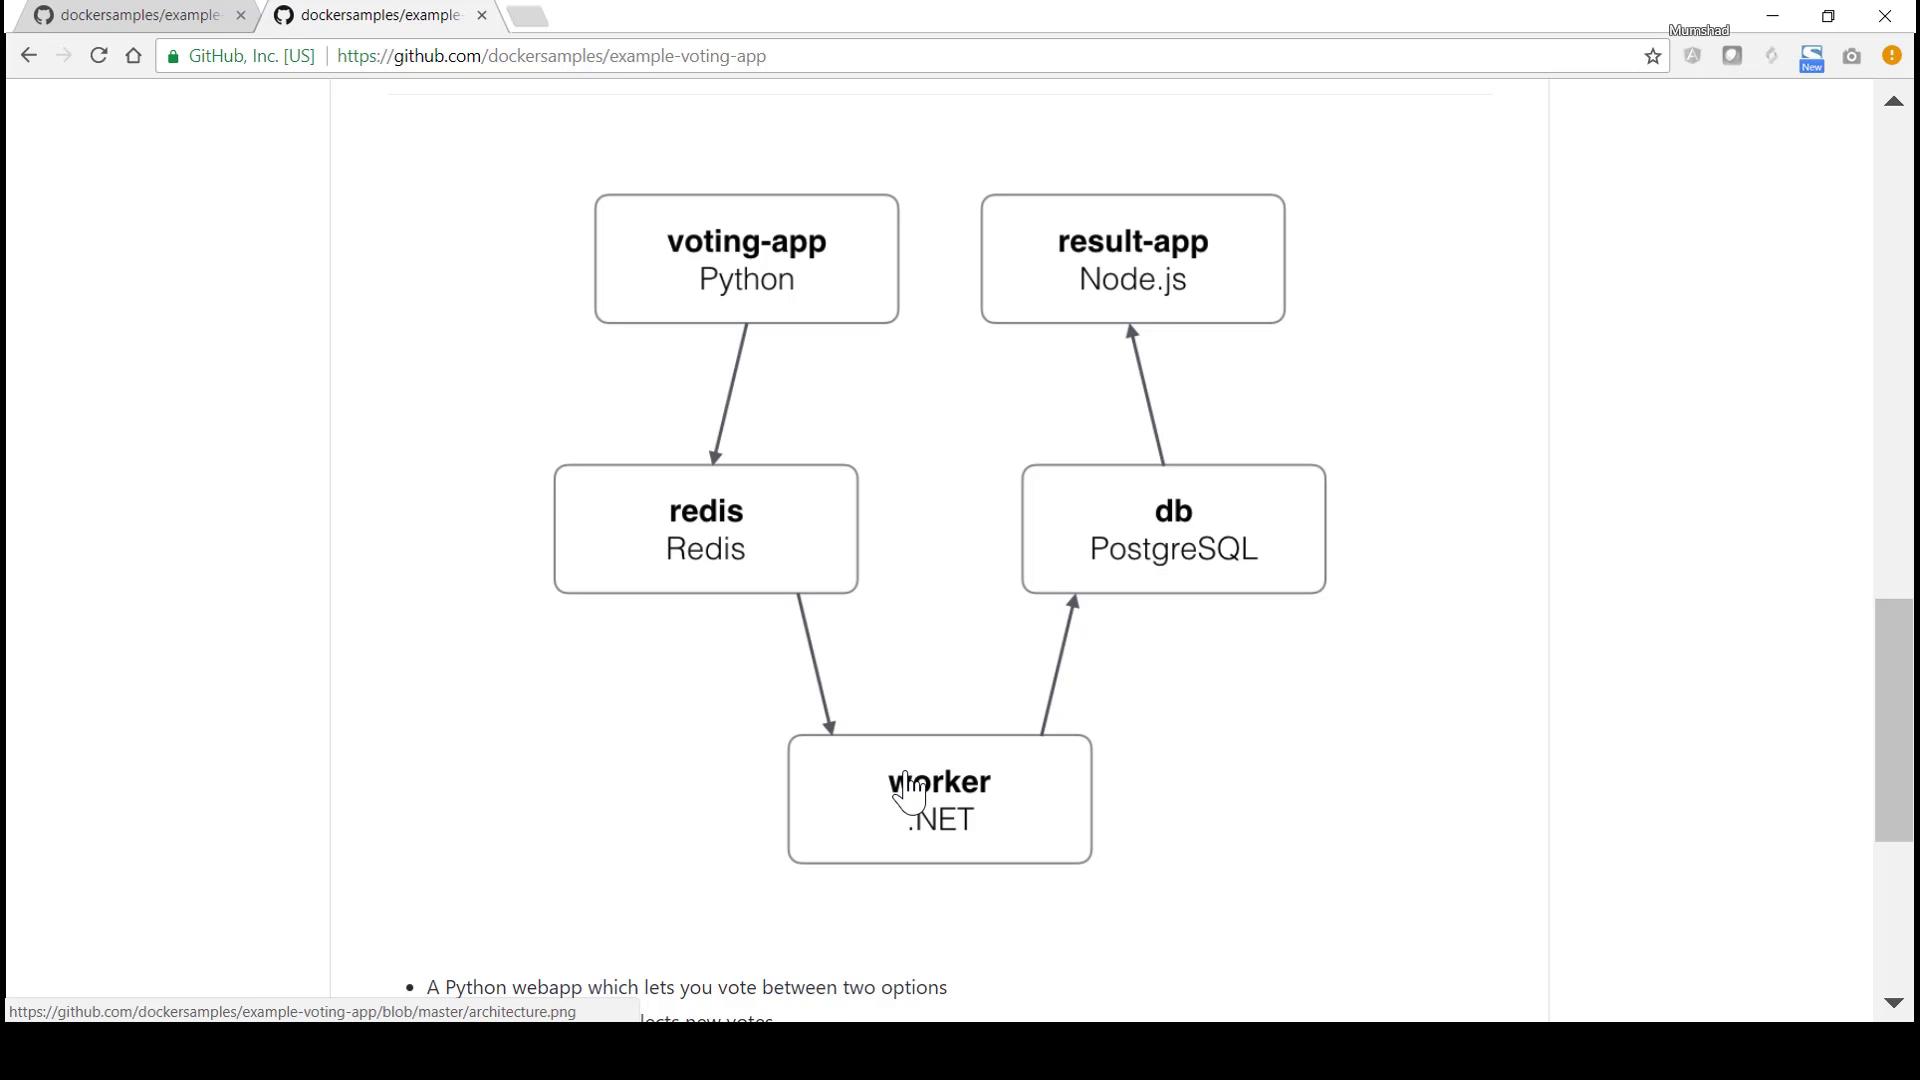
The voting application is composed of several distinct components:
* **Voting App:** A Python-based web application built with Flask, where users cast their votes.
* **Redis:** A messaging system that collects the submitted votes.
* **Worker:** A .NET application (with a Java-like code sample preserved) that processes votes and updates a PostgreSQL database.
* **Result App:** A Node.js and Express application that retrieves and displays voting results from the database.
Note that Redis and PostgreSQL are provided as prebuilt images from Docker Hub, while the Python, .NET, and Node.js applications are custom-developed and organized in separate folders within the repository.
Below is the architecture diagram featured in the lesson:
***
## The Voting Application
The voting app is a Flask-based Python application found in the `vote` directory. Its main file, `app.py`, defines GET and POST routes. The GET route renders the index page for voting, while the POST route captures the vote, connects to Redis, and stores the vote data.
Below is an enhanced excerpt of the Python code with clear descriptions:
```python theme={null}
import os
import json
import random
from flask import Flask, request, make_response, render_template, g
from redis import Redis
app = Flask(__name__)
def get_redis():
if not hasattr(g, 'redis'):
g.redis = Redis(host='redis', db=0, socket_timeout=5)
return g.redis
@app.route("/", methods=['GET', 'POST'])
def index():
voter_id = request.cookies.get('voter_id')
if not voter_id:
voter_id = hex(random.getrandbits(64))[2:-1]
vote = None
if request.method == 'POST':
redis = get_redis()
vote = request.form['vote']
data = json.dumps({'voter_id': voter_id, 'vote': vote})
redis.rpush('votes', data)
resp = make_response(render_template(
'index.html',
option_a="Cats",
option_b="Dogs",
hostname=os.uname()[1],
vote=vote,
))
resp.set_cookie('voter_id', voter_id)
return resp
if __name__ == "__main__":
app.run(host='0.0.0.0', port=80, debug=True, threaded=True)
```
When a user submits a vote, the application connects to the Redis container (accessed via the hostname "redis") and pushes the vote data into the `votes` list.
### Dockerfile for the Voting App
The Flask application is containerized using a Dockerfile based on the Python 2.7 Alpine image:
```dockerfile theme={null}
# Using official Python runtime base image
FROM python:2.7-alpine
# Set the application directory
WORKDIR /app
# Install the application requirements
ADD requirements.txt /app/requirements.txt
RUN pip install -r requirements.txt
# Copy the application code into the container
ADD . /app
# Expose port 80 for access
EXPOSE 80
# Define the command to run when the container starts
CMD ["gunicorn", "app:app", "-b", "0.0.0.0:80", "--log-file", "-", "--access-logfile", "-", "--workers", "4", "--keep-alive", "0"]
```
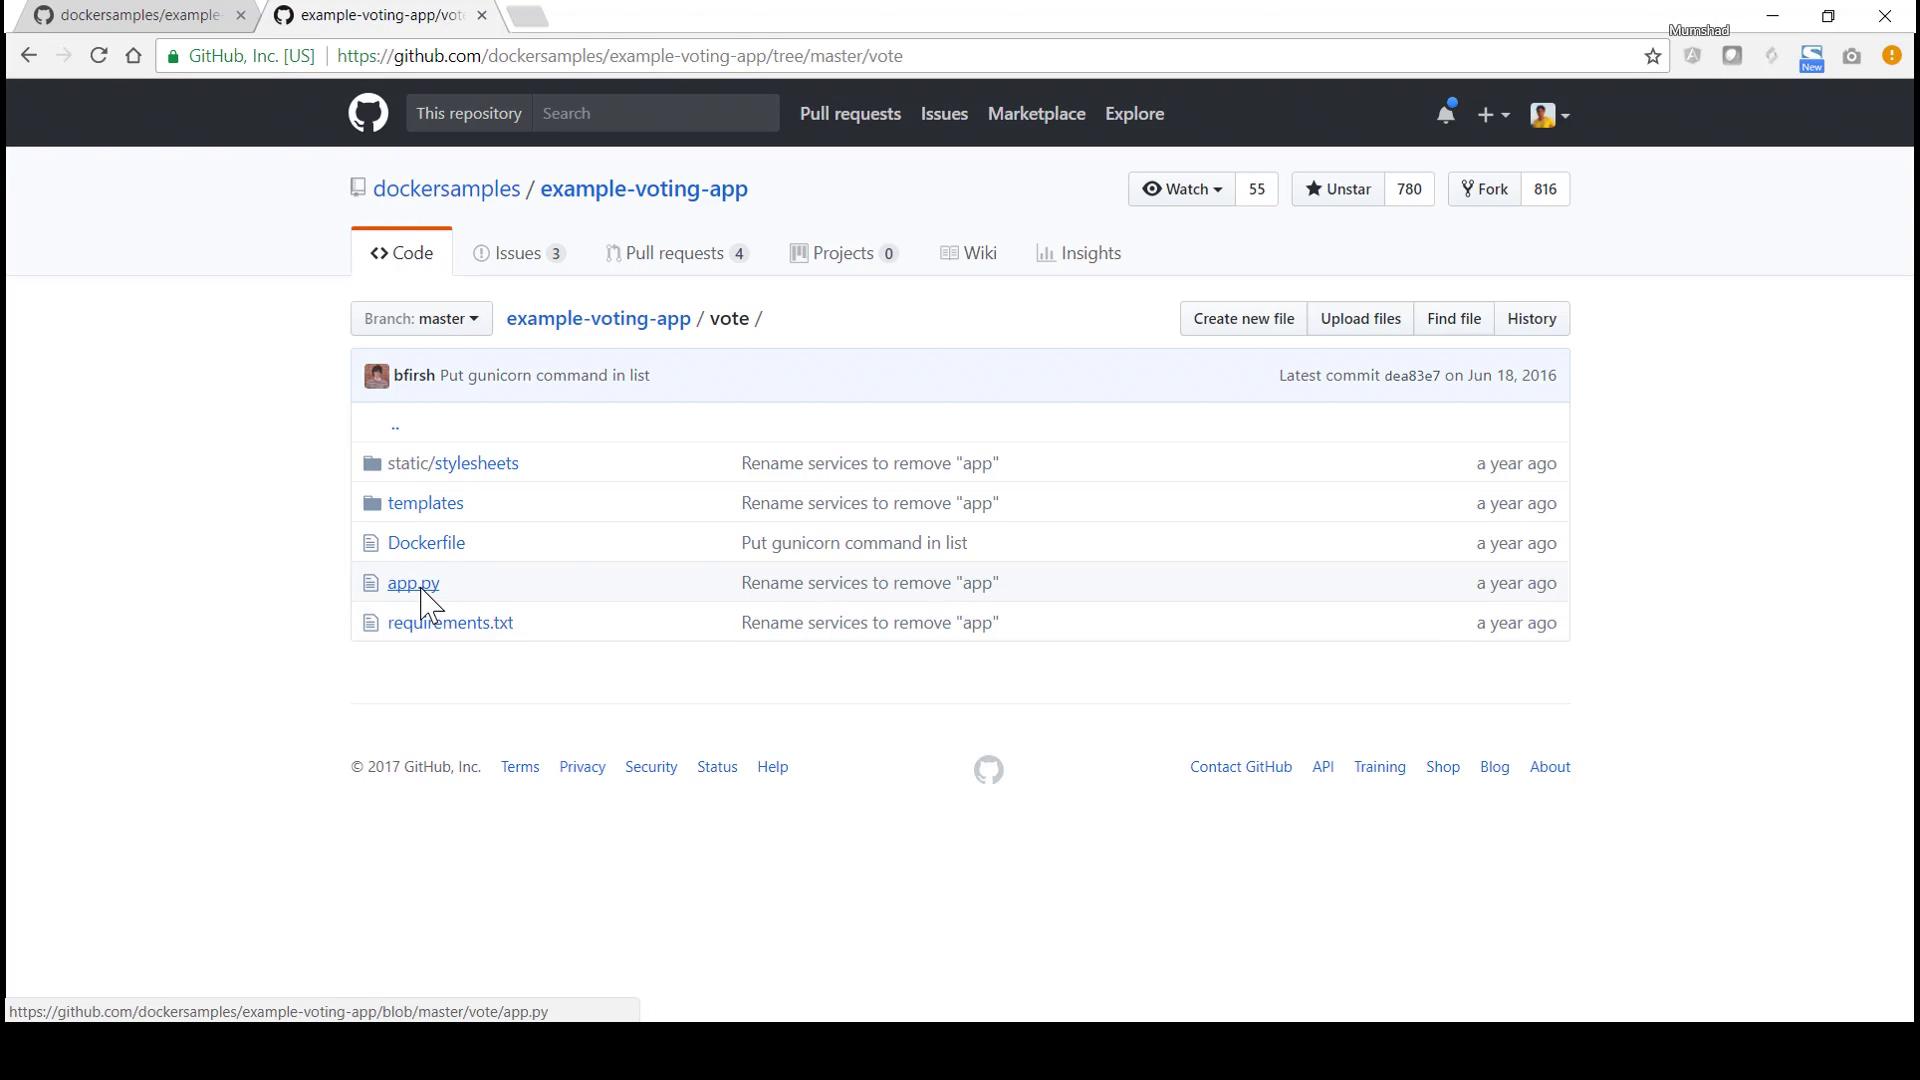
If you inspect the repository on GitHub, you'll notice the source code along with the Dockerfile:
***
## The .NET Worker
The worker component, located in the `worker` folder, is responsible for processing votes. It retrieves votes from Redis, updates the PostgreSQL database, and logs its activities. Below is an excerpt of the worker code (presented in Java-like syntax for historical reasons):
```java theme={null}
package worker;
import redis.clients.jedis.Jedis;
import redis.clients.jedis.exceptions.JedisConnectionException;
import java.sql.*;
import org.json.JSONObject;
class Worker {
public static void main(String[] args) {
try {
Jedis redis = connectToRedis("redis");
Connection dbConn = connectToDB("db");
System.err.println("Watching vote queue");
while (true) {
String voteJSON = redis.blpop("votes").get(1);
JSONObject voteData = new JSONObject(voteJSON);
String voterID = voteData.getString("voter_id");
String vote = voteData.getString("vote");
System.err.printf("Processing vote for '%s' by '%s'\n", vote, voterID);
updateVote(dbConn, voterID, vote);
}
} catch (SQLException e) {
e.printStackTrace();
System.exit(1);
}
}
static void updateVote(Connection dbConn, String voterID, String vote) throws SQLException {
PreparedStatement insert = dbConn.prepareStatement(
"INSERT INTO votes (id, vote) VALUES (?, ?)"
);
insert.setString(1, voterID);
insert.setString(2, vote);
// Execute the update (execution omitted in the sample)
}
}
```
### Dockerfile for the Worker
The Dockerfile for this component uses the Microsoft .NET SDK image. It adds the worker's source code and publishes the application:
```dockerfile theme={null}
FROM microsoft/dotnet:1.1.1-sdk
WORKDIR /code
ADD src/Worker /code/src/Worker
RUN dotnet restore -v minimal src/Worker \
&& dotnet publish -c Release -o "./src/Worker/"
CMD dotnet src/Worker/Worker.dll
```
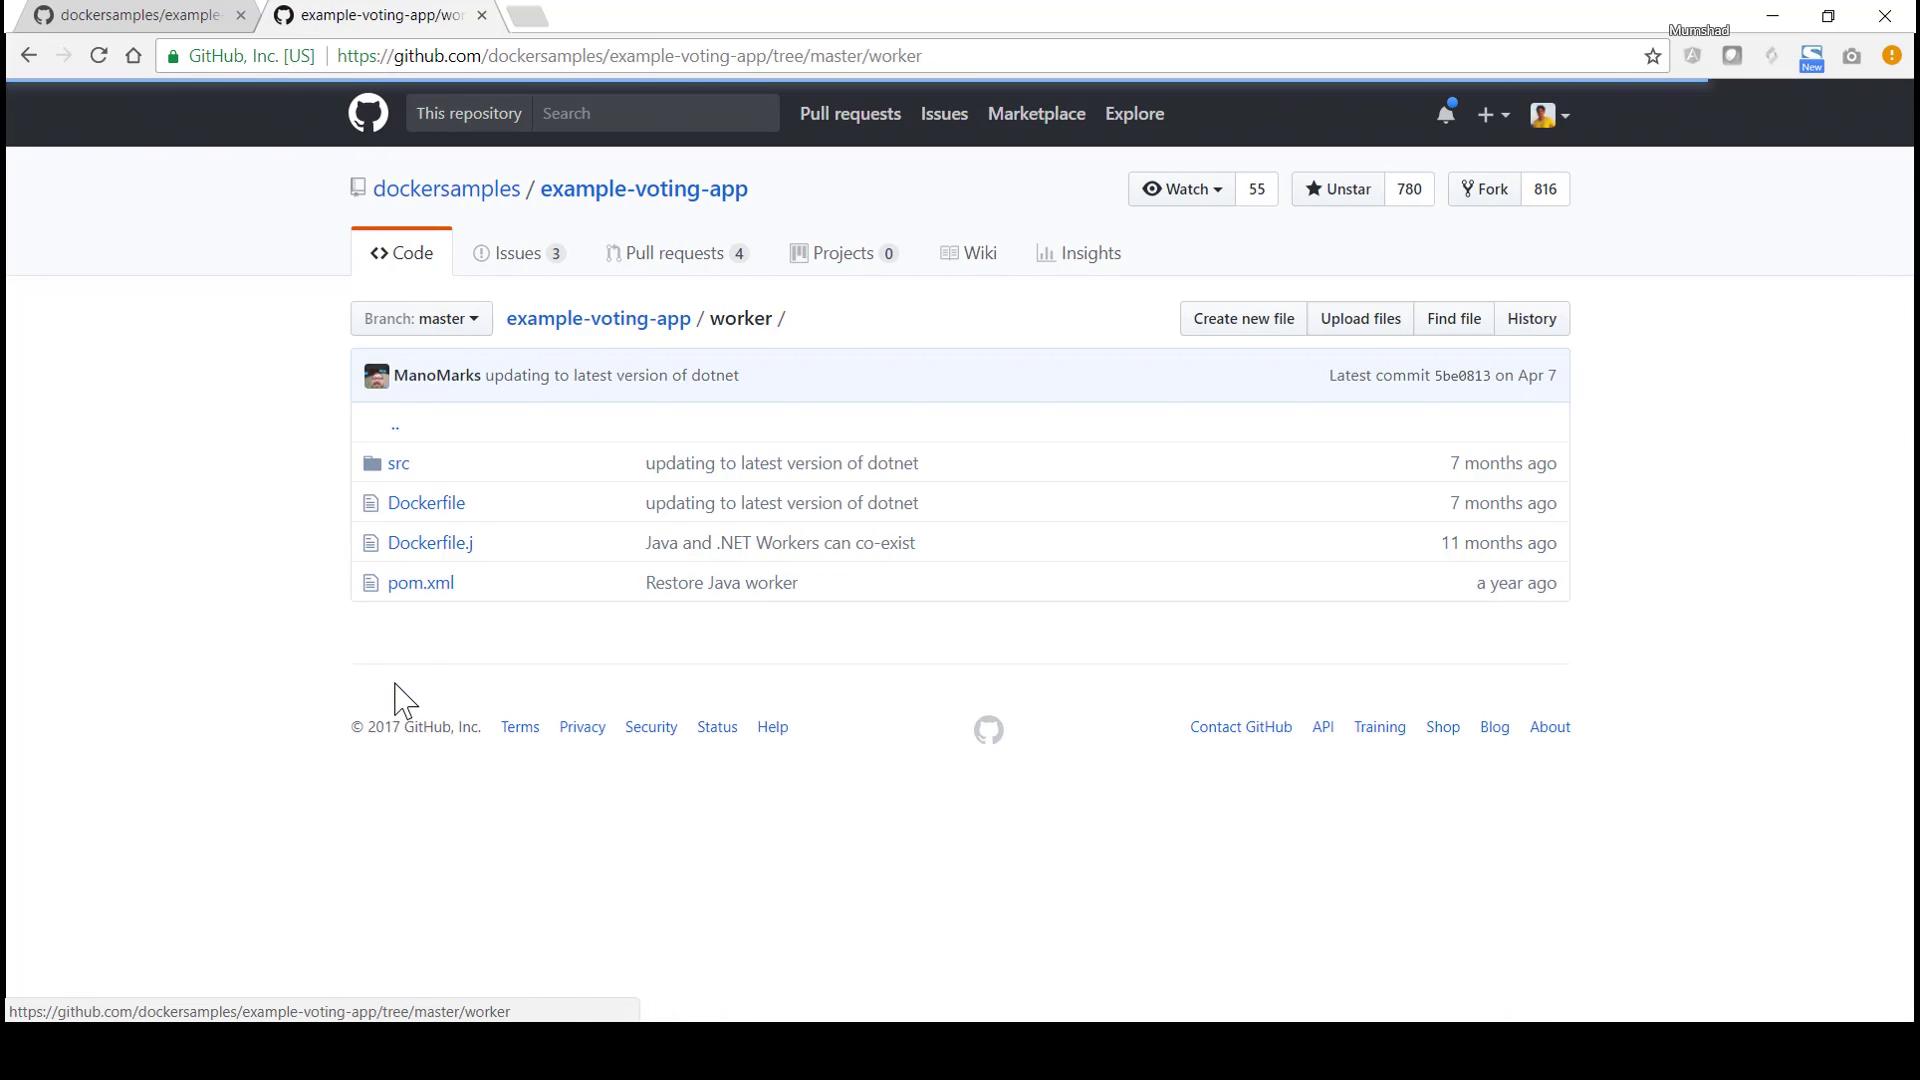
Review the GitHub repository view for the worker below:
***
## The Result Web Application
The result web application is built using Node.js and Express. It connects to the PostgreSQL database to query and display real-time voting results. The `server.js` file configures the Express server, sets up Socket.IO for live updates, and implements a retry mechanism for establishing a connection to PostgreSQL.
Below is an excerpt from the Node.js application:
```javascript theme={null}
var express = require('express'),
async = require('async'),
pg = require('pg'),
cookieParser = require('cookie-parser'),
bodyParser = require('body-parser'),
methodOverride = require('method-override'),
app = express();
var server = require('http').Server(app);
var io = require('socket.io')(server);
io.set('transports', ['polling']);
var port = process.env.PORT || 4000;
io.sockets.on('connection', function(socket) {
socket.emit('message', { text: 'Welcome!' });
socket.on('subscribe', function(data) {
socket.join(data.channel);
});
});
async.retry({ times: 1000, interval: 1000 }, function(callback) {
pg.connect('postgres://postgres@db/postgres', function(err, client, done) {
if (err) console.error("Waiting for db");
callback(err, client);
});
});
function getVotes(client) {
client.query('SELECT vote, COUNT(id) AS count FROM votes GROUP BY vote', [], function(err, result) {
if (err) {
console.error("Error performing query: " + err);
} else {
var votes = collectVotesFromResult(result);
io.sockets.emit('scores', JSON.stringify(votes));
}
});
}
```
### Dockerfile for the Result App
The Dockerfile for the result application is based on a slim version of Node.js. It installs required dependencies and starts the Node server:
```dockerfile theme={null}
FROM node:5.11.0-slim
WORKDIR /app
RUN npm install -g nodemon
ADD package.json /app/package.json
RUN npm config set registry=https://registry.npmjs.org
RUN npm install && npm ls
RUN mv /app/node_modules /node_modules
ADD . /app
ENV PORT 80
EXPOSE 80
CMD ["node", "server.js"]
```
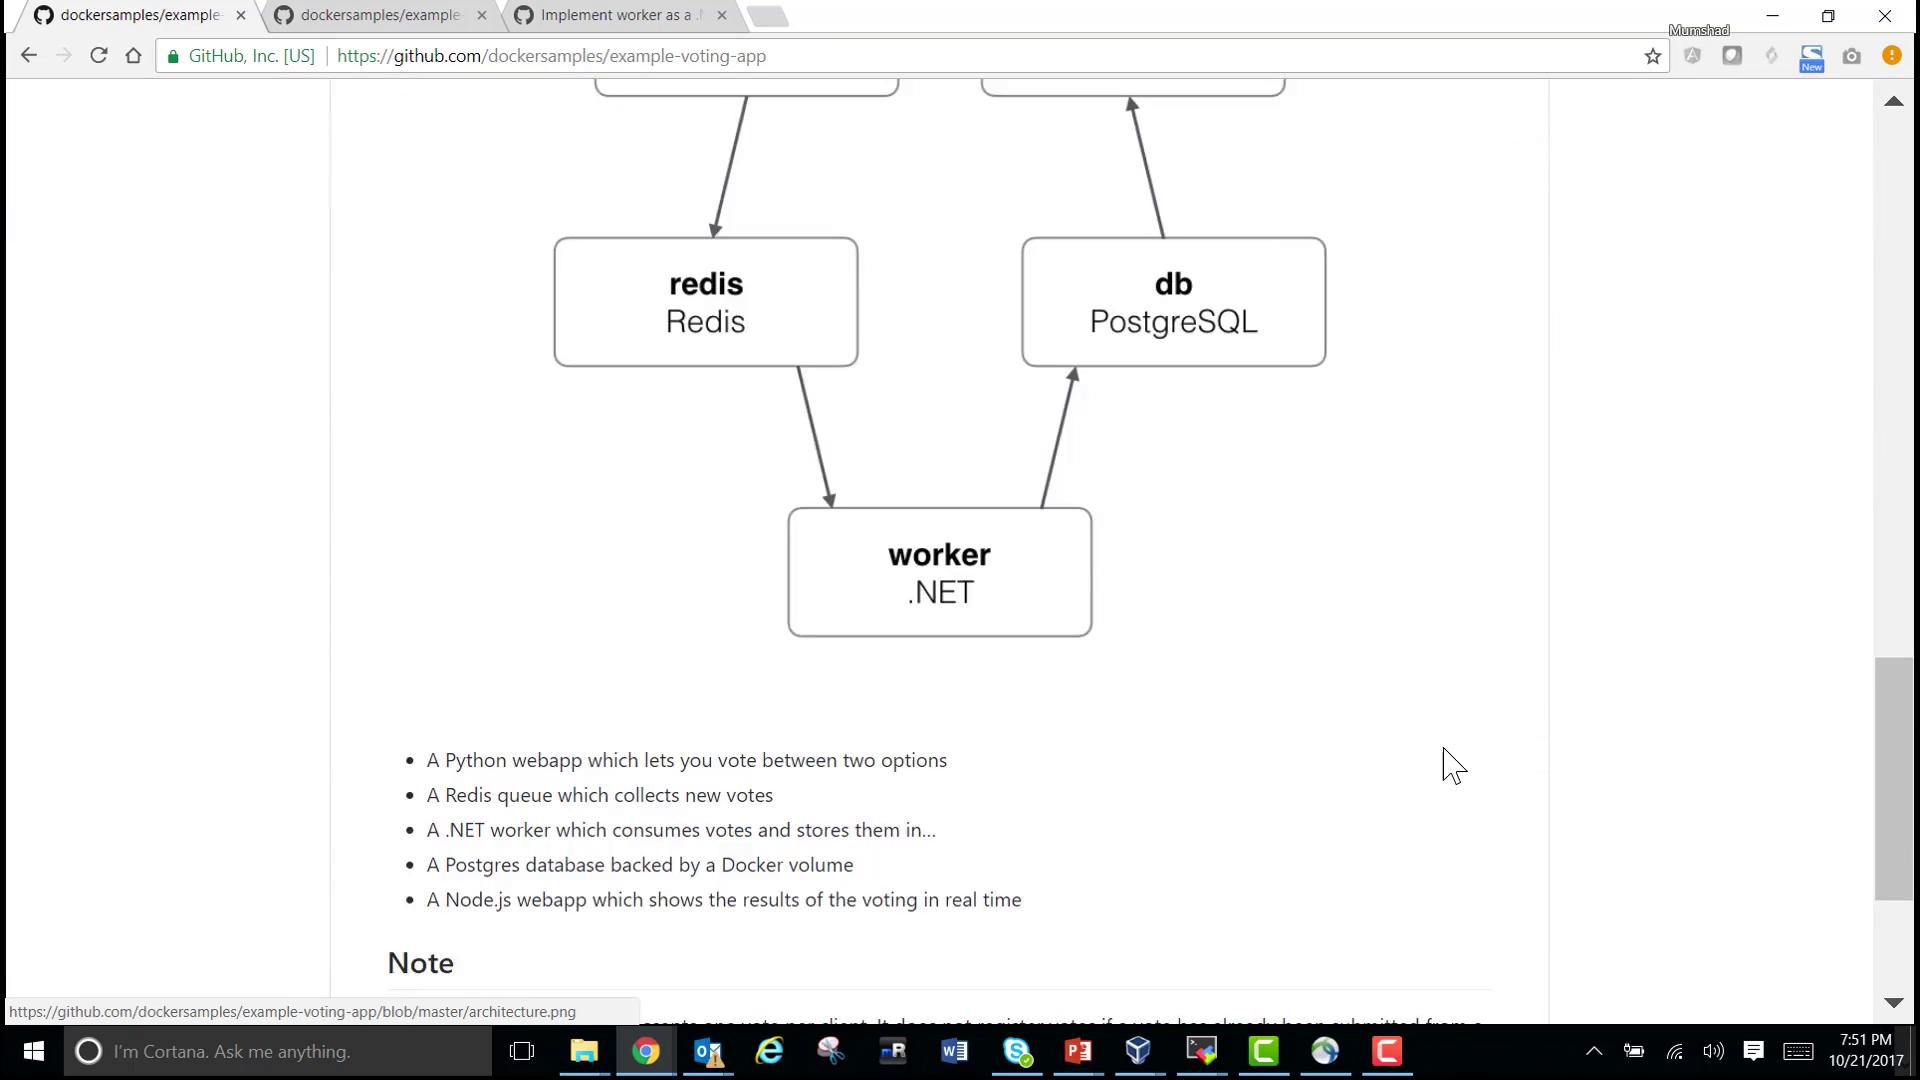
The overall architecture for the result app is illustrated below:
***
## Deploying the Application
This section outlines how to deploy the system components using Docker.
### Cloning the Repository
To begin, clone the repository to your local machine:
```bash theme={null}
git clone https://github.com/dockersamples/example-voting-app.git
```
This command clones the entire example voting application into the `example-voting-app` directory.
***
## Building and Running the Voting App
1. Navigate to the `vote` directory and inspect the Dockerfile by running:
```bash theme={null}
cd example-voting-app/vote
cat Dockerfile
```
2. Build the Docker image for the voting app:
```bash theme={null}
docker build . -t voting-app
```
3. Verify the image build by listing available Docker images:
```bash theme={null}
docker images
```
4. Launch the voting app container by mapping container port 80 to host port 5000:
```bash theme={null}
docker run -p 5000:80 voting-app
```
Open your browser at port 5000 to access the voting interface. If you cast a vote without an active Redis container, an internal server error will occur with log messages pointing to issues at the `redis.rpush('votes', data)` call.
Ensure Redis is running and linked correctly before casting votes to avoid connectivity issues.
***
## Deploying Redis
Since the voting app relies on Redis for vote submission, follow these steps:
1. Start a Redis container:
```bash theme={null}
docker run --name=redis -d redis
```
2. Re-run the voting app container with a link to the Redis container:
```bash theme={null}
docker run -p 5000:80 --link redis:redis voting-app
```
Now, the voting app can successfully connect to Redis when a vote is cast.
***
## Deploying PostgreSQL and the Worker
The worker component processes votes by interacting with a PostgreSQL database. To deploy these components:
1. Remove any existing PostgreSQL container named `db` (if present):
```bash theme={null}
docker rm db
```
2. Run a PostgreSQL container (version 9.4):
```bash theme={null}
docker run -d --name=db postgres:9.4
```
3. Verify that PostgreSQL is running:
```bash theme={null}
docker ps
```
### Building and Running the Worker App
1. Change to the `worker` directory and inspect the Dockerfile:
```bash theme={null}
cd ../worker
cat Dockerfile
```
2. Build the worker image:
```bash theme={null}
docker build . -t worker-app
```
3. Start the worker container by linking it to both Redis and PostgreSQL:
```bash theme={null}
docker run --link redis:redis --link db:db worker-app
```
You should see log messages in the worker output indicating that it is actively processing votes.
***
## Deploying the Result App
To deploy the Node.js-based result application and view live voting updates:
1. Navigate to the `result` directory and review its Dockerfile:
```bash theme={null}
cd ../result
cat Dockerfile
```
2. Build the result app image:
```bash theme={null}
docker build . -t result-app
```
3. Launch the result app container by mapping container port 80 to host port 5001 and linking to PostgreSQL:
```bash theme={null}
docker run -p 5001:80 --link db:db result-app
```
Open your browser at port 5001 to view the voting results. Any changes in votes (for example, a vote for "cats") will be reflected in real time.
***
## Conclusion
In this guide, we examined the architecture and source code for the example voting application while discussing step-by-step deployment of each component using Docker commands and container linking. The guide also offers insight into deploying multi-container applications using Docker Compose for coordinated deployments.
Thank you for following along. For further details and advanced deployment techniques, consider exploring additional Docker documentation and community resources.
***
## Additional Resources
* [Docker Documentation](https://docs.docker.com/)
* [Kubernetes Basics](https://kubernetes.io/docs/concepts/overview/what-is-kubernetes/)
* [Docker Hub](https://hub.docker.com/)
* [PostgreSQL Docker Image](https://hub.docker.com/_/postgres)
Happy deploying!