Event Streaming with Kafka

Foundations of Event Streaming

Demo Setting up Kafka Cluster and Kafka UI using Docker

In this tutorial, you'll learn how to spin up a fully functional Apache Kafka cluster with Docker and visualize it using an open-source Kafka UI. By the end, you’ll be able to manage topics, brokers, and partitions—all from a browser.

Prerequisites

  • Docker installed on your machine
  • A code editor or terminal of your choice

1. Create a Dedicated Docker Network

Isolate your Kafka components on a custom bridge network:

docker network create kafka-net

2. Launch the Kafka Cluster

We’ll use the lensesio/fast-data-dev Docker image, which bundles ZooKeeper, Kafka broker, Schema Registry, REST Proxy, and Control Center.

docker run --rm -d \
  --network kafka-net \
  -p 2181:2181 \
  -p 3030:3030 \
  -p 9092:9092 \
  -p 8081:8081 \
  -p 8082:8082 \
  -e ADV_HOST=kafka-cluster \
  --name kafka-cluster \
  lensesio/fast-data-dev
PortService
2181ZooKeeper
3030Schema Registry UI
9092Kafka broker
8081REST Proxy
8082Control Center

When you run this command for the first time, Docker will pull the image:

Unable to find image 'lensesio/fast-data-dev:latest' locally
latest: Pulling from lensesio/fast-data-dev
31.43MB/31.43MB
...
79b6f845fed: Download complete

Once started, verify the container is running:

docker container ls

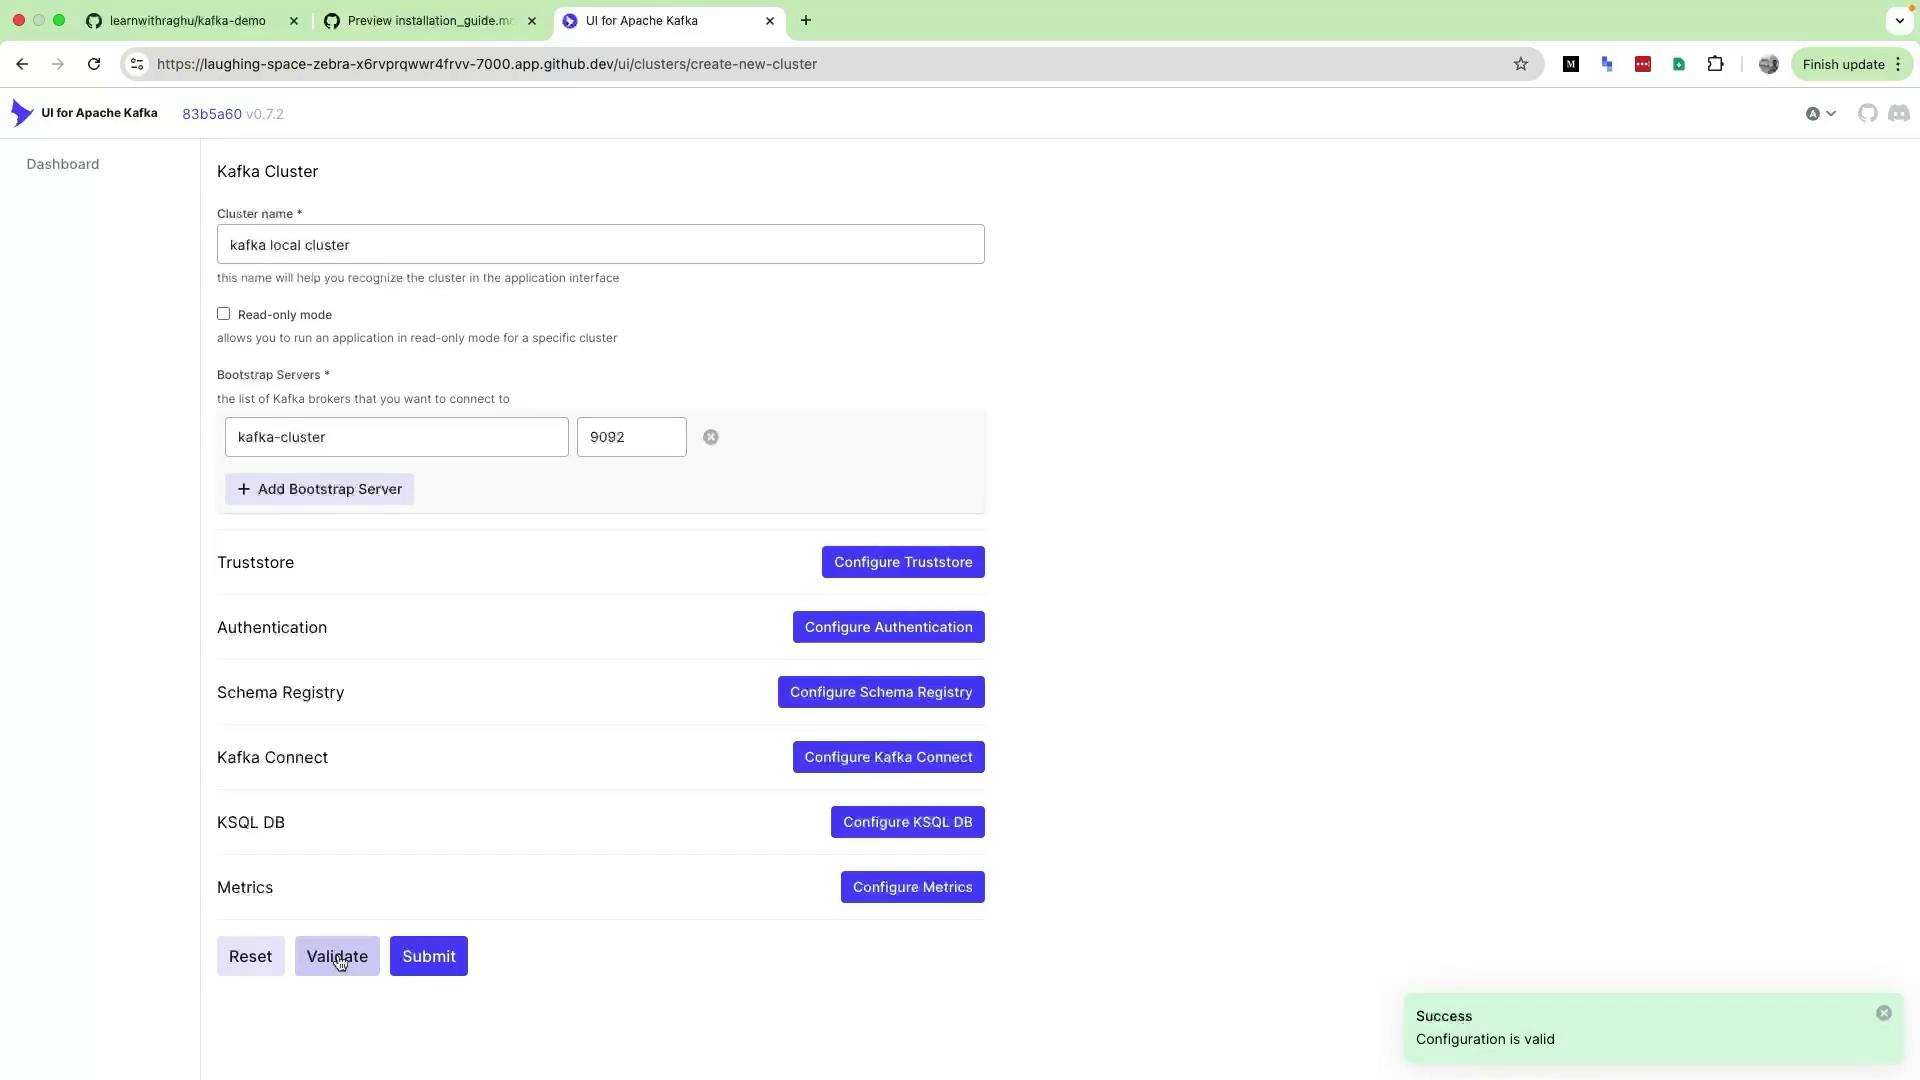
3. Deploy the Kafka UI

We’ll add Kafka UI by Provectus Labs to visualize and manage your cluster through a web interface.

docker run --rm -d \
  --network kafka-net \
  -p 7000:8080 \
  -e DYNAMIC_CONFIG_ENABLED=true \
  --name kafka-ui \
  provectuslabs/kafka-ui

Note

The DYNAMIC_CONFIG_ENABLED flag allows you to add and modify multiple Kafka clusters dynamically without restarting the UI.

Confirm both containers are up:

docker container ls

4. Configure Your Cluster in the UI

  1. Open your browser at:
    http://localhost:7000
  2. On the initial setup page:
    • Cluster Name: e.g., Kafka Local Cluster
    • Broker: kafka-cluster:9092
  3. Click Validate to test connectivity.
  4. Once validated, click Submit.

The image shows a user interface for configuring an Apache Kafka cluster, with options for setting the cluster name, bootstrap servers, and additional configurations like truststore and authentication. There are buttons for validating and submitting the configuration, and a success message indicates the configuration is valid.

After submission, refresh the page. You should see your cluster listed:

The image shows a dashboard interface for Apache Kafka, displaying details of a local cluster with one broker, 79 partitions, and 14 topics. The cluster is online with no production or consumption activity.

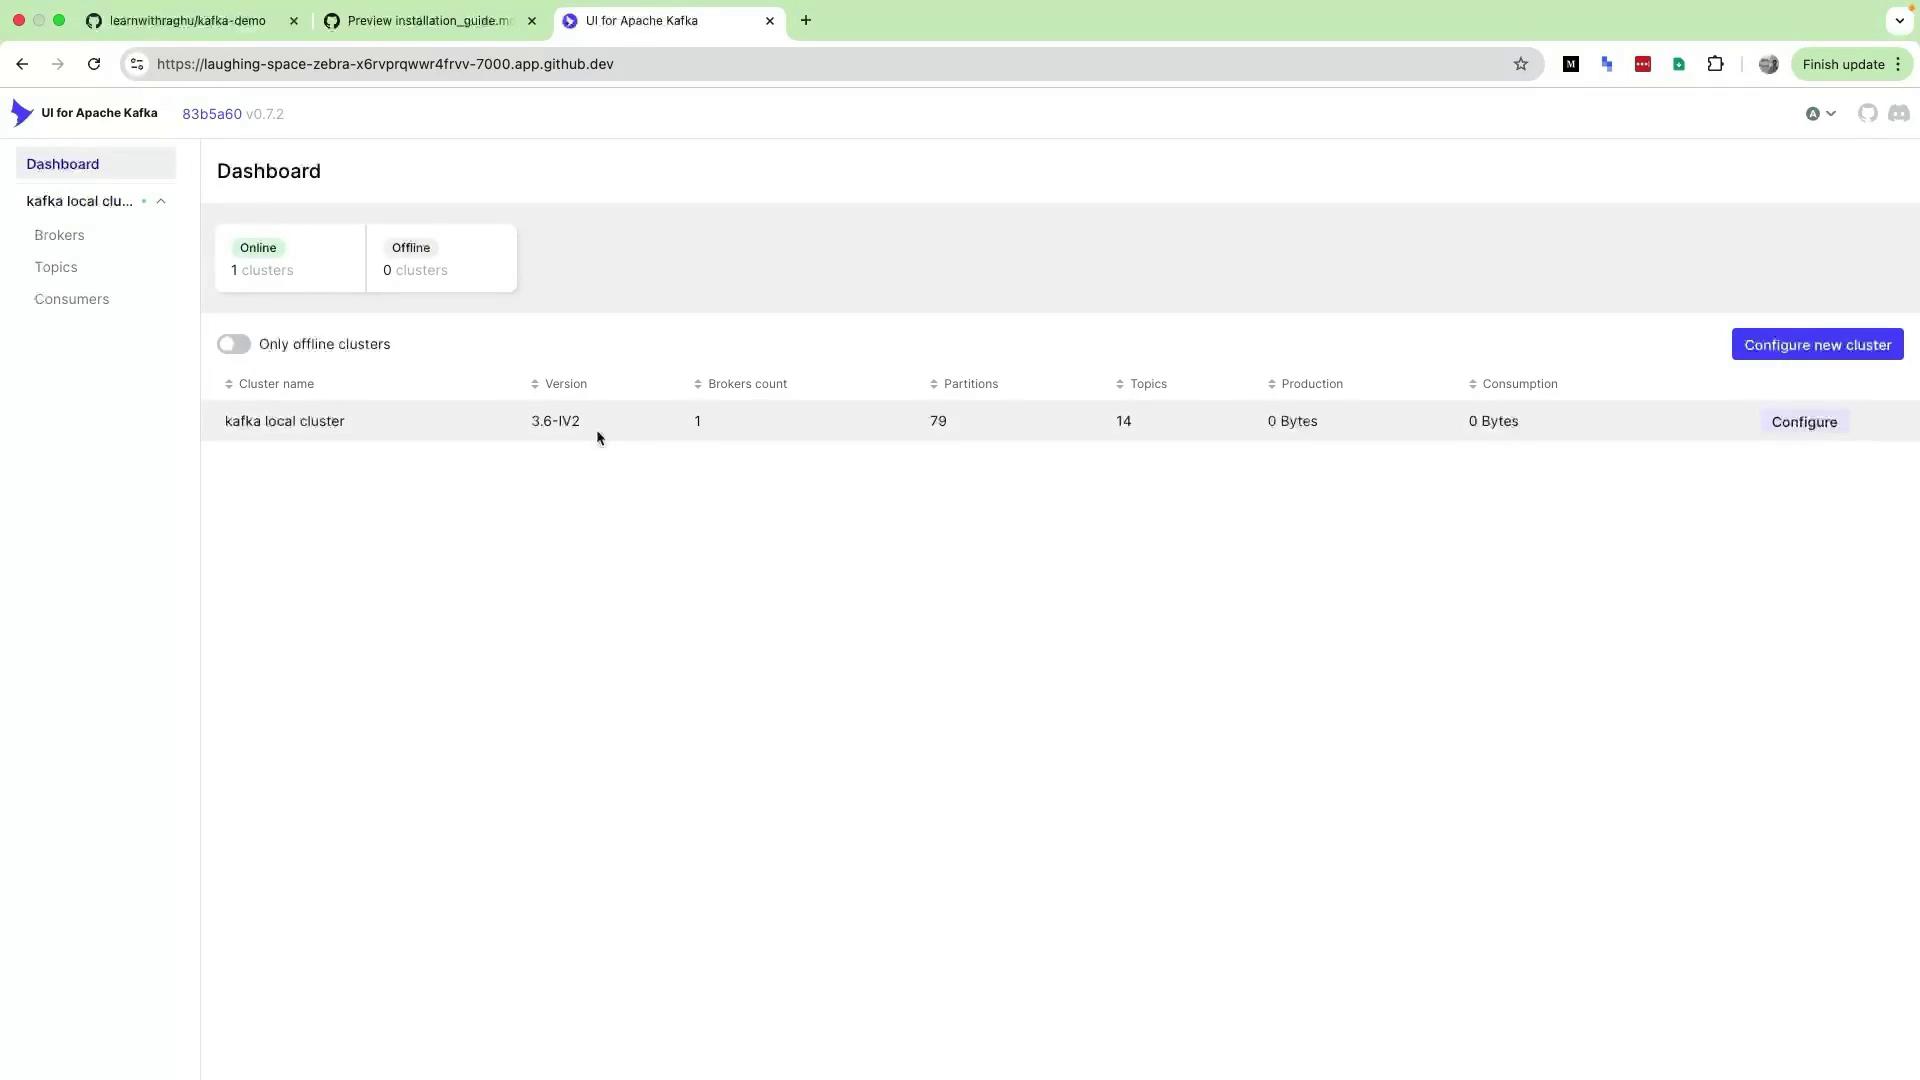
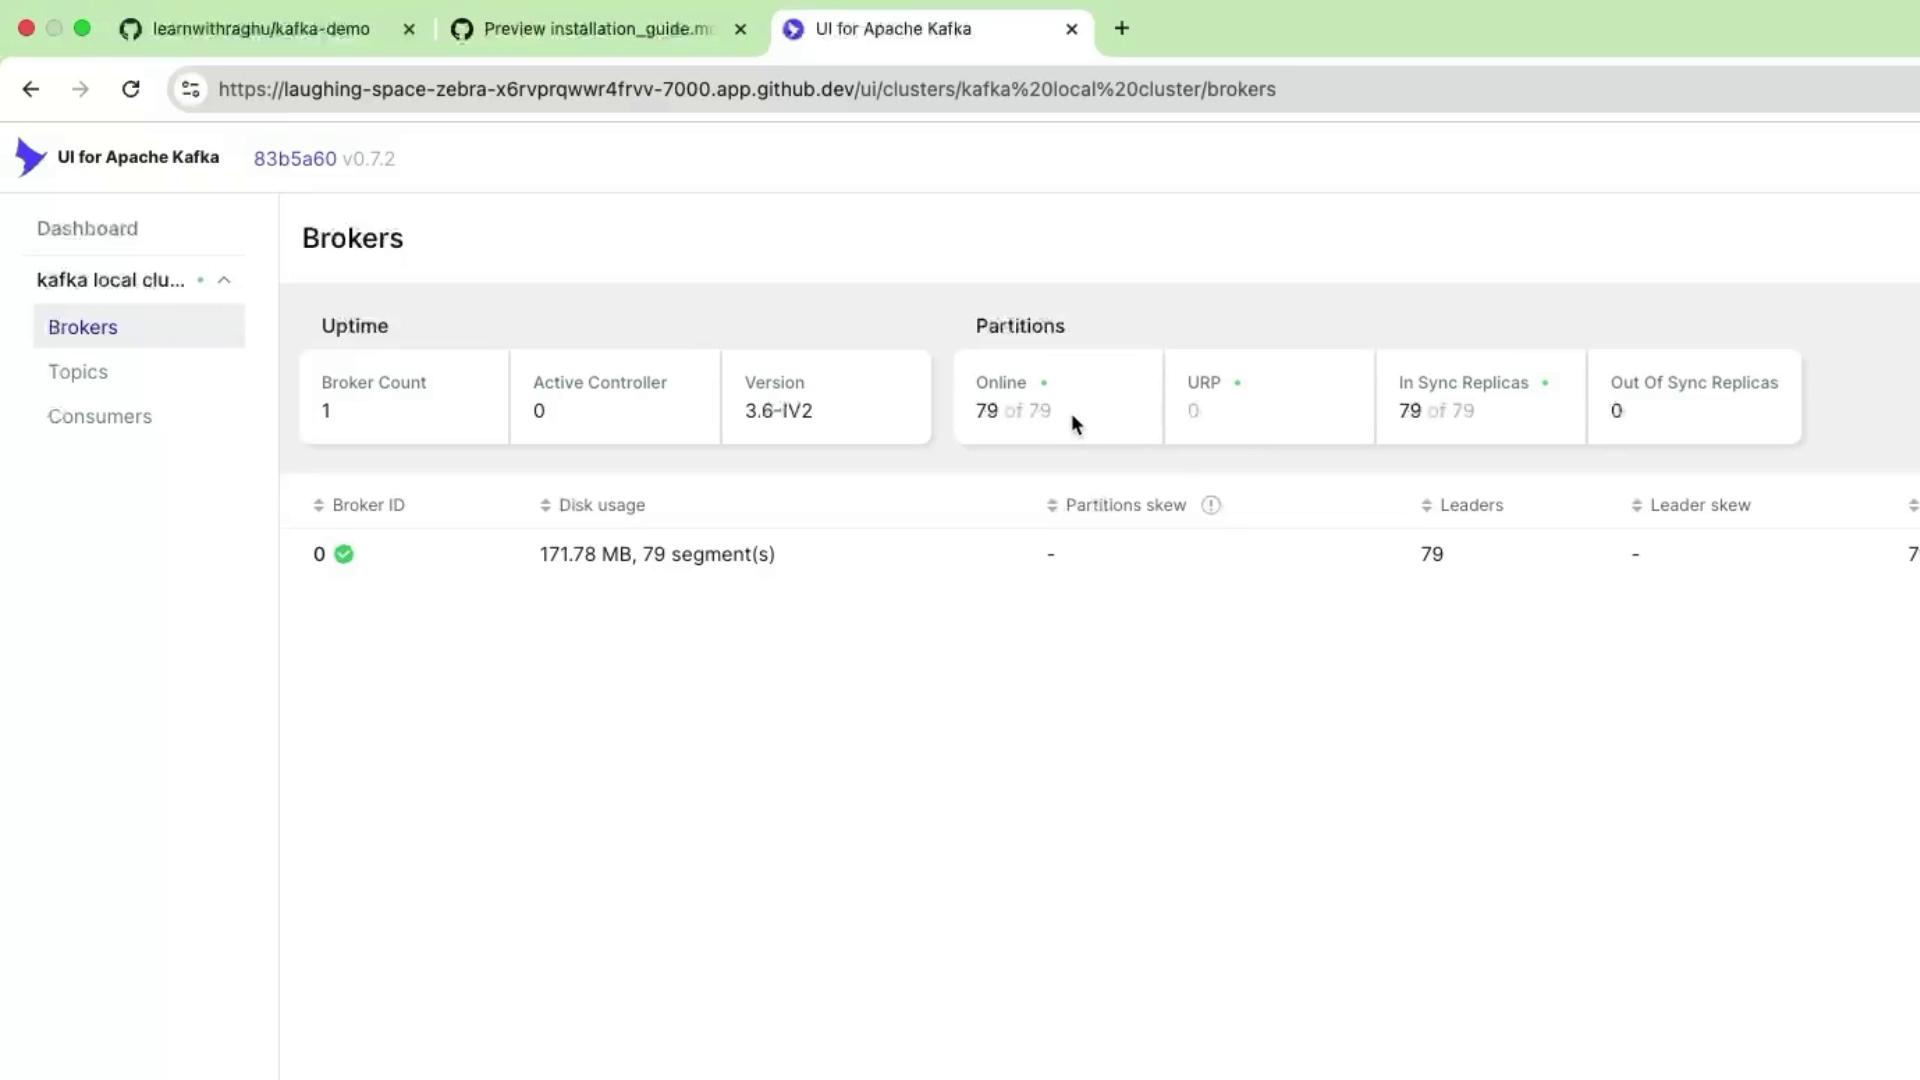
5. Explore Cluster Details

Brokers

Select Brokers from the sidebar to view:

  • Broker count and IDs
  • Controller status
  • Kafka version
  • Partition and replica status

The image shows a user interface for Apache Kafka, displaying broker information with details such as broker count, active controller, version, and partition status. It indicates one broker with 79 online partitions and no out-of-sync replicas.

Topics

Click Topics to browse all existing topics, including demo and system topics created by fast-data-dev.

Conclusion

With just two Docker commands, you now have a local Kafka cluster and a powerful UI to manage it. This setup eliminates heavy CLI usage and accelerates your development workflow.

Watch Video

Watch video content

Previous
Use cases and Real World Applications Use Case 2