> ## Documentation Index
> Fetch the complete documentation index at: https://notes.kodekloud.com/llms.txt
> Use this file to discover all available pages before exploring further.
# Demo Starting Our Frontend Interface
> Guide to building a Flask Toy Shop frontend that produces JSON order events to a Kafka cartevent topic, runs locally, and shows how to verify messages on the broker.
Welcome back. In the previous lesson we provisioned a VM on Amazon Elastic Compute Cloud (EC2), installed Kafka (using the Raft protocol), created an IAM role, launched an EC2 instance, and created the `cartevent` topic. In this article we'll build a simple front-end that produces order events to the Kafka cluster and verify those events on the broker.
Below you'll find the project layout, installation steps, the complete Flask app that produces events, how to run the UI, check logs, and validate messages on the Kafka broker.
## Project layout
| Path | Purpose |
| ---------------------------------------- | ----------------------------------------------------------- |
| `final_project/ToyShop/` | Frontend Flask app — "Toy Shop" UI (static, templates, app) |
| `final_project/ToyShop/static/` | CSS, images |
| `final_project/ToyShop/templates/` | HTML templates for each endpoint |
| `final_project/ToyShop/app.py` | Flask application that produces events to Kafka |
| `final_project/ToyShop/requirements.txt` | Python dependencies |
| `final_project/WarehouseUI/` | Internal dashboard — consumer (placeholder) |
Open a terminal, switch into the project folder, and install dependencies:
```bash theme={null}
cd final_project/
cd ToyShop
```
Requirements (contents of `requirements.txt`):
```text theme={null}
Flask==2.2.3
python-dotenv==1.0.0
Werkzeug==2.2.3
confluent-kafka
```
Install them:
```bash theme={null}
pip3 install -r requirements.txt
```
## Flask app — producing order events to Kafka
Open `app.py` in your editor. The example below shows the essential, corrected parts of the Flask application: imports, logging, Kafka producer configuration, a delivery callback, sample product data, routes for cart operations, and the handler that produces an order event to the `cartevent` topic.
```python theme={null}
# app.py
from flask import Flask, render_template, request, redirect, url_for
from confluent_kafka import Producer
import json
import logging
import socket
app = Flask(__name__)
# Configure logging
logging.basicConfig(level=logging.INFO)
logger = logging.getLogger(__name__)
# Kafka producer configuration
# NOTE: replace the IP below with your EC2 instance's public IP and port 9092.
conf = {
'bootstrap.servers': '54.226.13.161:9092',
'client.id': socket.gethostname()
}
# Initialize producer instance
producer = Producer(conf)
# Delivery callback for produced messages
def delivery_callback(err, msg):
if err:
logger.error(f"Message delivery failed: {err}")
else:
logger.info(f"Message delivered to {msg.topic()} [{msg.partition()}] at offset {msg.offset()}")
logger.info(f"Message timestamp: {msg.timestamp()}")
# Sample product data shown on the UI
products = [
{"id": 1, "name": "Toy 1", "price": 10.99, "image": "toy1.jpg"},
{"id": 2, "name": "Toy 2", "price": 15.99, "image": "toy2.jpg"},
{"id": 3, "name": "Toy 3", "price": 25.99, "image": "toy3.jpg"},
{"id": 4, "name": "Toy 4", "price": 29.99, "image": "toy4.jpg"},
{"id": 5, "name": "Toy 5", "price": 35.99, "image": "toy5.jpg"},
{"id": 6, "name": "Toy 6", "price": 45.99, "image": "toy6.jpg"}
]
# Simple in-memory cart (for demo purposes)
cart = []
@app.route('/')
def index():
return render_template('index.html', products=products, cart=cart)
@app.route('/add_to_cart', methods=['POST'])
def add_to_cart():
product_id = int(request.form.get('product_id'))
for p in products:
if p['id'] == product_id:
cart.append(p.copy())
break
return redirect(url_for('index'))
@app.route('/view_cart')
def view_cart():
return render_template('cart.html', cart=cart)
@app.route('/place_order', methods=['POST'])
def place_order():
try:
name = request.form.get('name')
address = request.form.get('address')
# Prepare the order event payload
order_event = {
"customer_name": name,
"delivery_address": address,
"products": cart,
"total_amount": sum(item["price"] for item in cart)
}
# Convert event to JSON string and produce to Kafka
event_string = json.dumps(order_event)
logger.info(f"Sending order event to Kafka: {event_string}")
producer.produce(
topic='cartevent',
value=event_string.encode('utf-8'),
callback=delivery_callback
)
# Ensure all messages are delivered before proceeding
producer.flush()
# Clear cart after successful placement
cart.clear()
return render_template('order.html', name=name)
except Exception as e:
logger.error(f"Failed to process order: {e}")
return render_template('error.html', error=str(e))
if __name__ == '__main__':
app.run(debug=True)
```
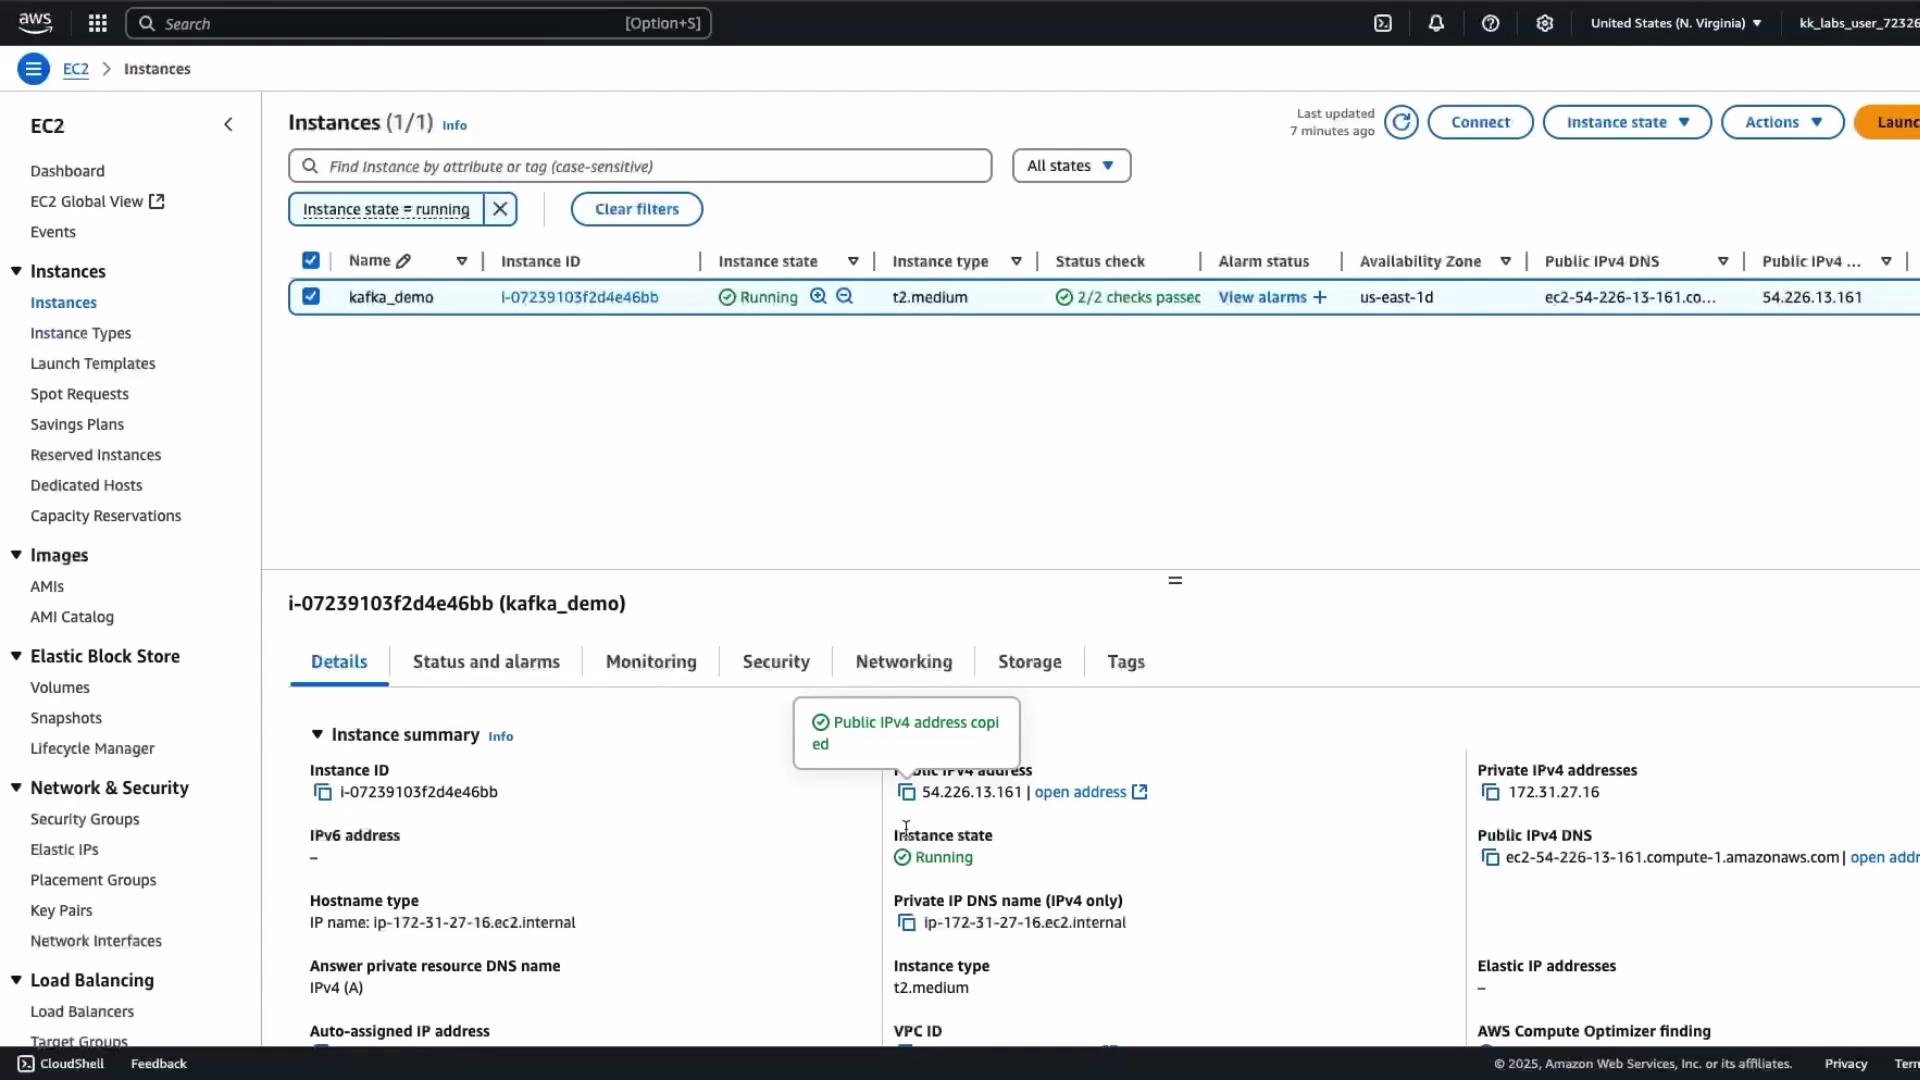
Be sure to replace `54.226.13.161:9092` in the `bootstrap.servers` configuration with the public IP of your Kafka [Amazon Elastic Compute Cloud (EC2)](https://learn.kodekloud.com/user/courses/amazon-elastic-compute-cloud-ec2) instance and the correct port. If broker is not reachable, the producer will fail to connect.
## Updating the bootstrap server
If your frontend cannot connect to Kafka, confirm the `bootstrap.servers` setting in `app.py` uses the EC2 instance's public IPv4 address and the Kafka listener port (default 9092). You can copy the public IP from the EC2 console and update the configuration accordingly.
 ## Running the frontend and placing an order
Start the Flask app:
```bash theme={null}
python3 app.py
```
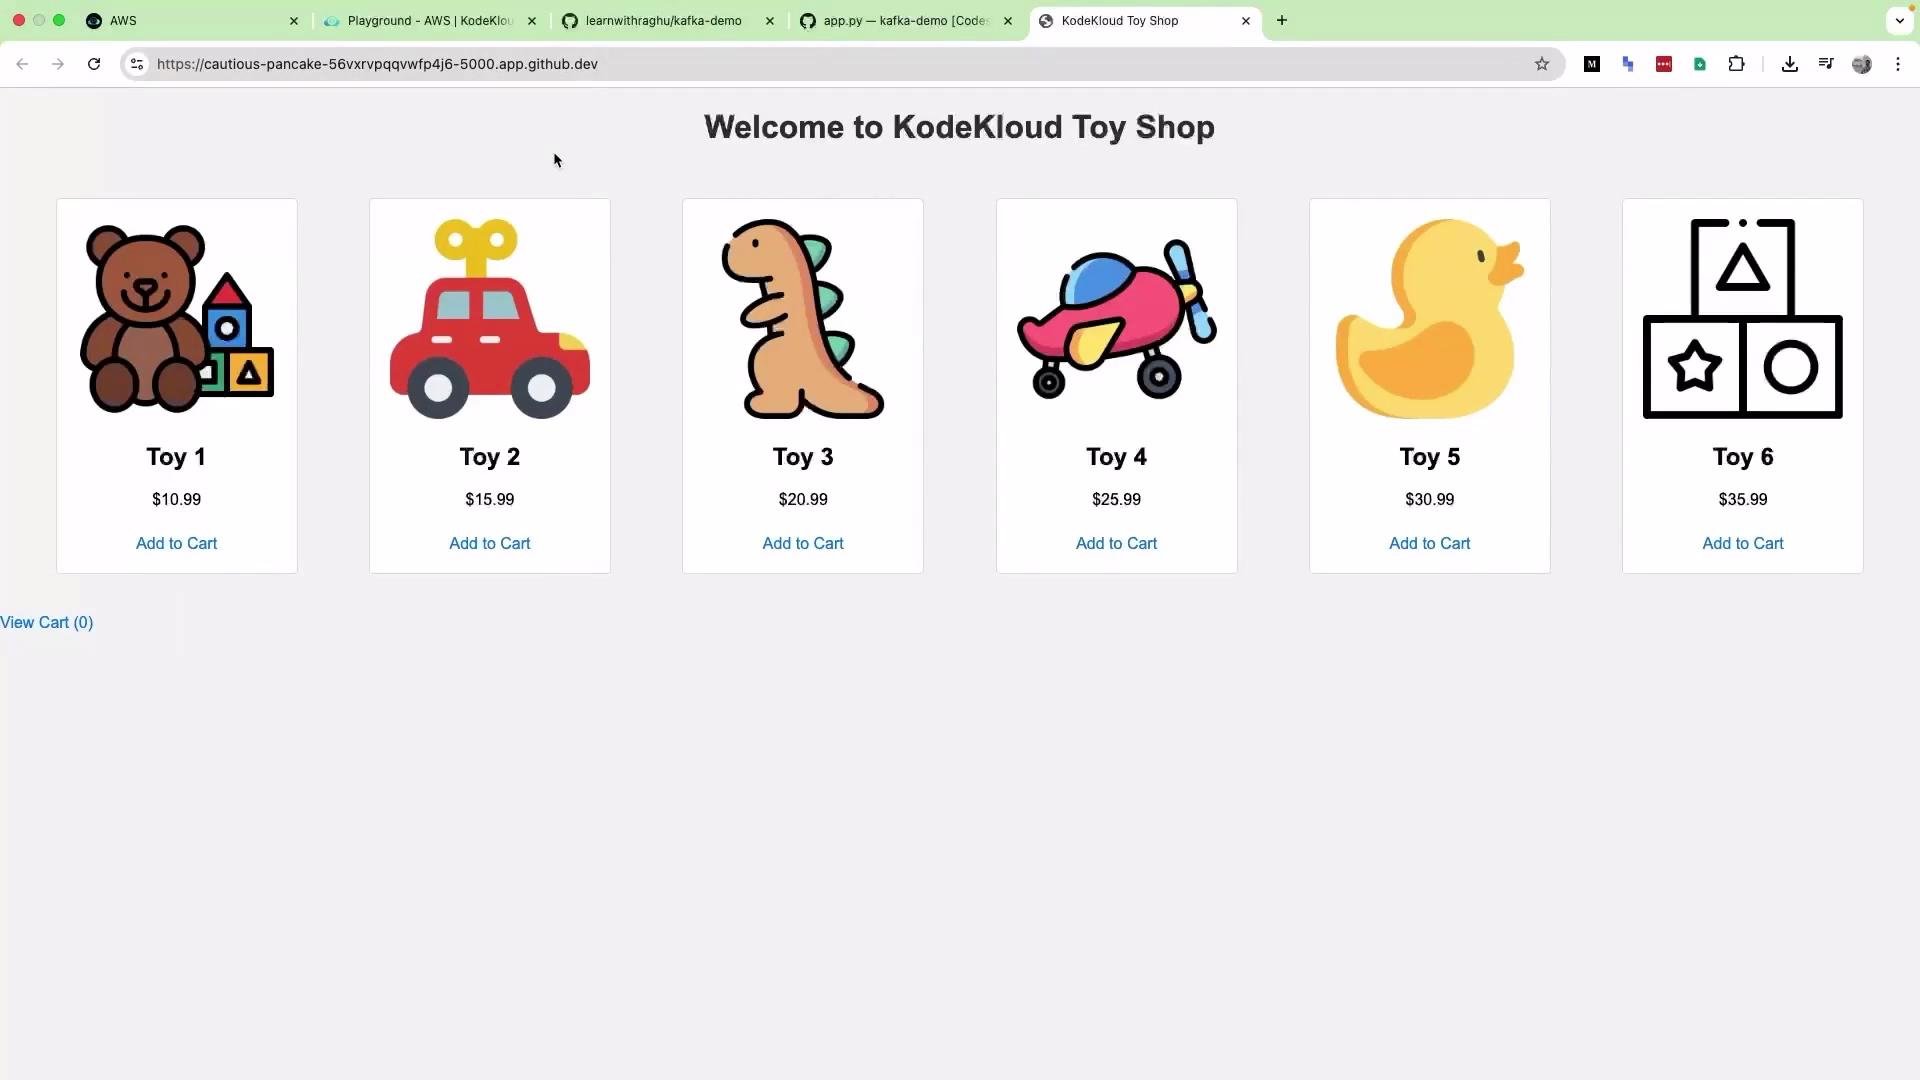
Open the Toy Shop in a browser ([http://localhost:5000](http://localhost:5000) if running locally). The UI shows a list of products. Add a couple of toys to the cart, view the cart, fill in name and address, and click Place Order. The app prepares an order object, serializes it to JSON, and produces it to the `cartevent` topic.
## Running the frontend and placing an order
Start the Flask app:
```bash theme={null}
python3 app.py
```
Open the Toy Shop in a browser ([http://localhost:5000](http://localhost:5000) if running locally). The UI shows a list of products. Add a couple of toys to the cart, view the cart, fill in name and address, and click Place Order. The app prepares an order object, serializes it to JSON, and produces it to the `cartevent` topic.
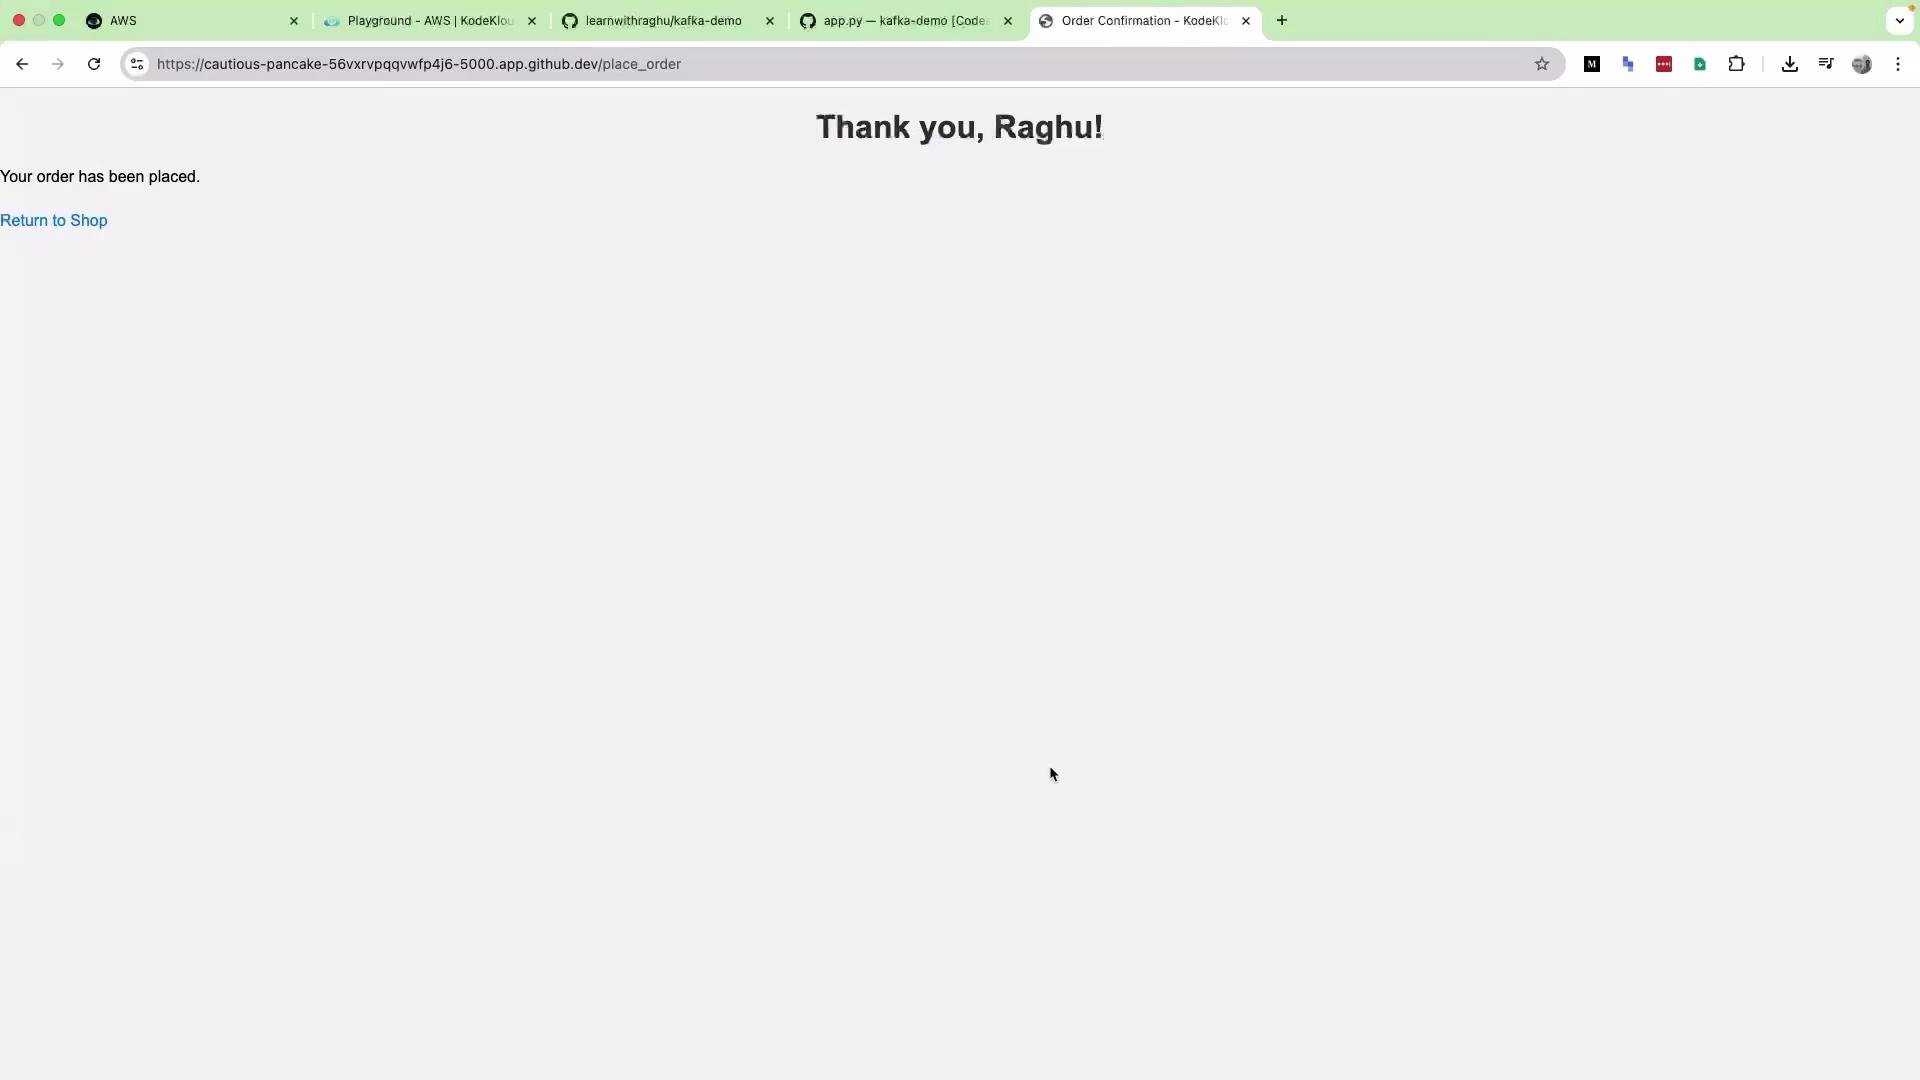
 After placing the order you should see a confirmation page:
 ## Checking the application logs
The Flask app logs HTTP requests as well as producer activity. If message delivery succeeds, the delivery callback logs the metadata (topic, partition, offset, timestamp). Example local logs:
```plaintext theme={null}
INFO:werkzeug:127.0.0.1 - - [03/May/2025 10:08:31] "GET / HTTP/1.1" 200 --
INFO:werkzeug:127.0.0.1 - - [03/May/2025 10:09:26] "POST /place_order HTTP/1.1" 200 --
INFO:root:Sending order event to Kafka: {"customer_name": "Raghu", "delivery_address": "Delhi", "products": [...], "total_amount": 26.98}
INFO:root:Message delivered to cartevent [0] at offset 12
```
## Consuming messages on the Kafka broker
On the Kafka EC2 instance you can create the `cartevent` topic (if not already created) and consume messages to verify they were produced by the frontend.
```sh theme={null}
# Create topic (run on the Kafka server)
bin/kafka-topics.sh --create --topic cartevent --bootstrap-server 54.226.13.161:9092 --partitions 3 --replication-factor 1
# Consume messages from the beginning
bin/kafka-console-consumer.sh --bootstrap-server 54.226.13.161:9092 --topic cartevent --from-beginning
```
Example consumer output showing two orders placed from the frontend:
```plaintext theme={null}
{"customer_name": "Raghu", "delivery_address": "Delhi", "products":[{"id": 1, "name": "Toy 1", "price": 10.99, "image": "toy1.jpg"}, {"id": 2, "name": "Toy 2", "price": 15.99, "image": "toy2.jpg"}], "total_amount": 26.98}
{"customer_name": "Bob", "delivery_address": "Paris", "products": [{"id": 6, "name": "Toy 6", "price": 35.99, "image": "toy6.jpg"}], "total_amount": 35.99}
```
## Next steps
With the Toy Shop producing order events to the `cartevent` topic, a logical next step is to implement the Warehouse UI (an internal consumer dashboard). That dashboard can consume `cartevent` messages and present orders to warehouse staff for picking, packing, and shipping.
## Links and references
* [Kafka Documentation](https://kafka.apache.org/documentation/)
* [Confluent Python Client (confluent-kafka)](https://github.com/confluentinc/confluent-kafka-python)
* [Amazon EC2 Documentation](https://docs.aws.amazon.com/ec2/index.html)
## Checking the application logs
The Flask app logs HTTP requests as well as producer activity. If message delivery succeeds, the delivery callback logs the metadata (topic, partition, offset, timestamp). Example local logs:
```plaintext theme={null}
INFO:werkzeug:127.0.0.1 - - [03/May/2025 10:08:31] "GET / HTTP/1.1" 200 --
INFO:werkzeug:127.0.0.1 - - [03/May/2025 10:09:26] "POST /place_order HTTP/1.1" 200 --
INFO:root:Sending order event to Kafka: {"customer_name": "Raghu", "delivery_address": "Delhi", "products": [...], "total_amount": 26.98}
INFO:root:Message delivered to cartevent [0] at offset 12
```
## Consuming messages on the Kafka broker
On the Kafka EC2 instance you can create the `cartevent` topic (if not already created) and consume messages to verify they were produced by the frontend.
```sh theme={null}
# Create topic (run on the Kafka server)
bin/kafka-topics.sh --create --topic cartevent --bootstrap-server 54.226.13.161:9092 --partitions 3 --replication-factor 1
# Consume messages from the beginning
bin/kafka-console-consumer.sh --bootstrap-server 54.226.13.161:9092 --topic cartevent --from-beginning
```
Example consumer output showing two orders placed from the frontend:
```plaintext theme={null}
{"customer_name": "Raghu", "delivery_address": "Delhi", "products":[{"id": 1, "name": "Toy 1", "price": 10.99, "image": "toy1.jpg"}, {"id": 2, "name": "Toy 2", "price": 15.99, "image": "toy2.jpg"}], "total_amount": 26.98}
{"customer_name": "Bob", "delivery_address": "Paris", "products": [{"id": 6, "name": "Toy 6", "price": 35.99, "image": "toy6.jpg"}], "total_amount": 35.99}
```
## Next steps
With the Toy Shop producing order events to the `cartevent` topic, a logical next step is to implement the Warehouse UI (an internal consumer dashboard). That dashboard can consume `cartevent` messages and present orders to warehouse staff for picking, packing, and shipping.
## Links and references
* [Kafka Documentation](https://kafka.apache.org/documentation/)
* [Confluent Python Client (confluent-kafka)](https://github.com/confluentinc/confluent-kafka-python)
* [Amazon EC2 Documentation](https://docs.aws.amazon.com/ec2/index.html)