Step 1: Setting Up the Flask Application
Begin by launching your VS Code editor and opening a new terminal. Also, open a separate terminal window to start the BentoML service, which must be running to serve predictions. Create a file namedflaskapp.py and include the following code. This code establishes an endpoint that receives a POST request containing a Base64-encoded CSV file. The CSV content is decoded and converted into a DataFrame. Should the DataFrame include a claim_id column, it is temporarily separated from the rest of the data. The remaining data is then sent as JSON to the BentoML predict endpoint. Upon receiving the prediction results, they are merged back with the original DataFrame, and the results are rendered through an HTML template.
Note: Ensure that both Flask and BentoML are installed in your Python environment to avoid import errors.
Step 2: Creating HTML Templates
To provide a straightforward user interface, create a folder namedtemplates in your project directory. Inside this folder, establish the following HTML templates:
1. index.html
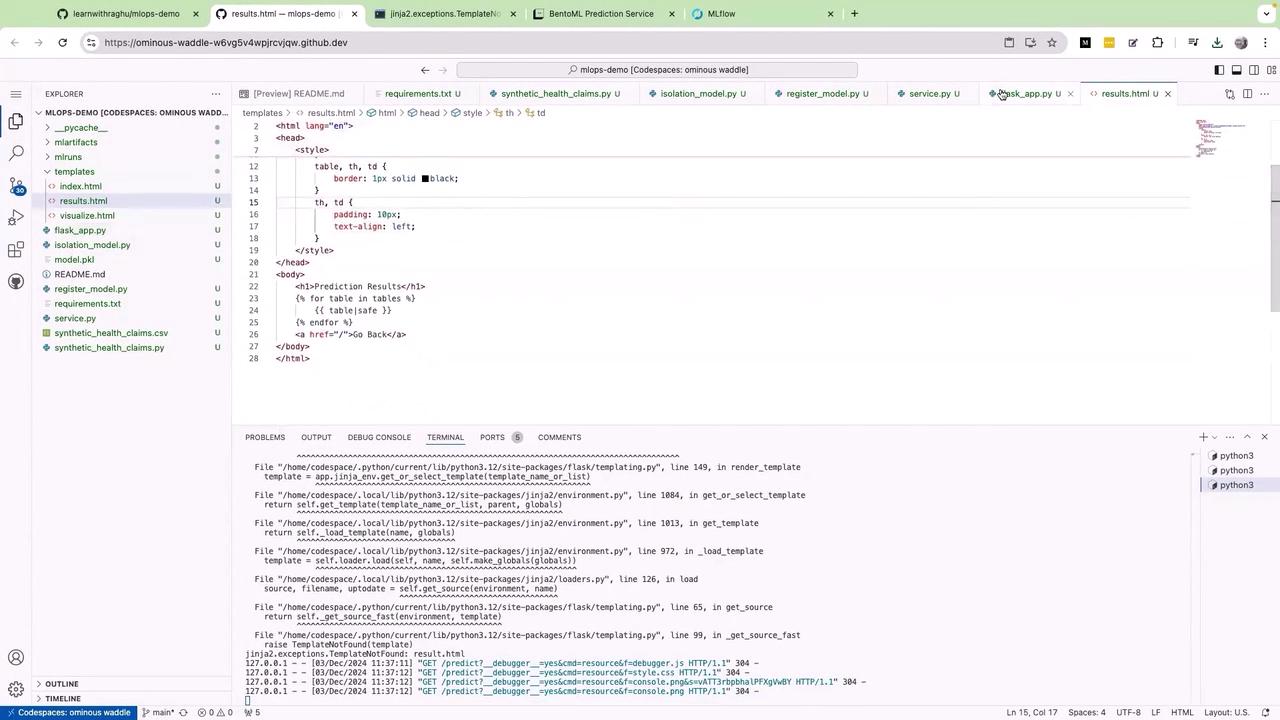
This template displays the file upload interface for users. (Customize this file according to your design preferences.)2. results.html
Theresults.html file displays prediction results formatted in a table. Below is an example template with basic table styling:
3. Additional HTML for File Upload Handling
Below is a minimal HTML snippet that includes client-side logic for handling CSV file uploads. You can either incorporate this snippet within yourindex.html or save it as a separate file (for example, visualize.html):
Step 3: Running the Flask Application
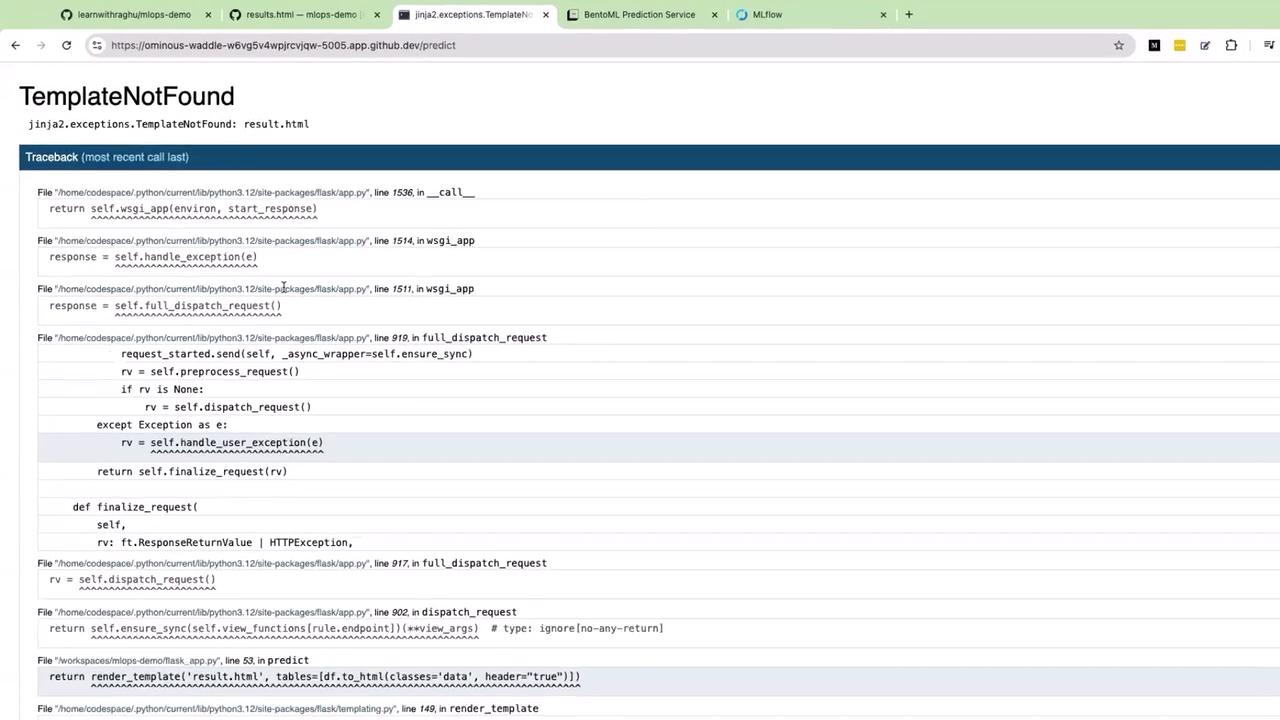
After saving all your files, run your Flask application with the following command in your terminal:Step 4: Debugging Template Errors
If you encounter aTemplateNotFound error for result.html when uploading a CSV file, it indicates that Flask is attempting to render a template with an incorrect name. Verify that your template filenames are consistent with those being referenced in your Flask code. The correct file name should be results.html (plural), not result.html.
Step 5: Testing the BentoML Integration
After resolving any template errors, refresh your page and drag-and-drop a CSV file containing claim data into the upload area. The application will then invoke the BentoML predict endpoint, and the ML model will process the claim data to return predictions. For example, a prediction value of -1 may indicate that a claim requires further investigation, whereas a value of +1 suggests that the claim can be automatically approved. The prediction results are then rendered into a table displaying essential claim details, such as claim ID, amount, number of services, patient age, provider ID, days since the last claim, and the corresponding prediction value.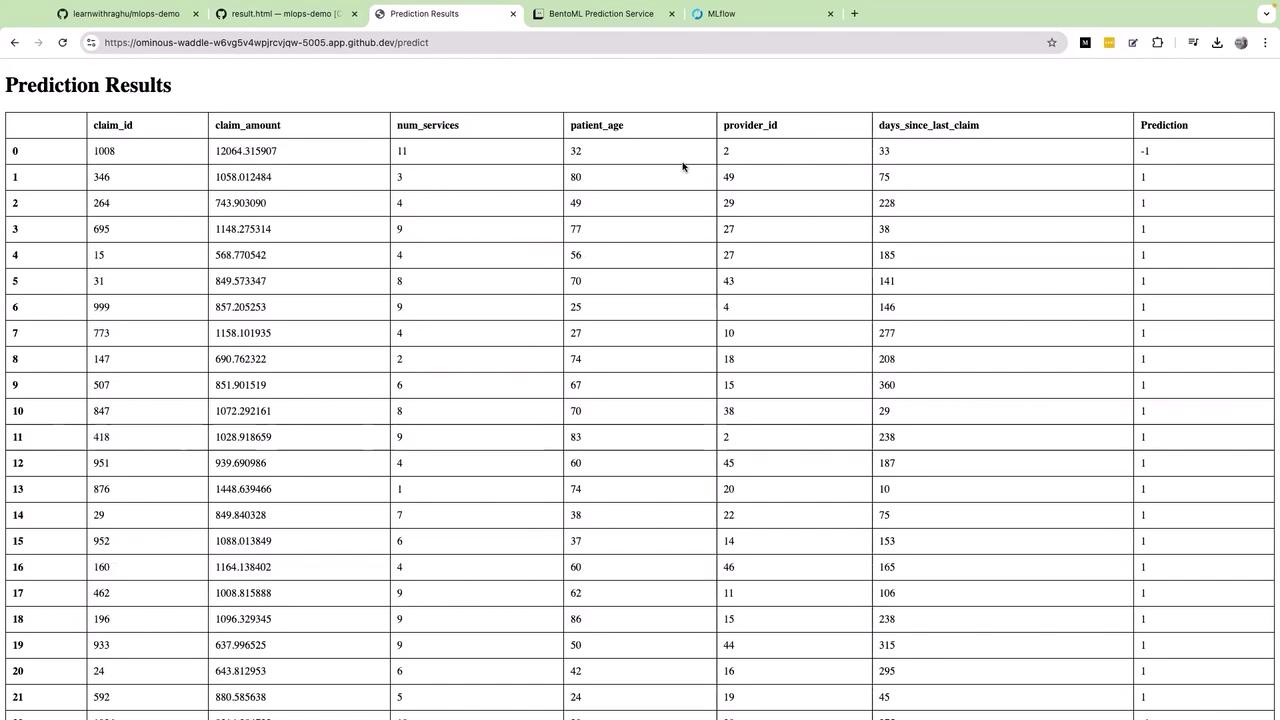
Step 6: Architectural Overview
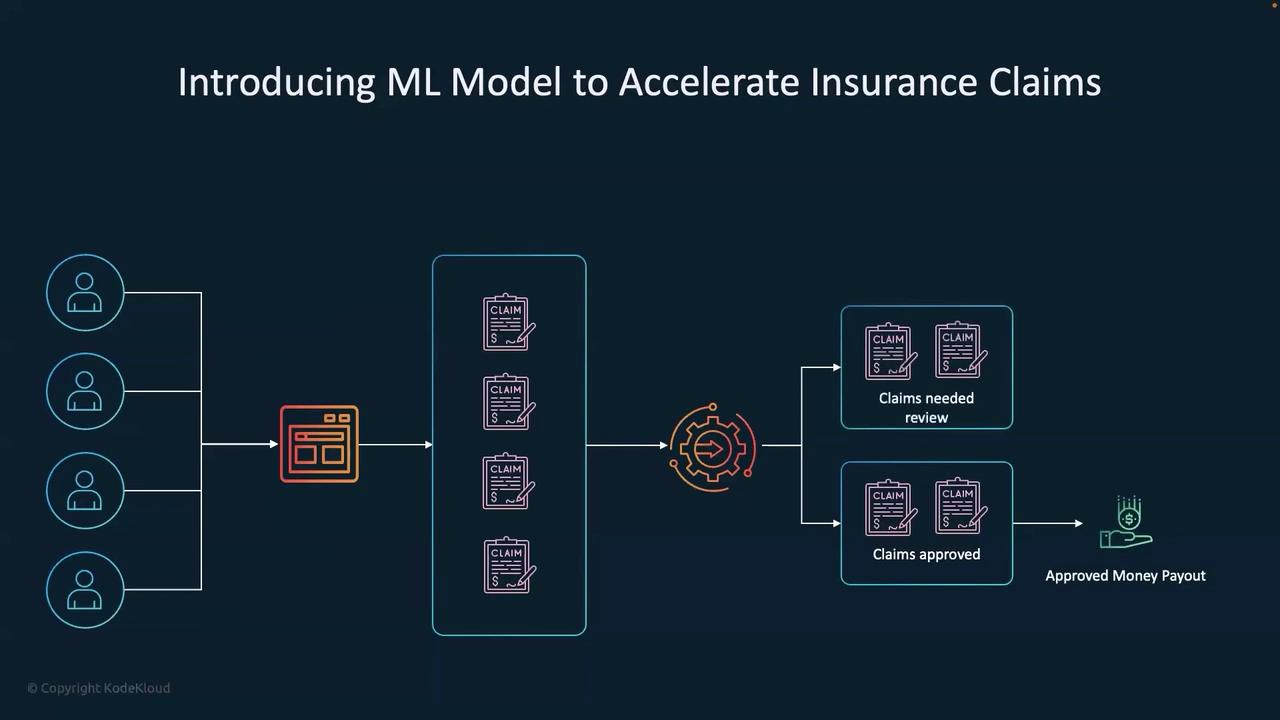
To summarize the entire workflow, consider the following steps:- Users submit claims through a dedicated portal.
- The uploaded CSV file containing claim data is processed by the Flask app.
- The processed data is sent as JSON to the BentoML predict endpoint.
- The ML model hosted with BentoML analyzes the data and returns predictions.
- Claims with a prediction of -1 are flagged for review, while those with +1 are automatically approved.
- A Data Lake containing historical claim data supports the ML model training process, further enhancing prediction accuracy.
Conclusion
This end-to-end project demonstrates how to modernize the insurance claims process using an ML model served via BentoML, seamlessly integrated with a Flask-based user interface. By automating the detection of problematic claims and streamlining automatic approvals, this solution empowers insurance agents to focus on claims that genuinely require attention. That concludes this lesson. See you in the next tutorial—thank you for joining us!Note: For additional details on Flask, BentoML, and integrating machine learning with web applications, visit the Flask Documentation and BentoML Docs.