> ## Documentation Index
> Fetch the complete documentation index at: https://notes.kodekloud.com/llms.txt
> Use this file to discover all available pages before exploring further.
# Demo Database demo
> This article covers launching and managing a cloud database using Google Cloud Platform, including setting up a Cloud SQL instance and connecting to it.
Hello and welcome back to this demo lesson on launching and managing a cloud database using Google Cloud Platform (GCP). In this session, we will set up a Cloud SQL instance, connect to it using Cloud Shell, and explore essential configuration options.
## Cloud Database Architecture
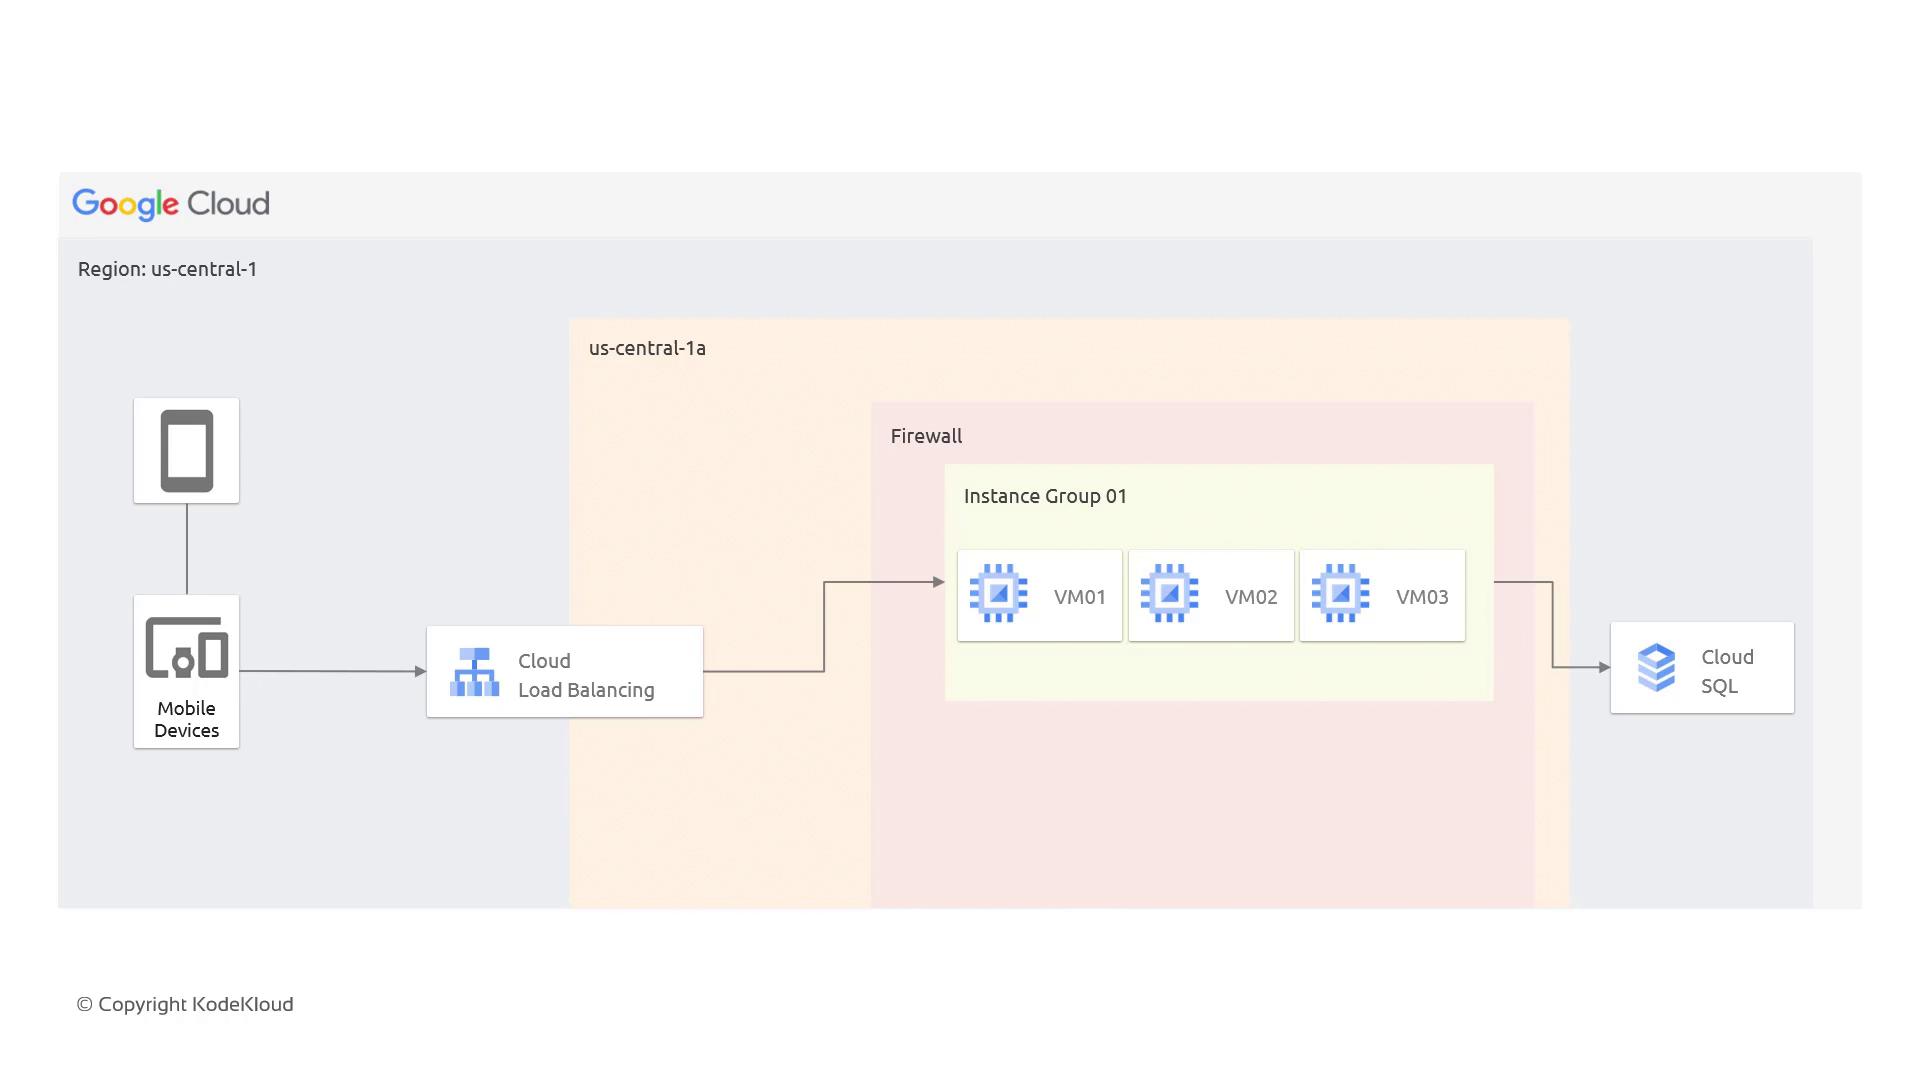
The architecture for this demo is straightforward: users access a URL on their smartphones or laptops, which routes through a cloud load balancer to an instance group. This group then connects to Cloud SQL for database services.
Below is a diagram illustrating the typical Google Cloud architecture:
## Creating a Cloud SQL Instance
In this section, you'll learn how to spin up a Cloud SQL instance and configure it for your needs.
In production environments, always secure your database with a strong password.
Follow these steps:
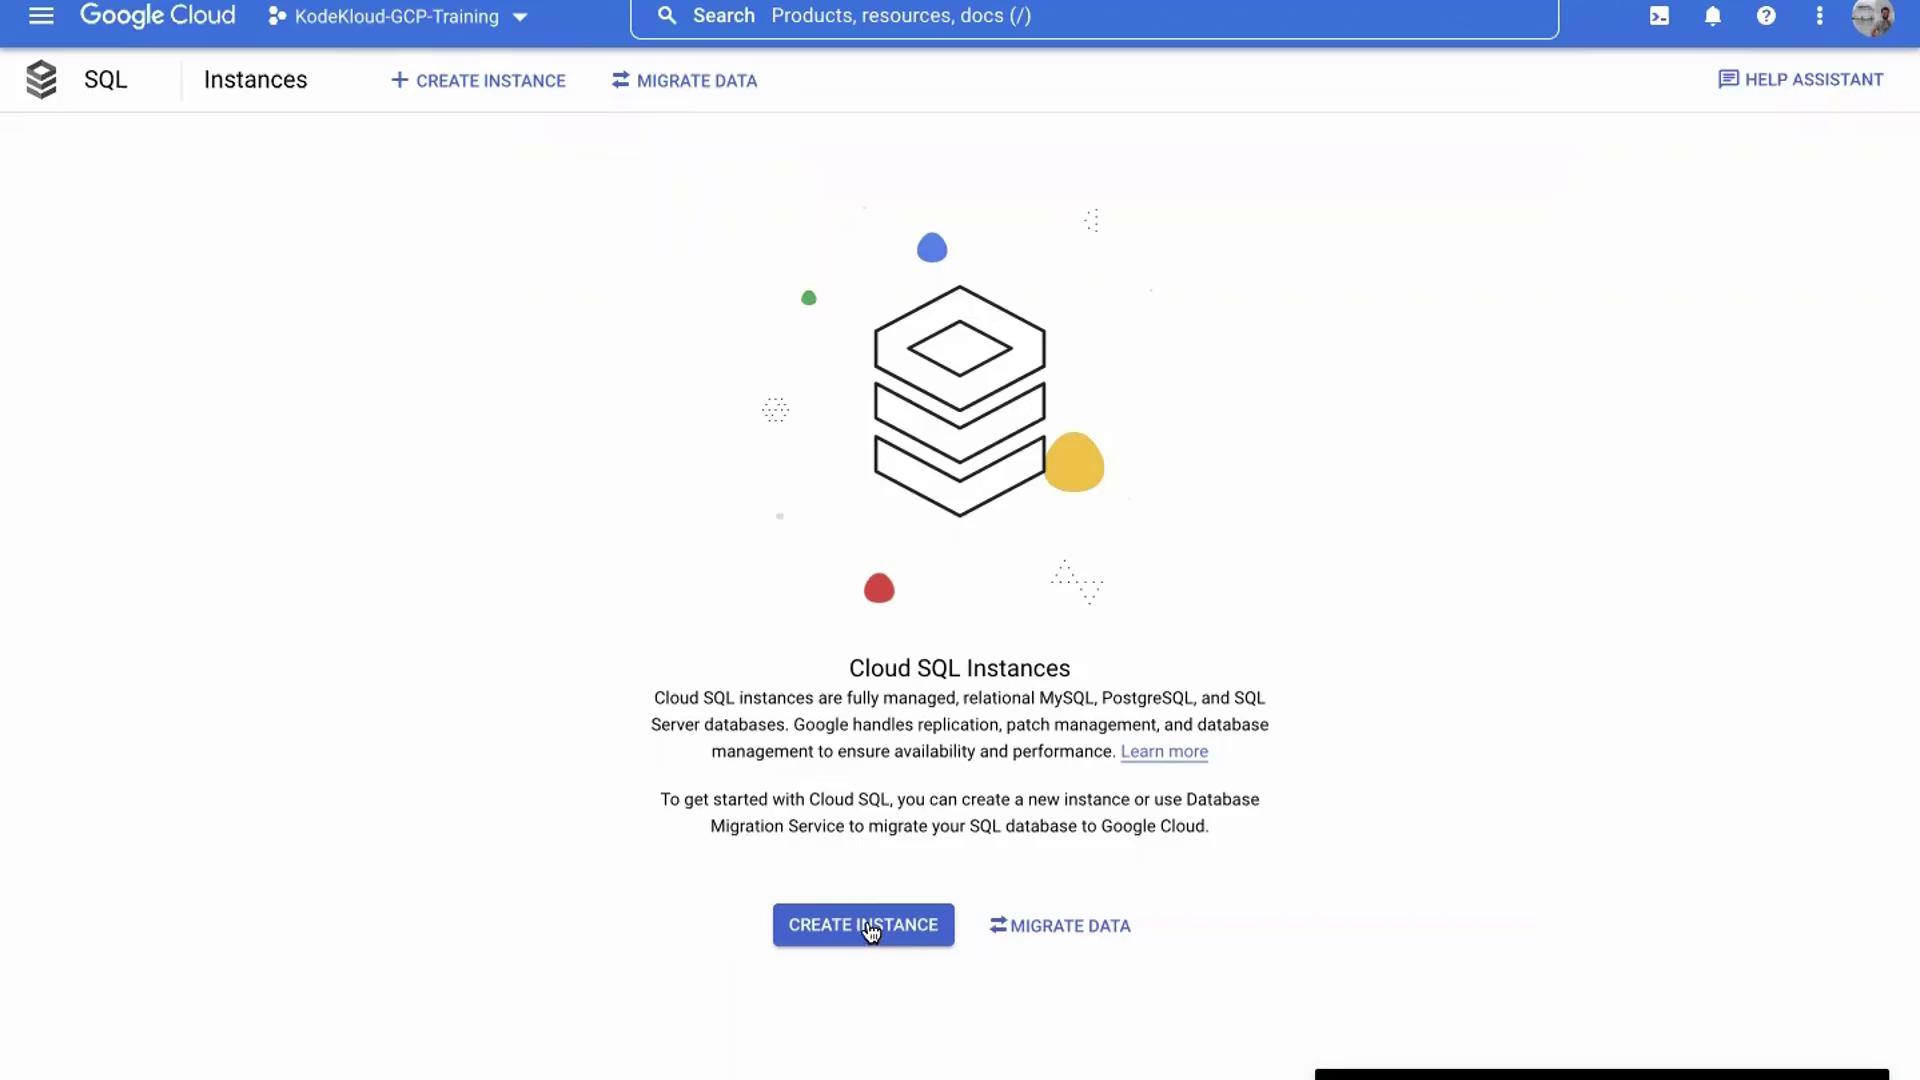
1. **Access the GCP Console:** Start by logging into your GCP account and navigating to the Cloud SQL page.
2. **Create Instance:** Click on **Create Instance**.
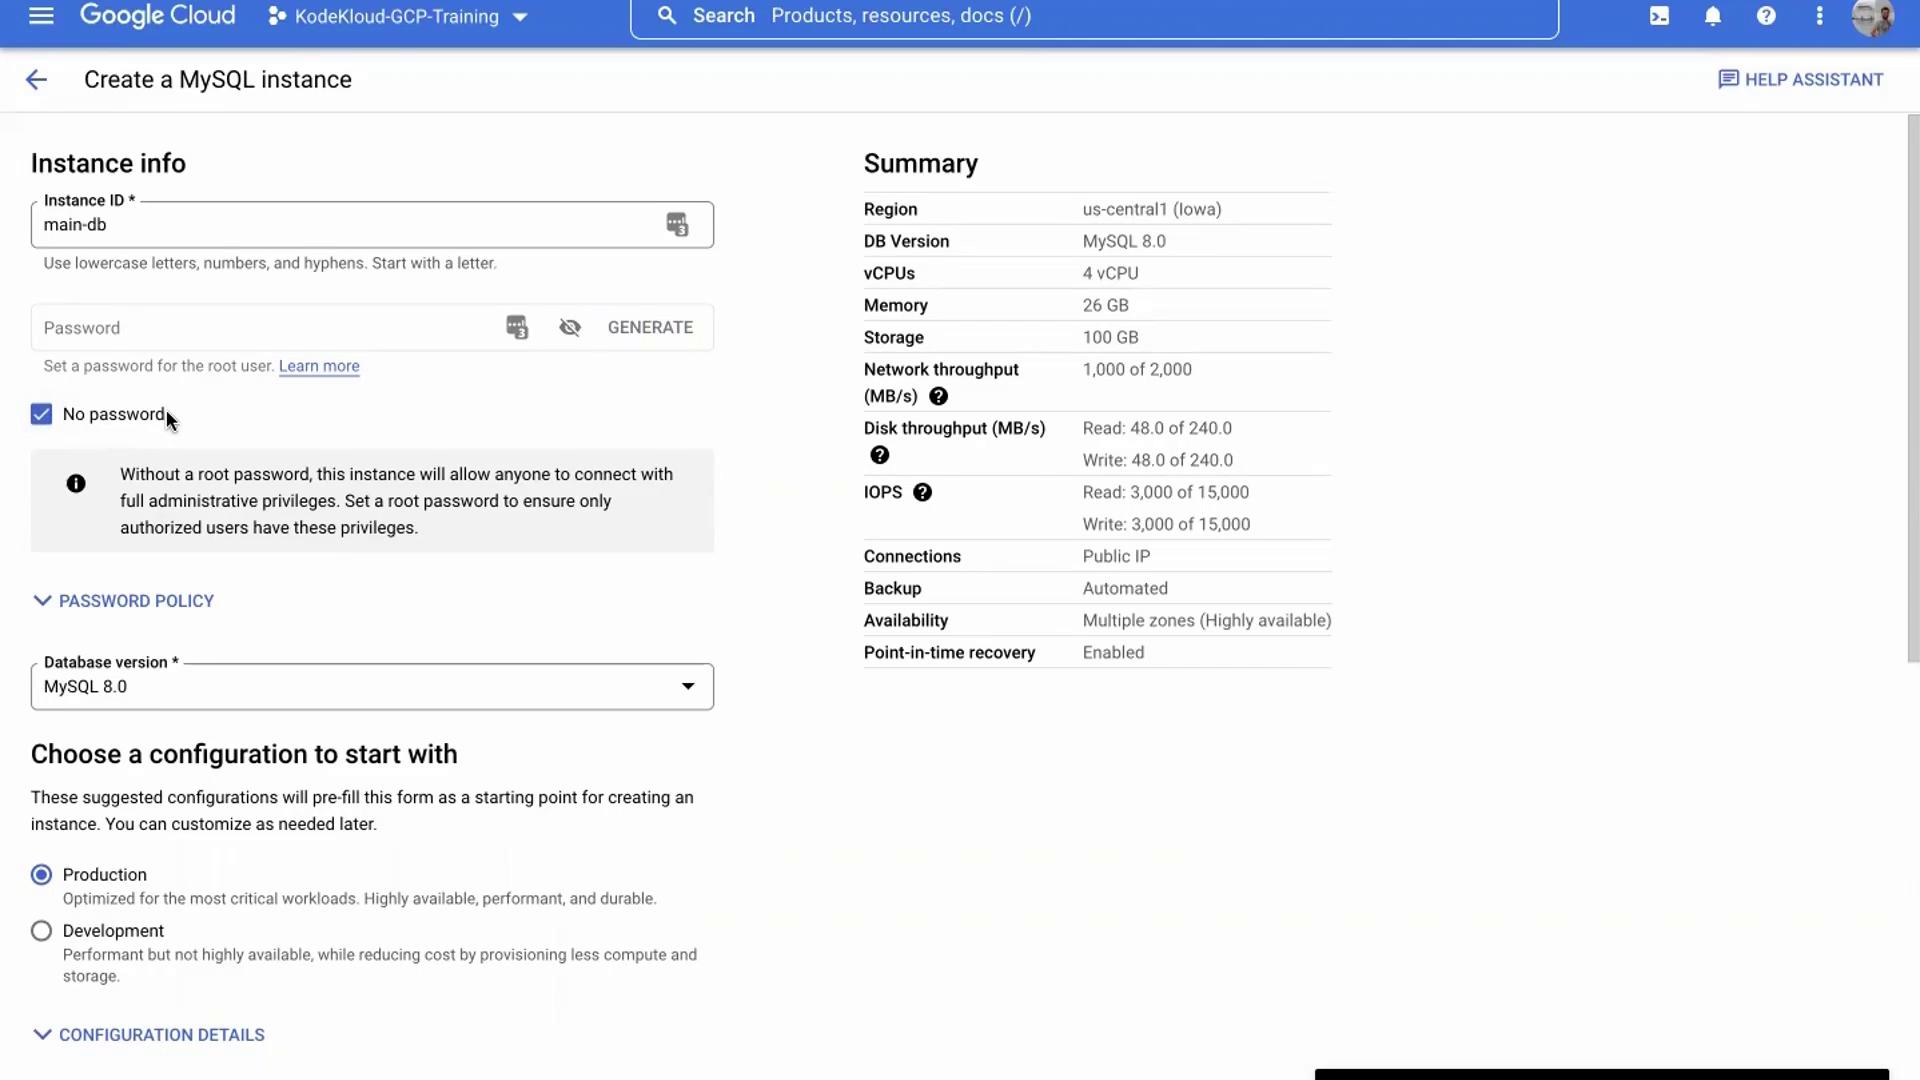
3. **Select MySQL:** From the three options provided, choose **MySQL**. Name your instance "main-db". For this demo, the instance is set up without a password. (For production, always use password protection.)
4. **Configure Instance Settings:** Choose your desired MySQL version. Additional configurations include:
* **Automated Backups:** GCP automatically backs up your database.
* **High Availability:** The database is spread across multiple zones to minimize downtime.
* **Point-in-Time Recovery:** Enables quick recovery from failures.
5. **Choose Environment:** Optionally, select whether the database is for development or production. Leave the region at its default value for this demo.
6. **Create Instance:** Once you have verified your settings, click on **Create Instance**. The process usually takes about 6 to 7 minutes.
After the instance is created, click on it to open the dashboard, where you can monitor CPU utilization, active connections, and other key metrics.

## Connecting to the Cloud SQL Instance
To interact with your MySQL database, use Cloud Shell available directly in the GCP console.
1. **Launch Cloud Shell:** Click on **Open Cloud Shell**.
2. **Connect to the Database:** Run the following command to initiate the connection:
```bash theme={null}
gcloud sql connect main-db --user=root --quiet
```
3. **Enable Cloud SQL Admin API:** If the connection fails because the Cloud SQL Admin API isn’t enabled, a URL will be provided. Copy and open this URL in a new browser tab to enable the API. This process may take one to two minutes.
4. **Reconnect:** After enabling the API, execute the command again:
```bash theme={null}
gcloud sql connect main-db --user=root --quiet
```
5. **MySQL Session:** No password was set during creation, so simply press Enter when prompted. Within the MySQL session, you can run commands like:
```mysql theme={null}
SHOW DATABASES;
```
6. **Exit MySQL:** To exit the session, type:
```mysql theme={null}
quit
```
In production applications, credentials should be securely stored and used rather than connecting manually through Cloud Shell.
## Disabling Delete Protection and Deleting the Instance
When you're ready to clean up, you will disable delete protection before deleting the instance.
1. **Edit the Instance:** Click on the **Edit** button for your database.
2. **Disable Delete Protection:** Locate the delete protection option and disable it, then save your changes.
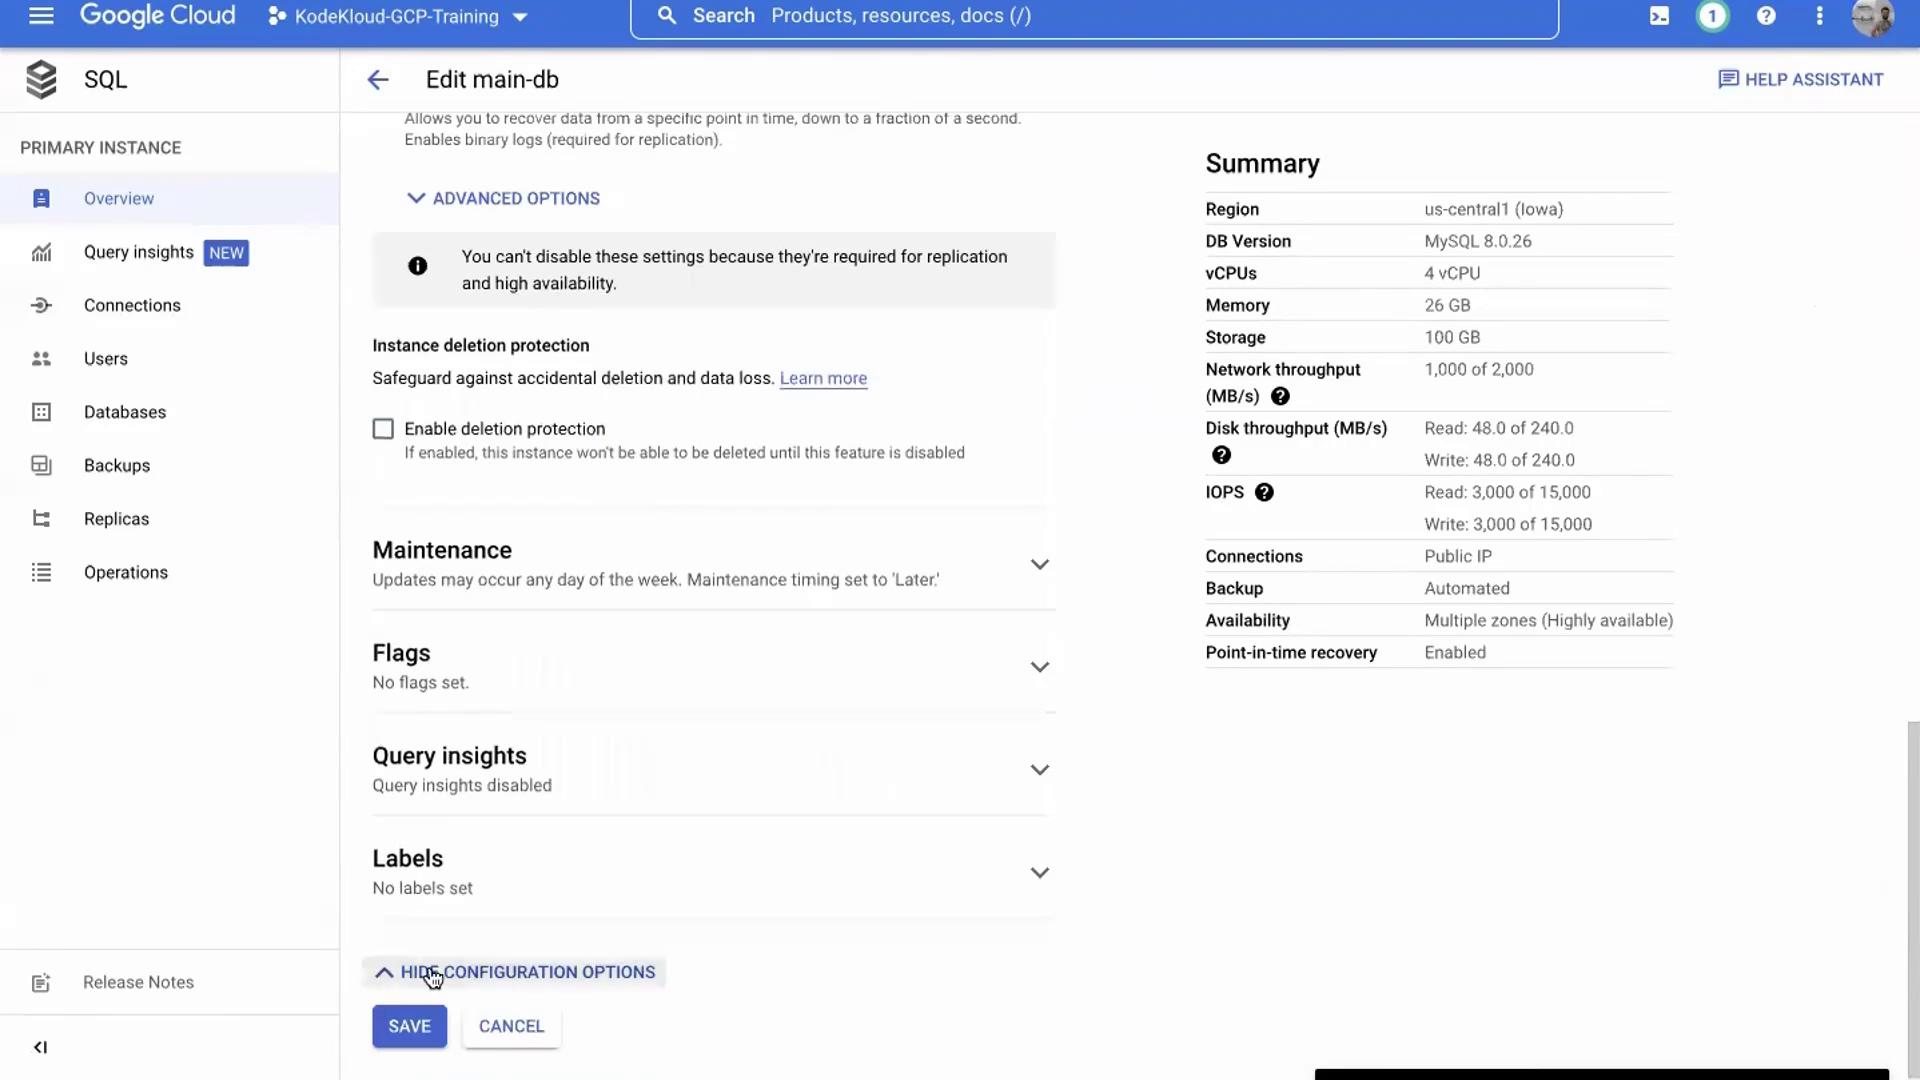
3. **Review Maintenance Settings (Optional):** You may review and adjust maintenance windows by scrolling to the maintenance section. Configure a preferred maintenance window (e.g., Sunday) and set its duration.
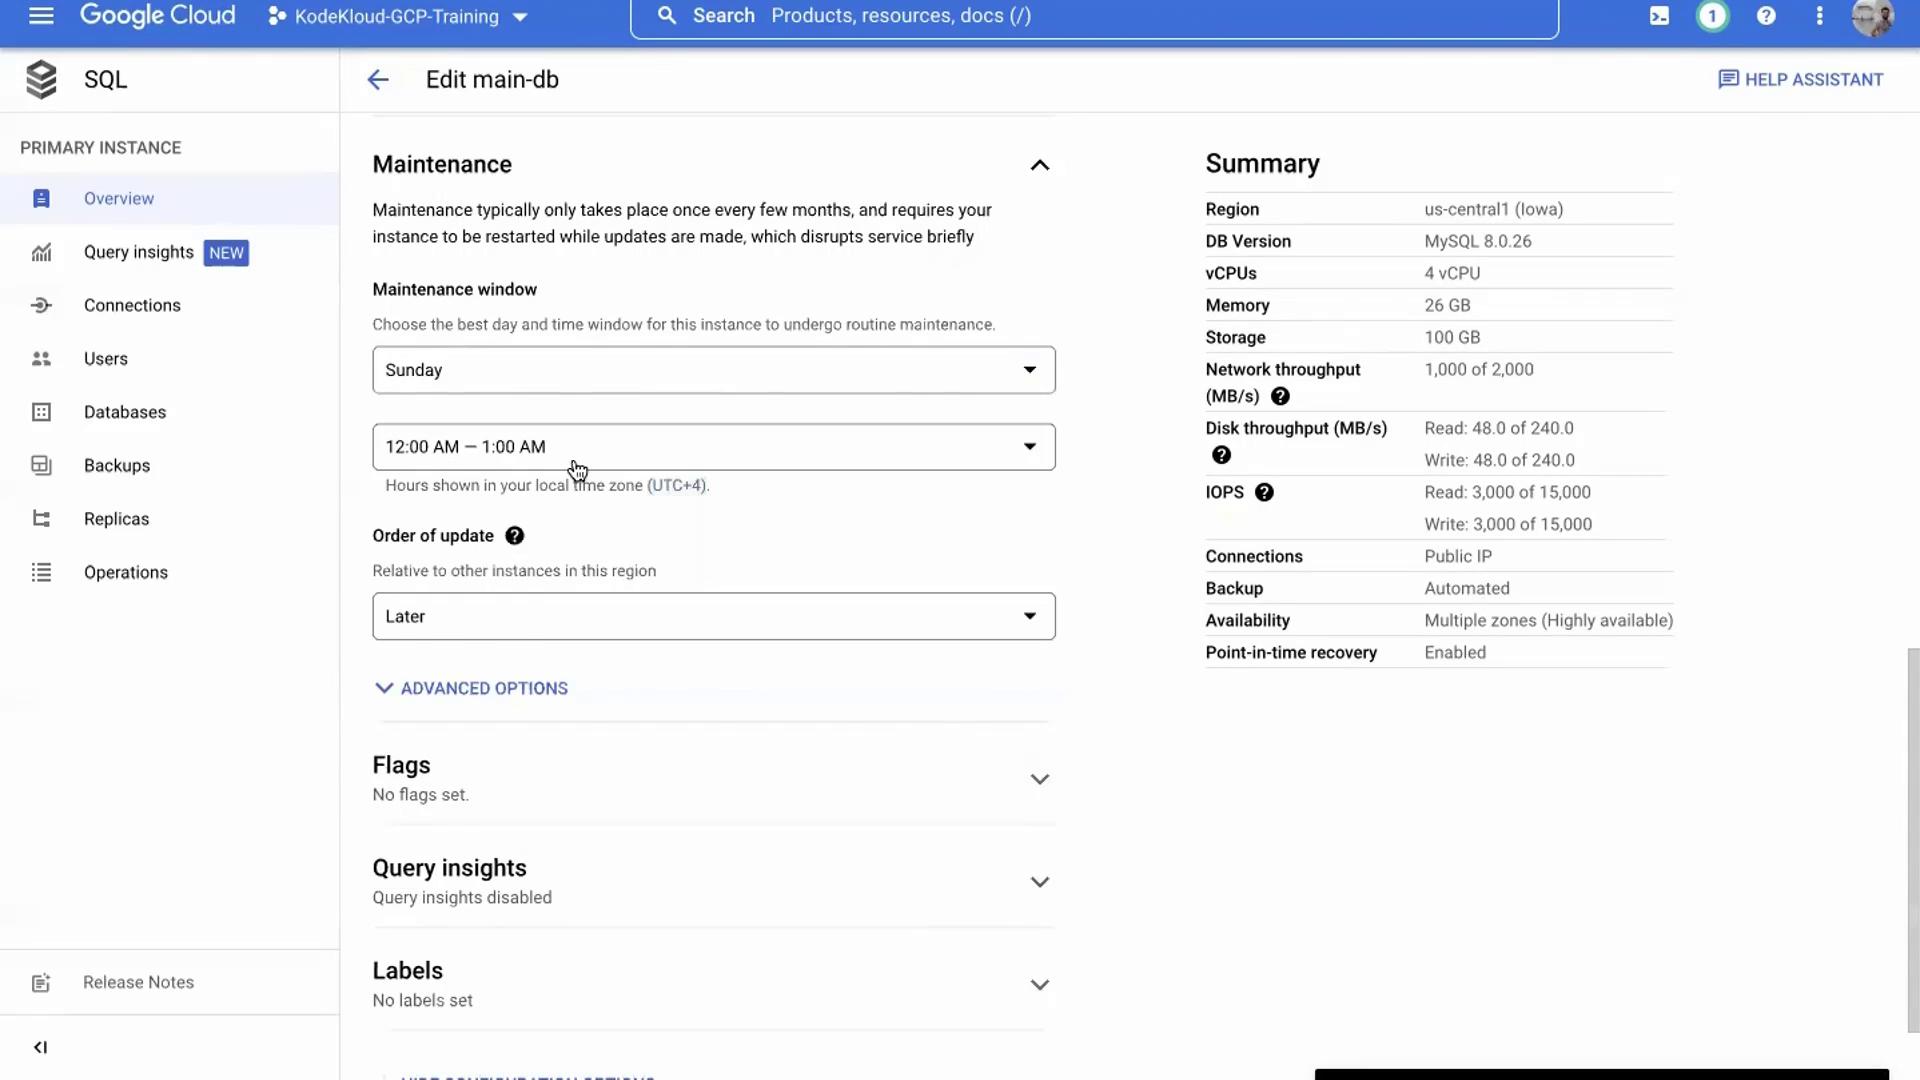
4. **Delete the Instance:** Return to the main database page, click **Delete**, confirm the database name, and proceed. Deletion typically takes about two to three minutes.
## Summary
In this lesson, you learned how to:
* Spin up a Cloud SQL database on Google Cloud Platform.
* Connect to the database using Cloud Shell.
* Configure key features such as automated backups, high availability, and maintenance windows.
* Disable delete protection and safely delete the database instance.
Thank you for following along with this demo lesson on managing cloud databases with GCP. For further reading, check out the [Kubernetes Documentation](https://kubernetes.io/docs/) and [Docker Hub](https://hub.docker.com/).