> ## Documentation Index
> Fetch the complete documentation index at: https://notes.kodekloud.com/llms.txt
> Use this file to discover all available pages before exploring further.

# Creating GKE cluster

> This guide explains how to create a Google Kubernetes Engine cluster on Google Cloud Platform, covering API activation, cluster types, configuration, and inspection.

In this guide, we’ll walk through creating your first Google Kubernetes Engine (GKE) cluster on Google Cloud Platform (GCP). You’ll learn how to enable the Kubernetes Engine API, compare Autopilot and Standard modes, configure node pools, networking, security, and inspect your new cluster.

## 1. Enable the Kubernetes Engine API

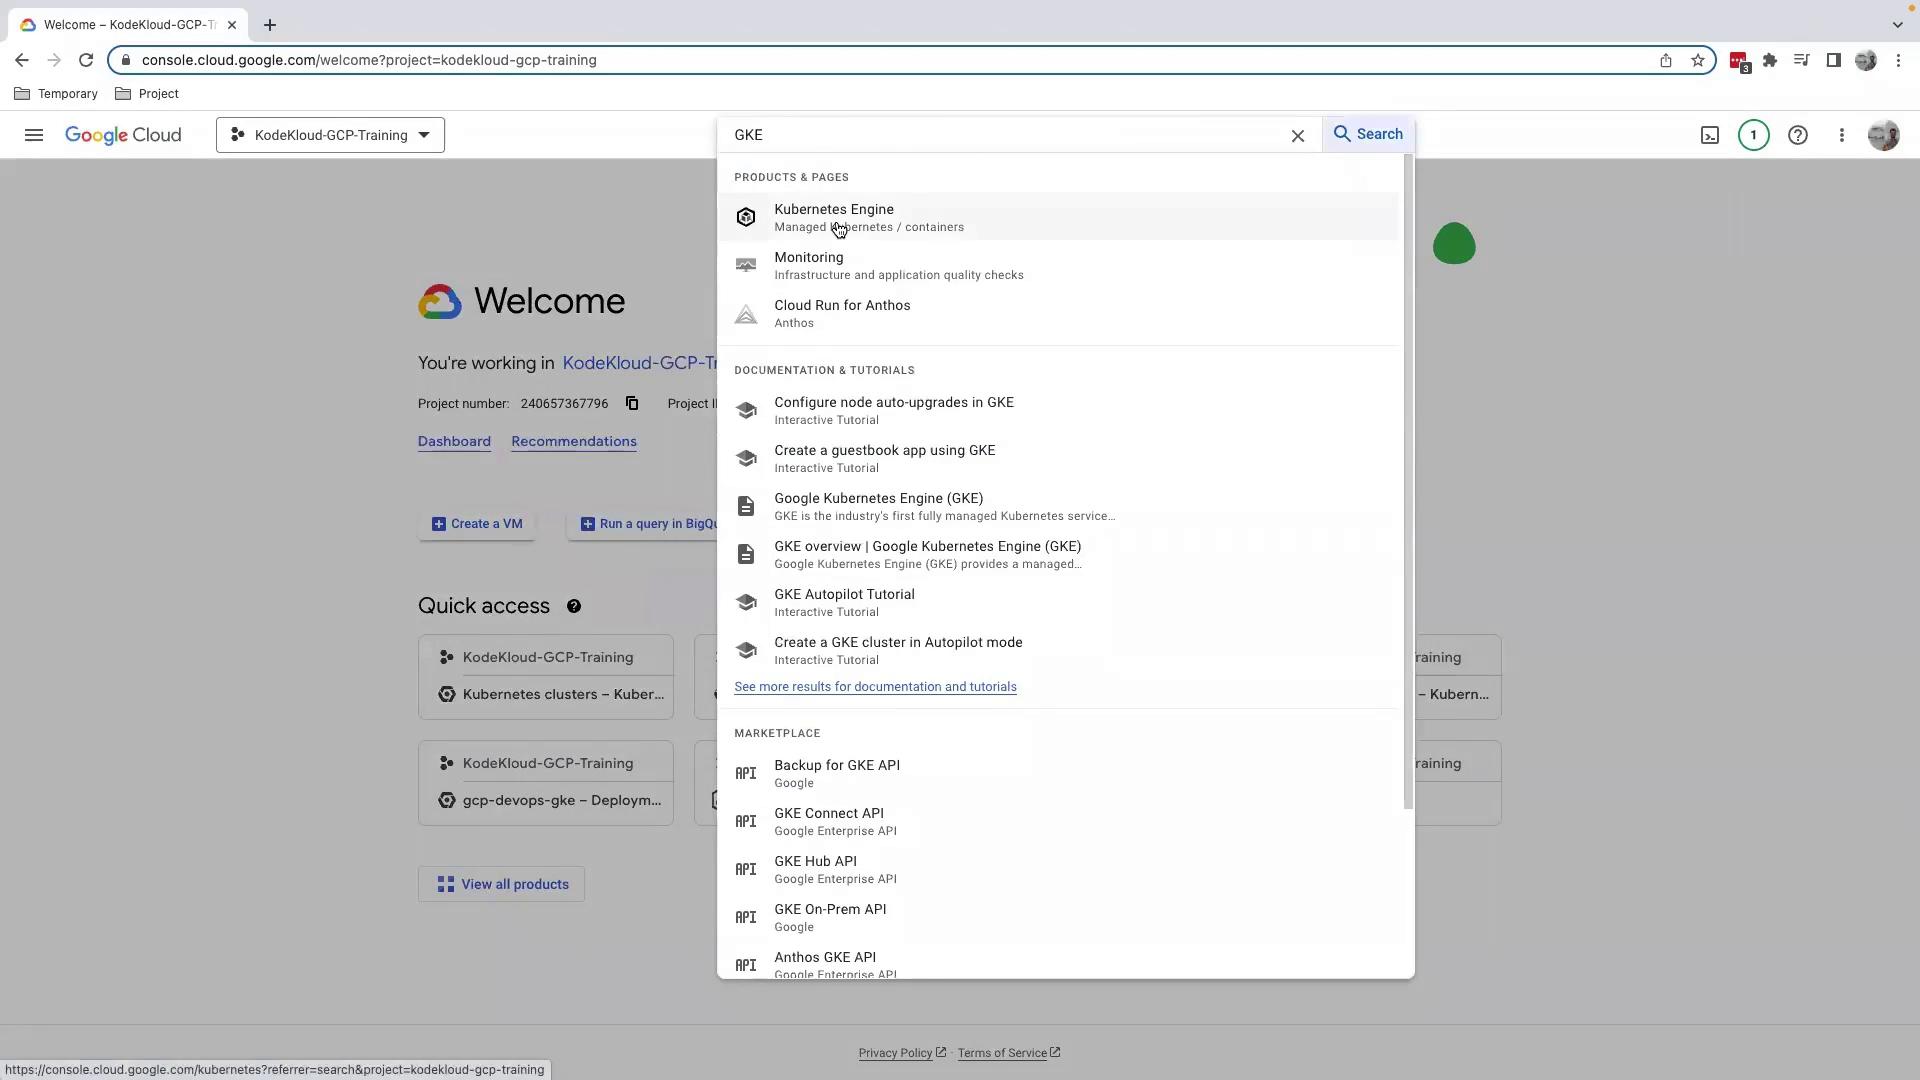
1. Sign in to the GCP Console and search for **GKE**, then click **Kubernetes Engine**.
<Frame>
  ![The image shows the Google Cloud Platform console with a search for "GKE" displaying results related to Kubernetes Engine, including products, documentation, tutorials, and marketplace APIs.](https://kodekloud.com/kk-media/image/upload/v1752875422/notes-assets/images/GCP-DevOps-Project-Creating-GKE-cluster/google-cloud-platform-gke-search-results.jpg)
</Frame>

<Callout icon="lightbulb" color="#1CB2FE">
  If you’re on a managed learning environment (e.g., [KodeKloud](https://www.kodekloud.com)), the Kubernetes Engine API is often pre-enabled.
</Callout>

2. If prompted, click **Enable** to activate the Kubernetes Engine API.

<Frame>
  ![The image shows the Google Cloud Platform interface for the Kubernetes Engine API, with options to enable or try the API and details about its features and terms of service.](https://kodekloud.com/kk-media/image/upload/v1752875424/notes-assets/images/GCP-DevOps-Project-Creating-GKE-cluster/google-cloud-kubernetes-engine-api-interface.jpg)
</Frame>

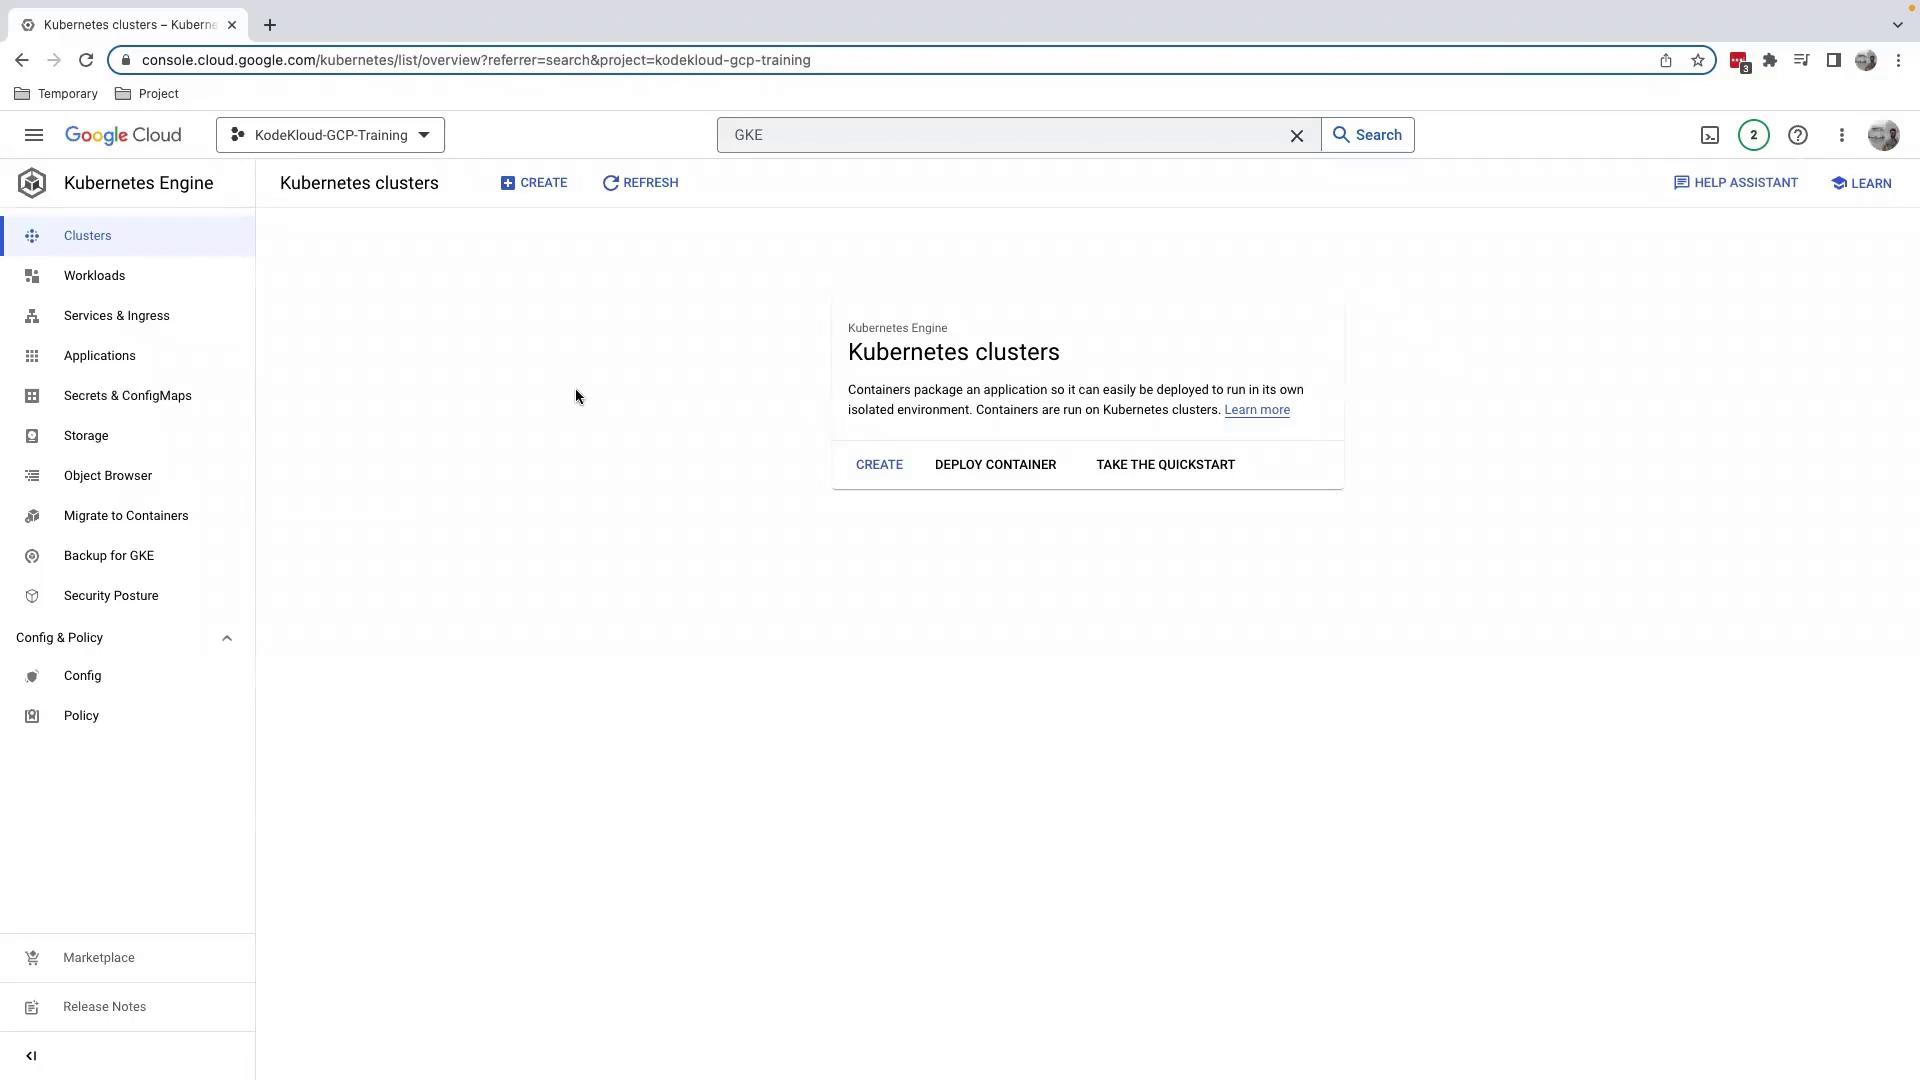
3. After enabling, you’ll be redirected to the **Kubernetes clusters** dashboard.
<Frame>
  ![The image shows the Google Cloud Console interface for Kubernetes Engine, specifically the Kubernetes clusters section, with options to create, deploy a container, or take a quickstart.](https://kodekloud.com/kk-media/image/upload/v1752875425/notes-assets/images/GCP-DevOps-Project-Creating-GKE-cluster/google-cloud-console-kubernetes-clusters.jpg)
</Frame>

## 2. Choose Cluster Type

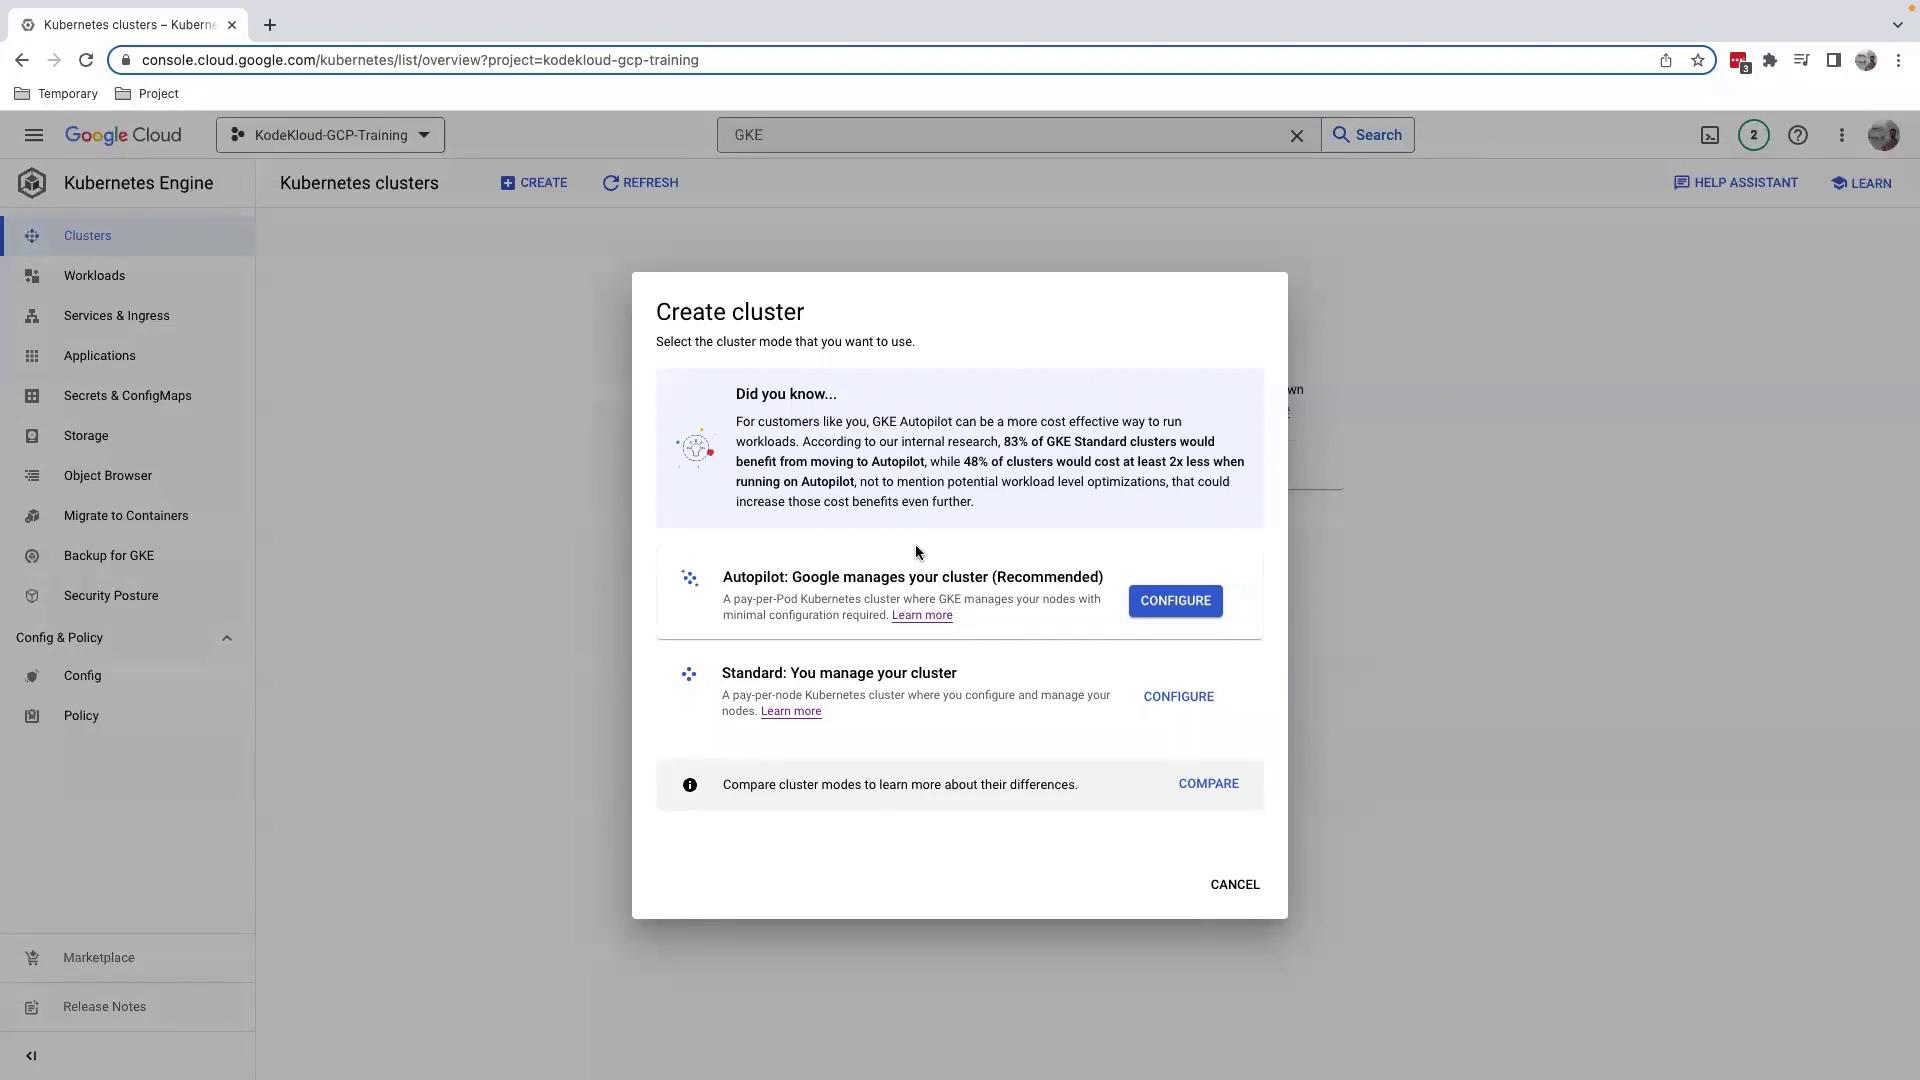
Click **Create** on the Kubernetes clusters page. You’ll see two modes:
<Frame>
  ![The image shows a Google Cloud Platform interface for creating a Kubernetes cluster, offering options for "Autopilot" and "Standard" cluster management.](https://kodekloud.com/kk-media/image/upload/v1752875427/notes-assets/images/GCP-DevOps-Project-Creating-GKE-cluster/google-cloud-kubernetes-cluster-interface.jpg)
</Frame>

| Cluster Mode | Management Responsibility                        | Best Use Case                        |
| ------------ | ------------------------------------------------ | ------------------------------------ |
| Autopilot    | GCP manages nodes, upgrades, and scaling         | Minimal ops overhead and quick start |
| Standard     | You manage node pools, upgrades, and autoscaling | Custom machine types & security      |

For full control over node pools and configurations, select **Standard**, then click **Configure**.

## 3. Configure Your Standard Cluster

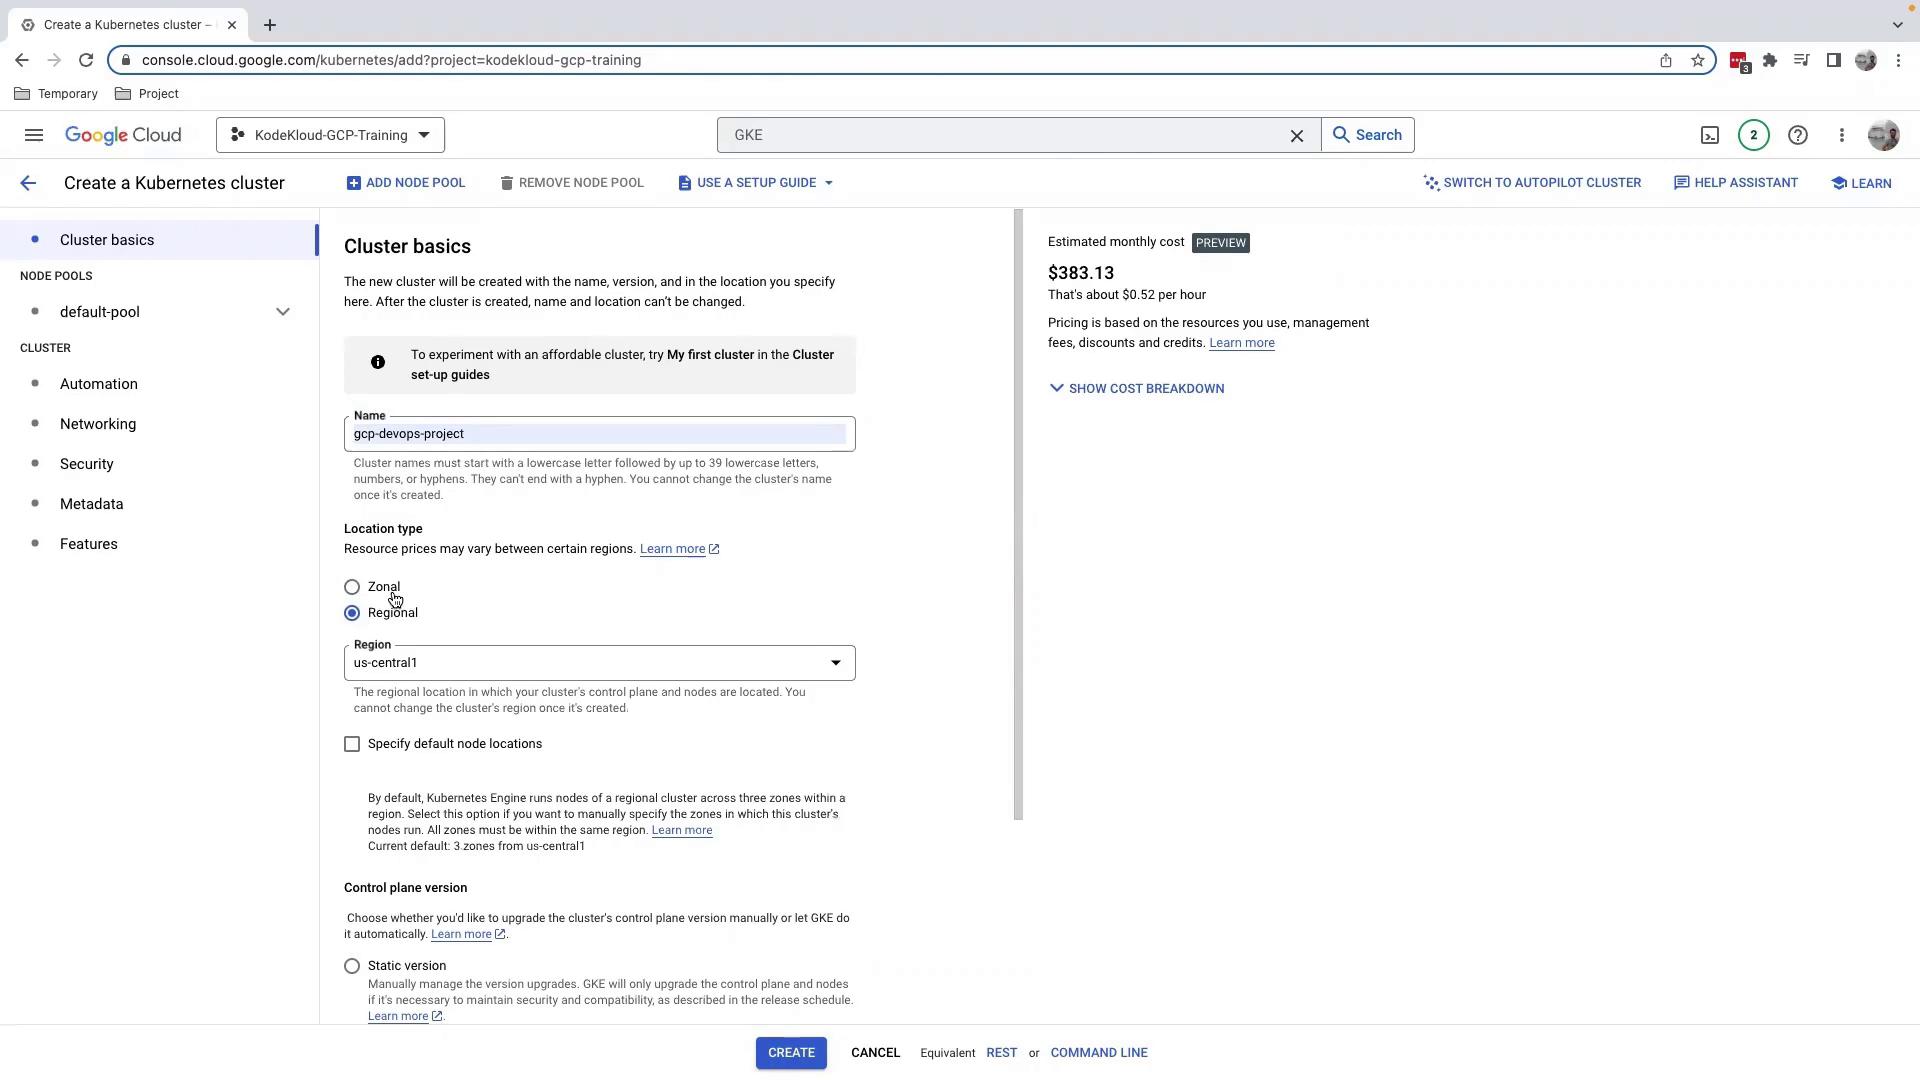
1. **Name** your cluster (e.g., `gcp-devops-project`).
2. Choose a **Location type**:
   * **Regional** spans multiple zones.
   * **Zonal** resides in a single zone (we’ll use Zonal here).
<Frame>
  ![The image shows a Google Cloud Platform interface for creating a Kubernetes cluster, with options for naming, location type, and region selection. It also displays an estimated monthly cost for the cluster.](https://kodekloud.com/kk-media/image/upload/v1752875428/notes-assets/images/GCP-DevOps-Project-Creating-GKE-cluster/google-cloud-kubernetes-cluster-interface-2.jpg)
</Frame>

### 3.1 Node Pools

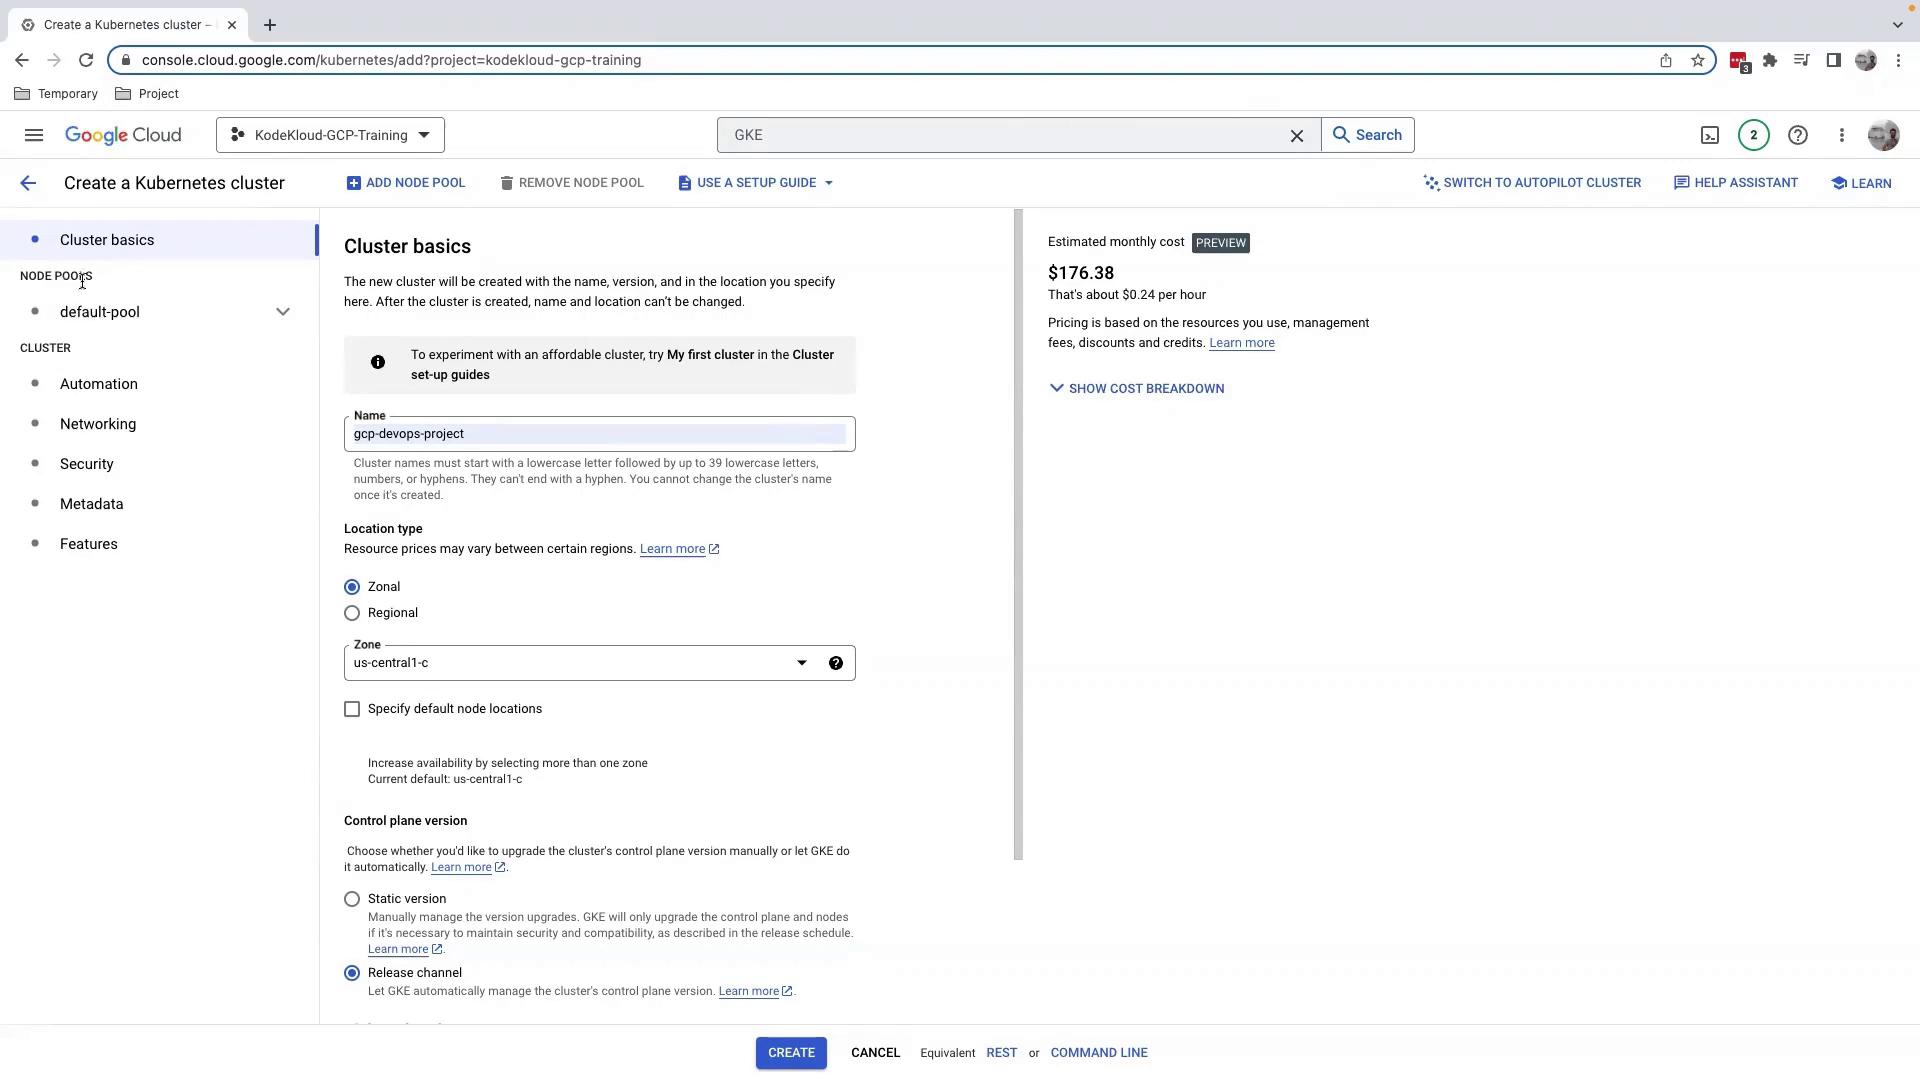
A **node pool** is a set of VM instances with the same configuration. By default, you get one node pool—expand **Node pools** to adjust settings.
<Frame>
  ![The image shows a Google Cloud Platform interface for creating a Kubernetes cluster, with options for naming, location, and control plane version. It also displays an estimated monthly cost for the cluster.](https://kodekloud.com/kk-media/image/upload/v1752875430/notes-assets/images/GCP-DevOps-Project-Creating-GKE-cluster/google-cloud-kubernetes-cluster-interface-3.jpg)
</Frame>

#### 3.1.1 Select Image Type

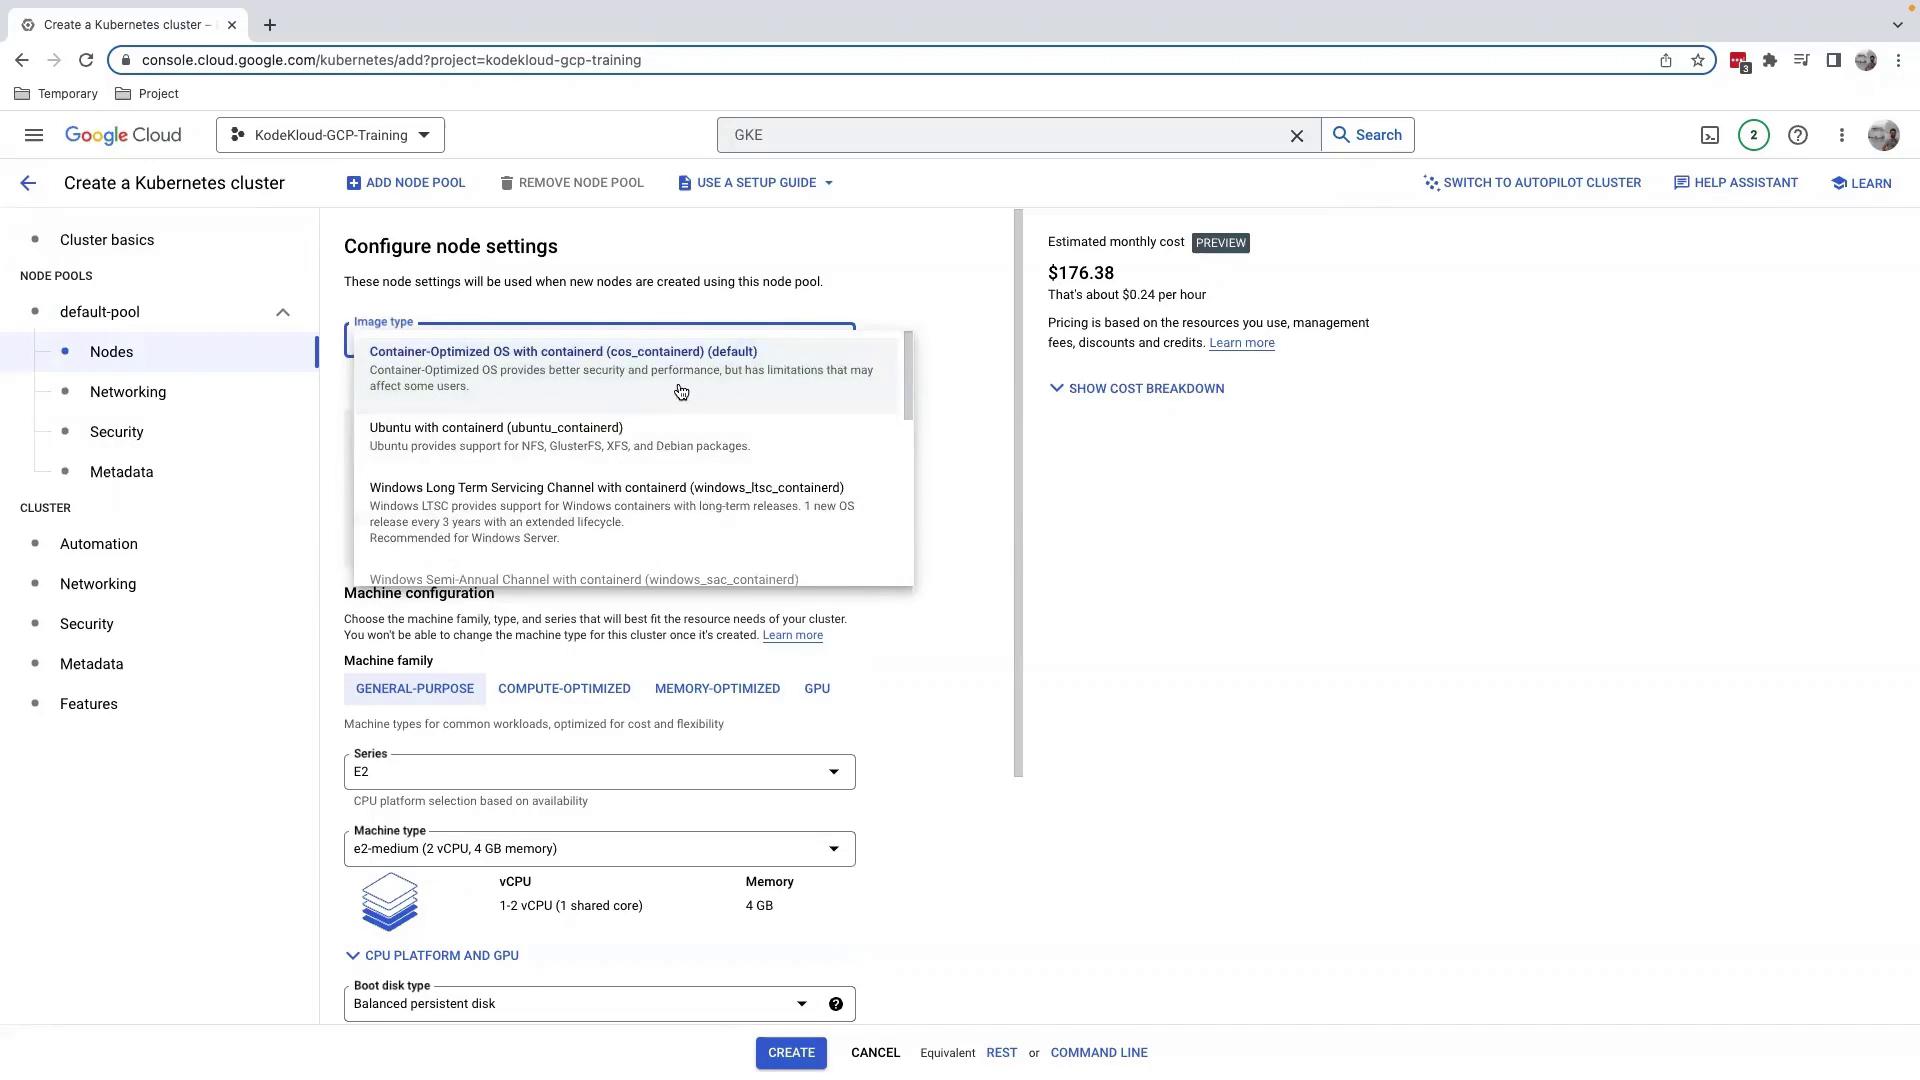
Under **Nodes**, choose your node image: Container-Optimized OS, Ubuntu, or Windows. We’ll keep the default.
<Frame>
  ![The image shows a Google Cloud Platform interface for configuring node settings in a Kubernetes cluster, including options for image type and machine configuration.](https://kodekloud.com/kk-media/image/upload/v1752875431/notes-assets/images/GCP-DevOps-Project-Creating-GKE-cluster/google-cloud-kubernetes-node-settings.jpg)
</Frame>

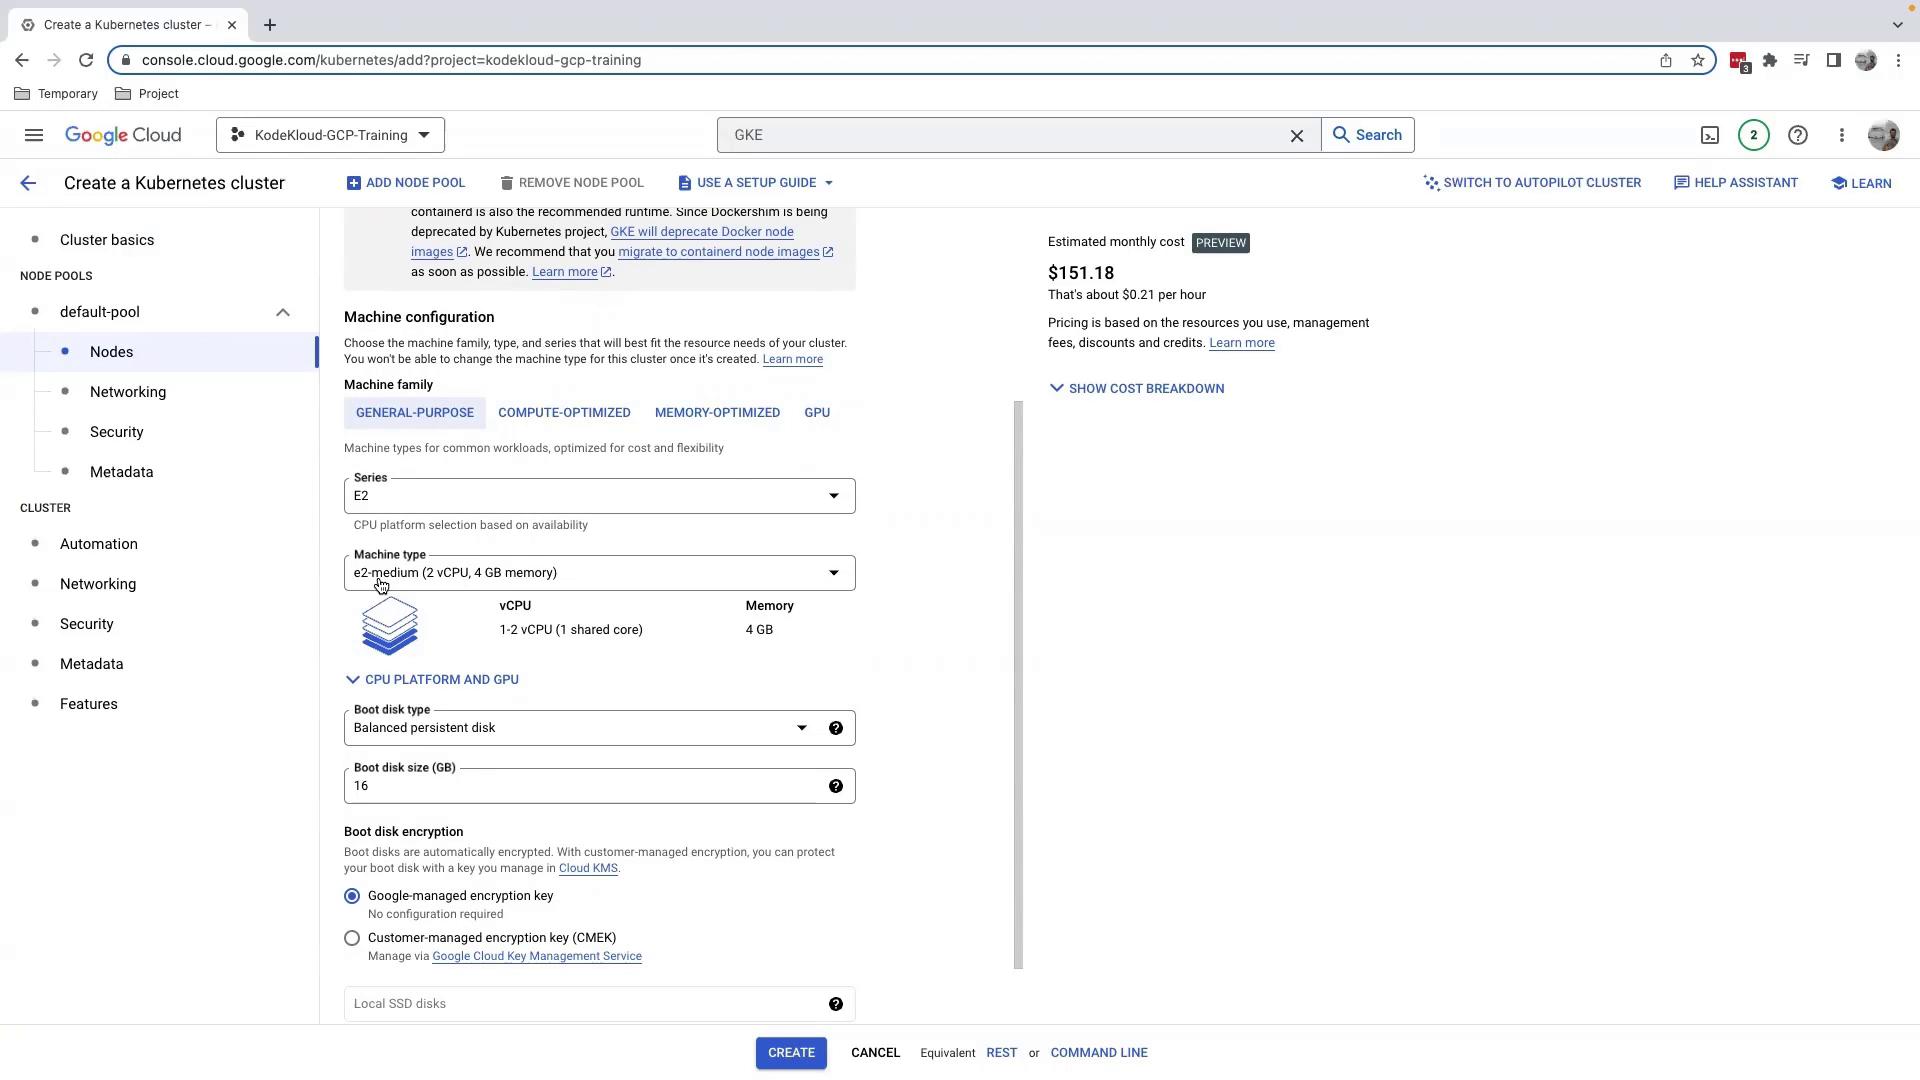
#### 3.1.2 Machine Type & Boot Disk

* **Machine type** defaults to `e2-medium`; adjust CPU and memory if needed.
* Reduce the **Boot disk** to 16 GB for cost savings.

### 3.2 Networking

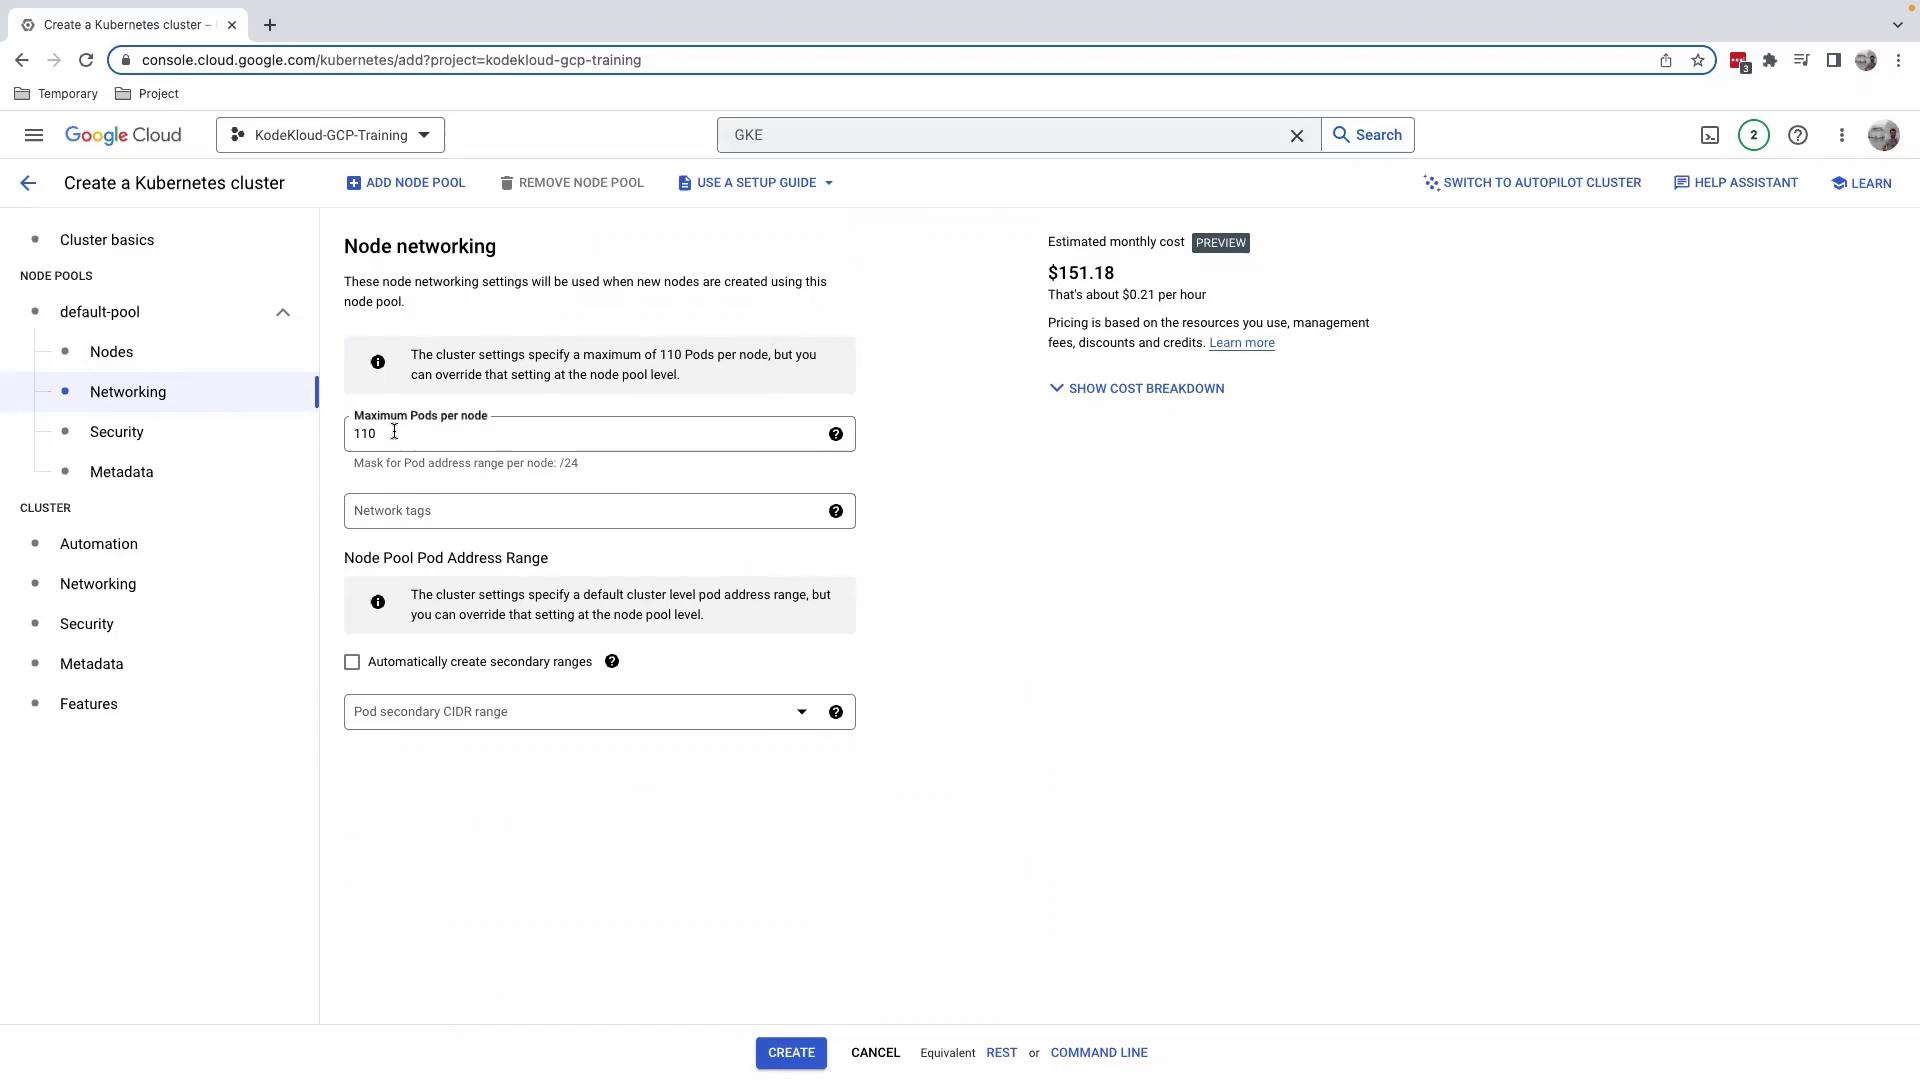
Leave the network defaults. Note that **Maximum pods per node** is set to 110 by default.
<Frame>
  ![The image shows a Google Cloud Platform interface for creating a Kubernetes cluster, specifically focusing on node networking settings. It includes options for configuring the maximum number of pods per node and pod address ranges, with an estimated monthly cost displayed.](https://kodekloud.com/kk-media/image/upload/v1752875432/notes-assets/images/GCP-DevOps-Project-Creating-GKE-cluster/google-cloud-kubernetes-cluster-networking.jpg)
</Frame>

### 3.3 Security & Metadata

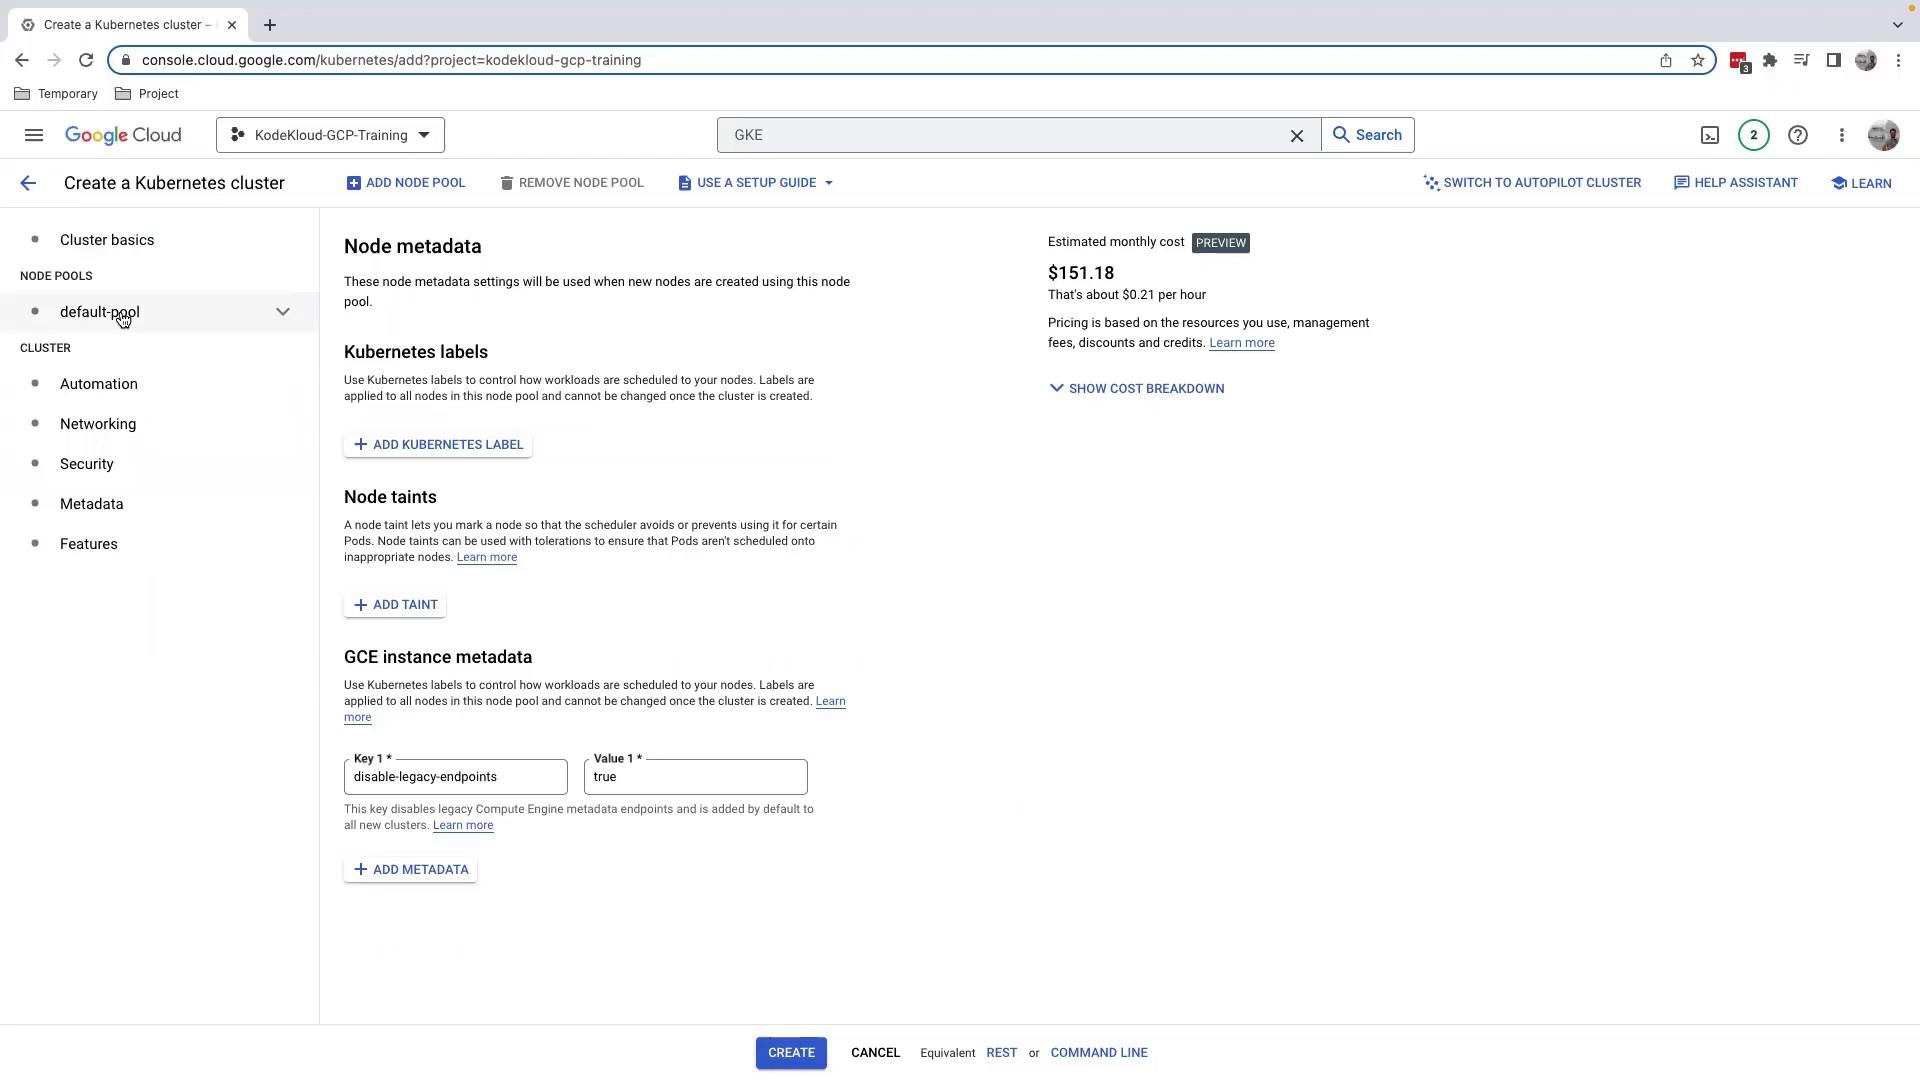
Add **Kubernetes labels**, **taints**, or custom **GCE instance metadata**. Enforce security policies here.
<Frame>
  ![The image shows a Google Cloud Platform interface for creating a Kubernetes cluster, with options for configuring node metadata, Kubernetes labels, node taints, and GCE instance metadata. It also displays an estimated monthly cost for the cluster.](https://kodekloud.com/kk-media/image/upload/v1752875433/notes-assets/images/GCP-DevOps-Project-Creating-GKE-cluster/google-cloud-kubernetes-cluster-interface-4.jpg)
</Frame>

### 3.4 Autoscaling & Resource Management

Enable **Node Pool Autoscaling** or the **Vertical Pod Autoscaler** for dynamic scaling. The balanced policy distributes pods evenly across nodes.
<Frame>
  ![The image shows a Google Cloud Platform interface for creating a Kubernetes cluster, with options for configuring machine type, boot disk, and encryption settings. The estimated monthly cost is displayed as \$151.18.](https://kodekloud.com/kk-media/image/upload/v1752875435/notes-assets/images/GCP-DevOps-Project-Creating-GKE-cluster/google-cloud-kubernetes-cluster-interface-5.jpg)
</Frame>

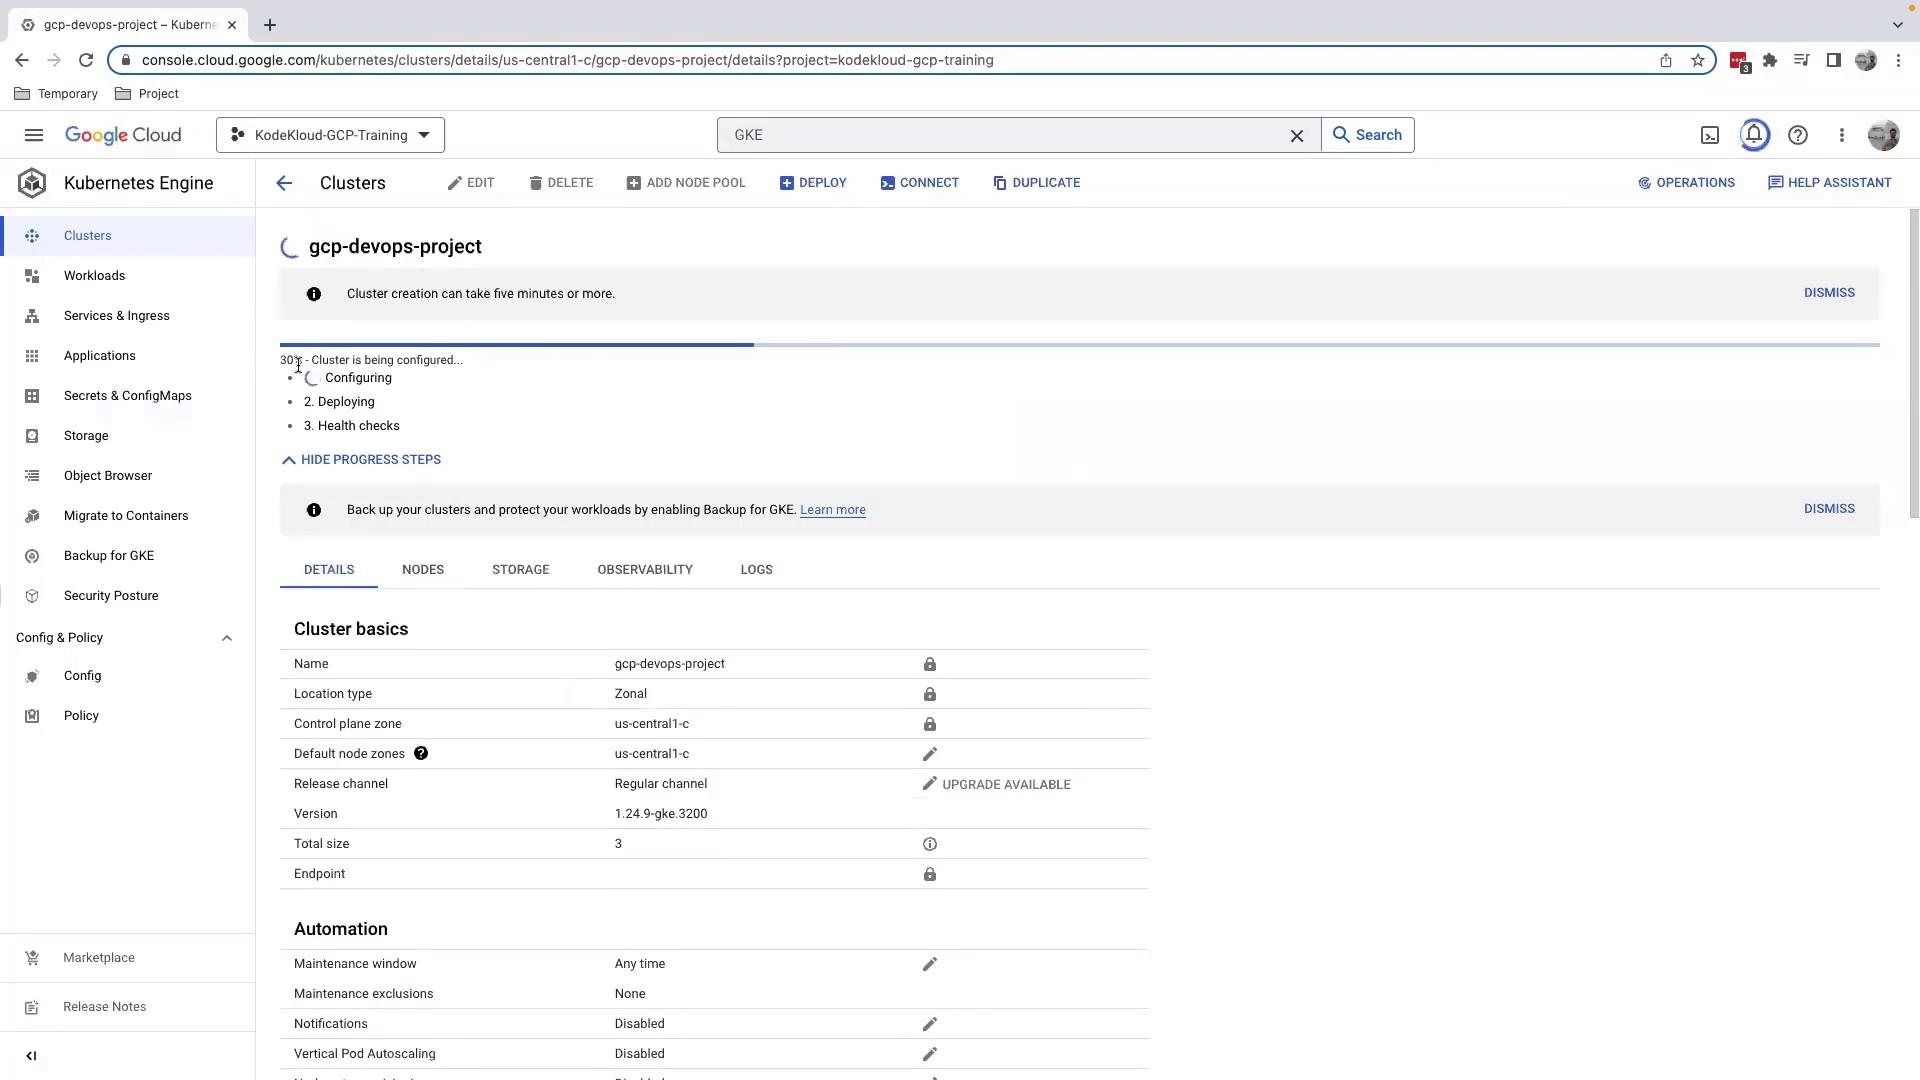
When you’re satisfied with the configuration, click **Create**. Provisioning takes about 5–10 minutes.
<Frame>
  ![The image shows a Google Cloud Platform (GCP) Kubernetes Engine interface where a cluster named "gcp-devops-project" is being configured, with progress at 30%. It includes details about the cluster's location, version, and automation settings.](https://kodekloud.com/kk-media/image/upload/v1752875436/notes-assets/images/GCP-DevOps-Project-Creating-GKE-cluster/gcp-kubernetes-engine-cluster-configuration.jpg)
</Frame>

<Callout icon="triangle-alert" color="#FF6B6B">
  Provisioning GKE clusters incurs charges. Review [GKE pricing](https://cloud.google.com/kubernetes-engine/pricing) and delete unused clusters to avoid surprise costs.
</Callout>

## 4. Inspect Your Cluster

After provisioning completes (\~10 minutes), click your cluster name to open the details page:

<Frame>
  ![The image shows a Google Cloud Platform interface for configuring node settings in Kubernetes, including options for image type and machine configuration.](https://kodekloud.com/kk-media/image/upload/v1752875438/notes-assets/images/GCP-DevOps-Project-Creating-GKE-cluster/google-cloud-kubernetes-node-settings-config.jpg)
</Frame>

Here you can:

* **Add Node Pool**: Create pools with different machine types or sizes.
* **Workloads**: View running pods and deployments.
* **Maintenance**: Set maintenance windows and policies (avoid “Any time” for production).

Node pools help you segregate workloads by resource requirements—run lightweight services on small VMs and high-memory jobs on larger ones.

## 5. Cleaning Up

To remove your cluster:

1. Click **Delete** on the cluster details page.
2. Confirm the cluster name.

In managed labs, simply shutting down the environment clears resources.

***

## References

* [GKE Documentation](https://cloud.google.com/kubernetes-engine/docs)
* [GCP Pricing Calculator](https://cloud.google.com/products/calculator)
* [Kubernetes Official Site](https://kubernetes.io/)

<CardGroup>
  <Card title="Watch Video" icon="video" cta="Learn more" href="https://learn.kodekloud.com/user/courses/gcp-devops-project/module/e0cc2e03-d889-468c-af73-0866856711aa/lesson/a12d8574-1077-414f-bd5c-d6669826c32f" />
</CardGroup>
