> ## Documentation Index
> Fetch the complete documentation index at: https://notes.kodekloud.com/llms.txt
> Use this file to discover all available pages before exploring further.
# Extending development environment 01
> Learn to replicate your production CI/CD pipeline for a development branch using Google Cloud Build and GKE.
Welcome back! In this tutorial, you’ll learn how to replicate your production CI/CD pipeline for a **development** branch using Google Cloud Build and GKE. By the end, you’ll have:
* A dedicated `development` Git branch
* A customized `cloudbuild.yaml` for development
* A Cloud Build trigger that reacts to pushes on `development`
* Verification steps to confirm your `-dev` image lands in Container Registry
***
## 1. Create and Switch to the `development` Branch
First, make sure your local `main` branch is up to date:
```bash theme={null}
# List local branches
git branch
# Ensure you're on main
git checkout main
# Pull the latest changes
git pull origin main
```
Use descriptive branch names like `development` to clearly separate lifecycle stages.
Now create and check out `development`:
```bash theme={null}
git checkout -b development
```
Verify you’re on the new branch:
```bash theme={null}
git branch
# * development
# main
# ...
```
Open your project in VS Code (or your preferred IDE) to confirm the active branch.
***
## 2. Customize `cloudbuild.yaml` for Development
Your production pipeline builds, pushes, and deploys the image `gcpdevops` to the `gcp-devops-prod` namespace:
```yaml theme={null}
steps:
- name: 'gcr.io/cloud-builders/docker'
args: ['build', '-t', 'gcr.io/$PROJECT_ID/gcpdevops', '.']
- name: 'gcr.io/cloud-builders/docker'
args: ['push', 'gcr.io/$PROJECT_ID/gcpdevops']
- name: 'gcr.io/cloud-builders/gke-deploy'
args:
- run
- --filename=gke.yaml
- --image=gcr.io/$PROJECT_ID/gcpdevops
- --location=us-central1-c
- --cluster=gcp-devops-project
- --namespace=gcp-devops-prod
```
Update it to target a development image (`-dev`) and namespace (`gcp-devops-dev`):
```yaml theme={null}
steps:
# Build development image
- name: 'gcr.io/cloud-builders/docker'
args: ['build', '-t', 'gcr.io/$PROJECT_ID/gcpdevops-dev', '.']
# Push to Container Registry
- name: 'gcr.io/cloud-builders/docker'
args: ['push', 'gcr.io/$PROJECT_ID/gcpdevops-dev']
# Deploy to GKE dev namespace
- name: 'gcr.io/cloud-builders/gke-deploy'
args:
- run
- --filename=gke.yaml
- --image=gcr.io/$PROJECT_ID/gcpdevops-dev
- --location=us-central1-c
- --cluster=gcp-devops-project
- --namespace=gcp-devops-dev
```
### Configuration Comparison
| Attribute | Production | Development |
| ------------------- | ----------------- | --------------------- |
| Docker Tag | `gcpdevops` | `gcpdevops-dev` |
| GKE Namespace | `gcp-devops-prod` | `gcp-devops-dev` |
| Cloud Build Trigger | Branch: `main` | Branch: `development` |
***
## 3. Commit and Push Your Changes
```bash theme={null}
git add cloudbuild.yaml
git commit -m "Customize Cloud Build for development environment"
git push -u origin development
```
***
## 4. Configure a Cloud Build Trigger for `development`
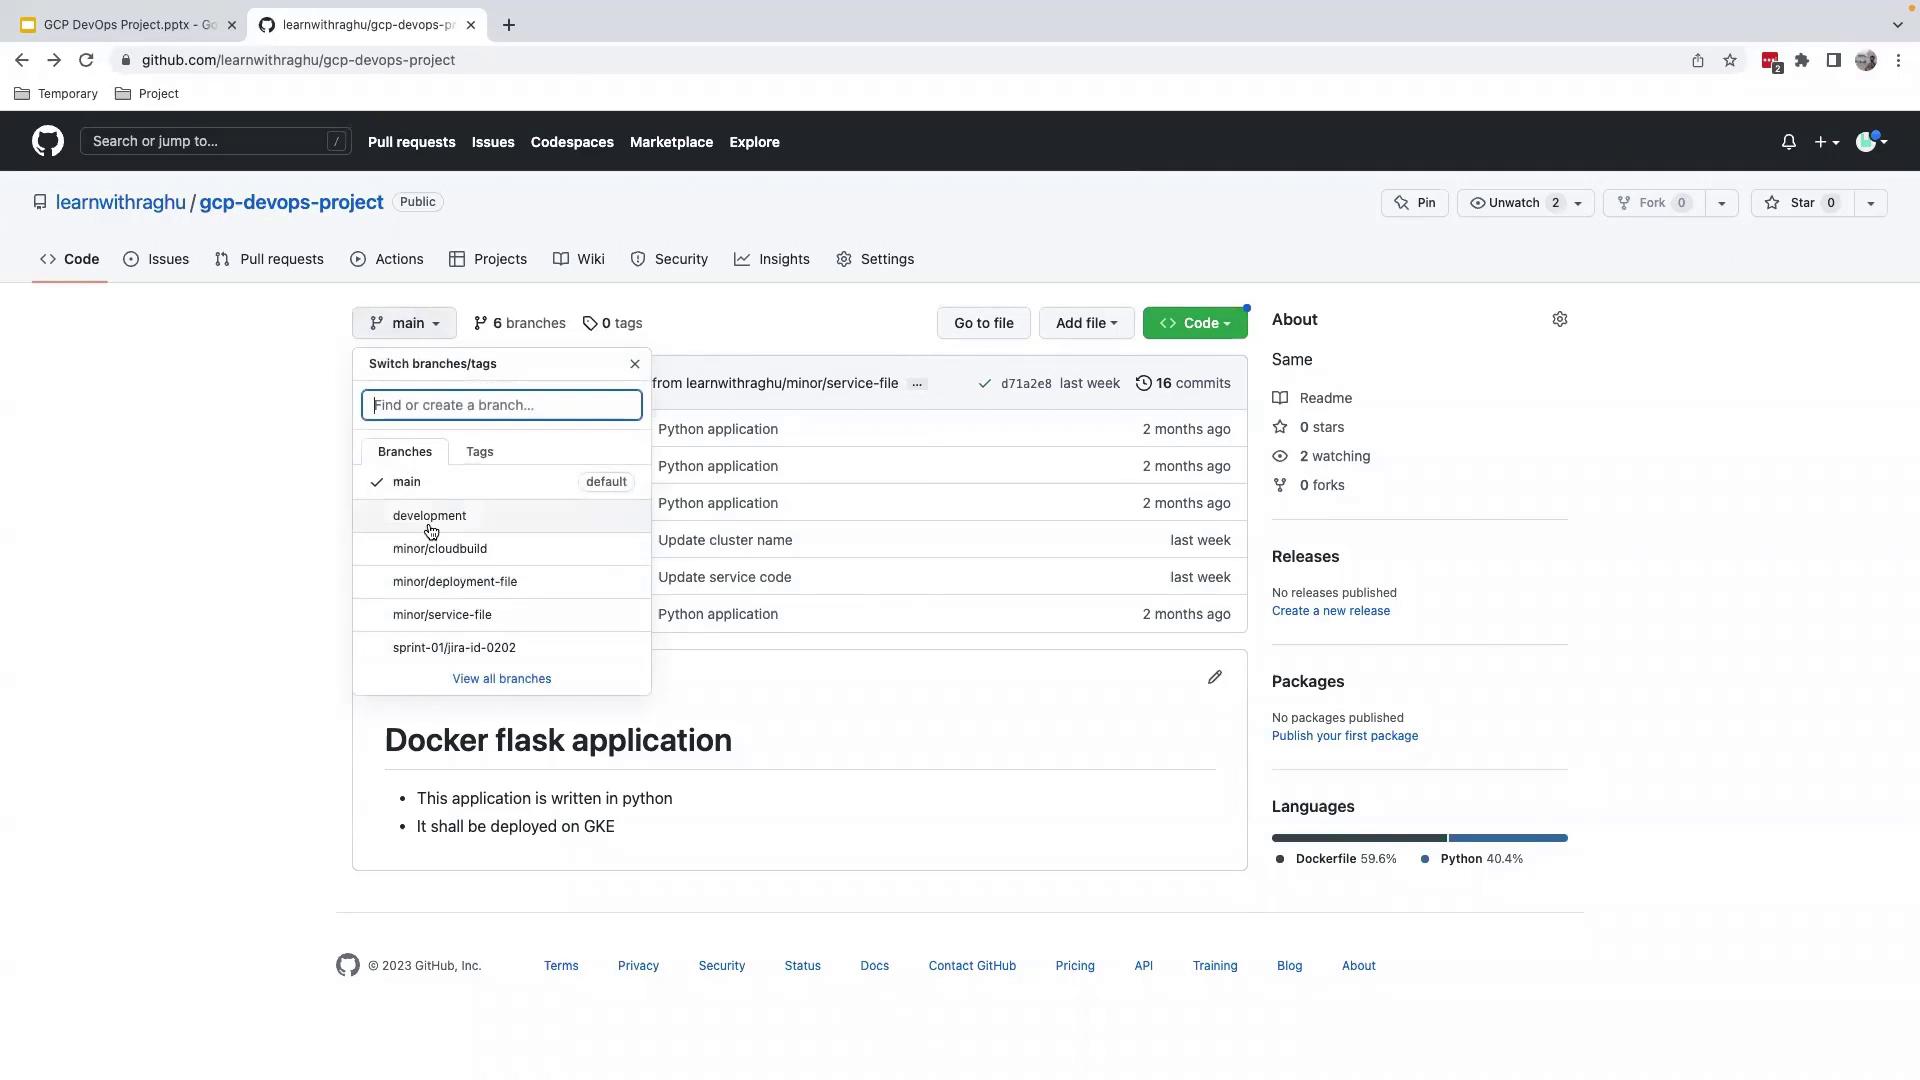
### 4.1 Select the `development` Branch in GitHub
1. Go to your GitHub repository.
2. Open the **Branch** dropdown and choose `development`.
### 4.2 Create the Trigger in Google Cloud Build
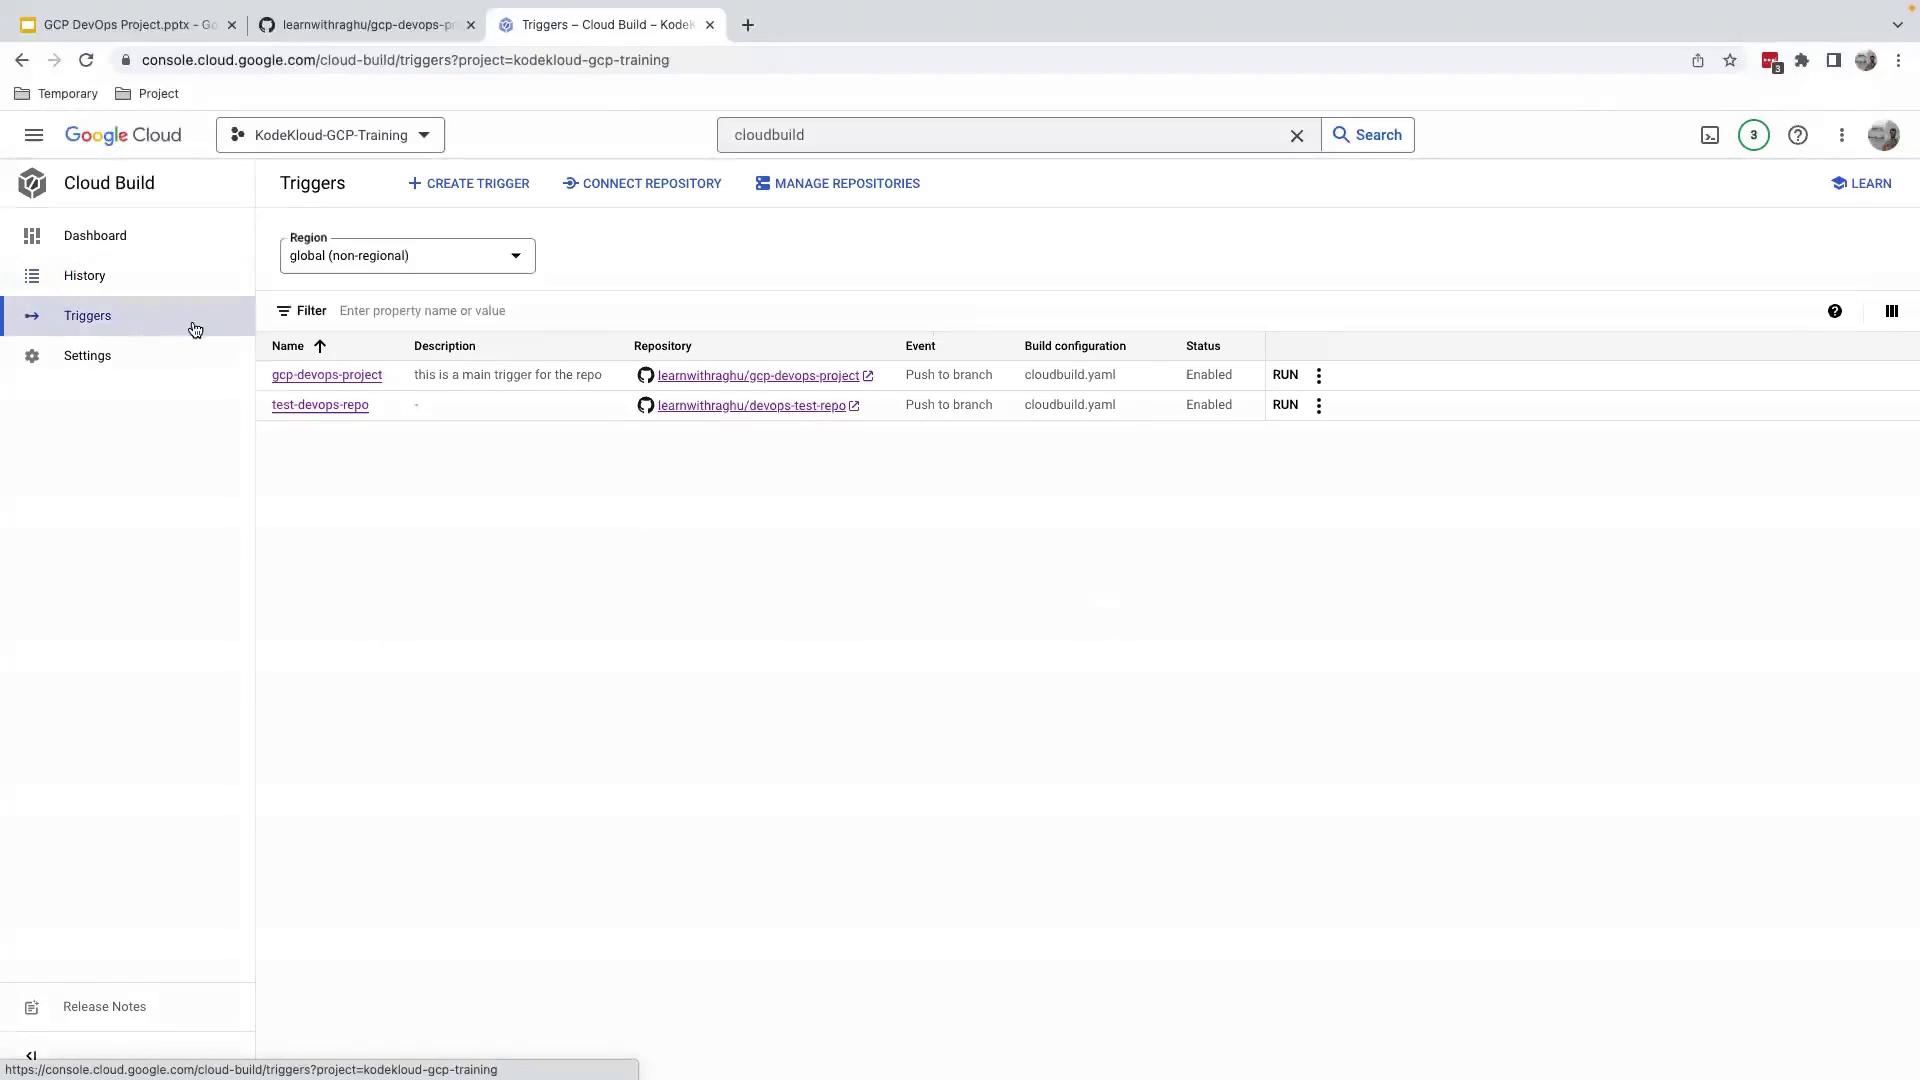
1. In the GCP Console, navigate to **Cloud Build > Triggers**.
2. Click **Create Trigger**.
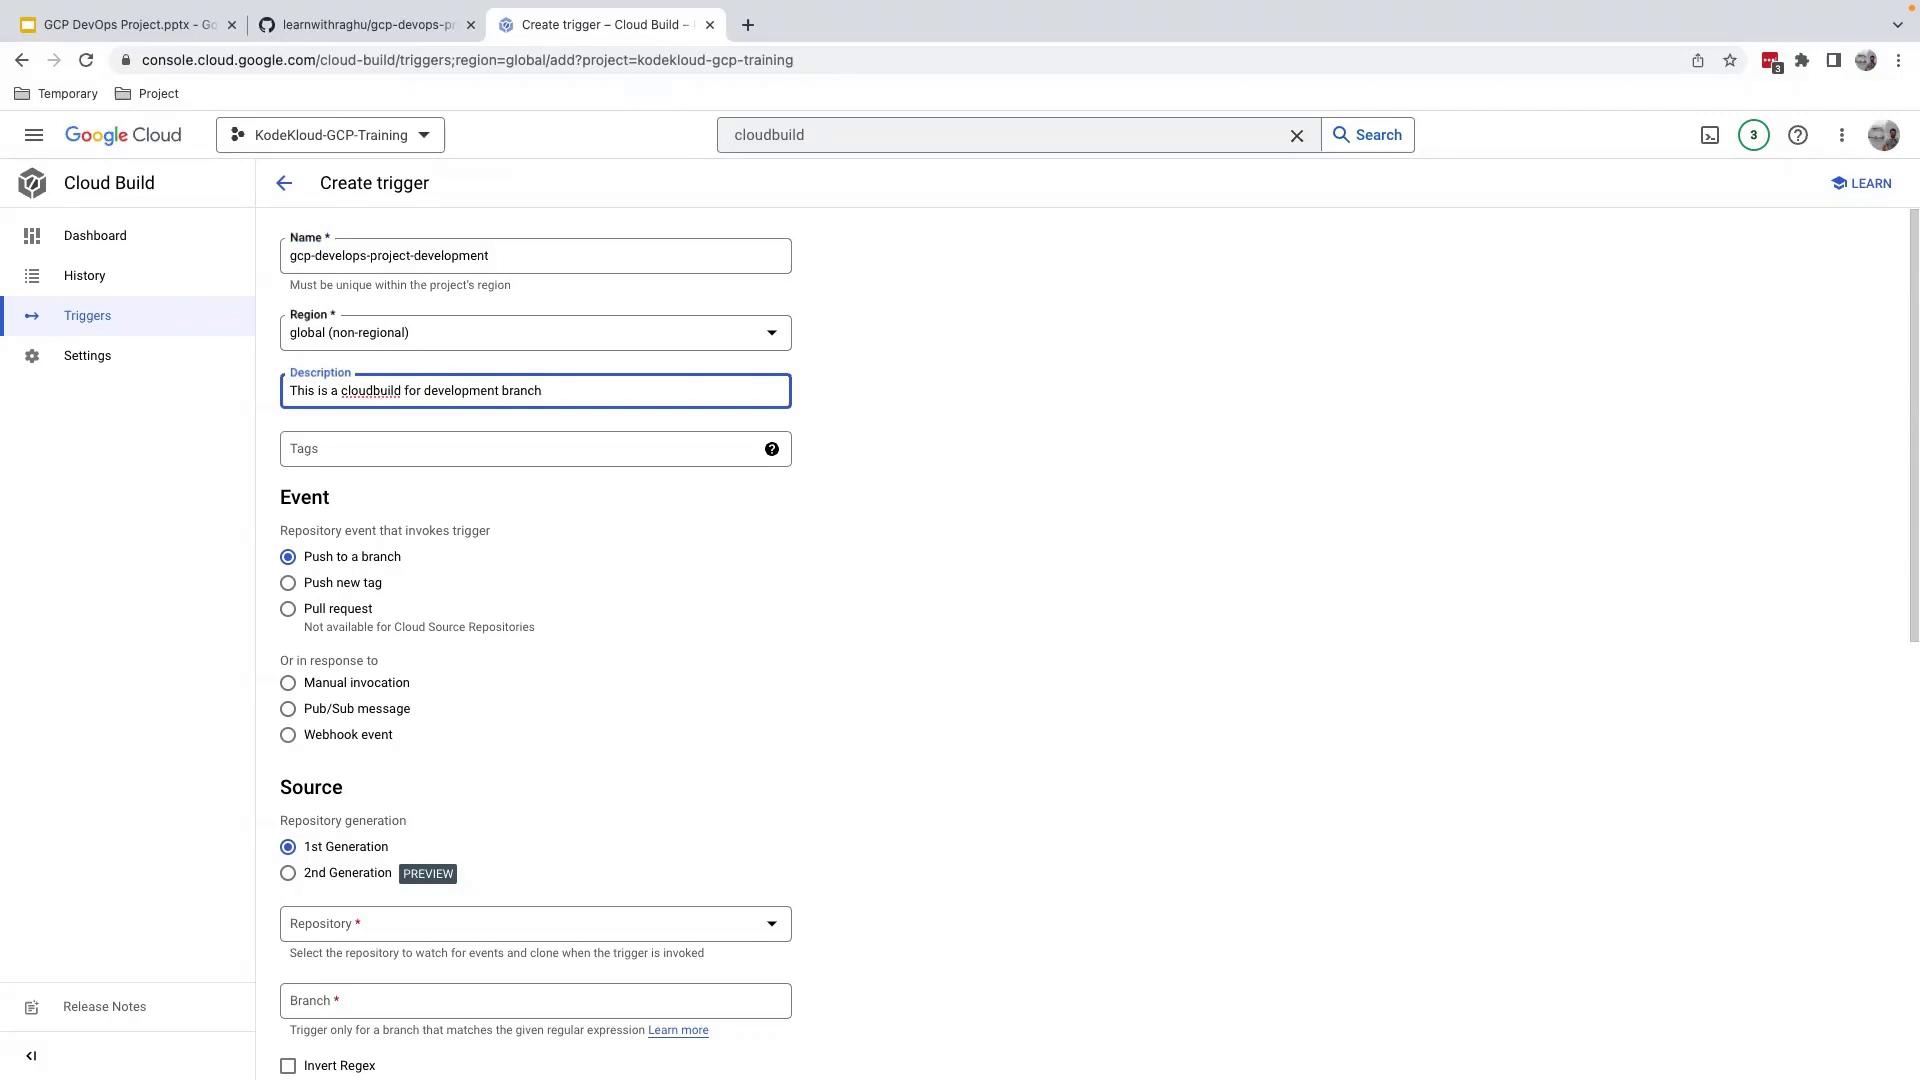
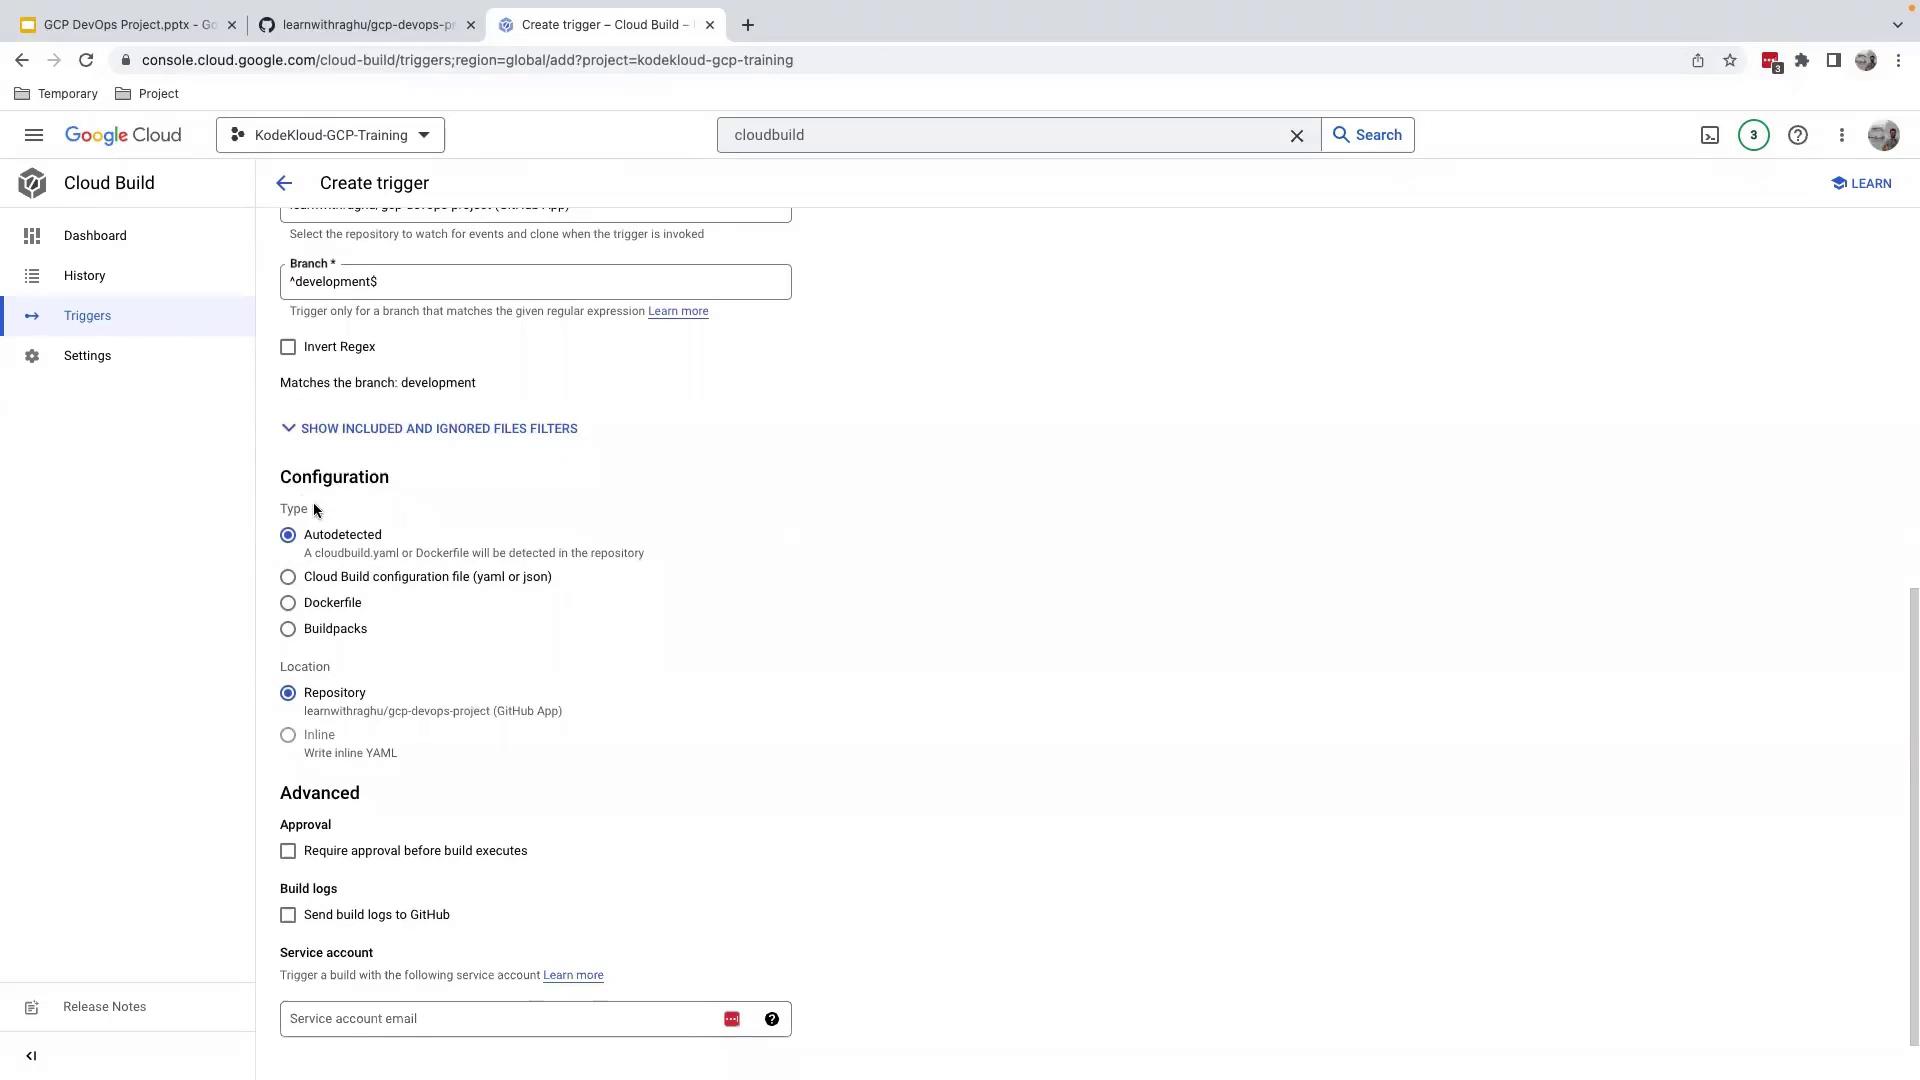
3. Fill out the **Create trigger** form:
* **Name**: `gcp-devops-project-development`
* **Event**: Push to a branch
* **Source repository**: *Your GitHub repo*
* **Branch**: `^development$`
* **Build configuration**: Cloud Build configuration file (`cloudbuild.yaml`)
4. (Optional) Expand **Advanced settings** to adjust substitutions, timeouts, or notifications.
5. Click **Create** to finalize.
### 4.3 Run and Verify the Trigger
* **Manual Trigger**: In **Cloud Build > Triggers**, click **Run** next to `gcp-devops-project-development`.
* **Monitor**: Go to **Cloud Build > History** to see builds initiated by the `development` branch.
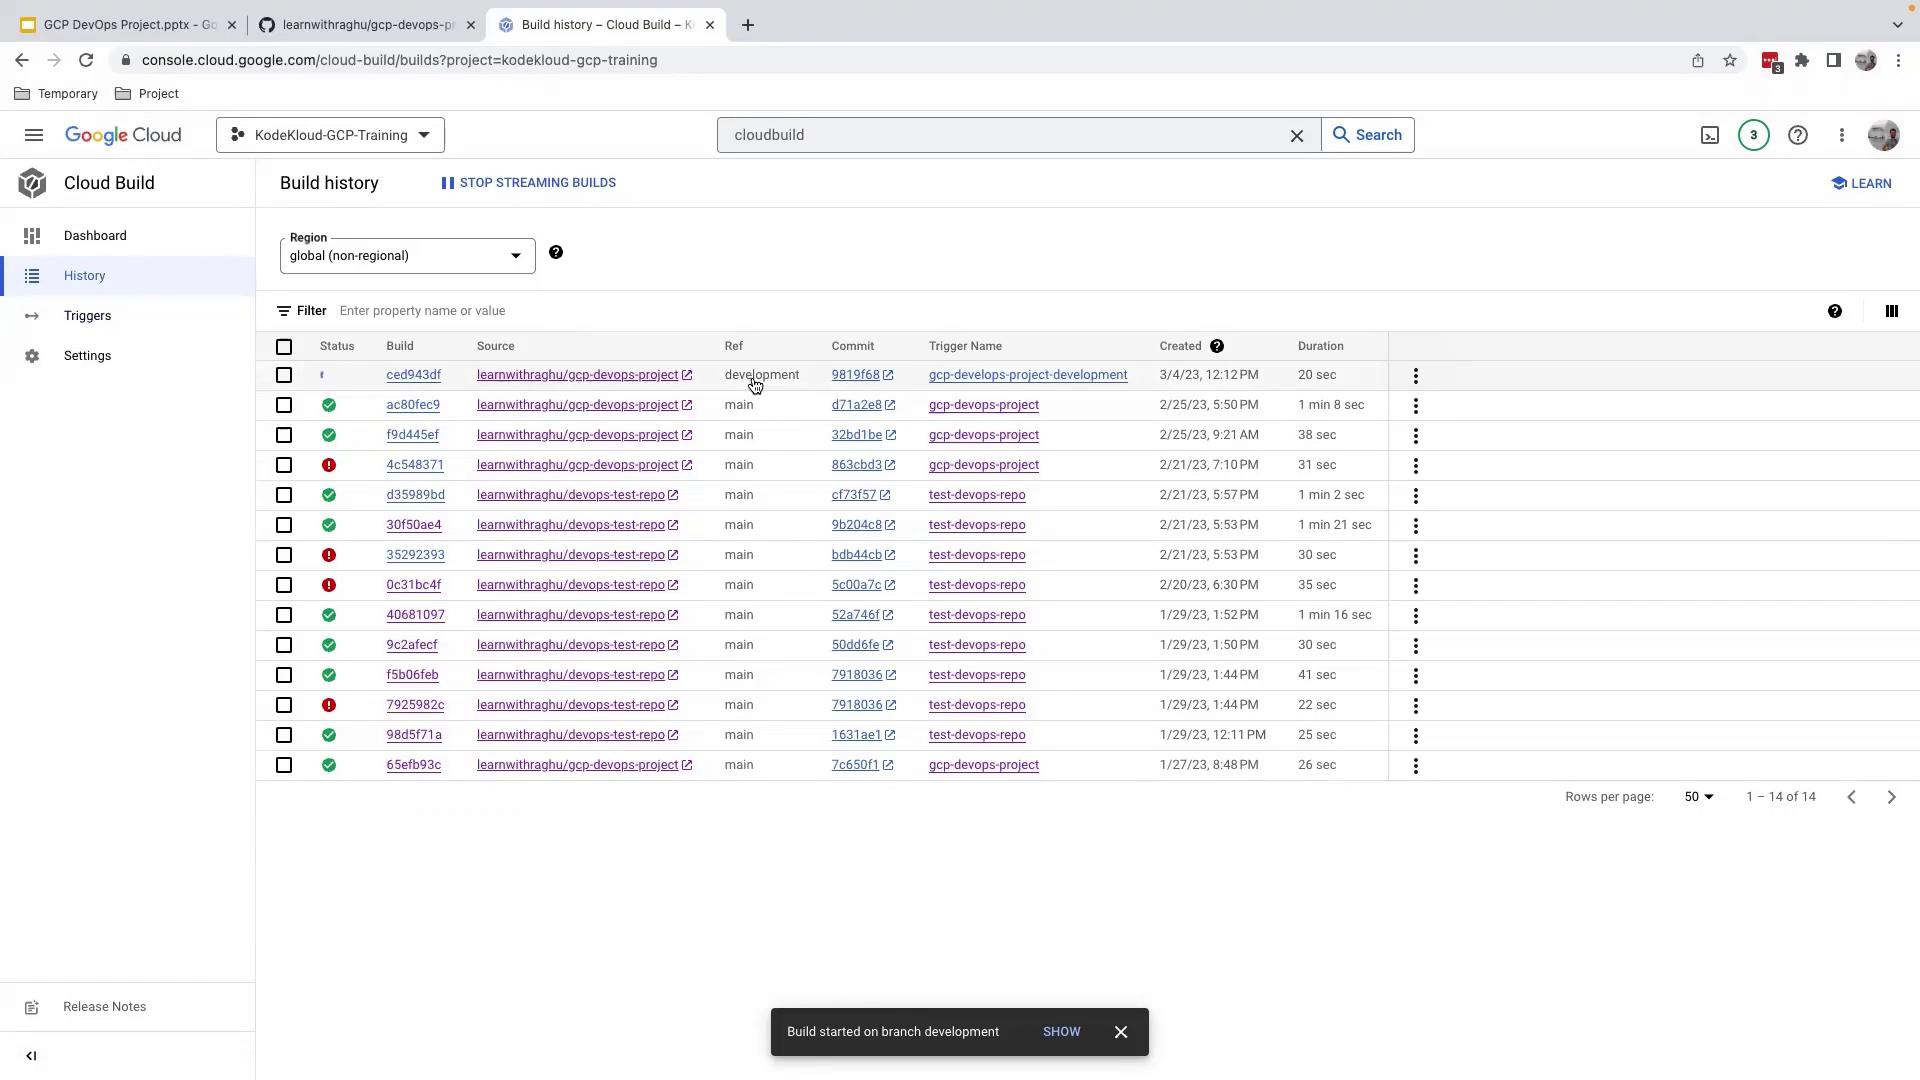
* Since the `gcp-devops-dev` namespace likely doesn’t exist yet, the deploy step will report a failure (this is expected at this stage):

***
## 5. Verify the Development Image in Registry
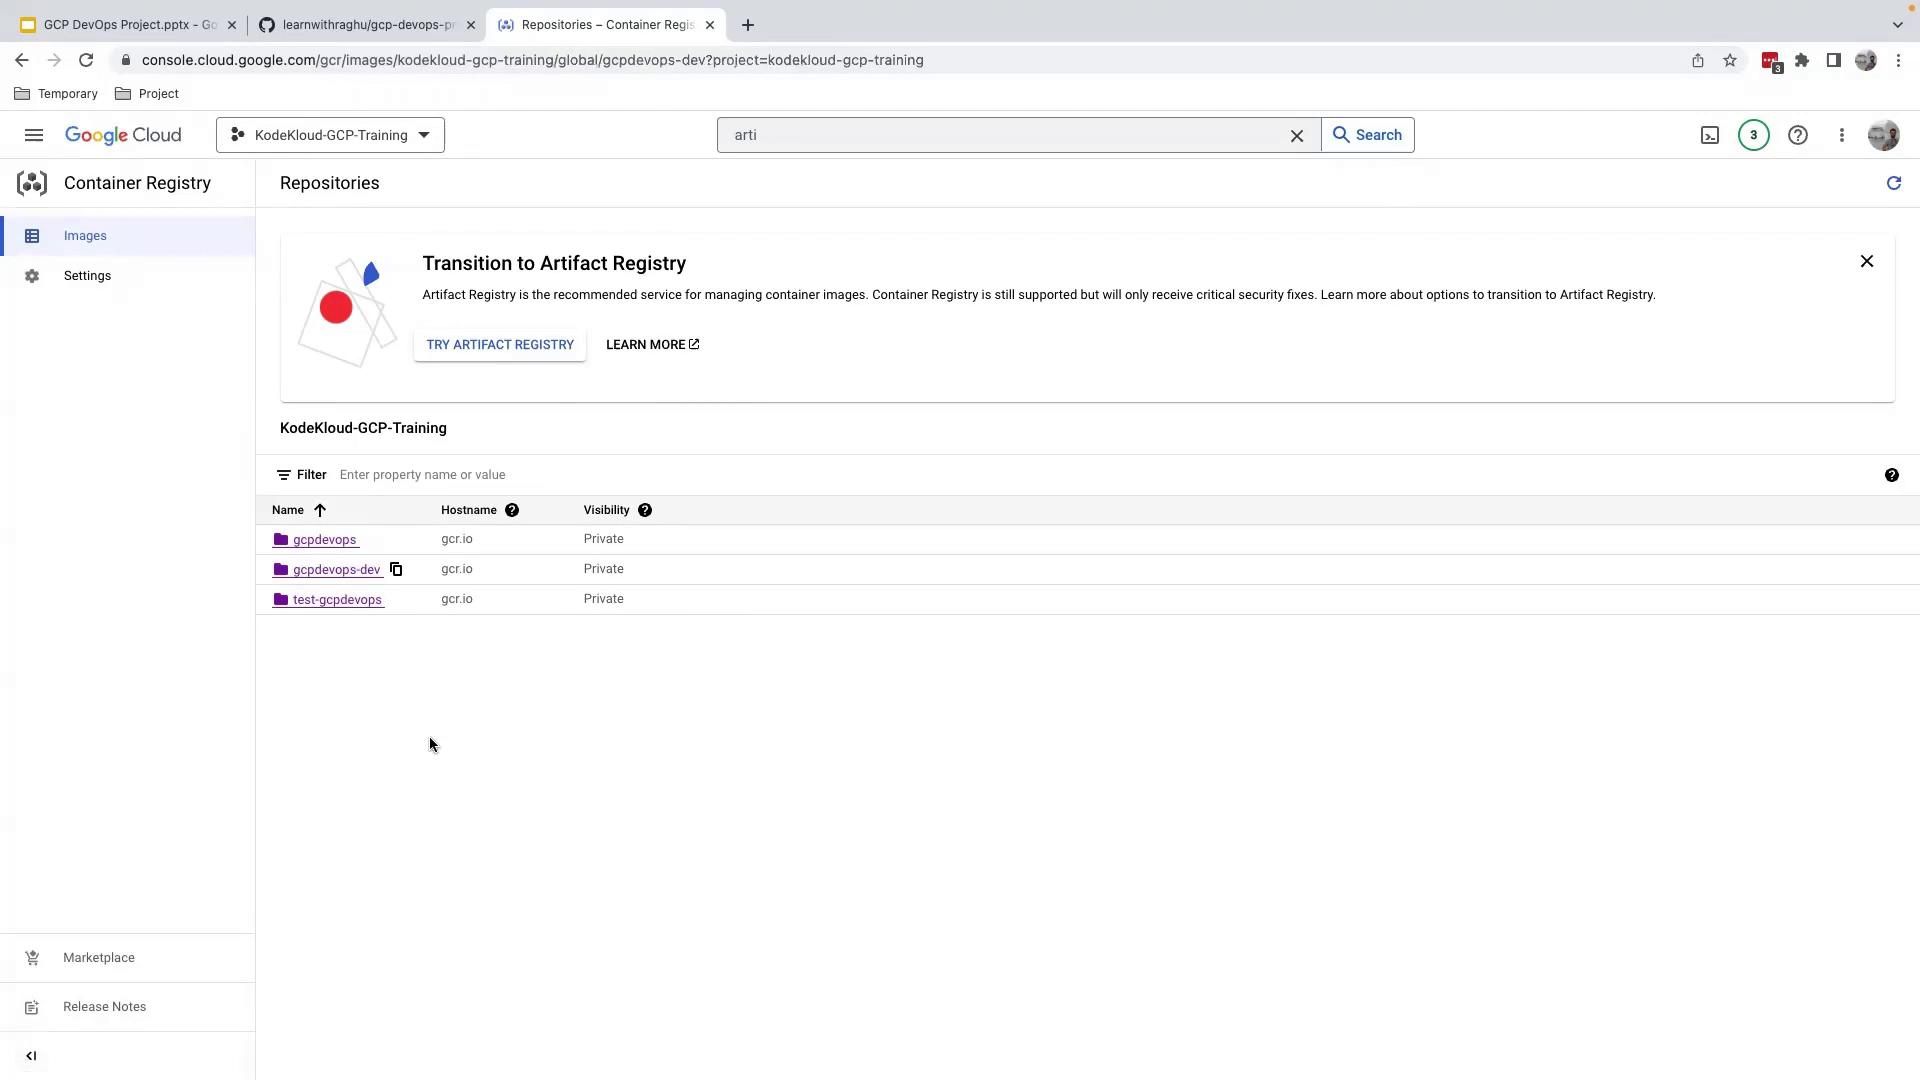
Navigate to **Artifact Registry** or **Container Registry** in the GCP Console. Under `gcr.io`, confirm that `gcpdevops-dev` is present:
***
Congratulations! Your Cloud Build trigger for the `development` branch is live. In the next lesson, you’ll learn how to create the dev namespace and finalize automatic deployments.
***
## Links and References
* [Google Cloud Build Triggers Docs](https://cloud.google.com/build/docs/automating-builds/create-manage-triggers)
* [GKE Deploy Builder](https://github.com/GoogleCloudPlatform/cloud-builders/tree/master/gke-deploy)
* [Kubernetes Namespaces](https://kubernetes.io/docs/concepts/overview/working-with-objects/namespaces/)