> ## Documentation Index
> Fetch the complete documentation index at: https://notes.kodekloud.com/llms.txt
> Use this file to discover all available pages before exploring further.
# Extending development environment 02
> This guide enhances your Google Kubernetes Engine development workflow covering cluster access, namespace isolation, manifest updates, automated builds, and deployment verification.
In this guide, you’ll continue enhancing your development workflow on Google Kubernetes Engine (GKE). We’ll cover cluster access, namespace isolation, manifest updates, automated builds, and deployment verification.
## Prerequisites
* A GCP project with a running GKE cluster
* `gcloud` CLI and `kubectl` installed and configured
* A GitHub repository connected to Cloud Build triggers
## 1. Connect to the Cluster and Create a Namespace
### 1.1 Launch Cloud Shell
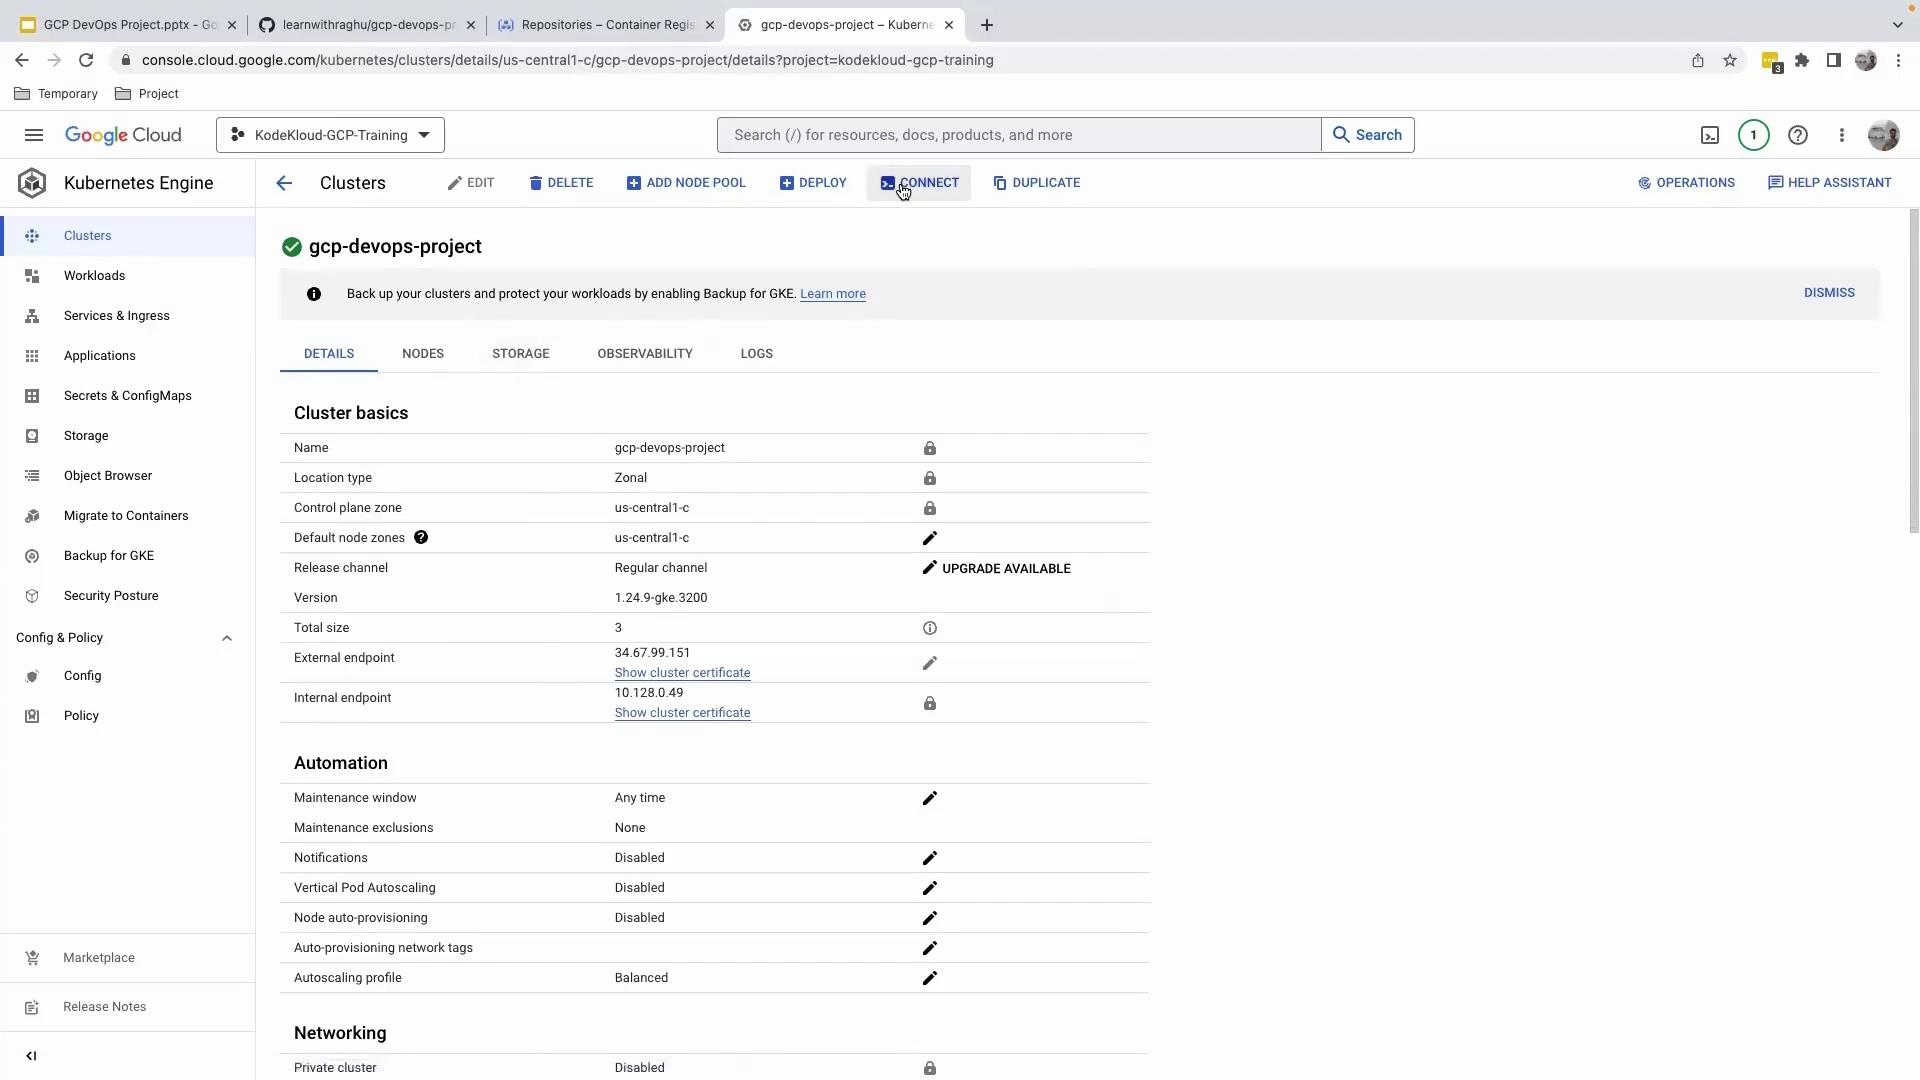
1. Navigate to Google Cloud Console > Kubernetes Engine > Clusters.
2. Select your cluster and click **Connect** to open Cloud Shell.
3. Press **Enter** to run the pre-populated `kubectl` authentication command.
Make sure your Google Cloud SDK is up to date to avoid authentication issues:
```bash theme={null}
gcloud components update
```
### 1.2 Create and Verify the Development Namespace
```bash theme={null}
# List current namespaces
kubectl get namespaces
# Create a new namespace for development
kubectl create namespace development
# Confirm the namespace was created
kubectl get namespaces
```
## 2. Update the gke.yaml Manifest
Open your `gke.yaml` file. This manifest defines both the Service and Deployment for your application. Modify it to point at the `development` namespace and use your development Docker image.
### 2.1 Resource Overview
| Kind | Purpose | Key Changes |
| ---------- | --------------------------------- | -------------------------------------------- |
| Service | Exposes your app via LoadBalancer | Set `namespace: development`, port 80 → 5000 |
| Deployment | Manages application pods | Use `-dev:latest` image tag, replicas = 1 |
### 2.2 Updated Manifest Snippet
```yaml theme={null}
apiVersion: v1
kind: Service
metadata:
name: gcp-devops-gke-service
namespace: development
labels:
app: gcp
spec:
type: LoadBalancer
ports:
- protocol: TCP
port: 80
targetPort: 5000
selector:
app: gcp
---
apiVersion: apps/v1
kind: Deployment
metadata:
name: gcp-devops-gke
namespace: development
spec:
replicas: 1
selector:
matchLabels:
app: gcp
template:
metadata:
labels:
app: gcp
spec:
containers:
- name: gcp-devops-gke
image: gcr.io/kodekloud-gcp-training/gcpdevops-dev:latest
ports:
- containerPort: 5000
env:
- name: PORT
value: "5000"
```
Save your changes and push to the `development` branch:
```bash theme={null}
git add gke.yaml
git commit -m "chore: update manifests for development namespace"
git push origin development
```
This push will trigger your Cloud Build configuration.
## 3. Verify the Cloud Build Trigger
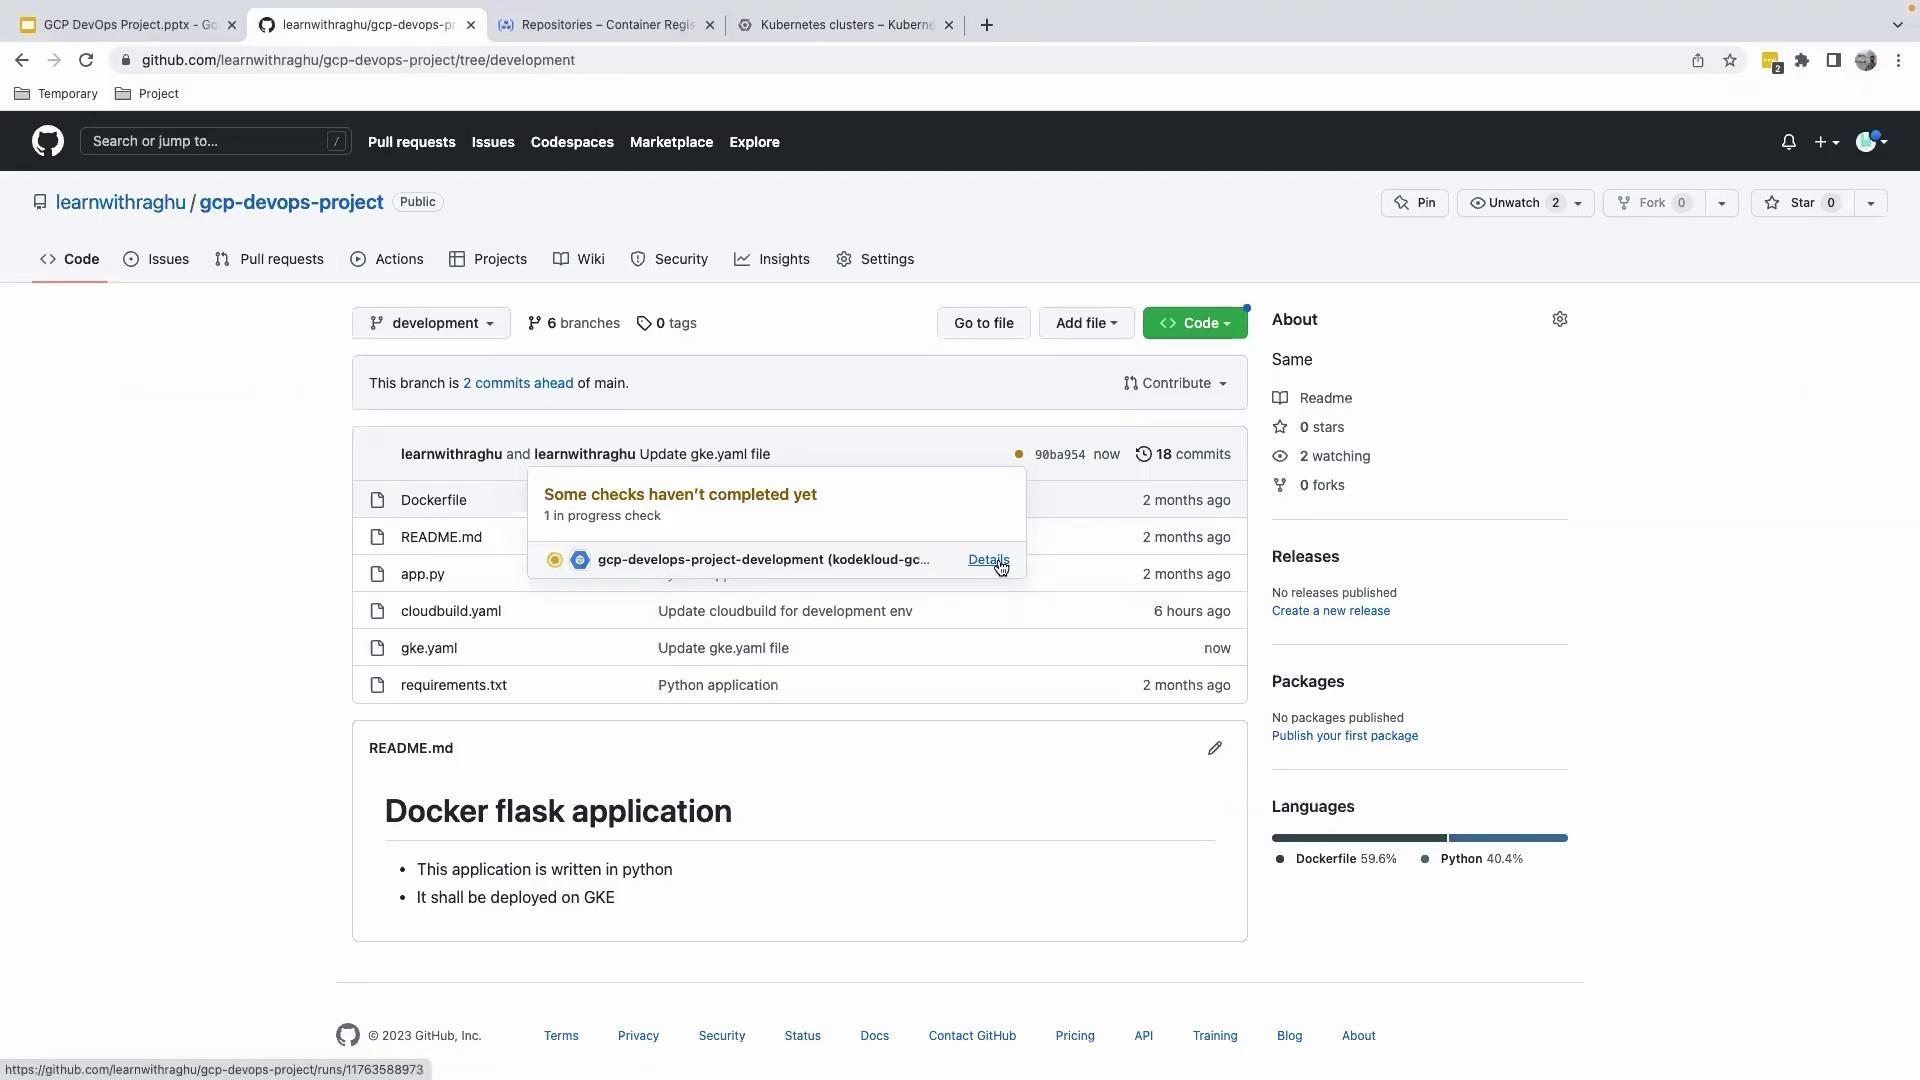
After pushing, open your GitHub repository to confirm that a Cloud Build trigger has started on the `development` branch.
## 4. Review Build and Deployment Logs
Go back to the GCP Console and navigate to **Cloud Build**. You’ll see logs for steps including:
* Building the Docker image
* Pushing to Container Registry
* Deploying to GKE
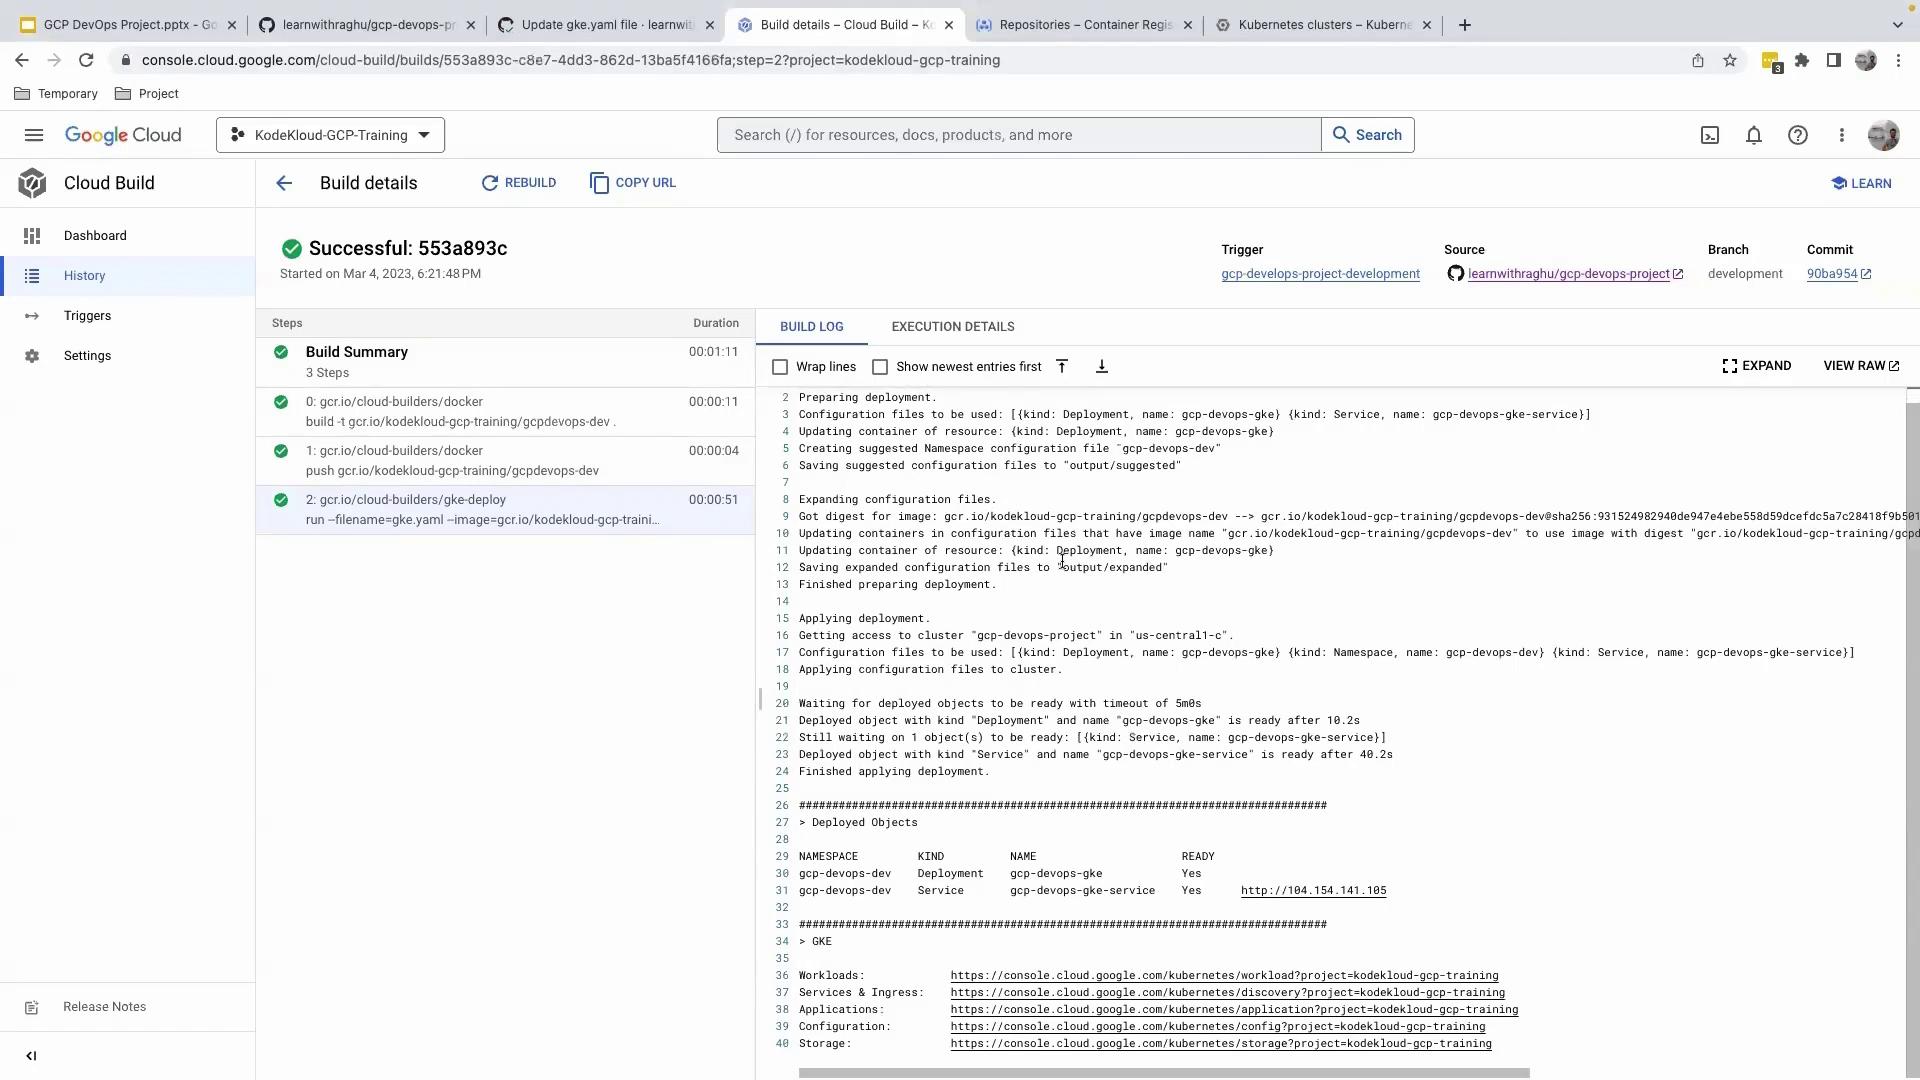
All steps should complete without errors.
## 5. Inspect the Deployment in GKE
1. In the GCP Console, go to **Kubernetes Engine > Workloads** and filter by the `development` namespace.
* Workload: `gcp-devops-gke`
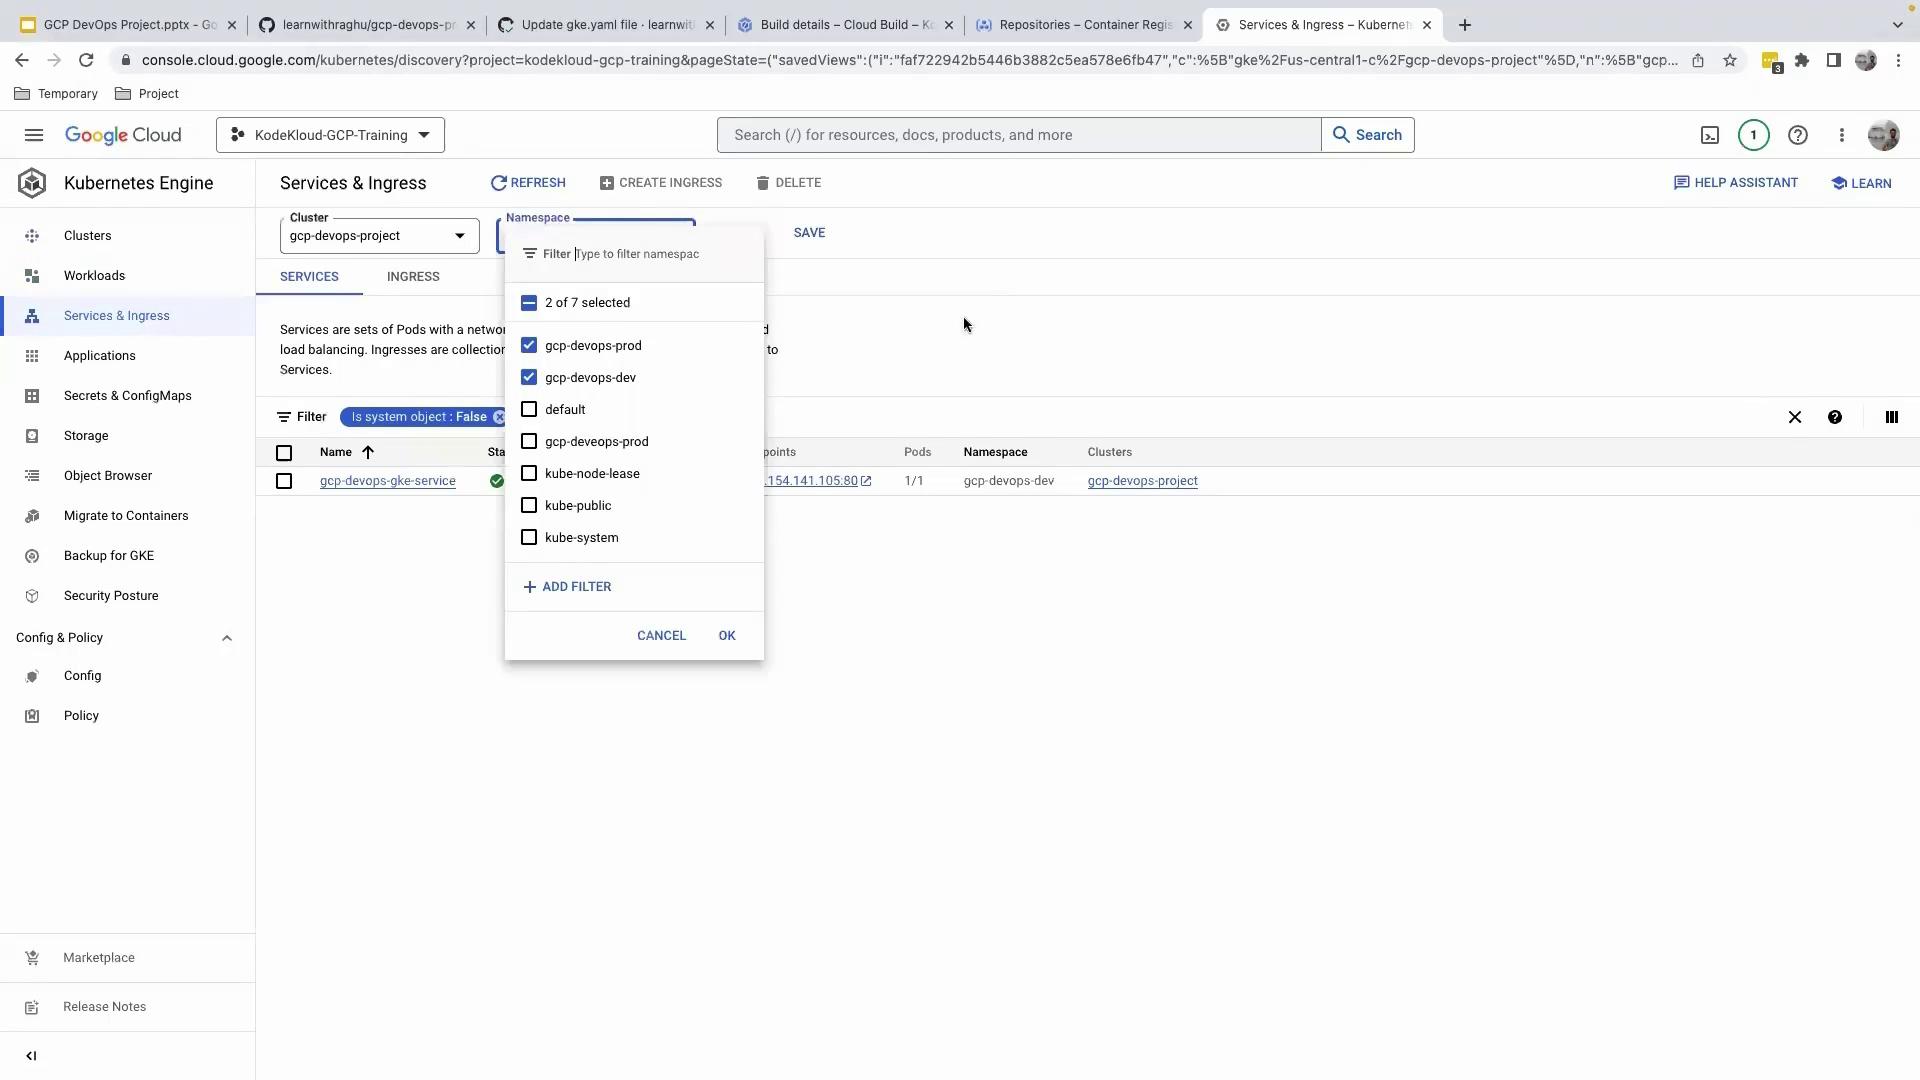
2. Then select **Services & Ingress**, keeping the `development` filter applied.
3. Copy the external LoadBalancer IP and open it in your browser to verify your app is running.
***
You’ve successfully set up a dedicated development namespace, updated your Kubernetes manifests for development artifacts, and confirmed an automated CI/CD pipeline. Future commits to the `development` branch will automatically build and deploy your application to GKE.
## Links and References
* [Kubernetes Namespaces](https://kubernetes.io/docs/concepts/overview/working-with-objects/namespaces/)
* [Google Kubernetes Engine Documentation](https://cloud.google.com/kubernetes-engine/docs)
* [Cloud Build Triggers](https://cloud.google.com/build/docs/automating-builds)
* [kubectl CLI Reference](https://kubernetes.io/docs/reference/kubectl/)