> ## Documentation Index
> Fetch the complete documentation index at: https://notes.kodekloud.com/llms.txt
> Use this file to discover all available pages before exploring further.
# Demo Configure container native load balancing using Ingress
> This tutorial explains setting up container-native load balancing on GKE using Ingress and Network Endpoint Groups.
In this tutorial, you’ll learn how to set up container-native load balancing for your GKE applications using Ingress and Network Endpoint Groups (NEGs). We’ll cover:
1. Creating a custom subnet in your VPC
2. Provisioning a VPC-native GKE cluster with IP aliasing
3. Deploying a simple HTTP server
4. Exposing it via Ingress backed by a NEG
5. Viewing the resulting Load Balancer and NEGs
6. Scaling the deployment and validating load balancing
This end-to-end guide uses Google Cloud Platform commands, Kubernetes manifests, and Console walkthroughs.
***
## 1. Create a custom subnet
First, create a `/24` subnet in the **default** VPC in **us-west1**:
```bash theme={null}
gcloud compute networks subnets create gke-deep-dive-subnet \
--network=default \
--region=us-west1 \
--range=10.10.0.0/24
```
You can verify the new subnet under **VPC networks > default VPC** in the Cloud Console.
Choose a CIDR range that doesn’t overlap with your existing networks. This subnet will host both Pods and Services via secondary IP ranges.
***
## 2. Provision a VPC-native GKE cluster
Set your Compute region and zone, then create a GKE cluster with **IP aliasing** enabled on the custom subnet:
```bash theme={null}
gcloud config set compute/region us-west1
gcloud config set compute/zone us-west1-a
gcloud container clusters create gke-deep-dive \
--num-nodes=1 \
--disk-type=pd-standard \
--disk-size=10 \
--enable-ip-alias \
--subnetwork=gke-deep-dive-subnet
```
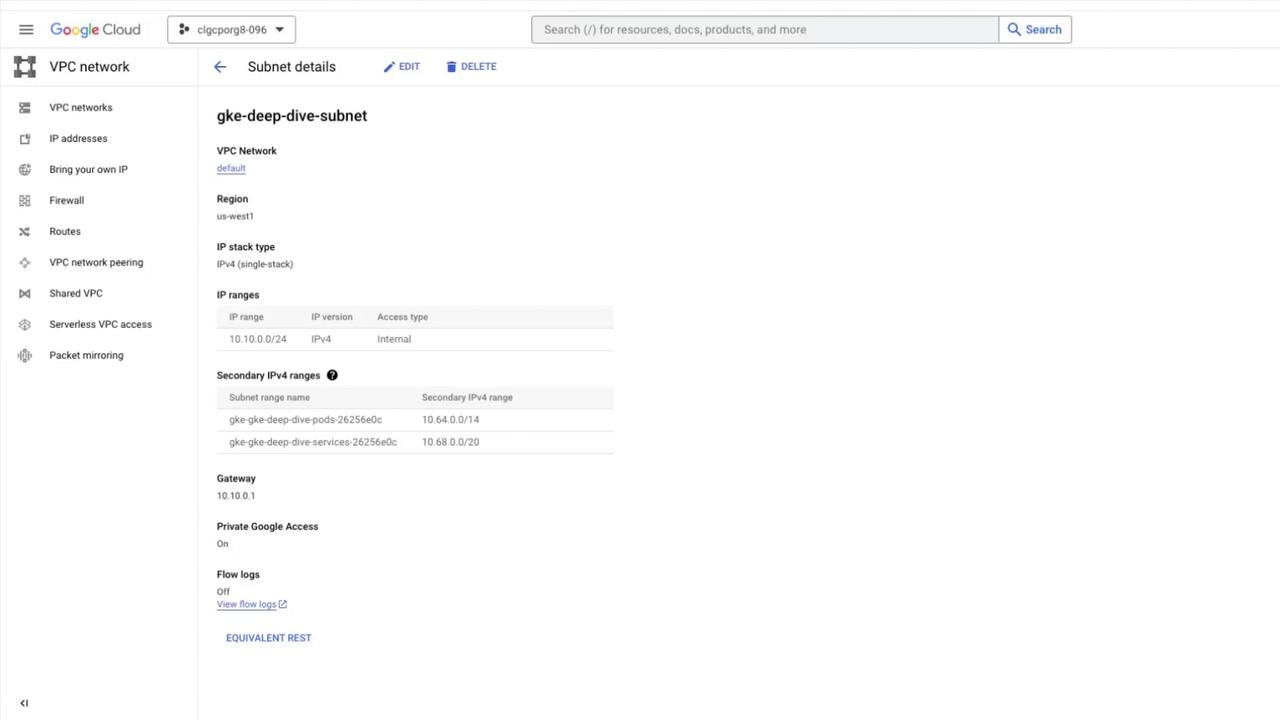
Cluster provisioning typically takes 10–15 minutes. Verify that two secondary IP ranges (for Pods and Services) appear under your subnet.
***
## 3. Deploy the HTTP server application
We’ll deploy a basic HTTP server that responds with its Pod hostname.
### 3.1 Deployment manifest
Create a file named `gke-deep-dive-app.yaml`:
```yaml theme={null}
apiVersion: apps/v1
kind: Deployment
metadata:
name: gke-deep-dive-app
labels:
app: gke-deep-dive-app
spec:
replicas: 1
selector:
matchLabels:
app: gke-deep-dive-app
template:
metadata:
labels:
app: gke-deep-dive-app
spec:
containers:
- name: gke-deep-dive
image: gcr.io/google-containers/serve_hostname
ports:
- containerPort: 80
protocol: TCP
```
Apply and verify:
```bash theme={null}
kubectl apply -f gke-deep-dive-app.yaml
kubectl get pods
```
### 3.2 Service manifest
Expose the Deployment as a ClusterIP Service annotated for NEGs. Save as `gke-deep-dive-svc.yaml`:
```yaml theme={null}
apiVersion: v1
kind: Service
metadata:
name: gke-deep-dive-svc
annotations:
cloud.google.com/neg: '{"ingress": true}'
spec:
type: ClusterIP
selector:
app: gke-deep-dive-app
ports:
- name: http
port: 80
protocol: TCP
targetPort: 80
```
Apply and confirm:
```bash theme={null}
kubectl apply -f gke-deep-dive-svc.yaml
kubectl get svc
```
### 3.3 Ingress manifest
Create `gke-deep-dive-ing.yaml` to route HTTP traffic via Ingress:
```yaml theme={null}
apiVersion: networking.k8s.io/v1
kind: Ingress
metadata:
name: gke-deep-dive-ing
spec:
defaultBackend:
service:
name: gke-deep-dive-svc
port:
number: 80
```
Apply the Ingress:
```bash theme={null}
kubectl apply -f gke-deep-dive-ing.yaml
kubectl get ingress
```
An **EXTERNAL-IP** may take a few minutes to appear. Wait until it’s provisioned before testing.
Once you have the IP, browse to:
```text theme={null}
http://
```
You should see the hostname of the serving Pod.
### 3.4 Resource manifest overview
| Resource Type | File | Purpose |
| ------------- | ---------------------- | --------------------------------------- |
| Deployment | gke-deep-dive-app.yaml | Deploy basic HTTP server |
| Service | gke-deep-dive-svc.yaml | Expose Pods with NEG annotation |
| Ingress | gke-deep-dive-ing.yaml | Route external HTTP traffic via Ingress |
***
## 4. View Load Balancer and NEG
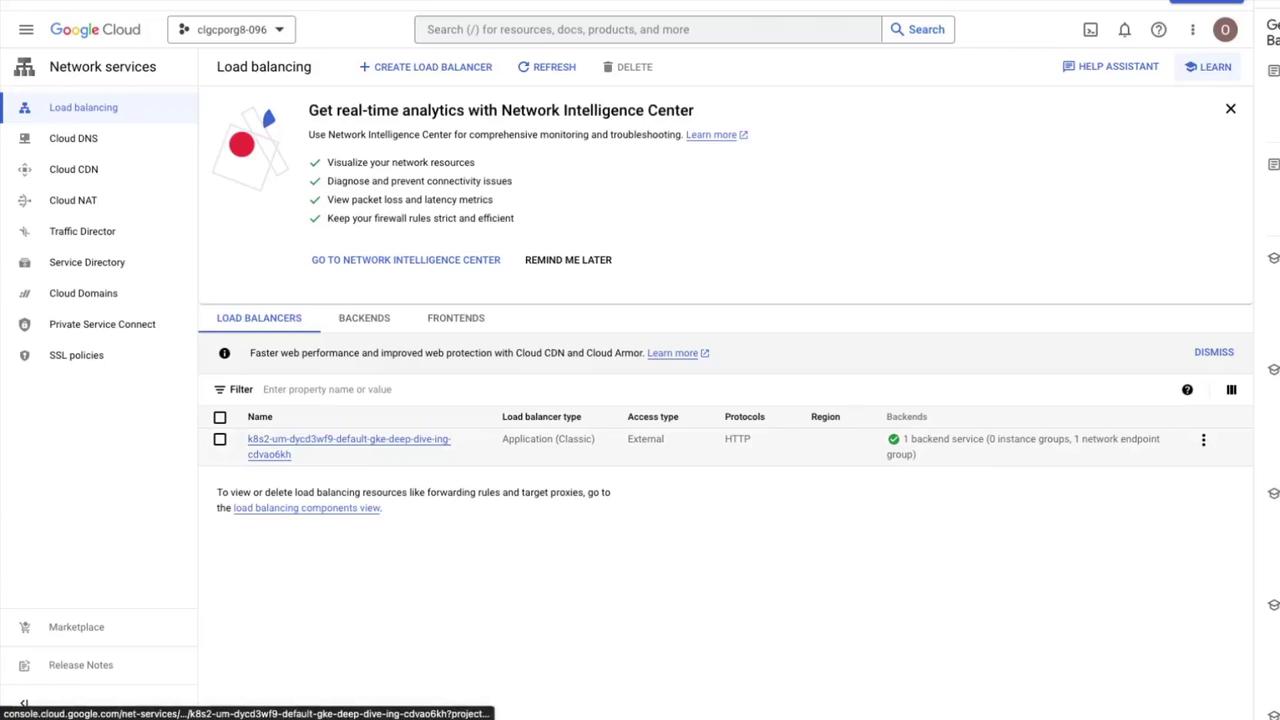
In the Cloud Console, go to **Network services > Load balancing**. You’ll see an HTTP(S) Load Balancer created for your Ingress:
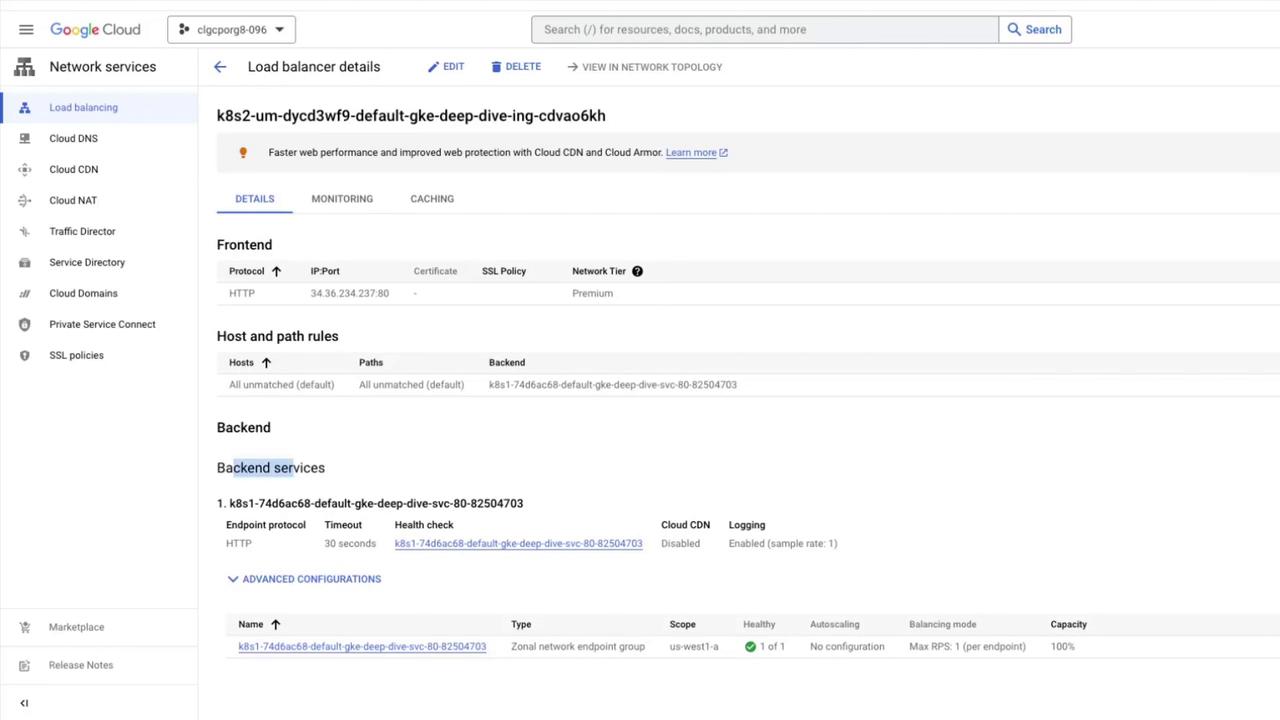
Click the Load Balancer name to view both frontend and backend configurations:
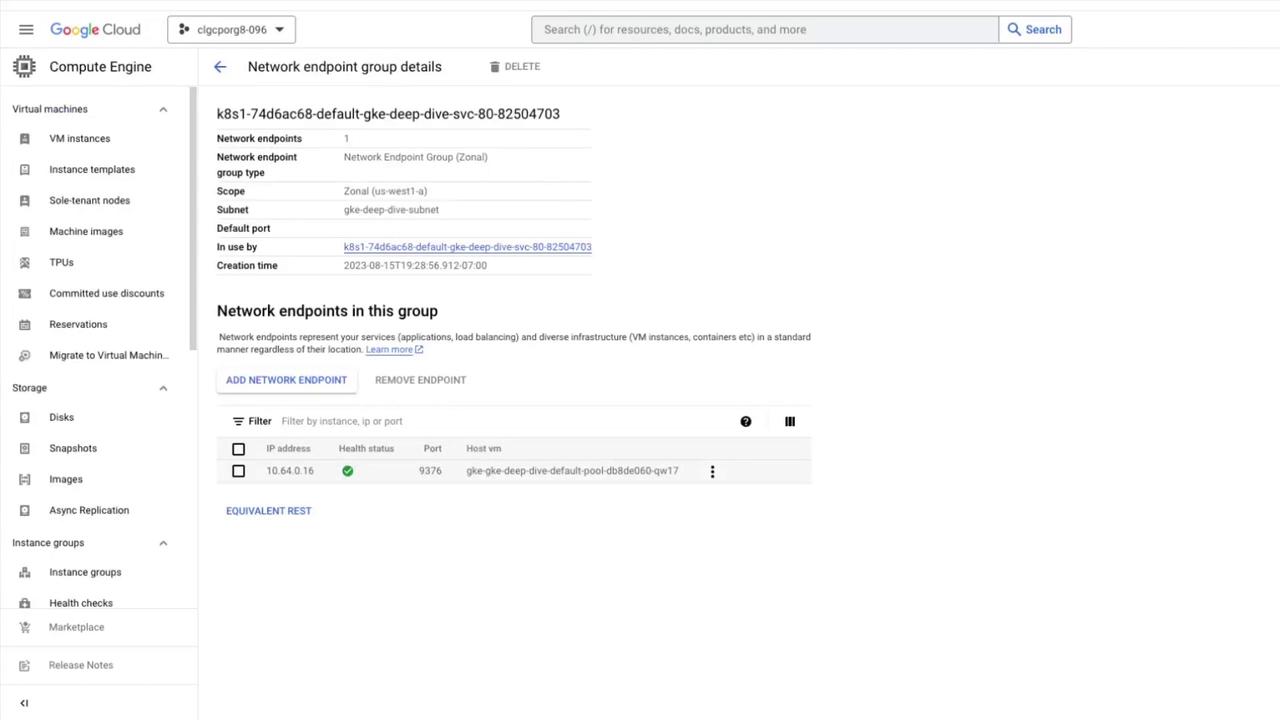
Select the backend service to inspect the NEG:
***
## 5. Scale and verify load balancing
Increase the Deployment to three replicas:
```bash theme={null}
kubectl scale deployment gke-deep-dive-app --replicas=3
kubectl get deployment gke-deep-dive-app
```
Refresh your browser at the Ingress IP. You’ll see responses cycling through the three Pod hostnames, demonstrating container-native load balancing via Ingress + NEGs.
***
## Links and References
* [GKE documentation](https://cloud.google.com/kubernetes-engine/docs)
* [Kubernetes Ingress Guide](https://kubernetes.io/docs/concepts/services-networking/ingress/)
* [Network Endpoint Groups](https://cloud.google.com/load-balancing/docs/negs)
* [VPC-Native Clusters (IP Aliasing)](https://cloud.google.com/kubernetes-engine/docs/concepts/alias-ips)
* [Google Cloud Console – Load Balancing](https://console.cloud.google.com/net-services/loadbalancing)