> ## Documentation Index
> Fetch the complete documentation index at: https://notes.kodekloud.com/llms.txt
> Use this file to discover all available pages before exploring further.
# Demo Create a VPC native cluster and configure max allowed pods
> This tutorial teaches how to create a VPC-native GKE cluster with IP aliasing and manage secondary IP ranges.
In this tutorial, you’ll learn how to provision a VPC-native Google Kubernetes Engine (GKE) cluster with IP aliasing and manage its secondary IP ranges. We’ll walk through:
| Step | Description |
| ---- | ------------------------------------------- |
| 1 | Set your Compute Zone |
| 2 | Create a custom VPC |
| 3 | Add a regional subnet |
| 4 | Launch an IP-alias (VPC-native) GKE cluster |
| 5 | Verify the secondary IP ranges |
| 6 | Clean up all resources |
***
## 1. Set the Compute Zone
Configure your default compute zone to `us-west1-a` (or your preferred region).
```bash theme={null}
gcloud config set compute/zone us-west1-a
```
***
## 2. Create a Custom VPC
Create a VPC in custom subnet mode so you can define your own IP ranges.
```bash theme={null}
gcloud compute networks create gke-deep-dive-vpc \
--subnet-mode=custom
```
In the Google Cloud Console, navigate to **VPC network → VPC networks**. You should see `gke-deep-dive-vpc` listed, but no subnets yet.
***
## 3. Add a Regional Subnet
Define a subnet in `us-west1` with a /24 CIDR block.
```bash theme={null}
gcloud compute networks subnets create gke-deep-dive-subnet \
--network=gke-deep-dive-vpc \
--range=10.10.0.0/24 \
--region=us-west1
```
VPC networks are global, whereas subnets are regional. Choose the region that best suits your workload.
Refresh **VPC networks → Subnets** in the Console to confirm the `gke-deep-dive-subnet` (10.10.0.0/24) appears under your VPC.
***
## 4. Launch an IP-Alias (VPC-native) GKE Cluster
Use IP aliasing to allocate two secondary IP ranges—one for Pods and one for Services.
```bash theme={null}
gcloud container clusters create gke-dive-vpc-native \
--zone=us-west1-a \
--num-nodes=1 \
--disk-type=pd-standard \
--disk-size=10 \
--enable-ip-alias \
--network=gke-deep-dive-vpc \
--subnetwork=gke-deep-dive-subnet \
--cluster-secondary-range-name=pods-range \
--services-secondary-range-name=services-range \
--cluster-ipv4-cidr=/21 \
--services-ipv4-cidr=/21
```
| Flag | Purpose |
| --------------------------------- | ------------------------------------------------ |
| `--enable-ip-alias` | Enable VPC-native IP aliasing |
| `--cluster-secondary-range-name` | Name for the Pods’ secondary IP range |
| `--services-secondary-range-name` | Name for the Services’ secondary IP range |
| `/21` CIDR | Allocates a block with \~2048 IPs for each range |
Cluster provisioning can take several minutes.
***
## 5. Verify Secondary Ranges
### Console View
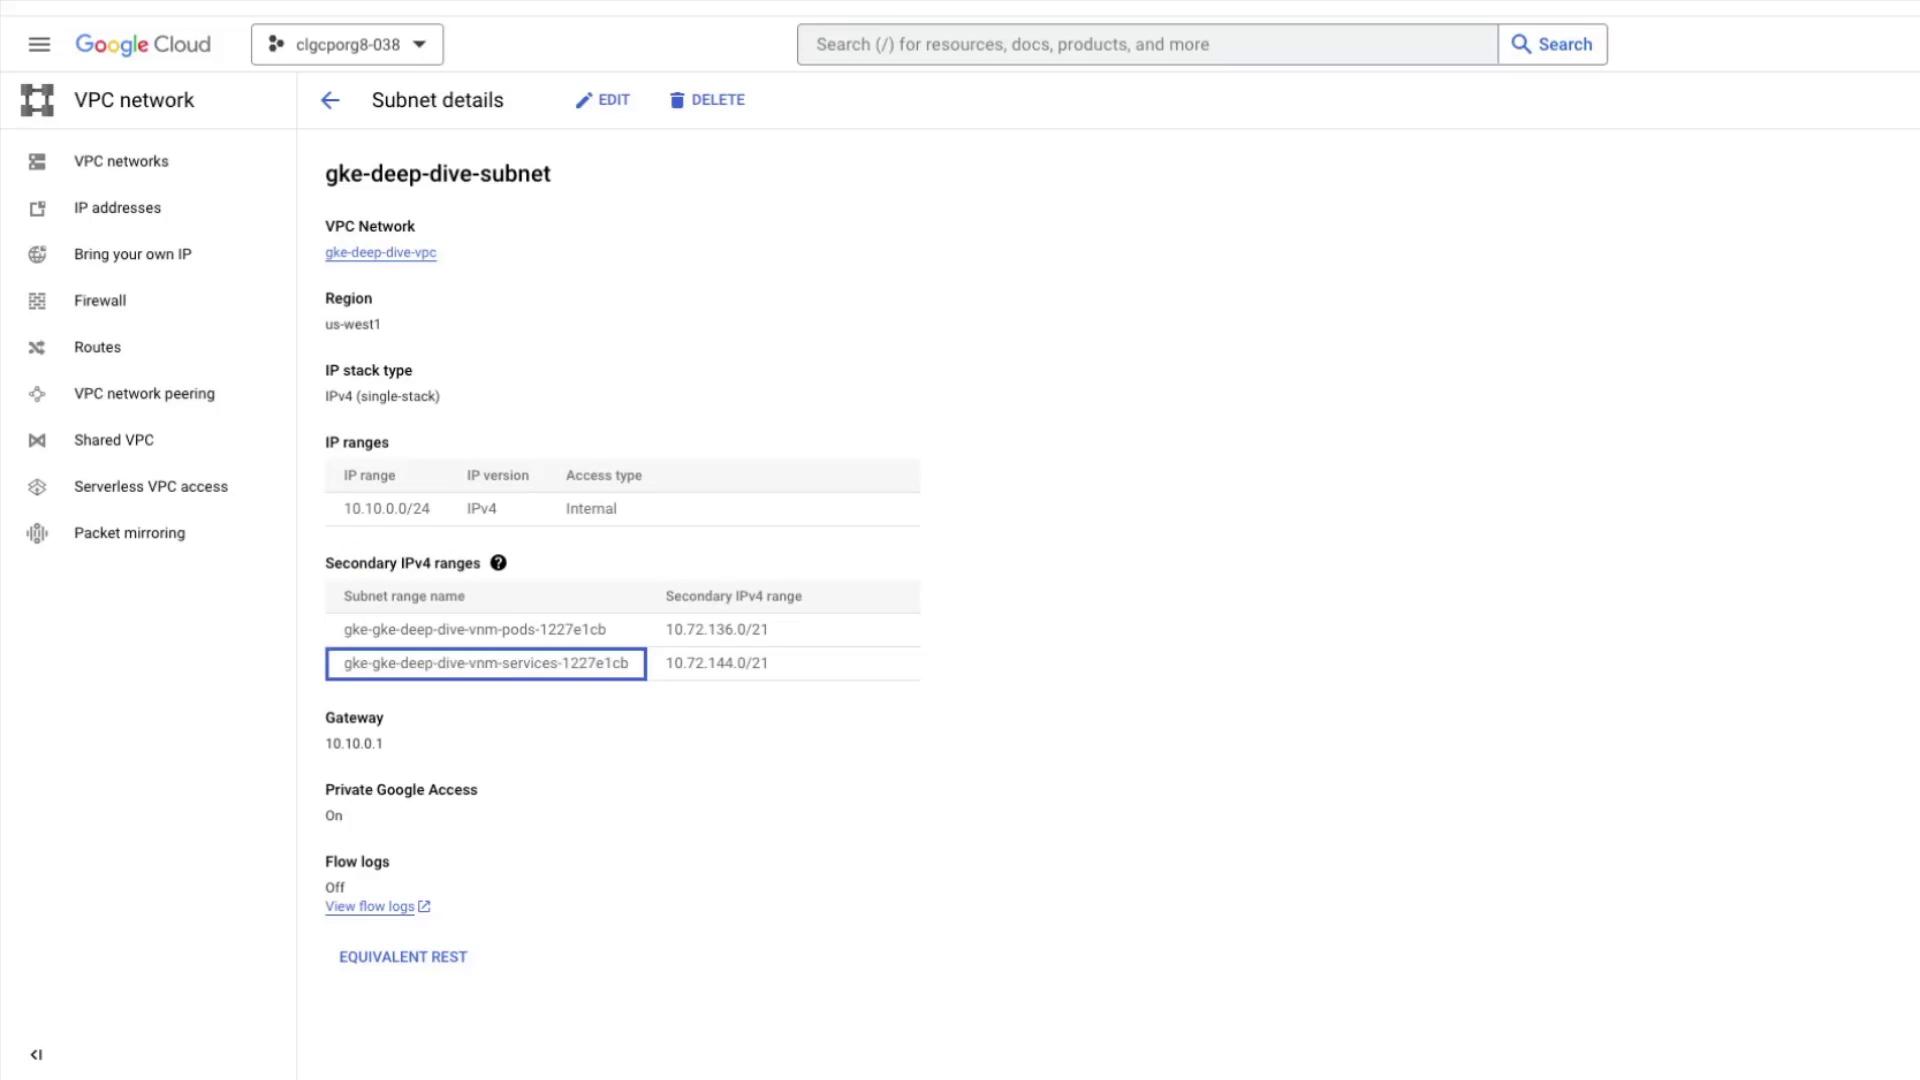
In the Cloud Console, open **VPC networks → Subnets** and select `gke-deep-dive-subnet`. You should see two new secondary IP ranges:
### CLI Verification
Describe the cluster’s IP allocation policy:
```bash theme={null}
gcloud container clusters describe gke-dive-vpc-native \
--zone=us-west1-a \
--format="yaml(ipAllocationPolicy)"
```
Look for these fields in the output:
* `clusterIpv4Cidr`
* `servicesIpv4Cidr`
* `clusterSecondaryRangeName`
* `servicesSecondaryRangeName`
***
## 6. Clean Up Resources
### Delete the GKE Cluster
```bash theme={null}
gcloud container clusters delete gke-dive-vpc-native \
--zone=us-west1-a --quiet
```
Secondary ranges are automatically detached from `gke-deep-dive-subnet` upon cluster deletion.
### Remove Subnet and VPC
```bash theme={null}
gcloud compute networks subnets delete gke-deep-dive-subnet \
--region=us-west1 --quiet
gcloud compute networks delete gke-deep-dive-vpc --quiet
```
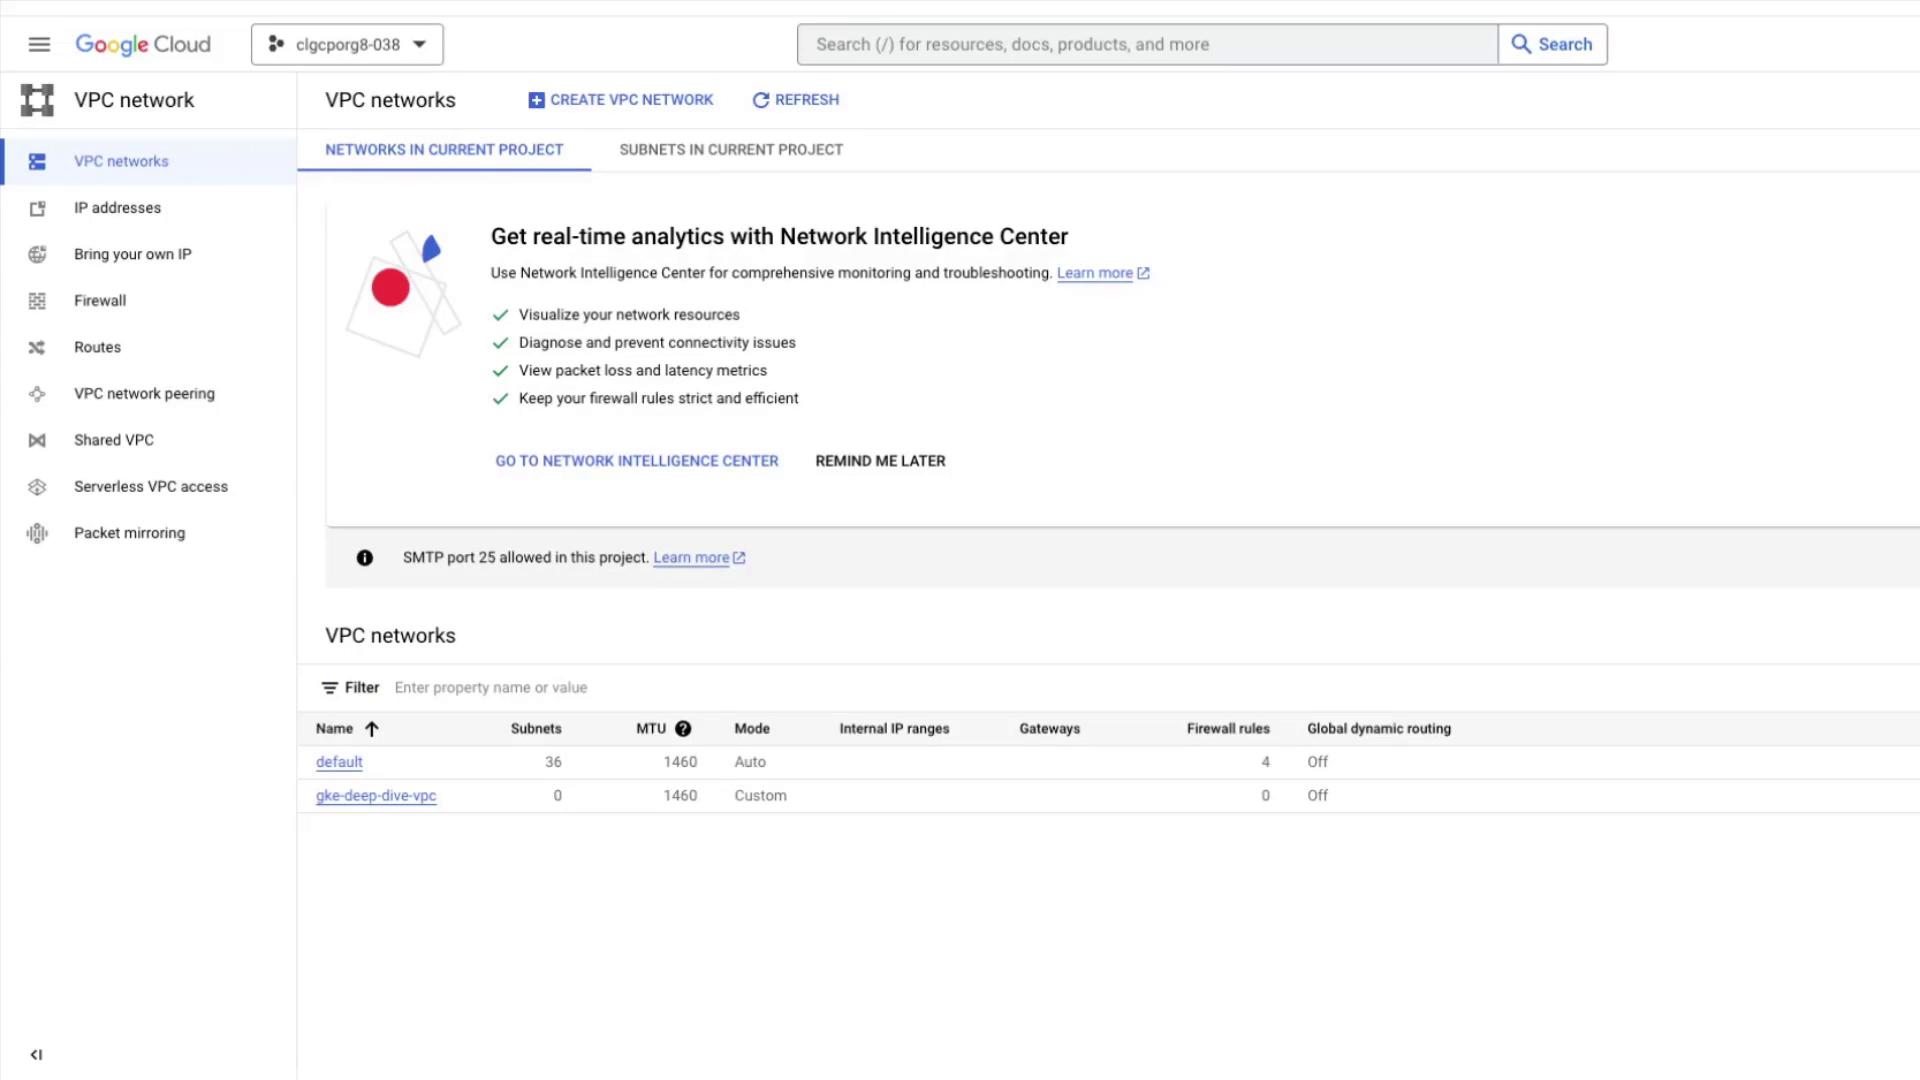
Back in the Console, verify that only the default VPC remains:
Resource deletion is irreversible. Ensure no critical workloads are running before you clean up.
***
## Links and References
* [GKE IP Aliasing](https://cloud.google.com/kubernetes-engine/docs/how-to/alias-ips)
* [Configuring VPC Networks](https://cloud.google.com/vpc/docs)
* [Google Kubernetes Engine Documentation](https://cloud.google.com/kubernetes-engine/docs)