> ## Documentation Index
> Fetch the complete documentation index at: https://notes.kodekloud.com/llms.txt
> Use this file to discover all available pages before exploring further.
# Clone Git Repo
> This tutorial guides you through migrating the Solar System application repository from GitLab to GitHub.
In this tutorial, you’ll migrate the Solar System application repository from GitLab to GitHub. Once the import is complete, you can start building and automating workflows with GitHub Actions.
## Step 1: Copy the GitLab Repository URL
1. Sign in to your GitLab account and navigate to the Solar System project.
2. Click **Clone** and choose either **HTTPS** or **SSH**.
3. Copy the displayed URL to your clipboard.
If you select SSH, ensure your local machine has the corresponding SSH key added to your [GitLab SSH Keys](https://docs.gitlab.com/ee/ssh/#add-an-ssh-key-to-your-gitlab-account).
## Step 2: Import the Repository on GitHub
1. In your GitHub account, go to **Import a repository**:\
[https://github.com/new/import](https://github.com/new/import)
2. Paste the GitLab clone URL into **Old repository’s clone URL**.
3. Assign a **Name** for the new repository (e.g., `solar-system`).
4. Select **Public** or **Private** under **Visibility**.
5. Click **Begin import**.
| Field | Description |
| -------------------------- | -------------------------------------------------- |
| Old repository’s clone URL | The HTTPS or SSH clone URL you copied from GitLab |
| Name | Your new GitHub repo name (e.g., `solar-system`) |
| Visibility | Public (open to everyone) or Private (restricted) |
| Begin import | Starts the migration and transfers commits & files |
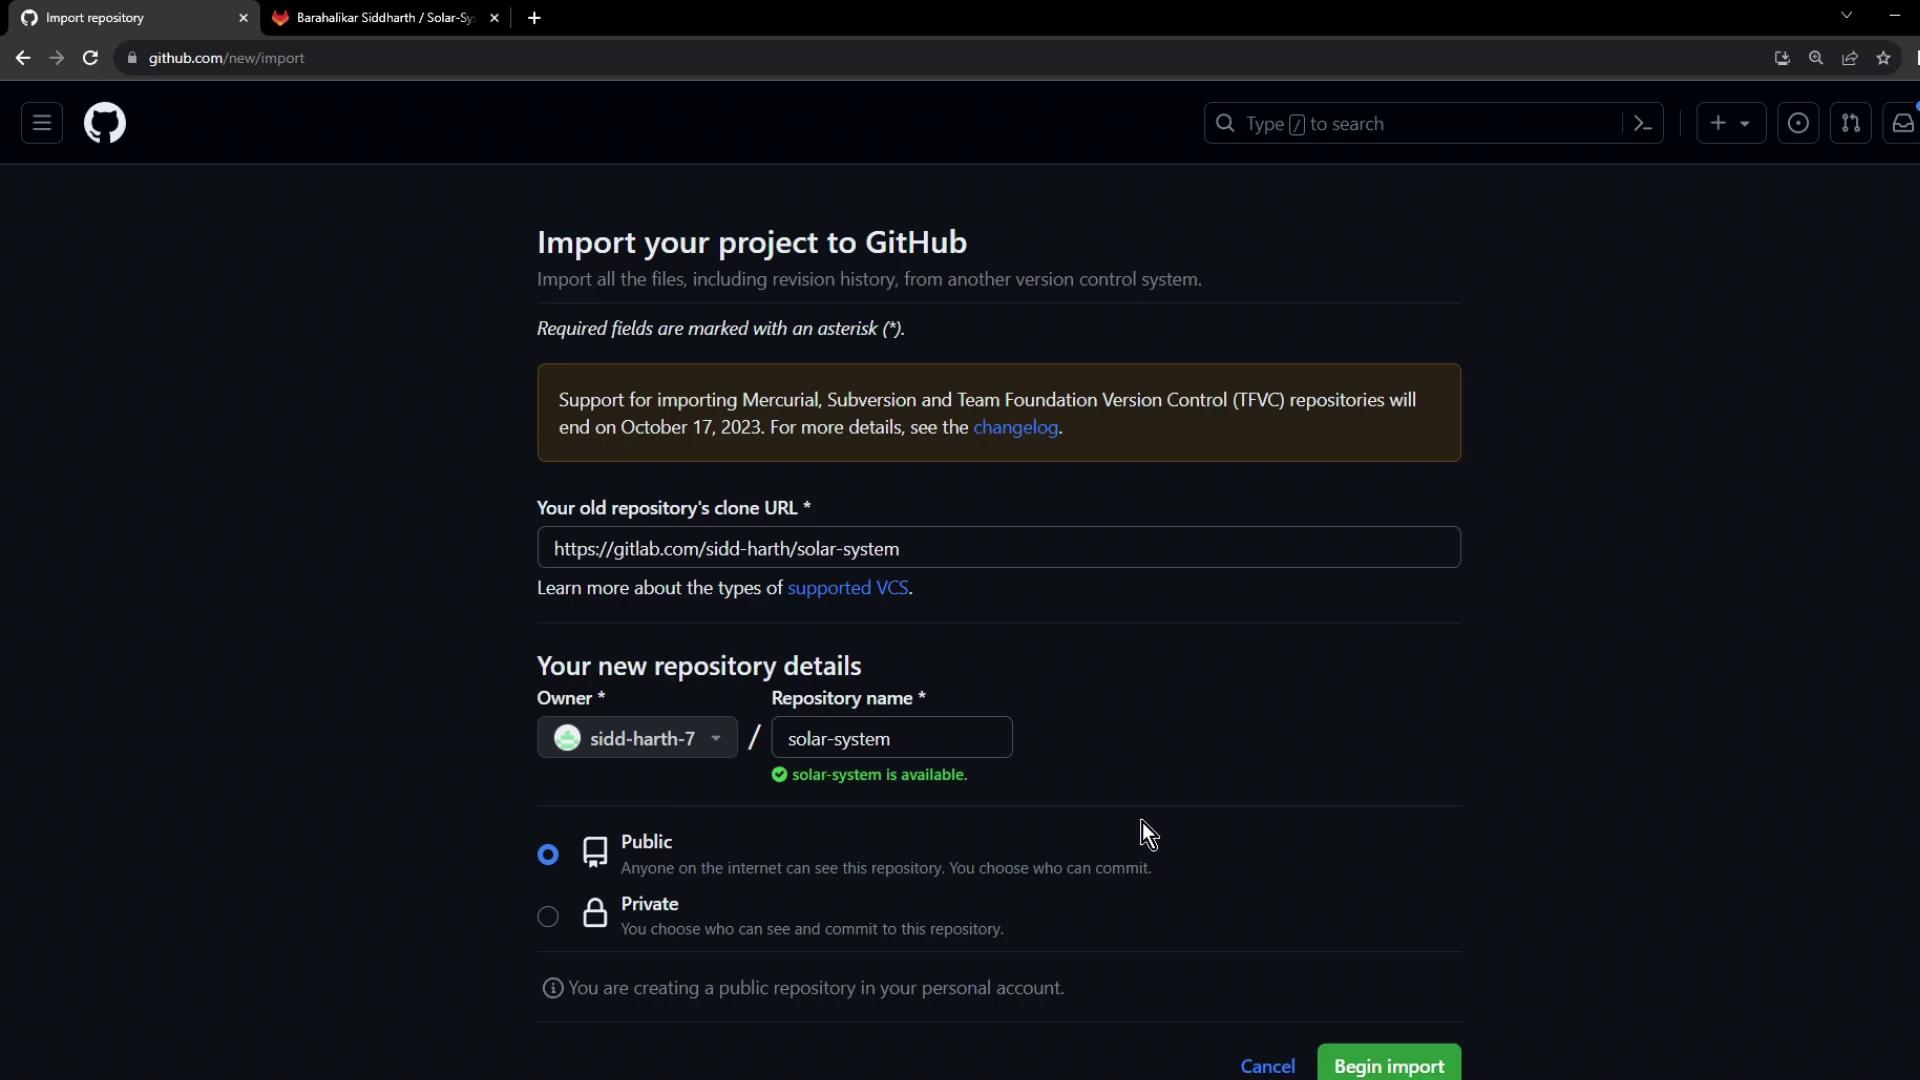
Large repositories may take a few minutes to finish importing all files and commit history.
## Step 3: Verify the Imported Repository
Once the process completes, you’ll see:
**Import complete — your new repository is ready**
1. Click **View your new project** or navigate directly to your GitHub organization.
2. Confirm that every file, branch, and commit history has been transferred.
If you don’t see all branches, check the importer logs or retry the import. For troubleshooting, refer to [GitHub Importer troubleshooting](https://docs.github.com/en/github/importing-your-projects-to-github/troubleshooting-an-import).
***
Now that your Solar System application resides on GitHub, you’re all set to configure GitHub Actions workflows and automate your CI/CD pipeline.
## Links and References
* [GitHub Importing a repository](https://docs.github.com/en/github/importing-your-projects-to-github/importing-a-repository-with-github-importer)
* [GitLab HTTPS and SSH clone URLs](https://docs.gitlab.com/ee/gitlab-basics/start-using-git.html#clone-a-repository)
* [GitHub Actions Documentation](https://docs.github.com/en/actions)