> ## Documentation Index
> Fetch the complete documentation index at: https://notes.kodekloud.com/llms.txt
> Use this file to discover all available pages before exploring further.
# Managing self hosted runners using groups Part 2
> This article covers managing self-hosted GitHub Actions runners, including creating custom groups, moving runners, and configuring access controls for secure workflows.
Welcome to Part 2 of our guide on managing self-hosted GitHub Actions runners at the enterprise level. In Part 1, we provisioned a runner and attached it to the default enterprise group. Now, we'll dive into creating custom runner groups, moving runners between them, and configuring access controls to ensure your workflows run securely and predictably.
If you haven’t set up your first self-hosted runner yet, check out [Part 1: Provisioning Self-Hosted Runners](#).
## What Are Runner Groups?
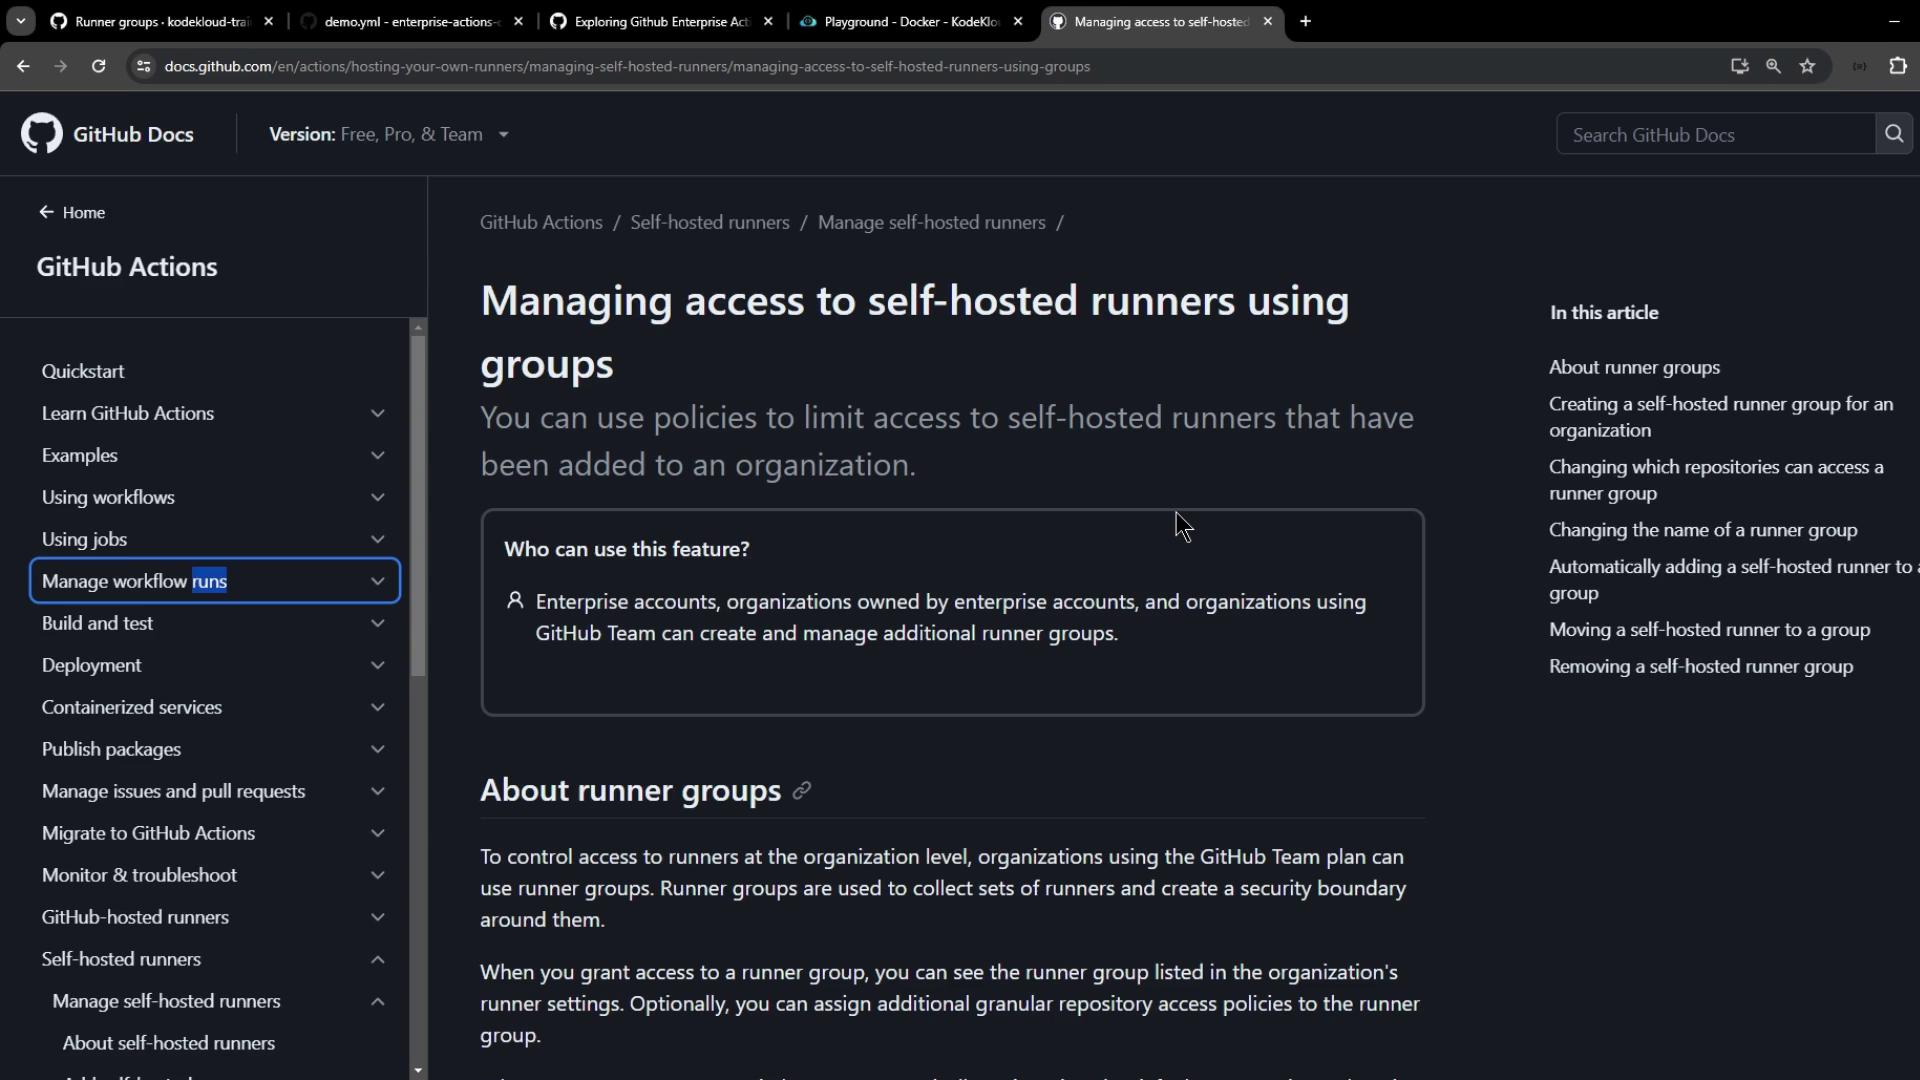
Runner groups let you organize your self-hosted runners under enterprise or organization scopes. You can apply consistent security, network, and repository access policies across each group. For comprehensive details, see the official [GitHub documentation on managing access to self-hosted runners using groups](https://docs.github.com/en/enterprise-cloud@latest/actions/hosting-your-own-runners/managing-access-to-self-hosted-runners).
***
## 1. Creating a New Runner Group
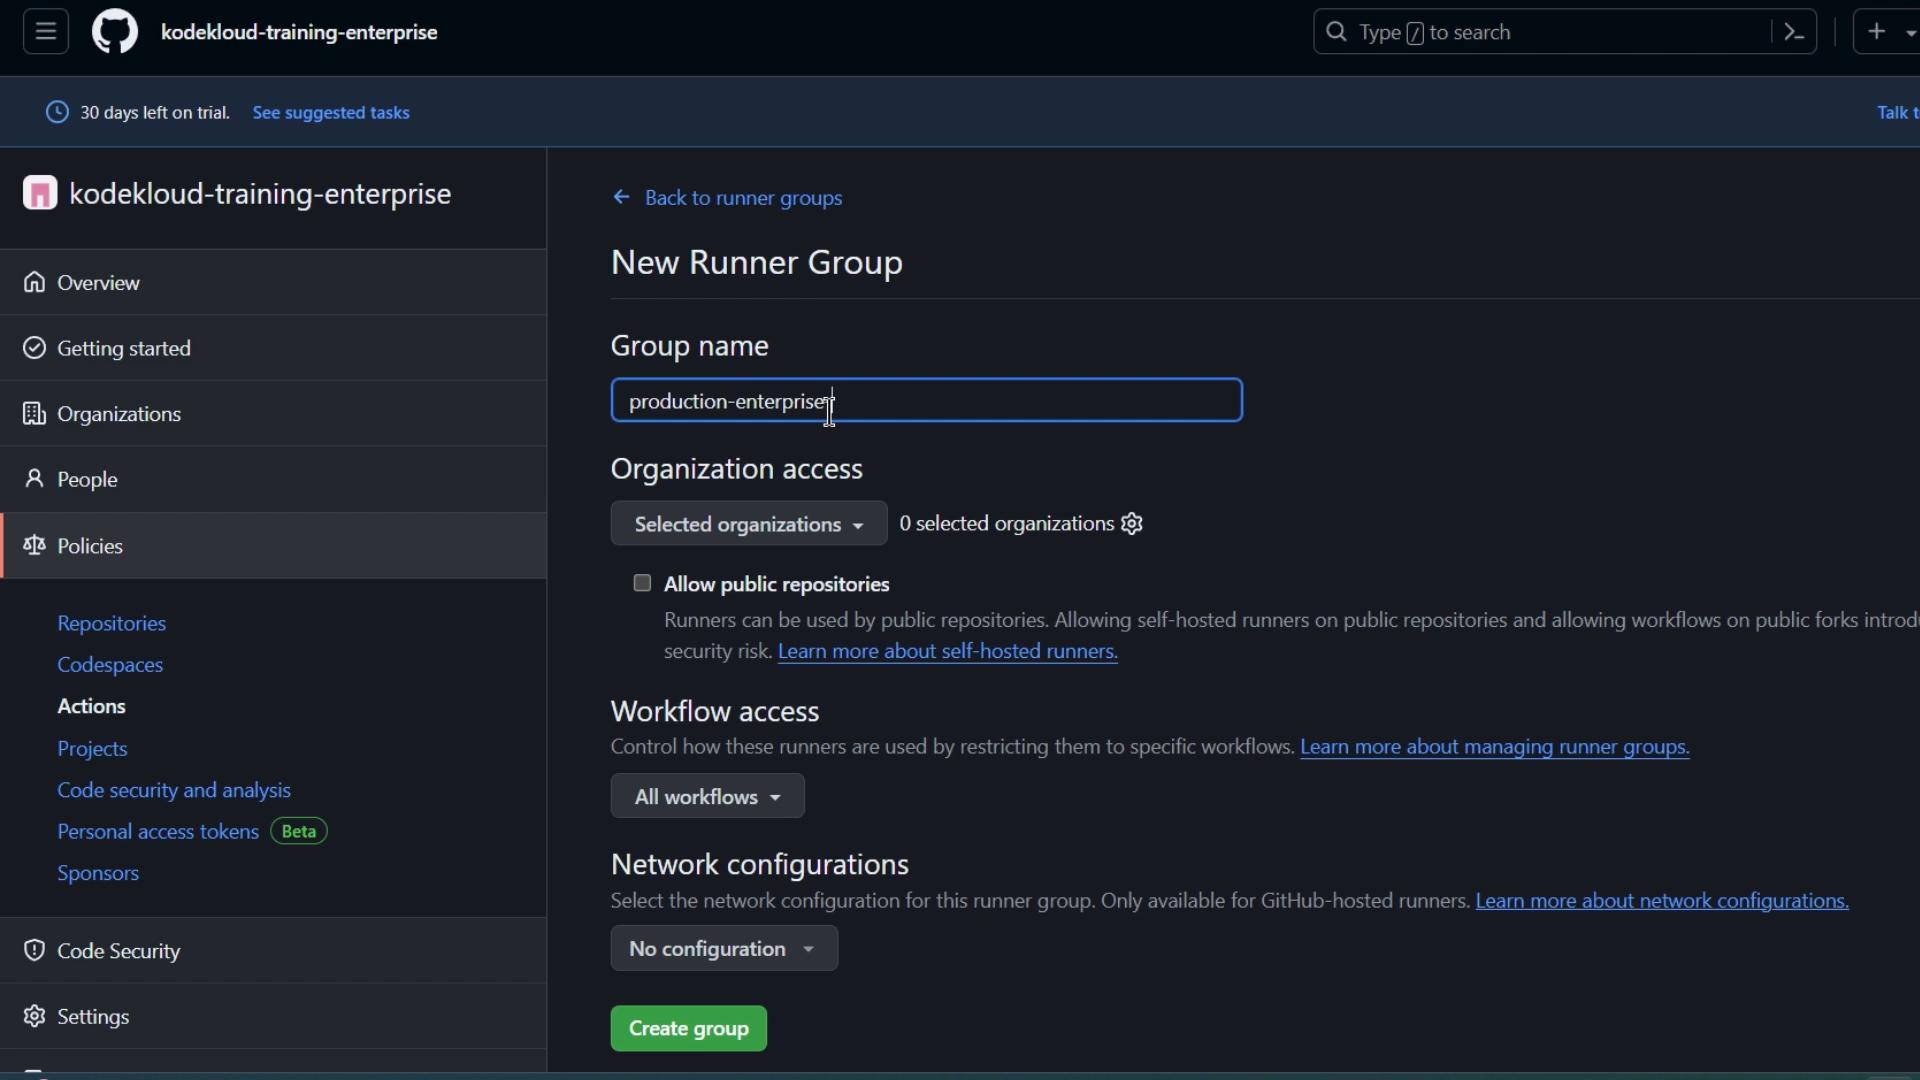
1. Go to **Enterprise settings** > **Policies** > **Actions** > **Runner groups**.
2. Click **New runner group**.
3. Fill in the details:
* **Name**: e.g., `Production Enterprise Group`
* **Organization access**: select one or more orgs
* **Public repositories**: enable if needed
* **Workflow access**: leave unconfigured for now
4. Click **Create group**.
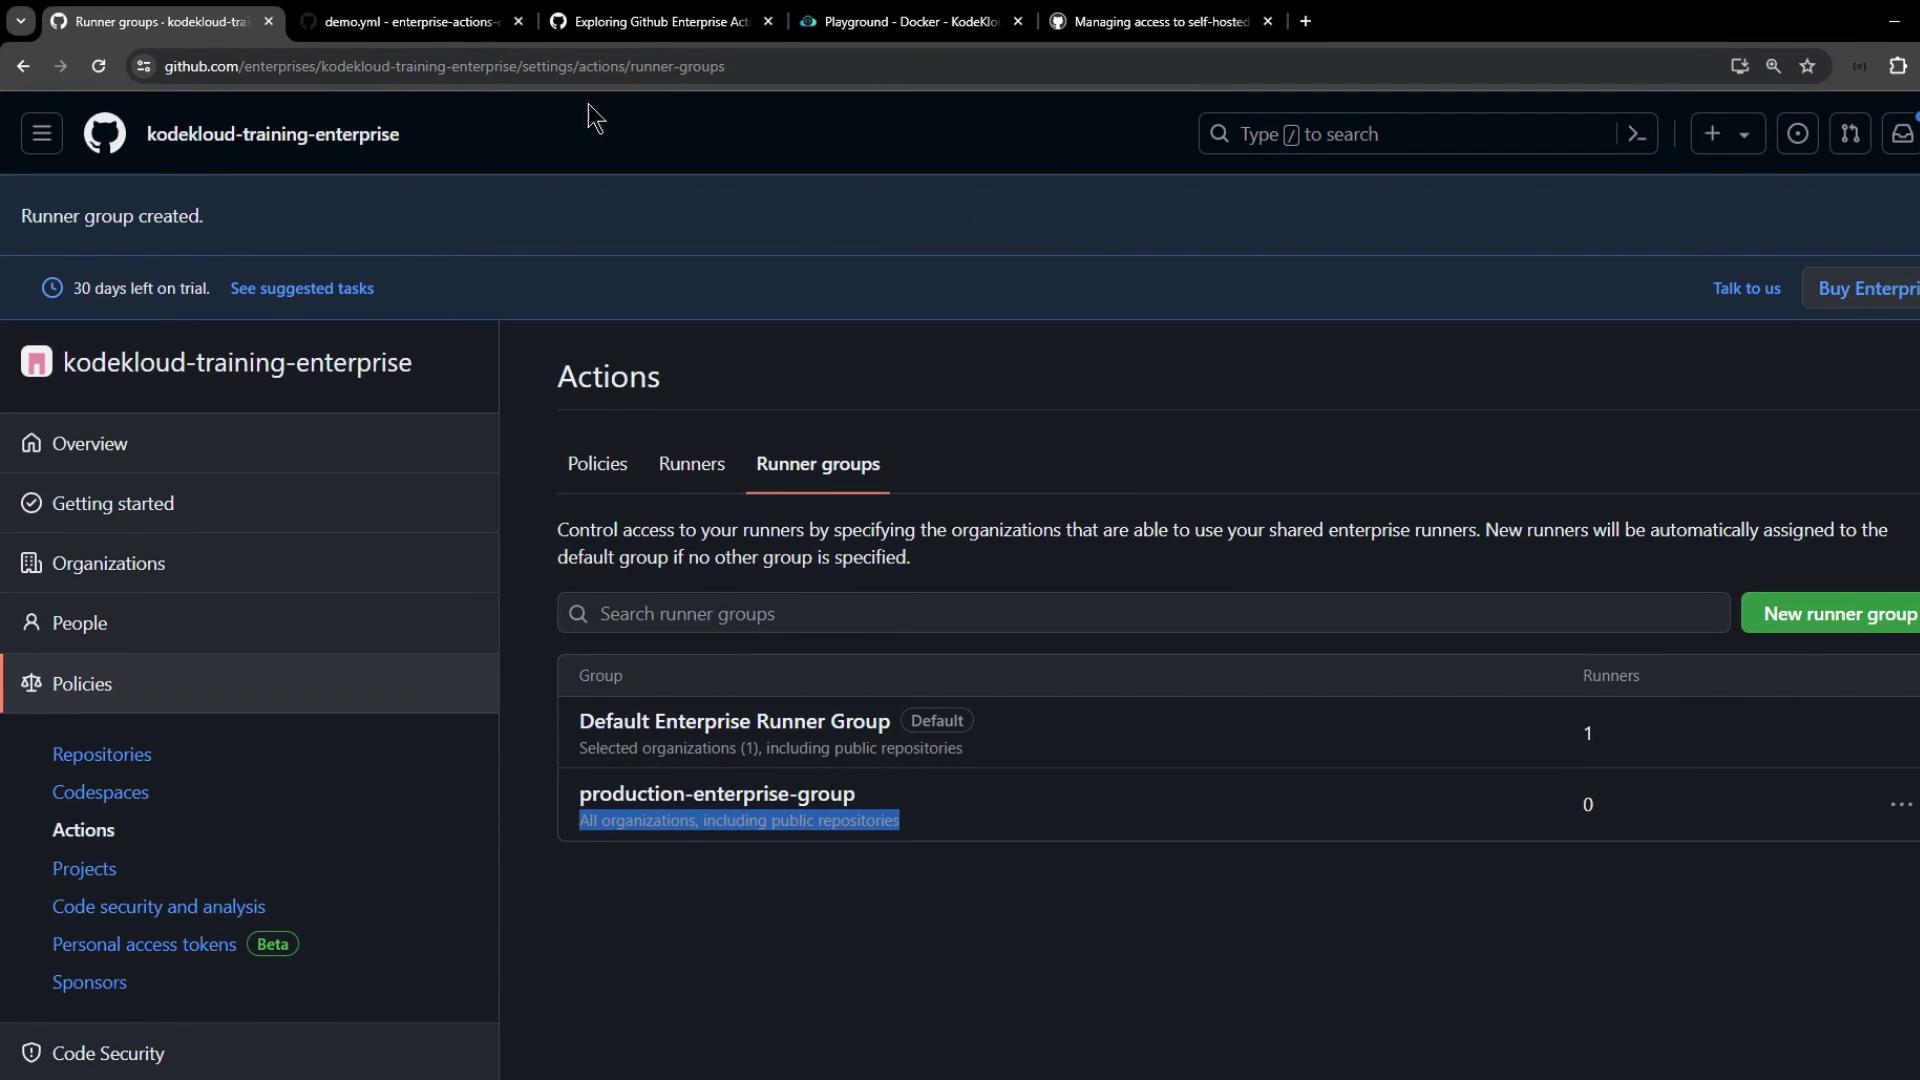
You’ll now see your new group alongside the default enterprise group.
***
## 2. Viewing Runner Groups at the Organization Level
Switch to **Organization settings** > **Actions** > **Runner groups**. Both the **Default** group and your `Production Enterprise Group` (with zero runners) should be listed.
***
## 3. Moving a Runner to the New Group
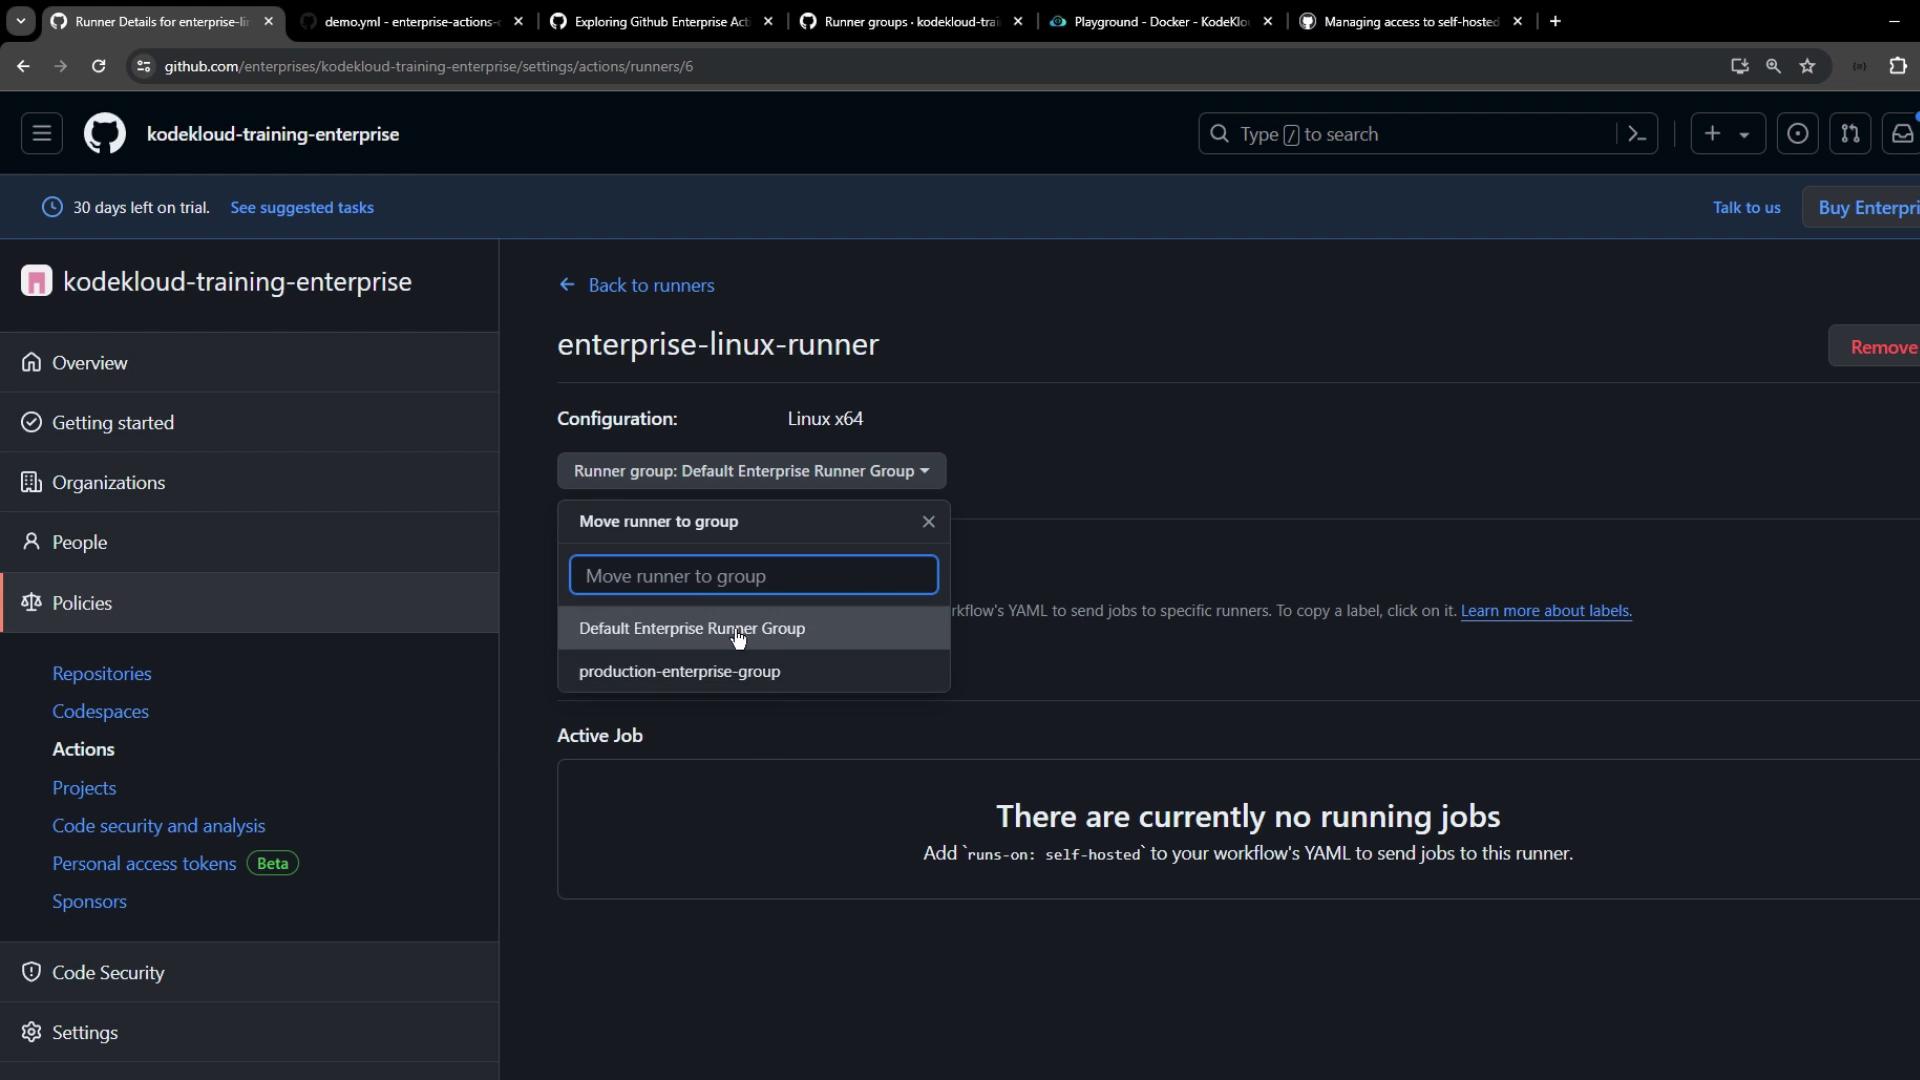
1. Return to **Enterprise settings** > **Actions** > **Runners**.
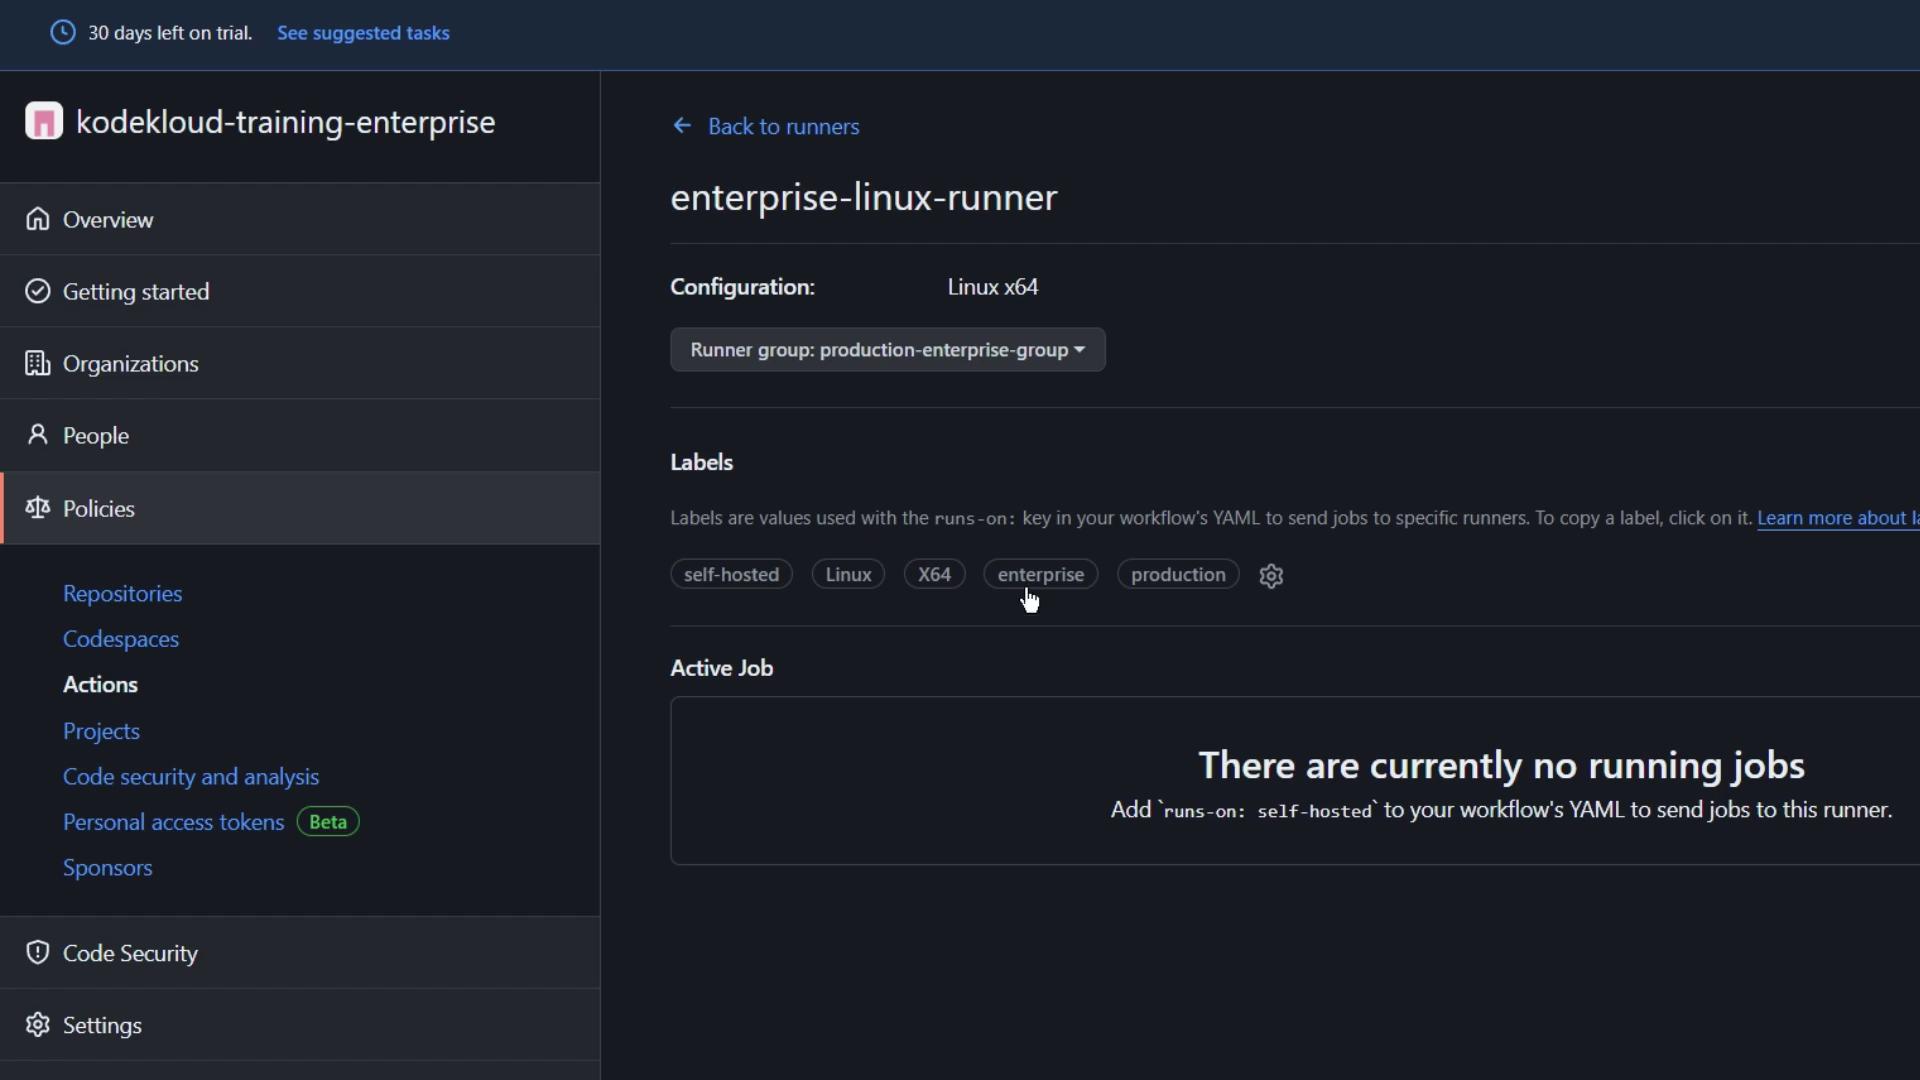
2. Select your **Enterprise Linux Runner** (currently under the default group).
3. Click **Move**, then choose **Production Enterprise Group**.
4. (Optional) Update labels—e.g., replace `enterprise` with `production`.
5. Refresh to see the updated label.
***
## 4. Verifying the Runner at the Organization Level
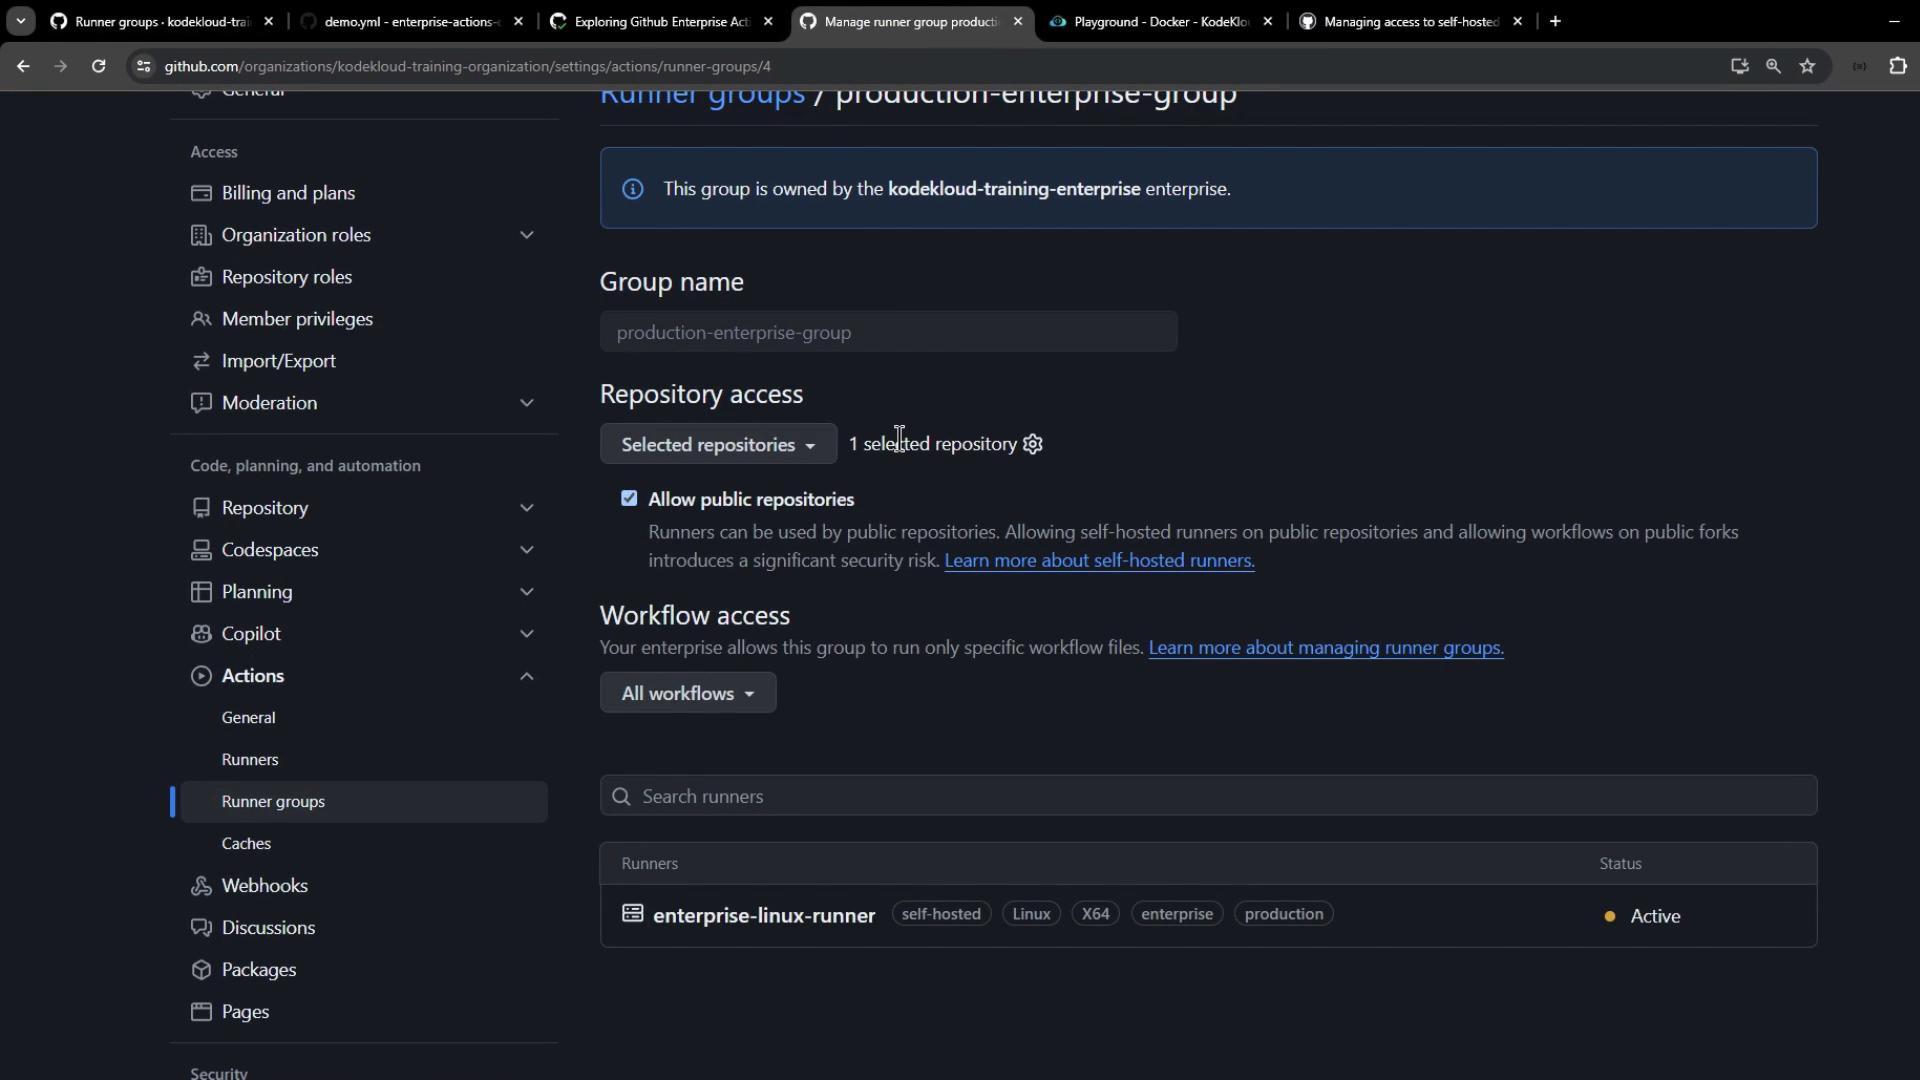
Back in **Organization settings** > **Actions** > **Runner groups**, open `Production Enterprise Group`. You should now see your runner listed.
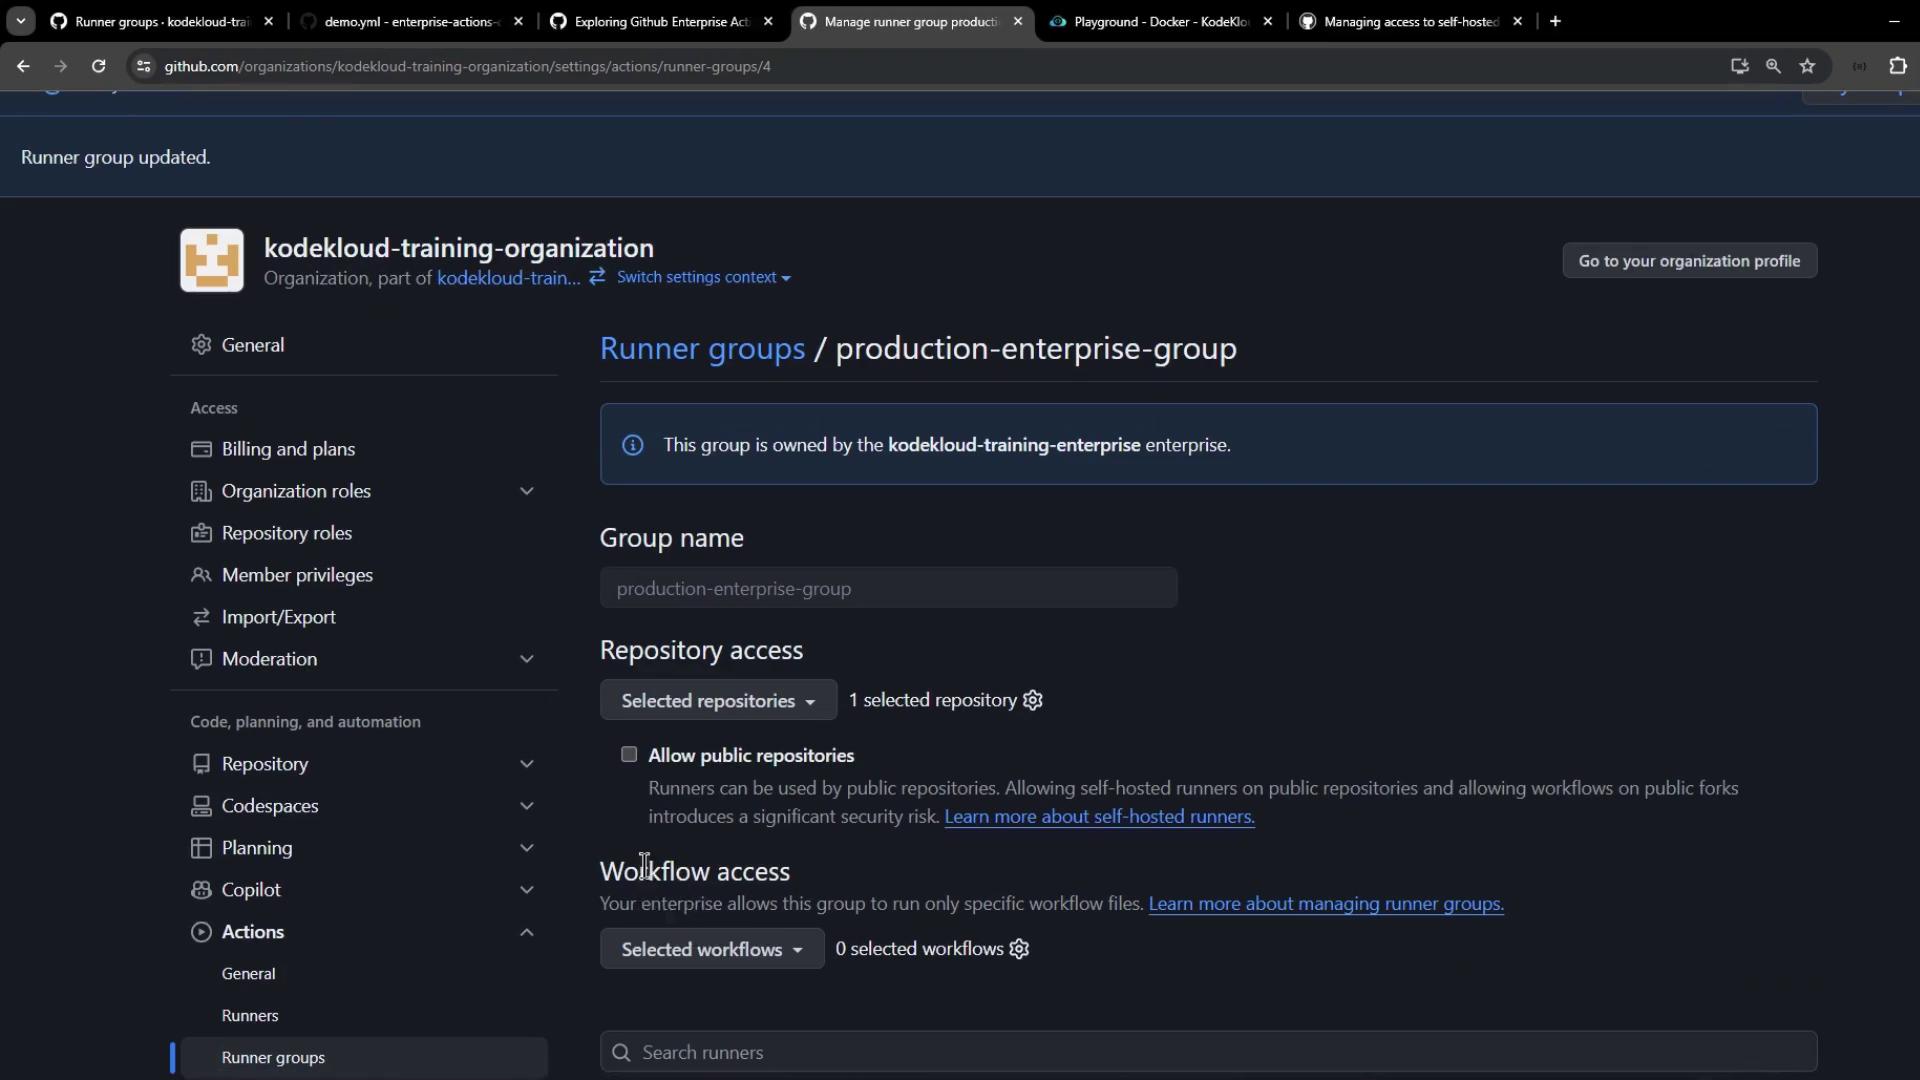
> At this stage, no repositories or workflows are allowed, so the group cannot pick up jobs yet.
***
## 5. Configuring Access Controls
Runner groups enable you to restrict which repos and workflows can use your self-hosted runners.
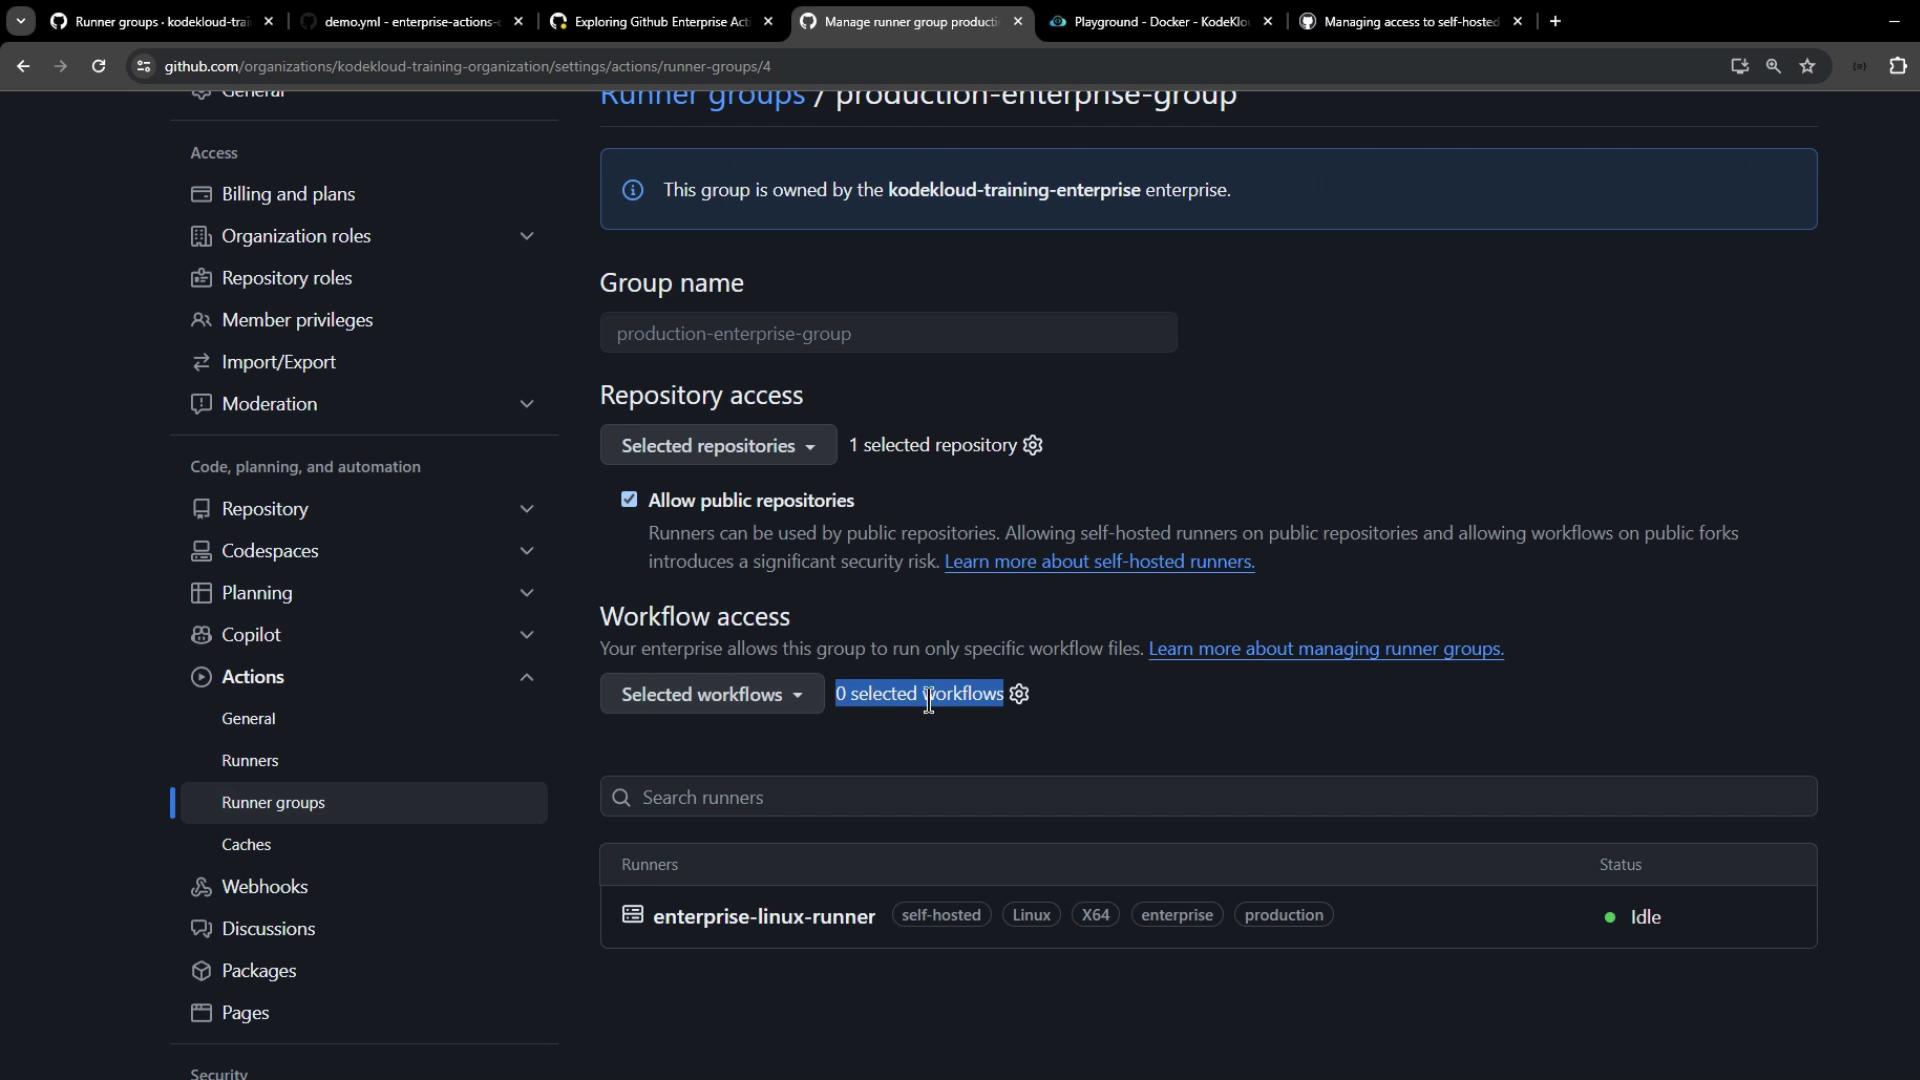
1. Edit **Production Enterprise Group**.
2. Under **Repository access**, select the repositories (e.g., `enterprise-actions-demo`).
3. (Optional) Allow public repositories.
4. Under **Workflow access**, leave at 0 for now.
5. Click **Save**.
***
## 6. Triggering and Troubleshooting a Workflow
1. In the `enterprise-actions-demo` repo, trigger a workflow run manually.
2. You’ll see the job remain **pending** because no workflows are yet allowed.
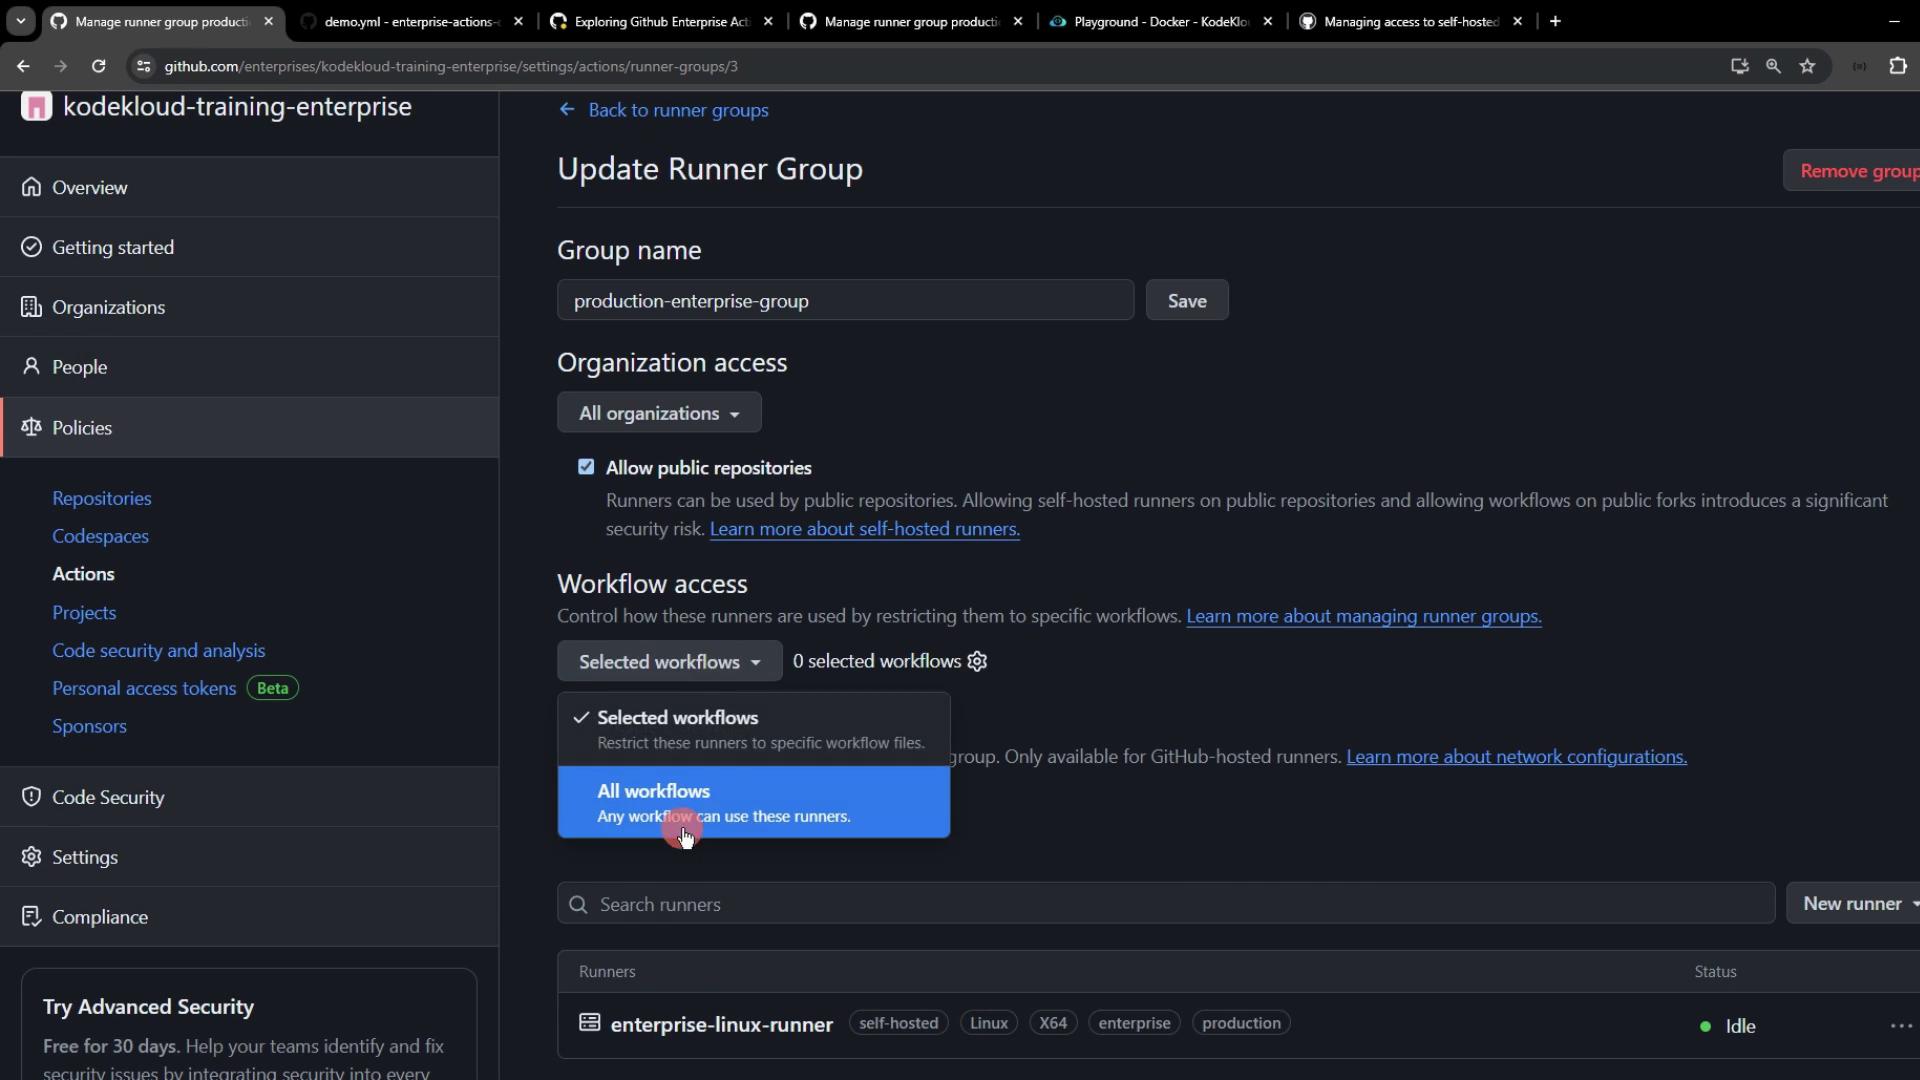
Pending jobs usually mean your runner group isn’t authorized to run any workflows. Update **Workflow access** to allow specific or all workflows.
3. Go back to **Enterprise settings** > **Actions** > **Runner groups** > **Production Enterprise Group**.
4. Set **Workflow access** to **All workflows** and save.
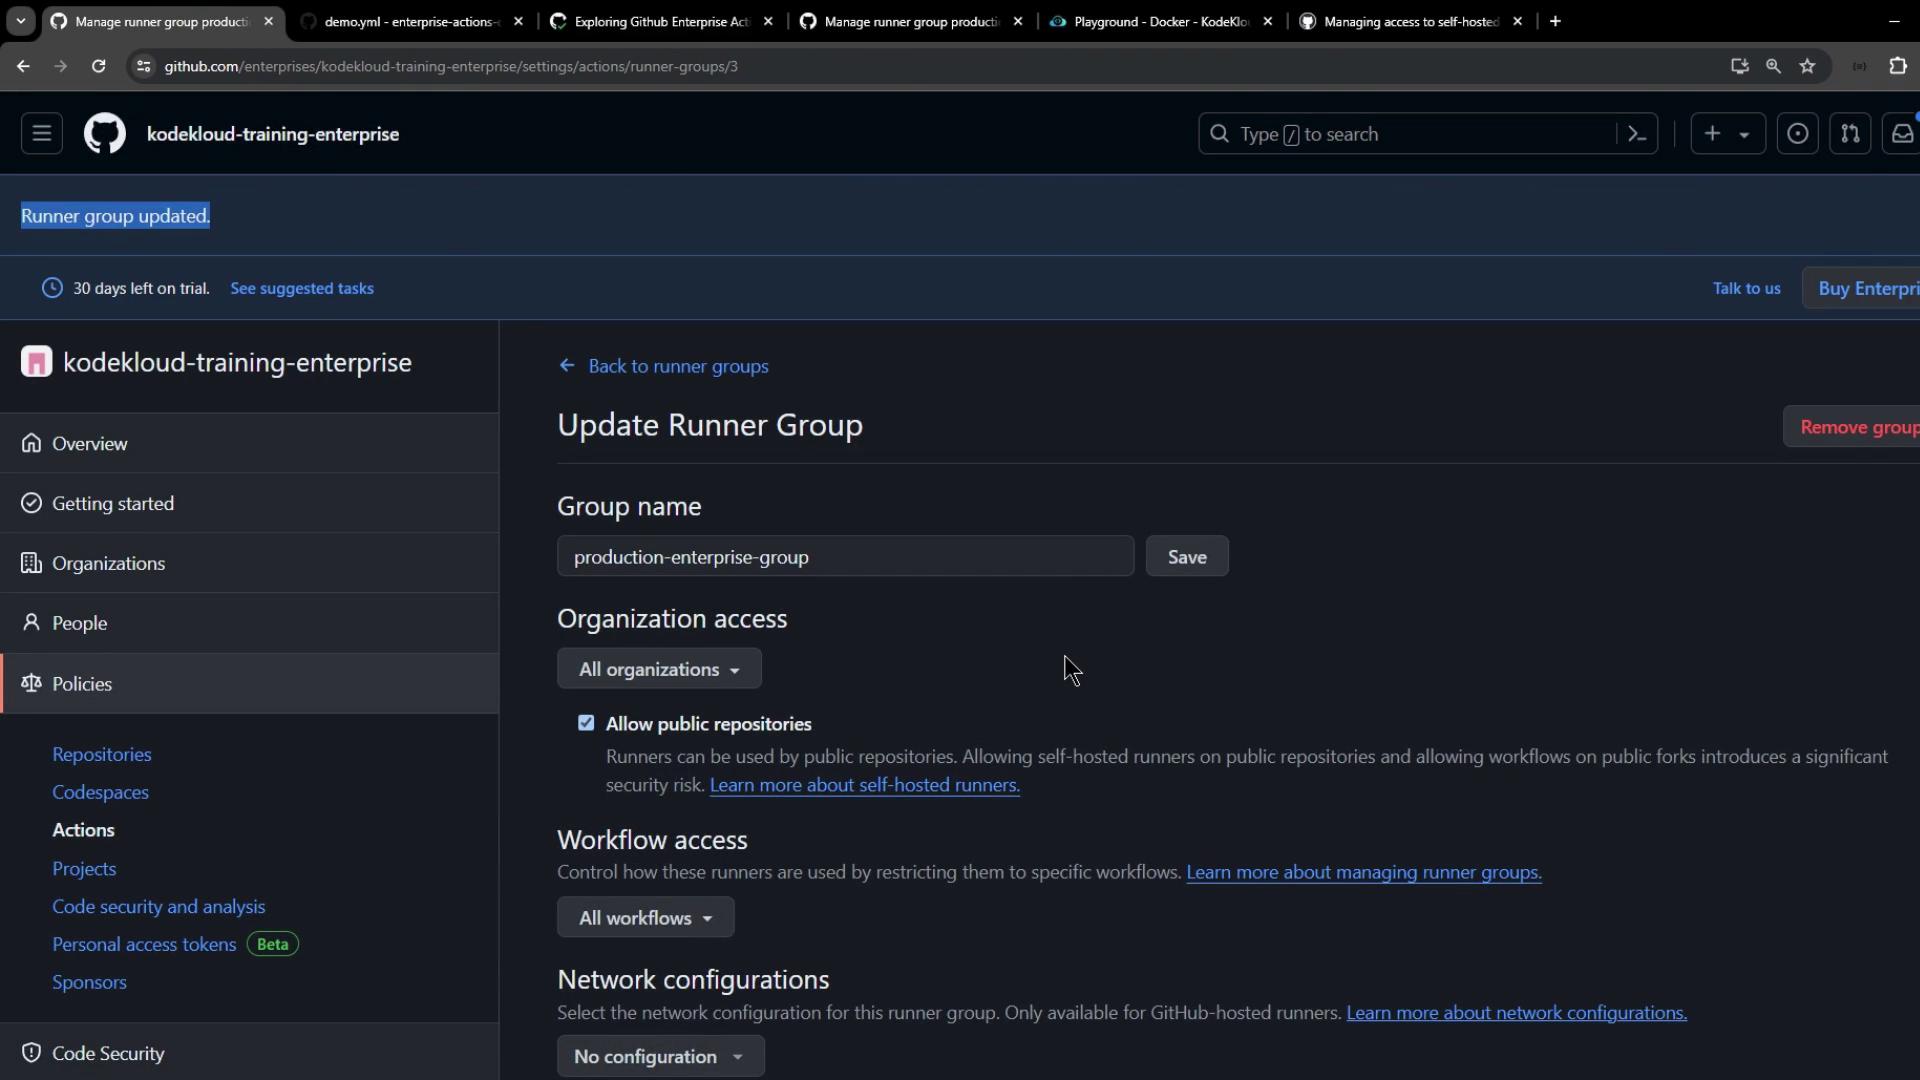
Once the settings propagate, the pending job will be picked up by your runner.
***
## 7. Inspecting the Job Output
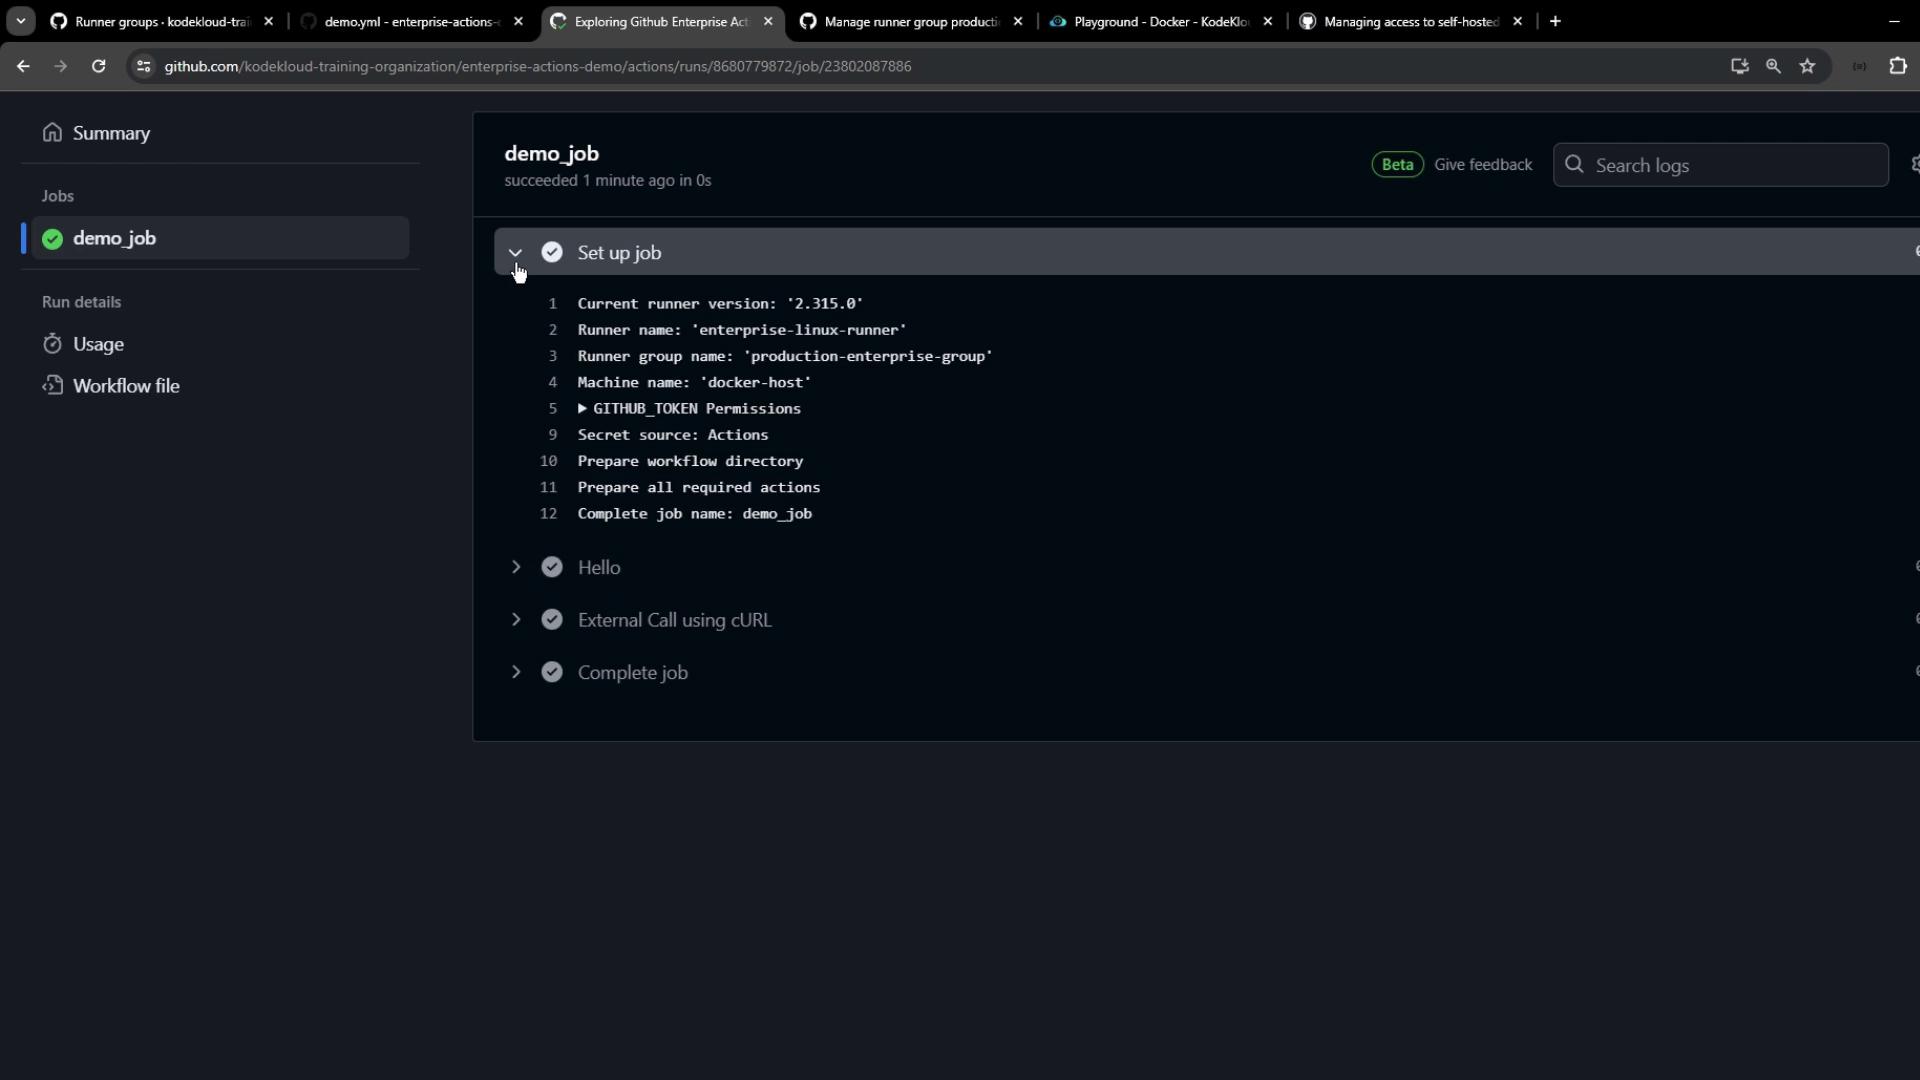
In our example workflow, we use `curl` to display the runner’s public IP:
```bash theme={null}
curl -v http://httpbin.org/ip
```
Sample output:
```plaintext theme={null}
* TCP_NODELAY set
* Connected to httpbin.org (52.0.229.30) port 80 (#0)
> GET /ip HTTP/1.1
> Host: httpbin.org
> User-Agent: curl/7.68.0
> Accept: */*
< HTTP/1.1 200 OK
...
{
"origin": "35.188.139.128"
}
```
You can also verify directly on your runner host:
```bash theme={null}
curl ifconfig.me
# => 35.188.139.128
```
***
## 8. Summary of Key Steps
| Step | Action |
| ---------------------------- | ----------------------------------------------------------------- |
| 1. Create Runner Group | Enterprise settings → Policies → Actions → Runner groups → New |
| 2. Move Runner | Select runner → Move → Choose group |
| 3. Update Labels | Edit runner labels (e.g., replace `enterprise` with `production`) |
| 4. Set Repository Access | Runner group → Edit → Select repos |
| 5. Configure Workflow Access | Runner group → Edit → Allow specific/all workflows |
| 6. Troubleshoot Pending Jobs | Confirm access settings at both enterprise and org levels |
***
## Links and References
* [Managing Access to Self-Hosted Runners](https://docs.github.com/en/enterprise-cloud@latest/actions/hosting-your-own-runners/managing-access-to-self-hosted-runners)
* [GitHub Actions Runner Groups](https://docs.github.com/en/enterprise-cloud@latest/admin/policies/runner-groups)
* [Ifconfig.me Service](https://ifconfig.me)
In this lesson, you learned how to create runner groups, move runners, configure labels and access controls, and troubleshoot pending workflows. Always ensure your runner groups have the correct repository and workflow permissions to avoid unexpected pending jobs.