> ## Documentation Index
> Fetch the complete documentation index at: https://notes.kodekloud.com/llms.txt
> Use this file to discover all available pages before exploring further.

# Managing self hosted runners using groups Part1

> This guide explains configuring and managing self-hosted GitHub Actions runners across GitHub Enterprise and organization scopes.

In this guide, you’ll learn how to configure and manage self-hosted GitHub Actions runners across GitHub Enterprise and organization scopes. We’ll cover:

* Reviewing Enterprise vs. Organization settings
* Creating and renaming runner groups
* Assigning runners to repositories (including public repos)
* Installing a self-hosted runner on Linux
* Running a sample workflow on your new runner

***

## 1. Compare Enterprise and Organization Dashboards

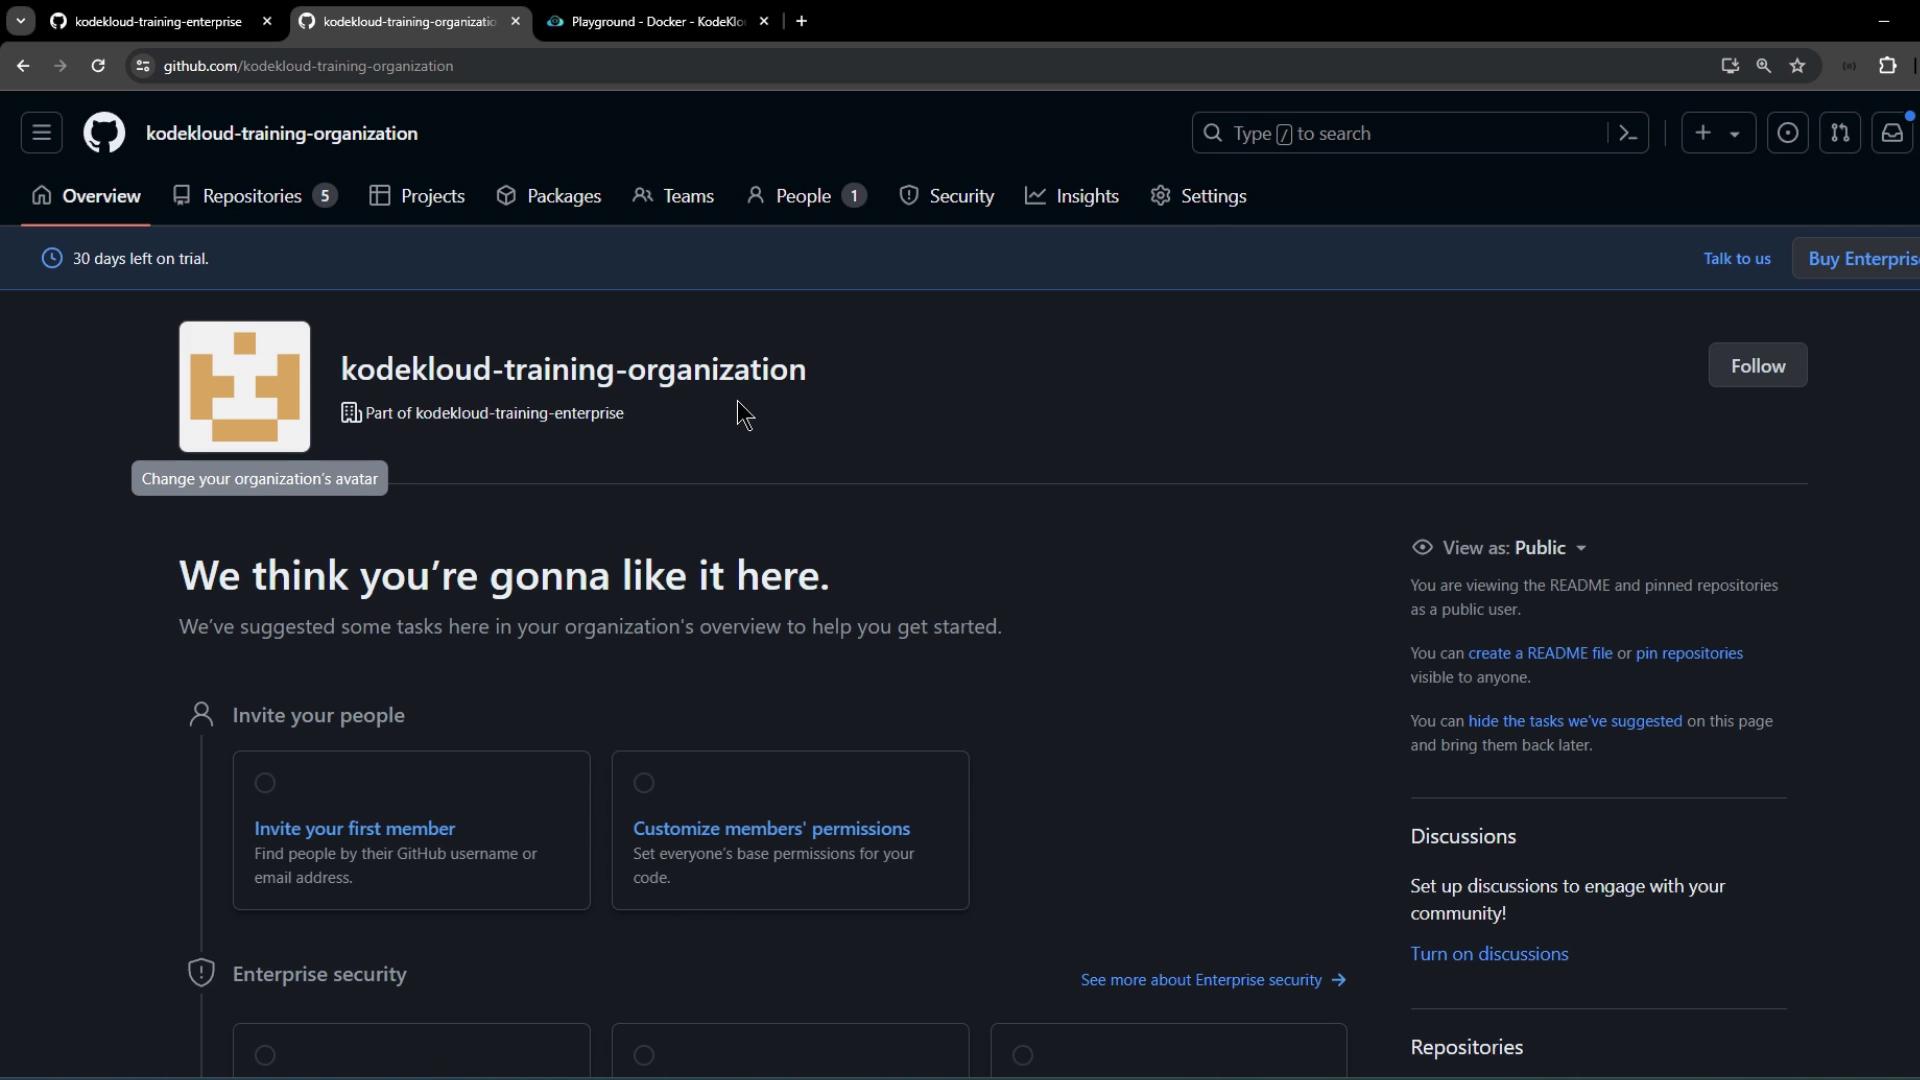
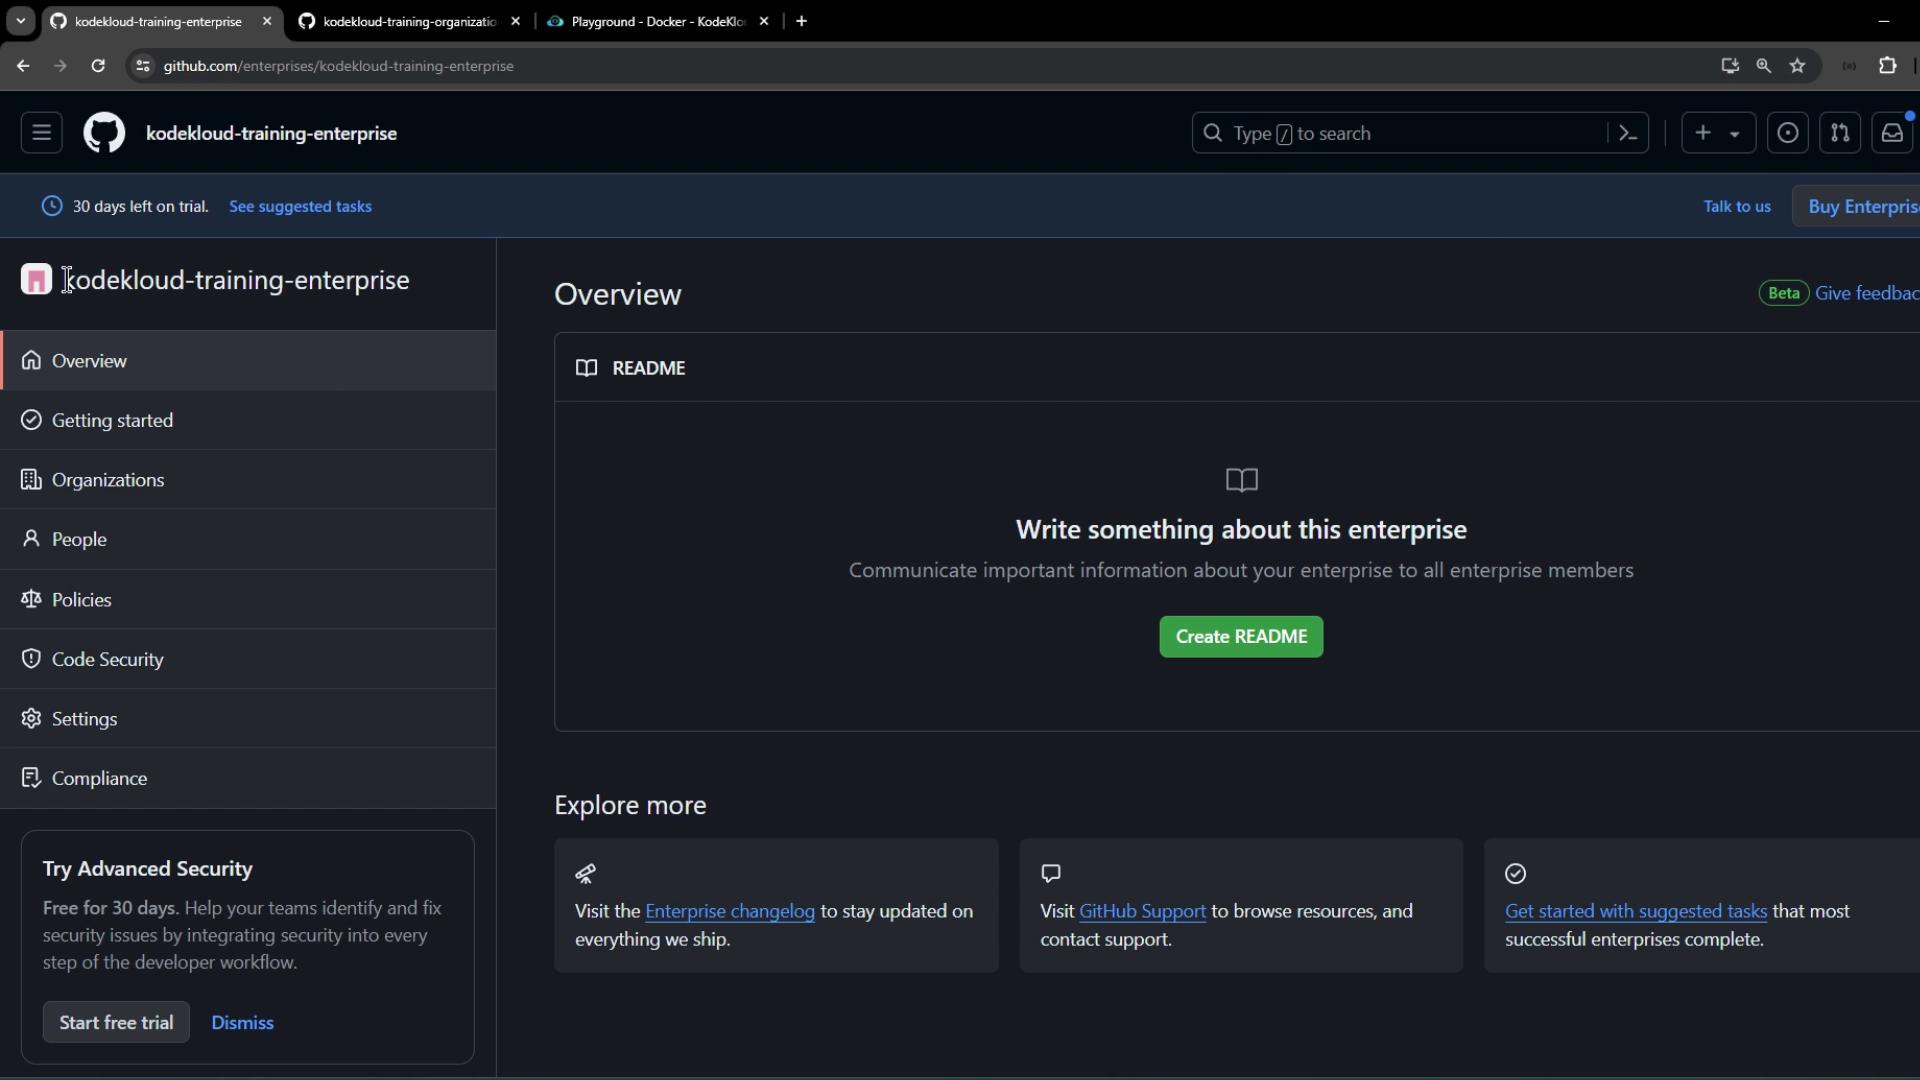
First, open two browser tabs side by side:

Tab 1: **Enterprise Overview**
<Frame>
  ![The image shows a GitHub enterprise dashboard for "kodekloud-training-enterprise," featuring navigation options like Overview, Getting Started, and Settings, with a prompt to create a README.](https://kodekloud.com/kk-media/image/upload/v1752876264/notes-assets/images/GitHub-Actions-Certification-Managing-self-hosted-runners-using-groups-Part1/github-enterprise-dashboard-kodekloud-training.jpg)
</Frame>

Tab 2: **Organization Home**

<Frame>
  ![The image shows a GitHub organization page for "kodekloud-training-organization," which is part of "kodekloud-training-enterprise." It includes options for inviting members, customizing permissions, and setting up discussions.](https://kodekloud.com/kk-media/image/upload/v1752876266/notes-assets/images/GitHub-Actions-Certification-Managing-self-hosted-runners-using-groups-Part1/github-organization-kodekloud-training.jpg)
</Frame>

Notice the UI placement:

* Enterprise settings live in the **left sidebar**.
* Organization and user settings appear in the **top navigation**.

***

## 2. View and Rename Organization Runner Groups

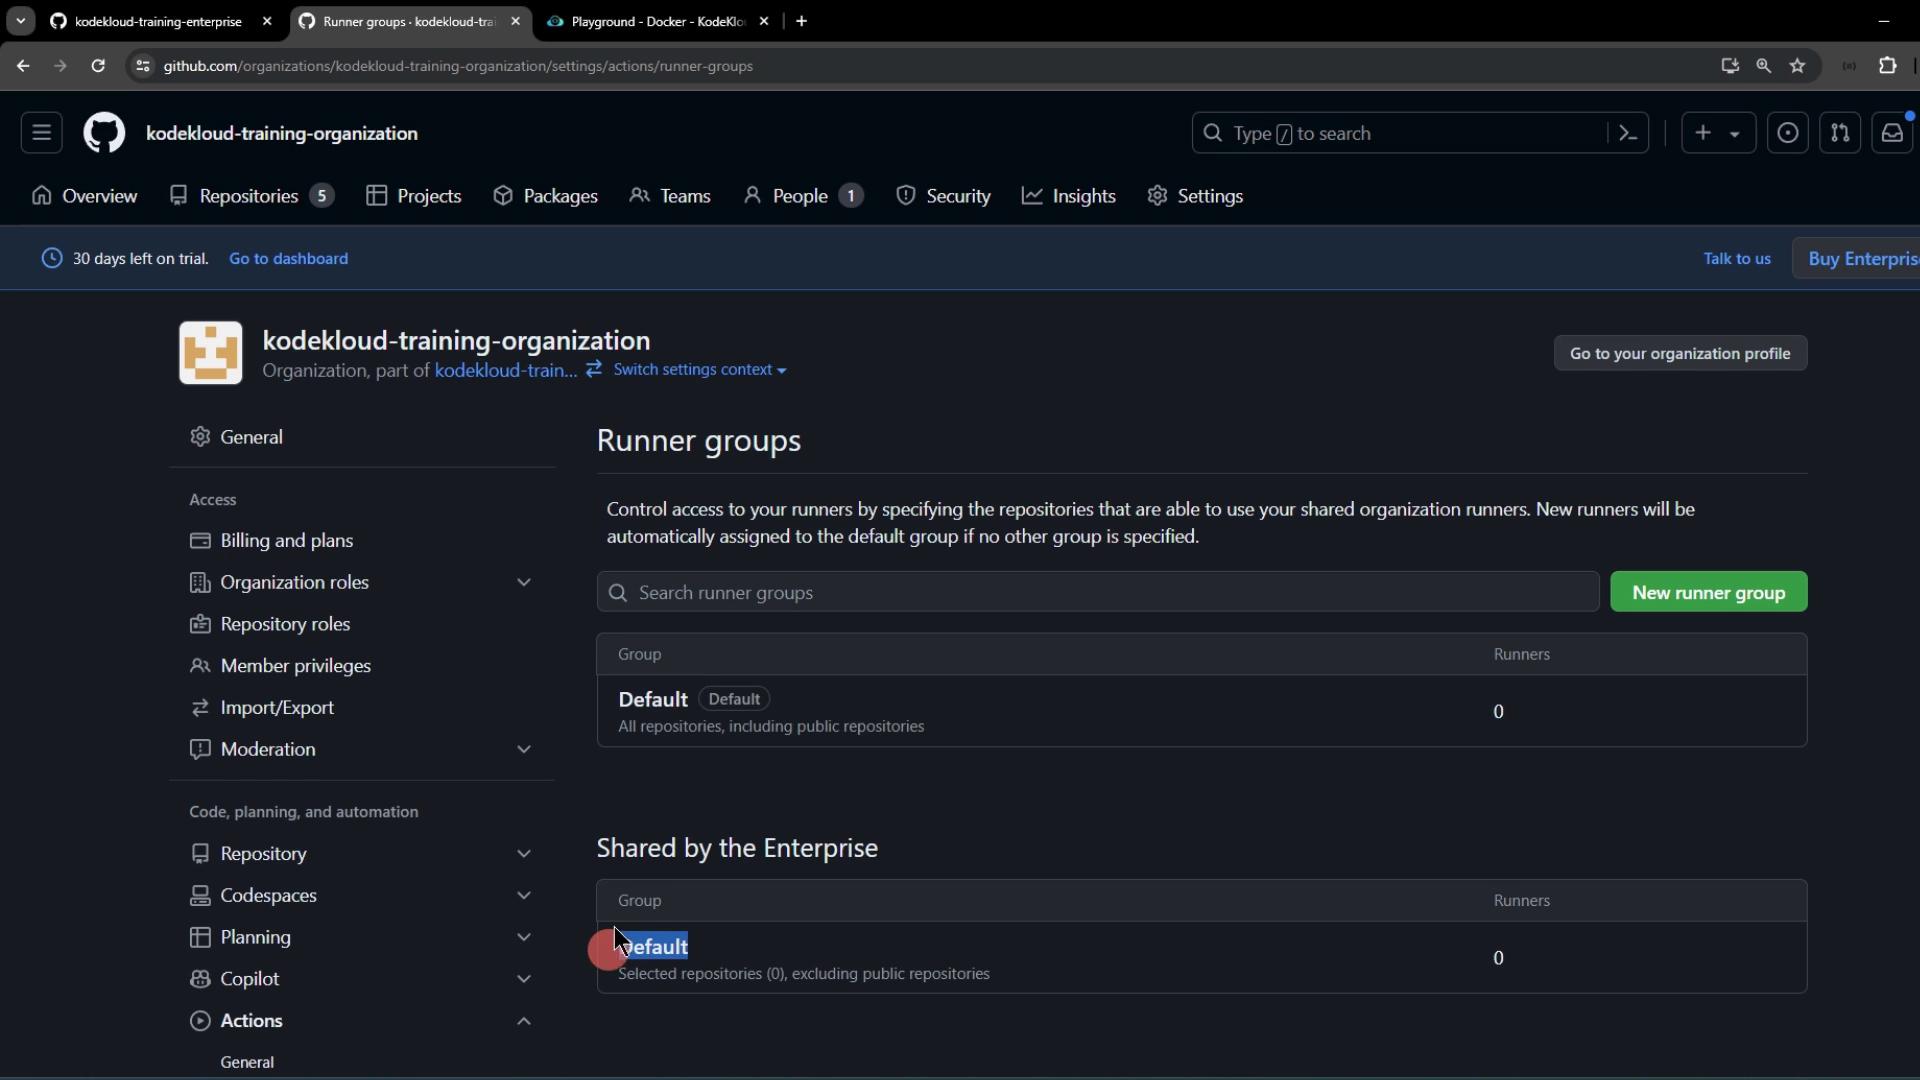
1. In your organization, navigate to **Settings > Actions > Runner groups**.
2. You’ll see the **default** runner group:
<Frame>
  ![The image shows a GitHub organization settings page for "kodekloud-training-organization," specifically focusing on the "Runner groups" section, where users can manage access to shared organization runners.](https://kodekloud.com/kk-media/image/upload/v1752876267/notes-assets/images/GitHub-Actions-Certification-Managing-self-hosted-runners-using-groups-Part1/github-organization-settings-runner-groups.jpg)
</Frame>

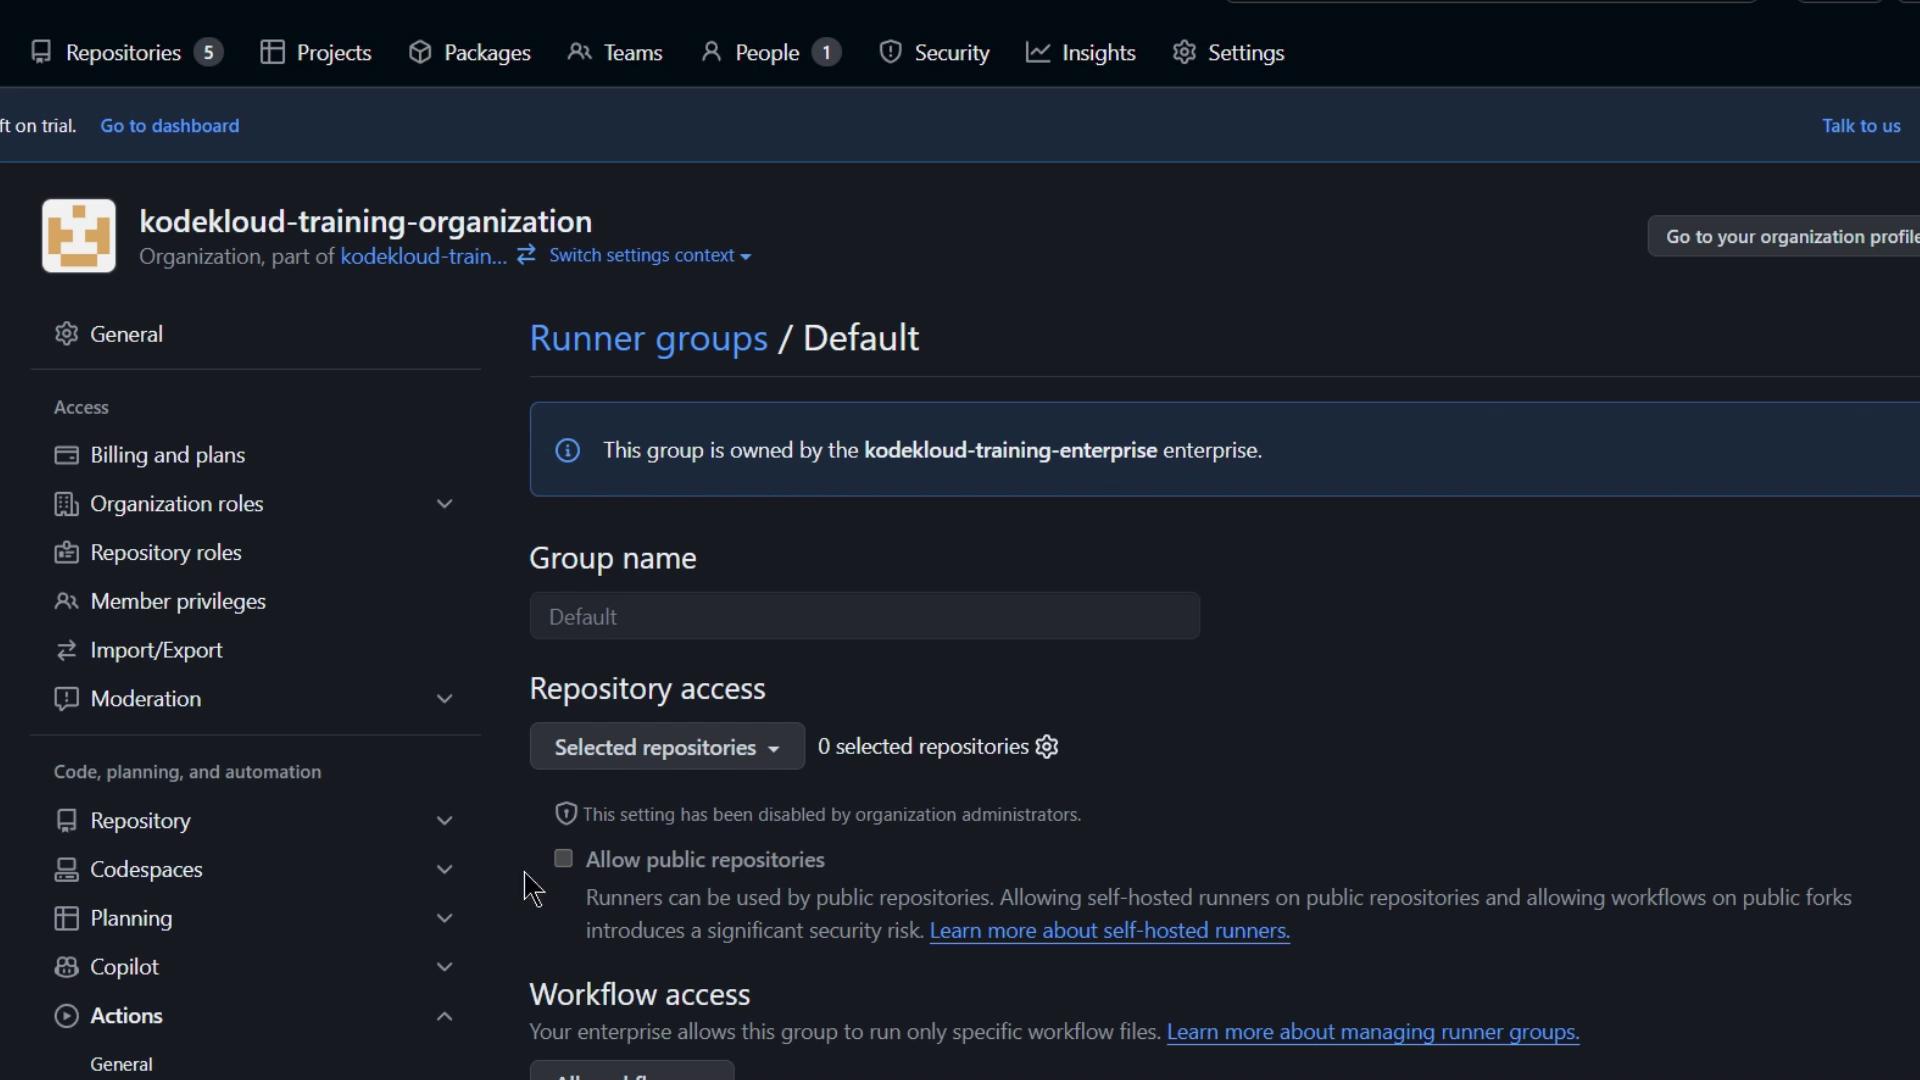
3. Click into the default group and observe that **public repository support** cannot be toggled here:
<Frame>
  ![The image shows a GitHub organization settings page for "kodekloud-training-organization," focusing on runner group settings and repository access options.](https://kodekloud.com/kk-media/image/upload/v1752876268/notes-assets/images/GitHub-Actions-Certification-Managing-self-hosted-runners-using-groups-Part1/github-organization-settings-runner-group.jpg)
</Frame>

<Callout icon="triangle-alert" color="#FF6B6B">
  Public repository support for a runner group is only configurable at the **enterprise** level. You won’t be able to enable it within the organization settings.
</Callout>

***

## 3. Configure Enterprise Runner Group Policies

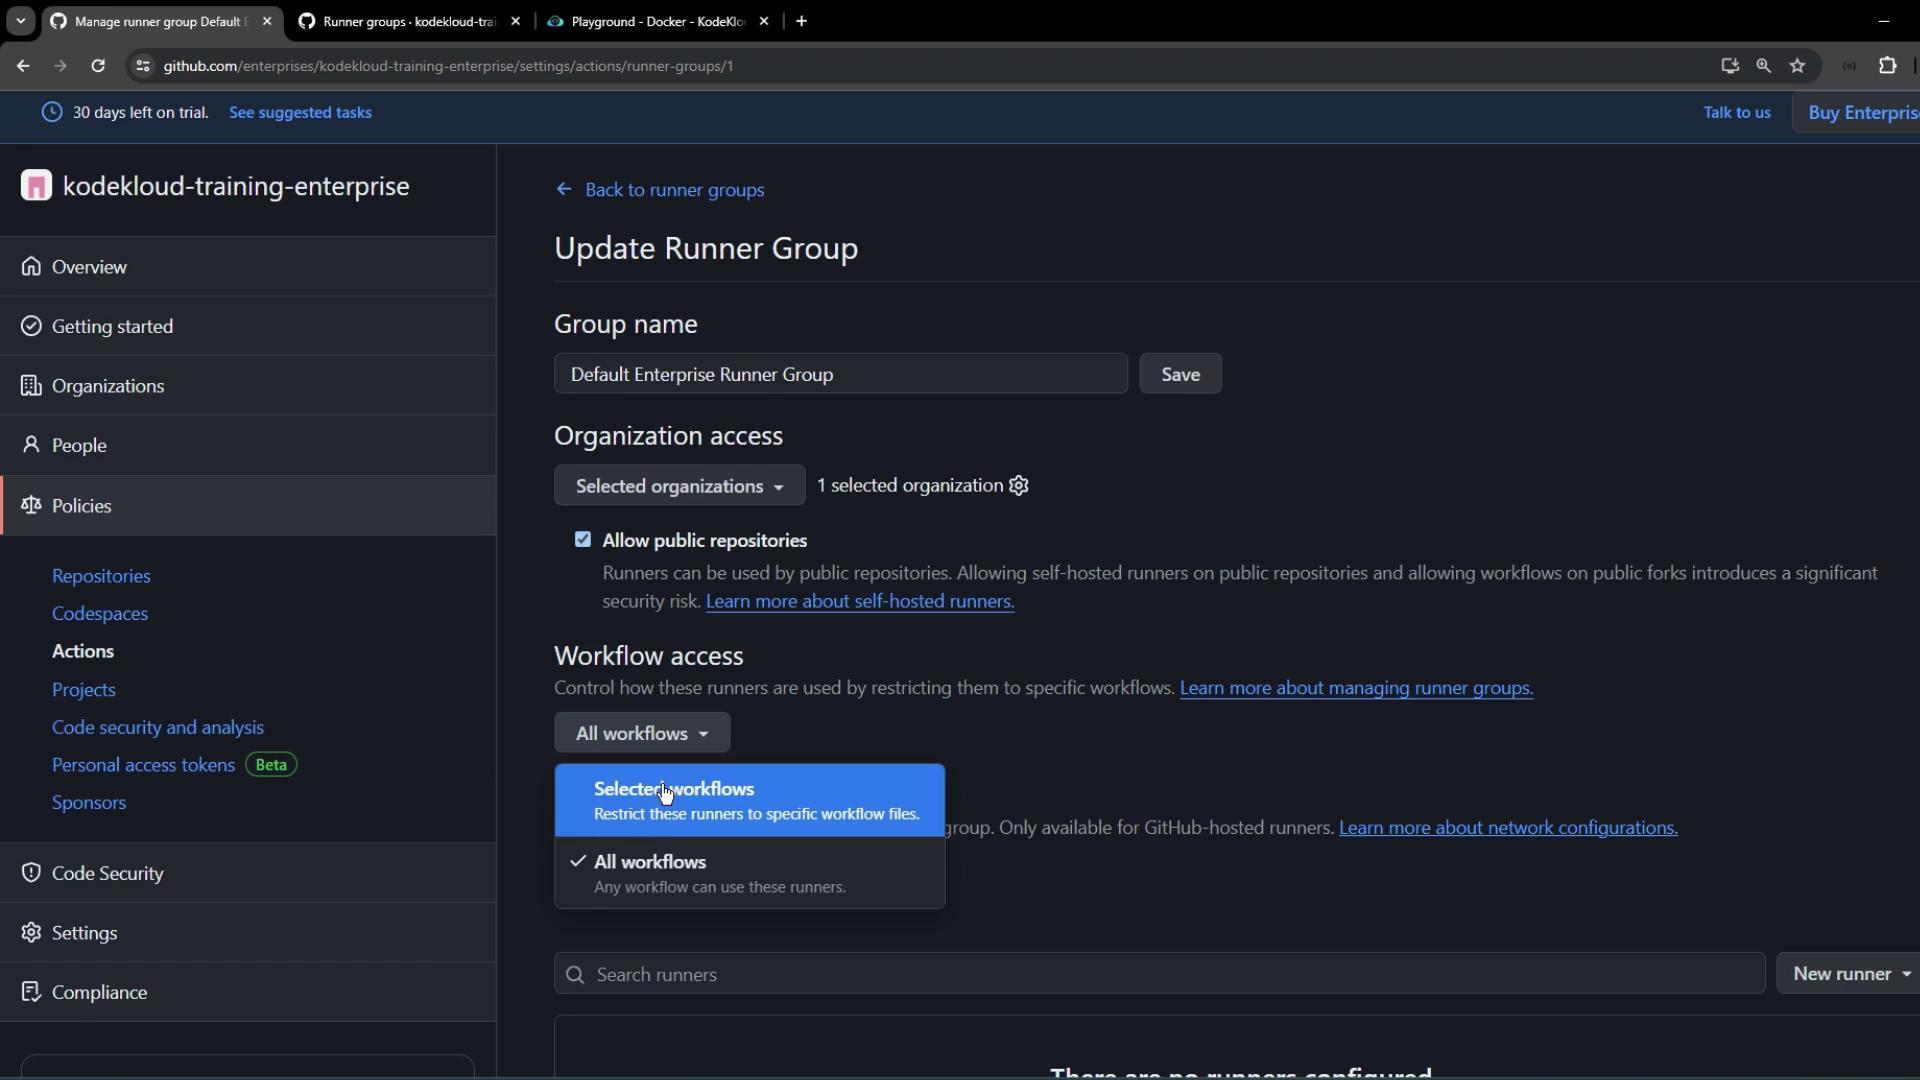
Switch to **Enterprise > Policies > Actions > Runner groups**:
<Frame>
  ![The image shows a GitHub interface for updating a runner group, with options for setting the group name, organization access, and workflow access. The sidebar includes navigation links for various settings and features.](https://kodekloud.com/kk-media/image/upload/v1752876269/notes-assets/images/GitHub-Actions-Certification-Managing-self-hosted-runners-using-groups-Part1/github-runner-group-update-interface.jpg)
</Frame>

Here you can:

| Option                     | Description                                                |
| -------------------------- | ---------------------------------------------------------- |
| Group Name                 | Rename (e.g., `default enterprise runner group`)           |
| Organization Access        | Restrict to specific orgs or allow all                     |
| Repository Access          | Choose **All**, **Selected**, and include **Public** repos |
| Workflow File Restrictions | Limit to certain workflow filenames                        |

Apply your changes and save.

***

## 4. Assign Runner Group to Organization Repositories

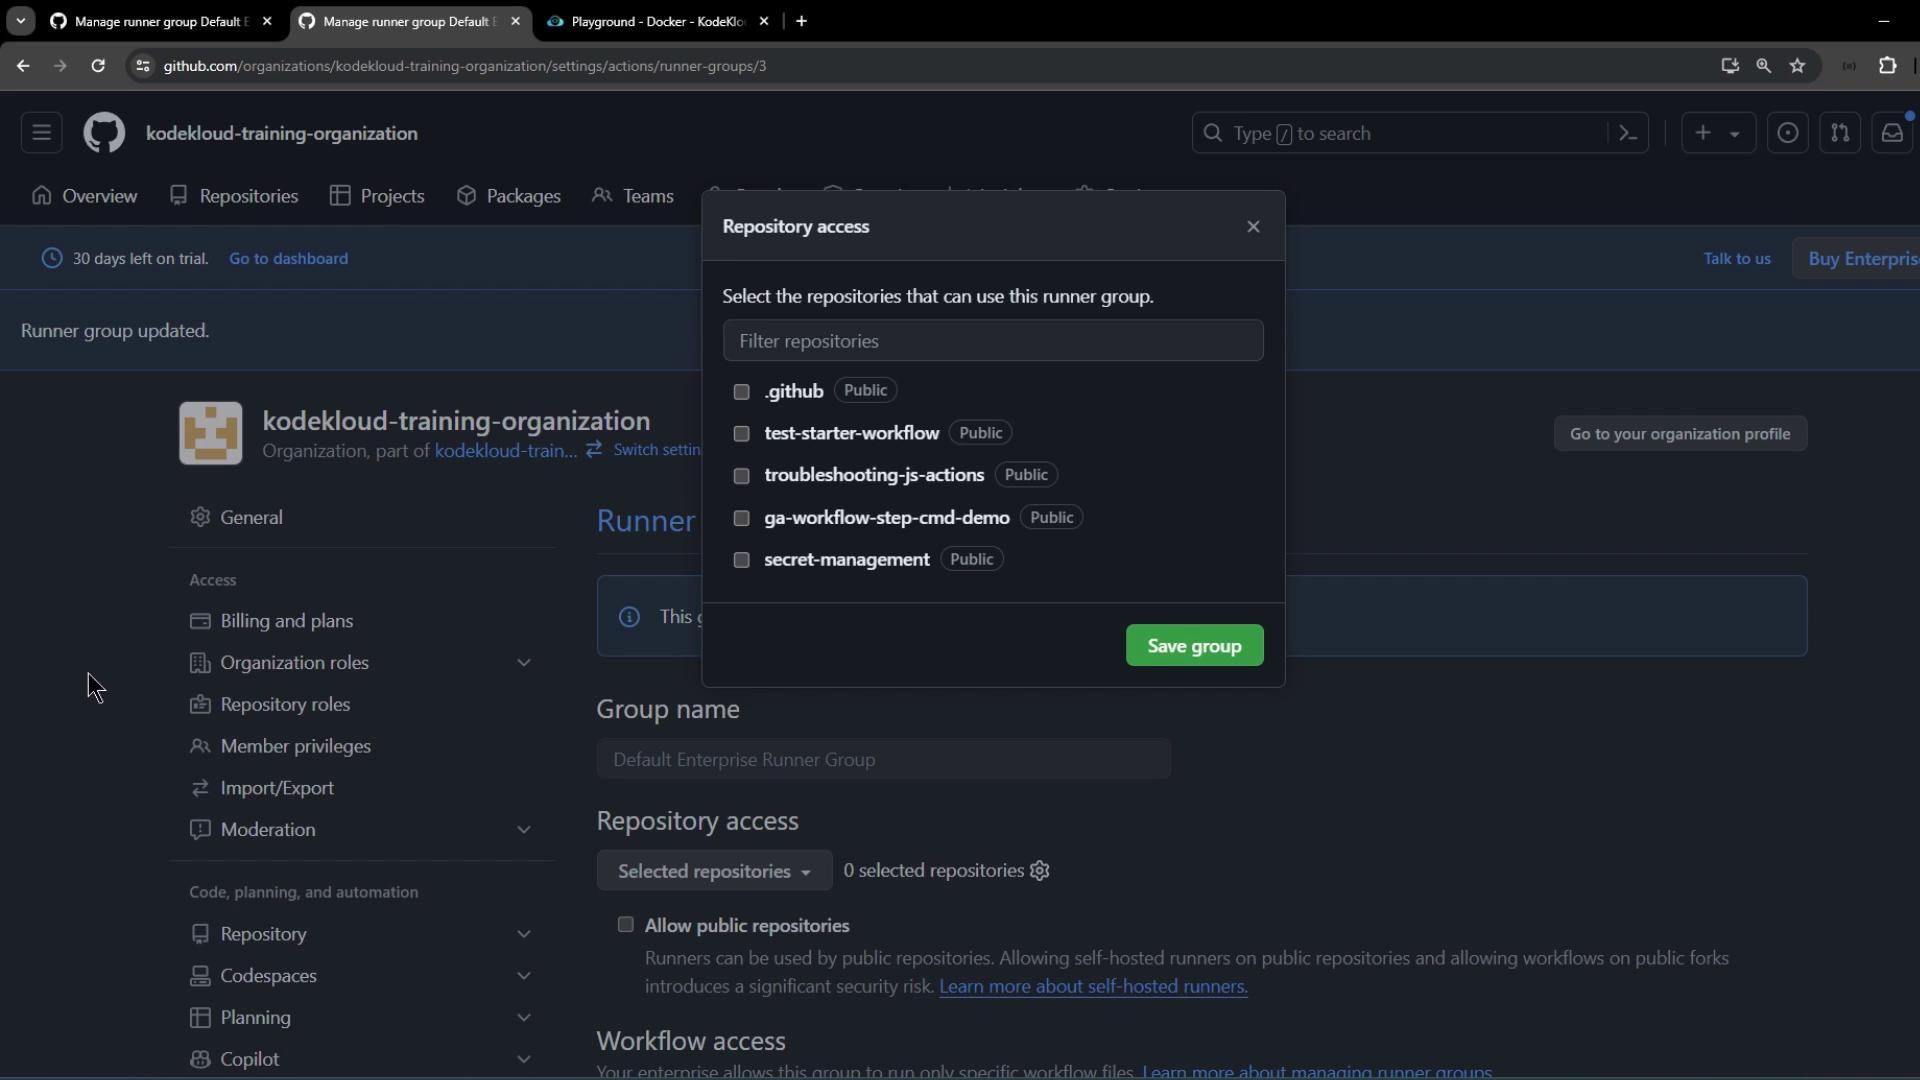
Return to the organization’s **Runner groups** page and refresh. The renamed enterprise group will appear. Click **Add repository access**:
<Frame>
  ![The image shows a GitHub settings page for a runner group in the "kodekloud-training-organization," with a pop-up window for selecting repository access.](https://kodekloud.com/kk-media/image/upload/v1752876270/notes-assets/images/GitHub-Actions-Certification-Managing-self-hosted-runners-using-groups-Part1/github-settings-runner-group-repository-access.jpg)
</Frame>

Select:

* **All repositories**
* **Include public repositories**

Save to propagate the policy.

***

## 5. Install a Self-Hosted Runner on Linux

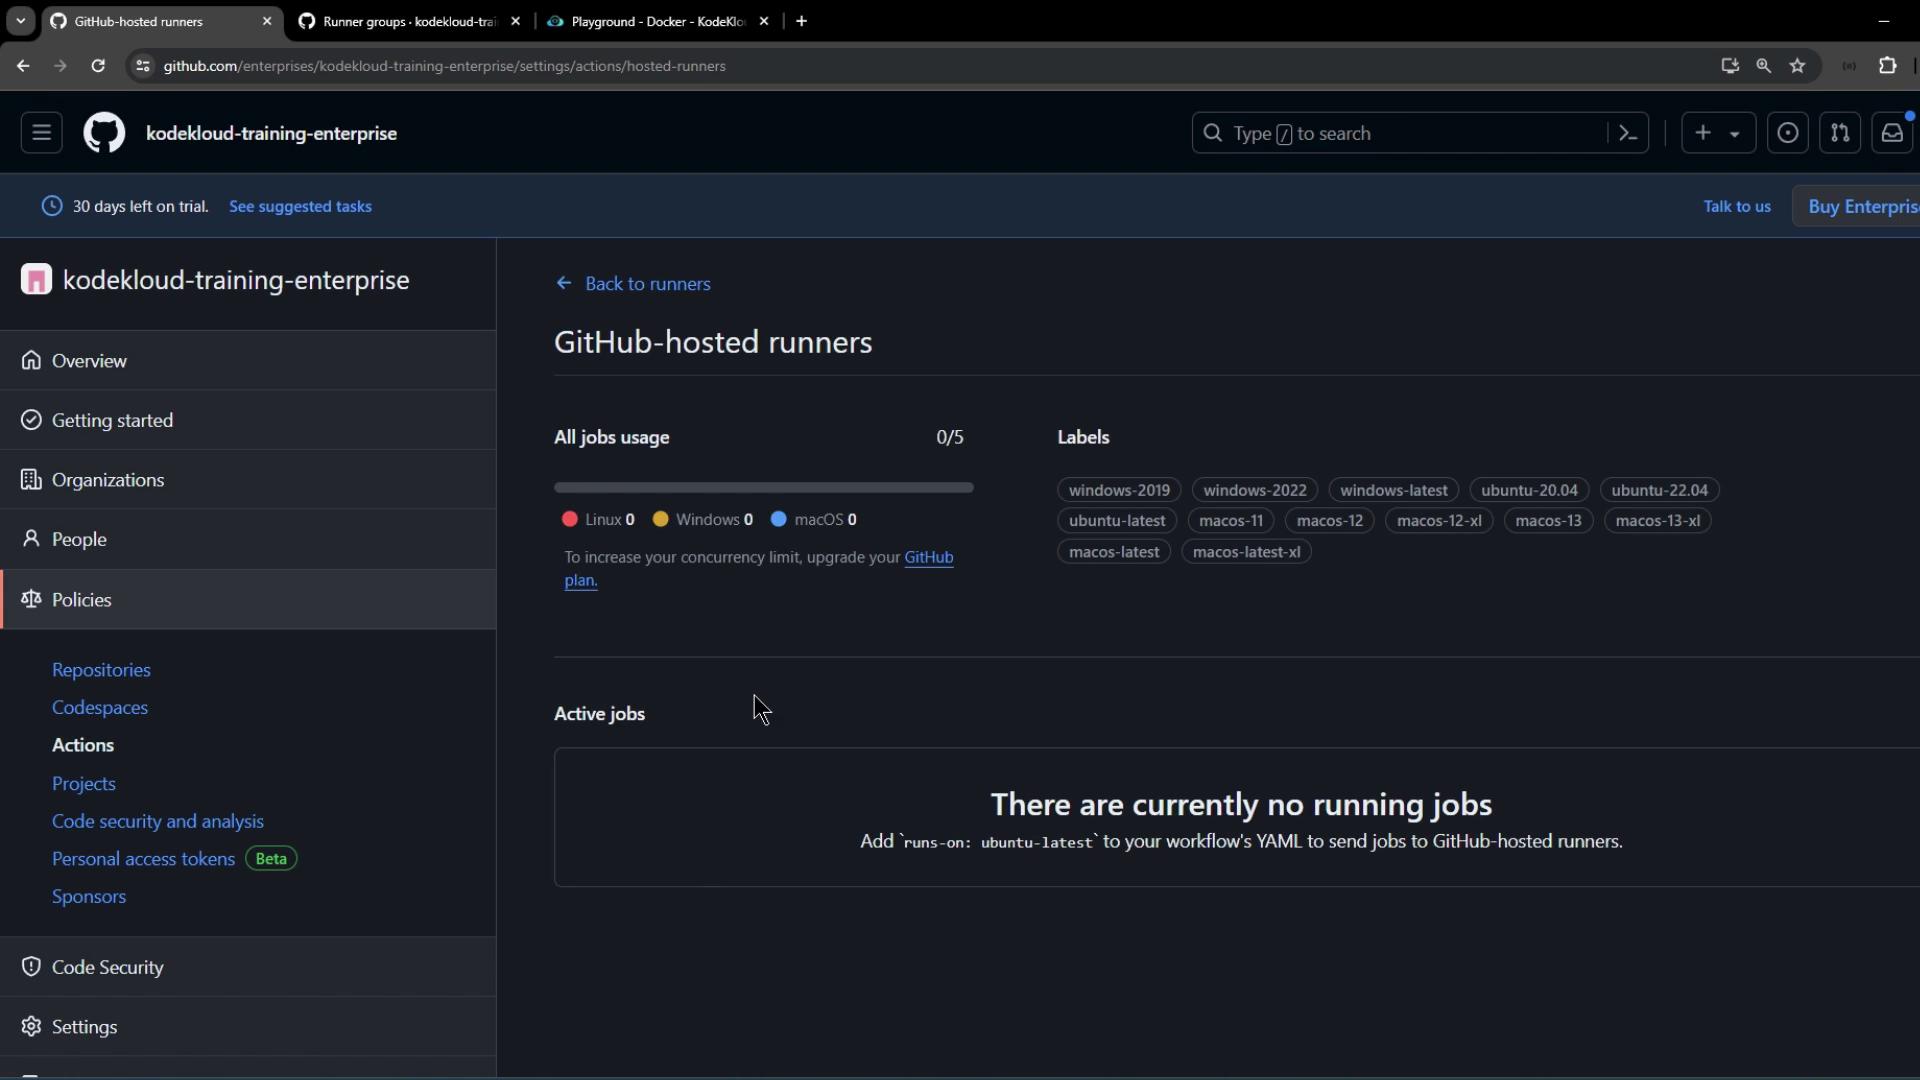
In the enterprise settings, go to **Policies > Actions > Runners**:
<Frame>
  ![The image shows a GitHub interface for managing GitHub-hosted runners, indicating no active jobs and displaying various labels for different operating systems. The sidebar includes options like Overview, Organizations, and Actions.](https://kodekloud.com/kk-media/image/upload/v1752876271/notes-assets/images/GitHub-Actions-Certification-Managing-self-hosted-runners-using-groups-Part1/github-runners-interface-no-active-jobs.jpg)
</Frame>

Click **New self-hosted runner**, choose **Linux** → **x64**, and follow the prompts. On your Linux VM, run:

```bash theme={null}
# 1. Create directory and enter it
mkdir actions-runner && cd actions-runner

# 2. Download the runner package
curl -L -o actions-runner-linux-x64-2.315.0.tar.gz \
  https://github.com/actions/runner/releases/download/v2.315.0/actions-runner-linux-x64-2.315.0.tar.gz

# 3. (Optional) Verify checksum
echo "6362646b67613c6981db76f4d25e68e463a9af2cc8d16e31bfeabe39153606a0 actions-runner-linux-x64-2.315.0.tar.gz" \
  | shasum -a 256 -c

# 4. Extract
tar xzf actions-runner-linux-x64-2.315.0.tar.gz

# 5. Configure (replace URL and token)
./config.sh \
  --url https://github.com/enterprises/kodekloud-training-enterprise \
  --token BDEPF64QGNY4SWJQPXUFF363GDQT42

# 6. Start the runner
./run.sh
```

During setup, assign this runner to your **default enterprise runner group** and add a label such as `enterprise`.

Once up, you’ll see logs like:
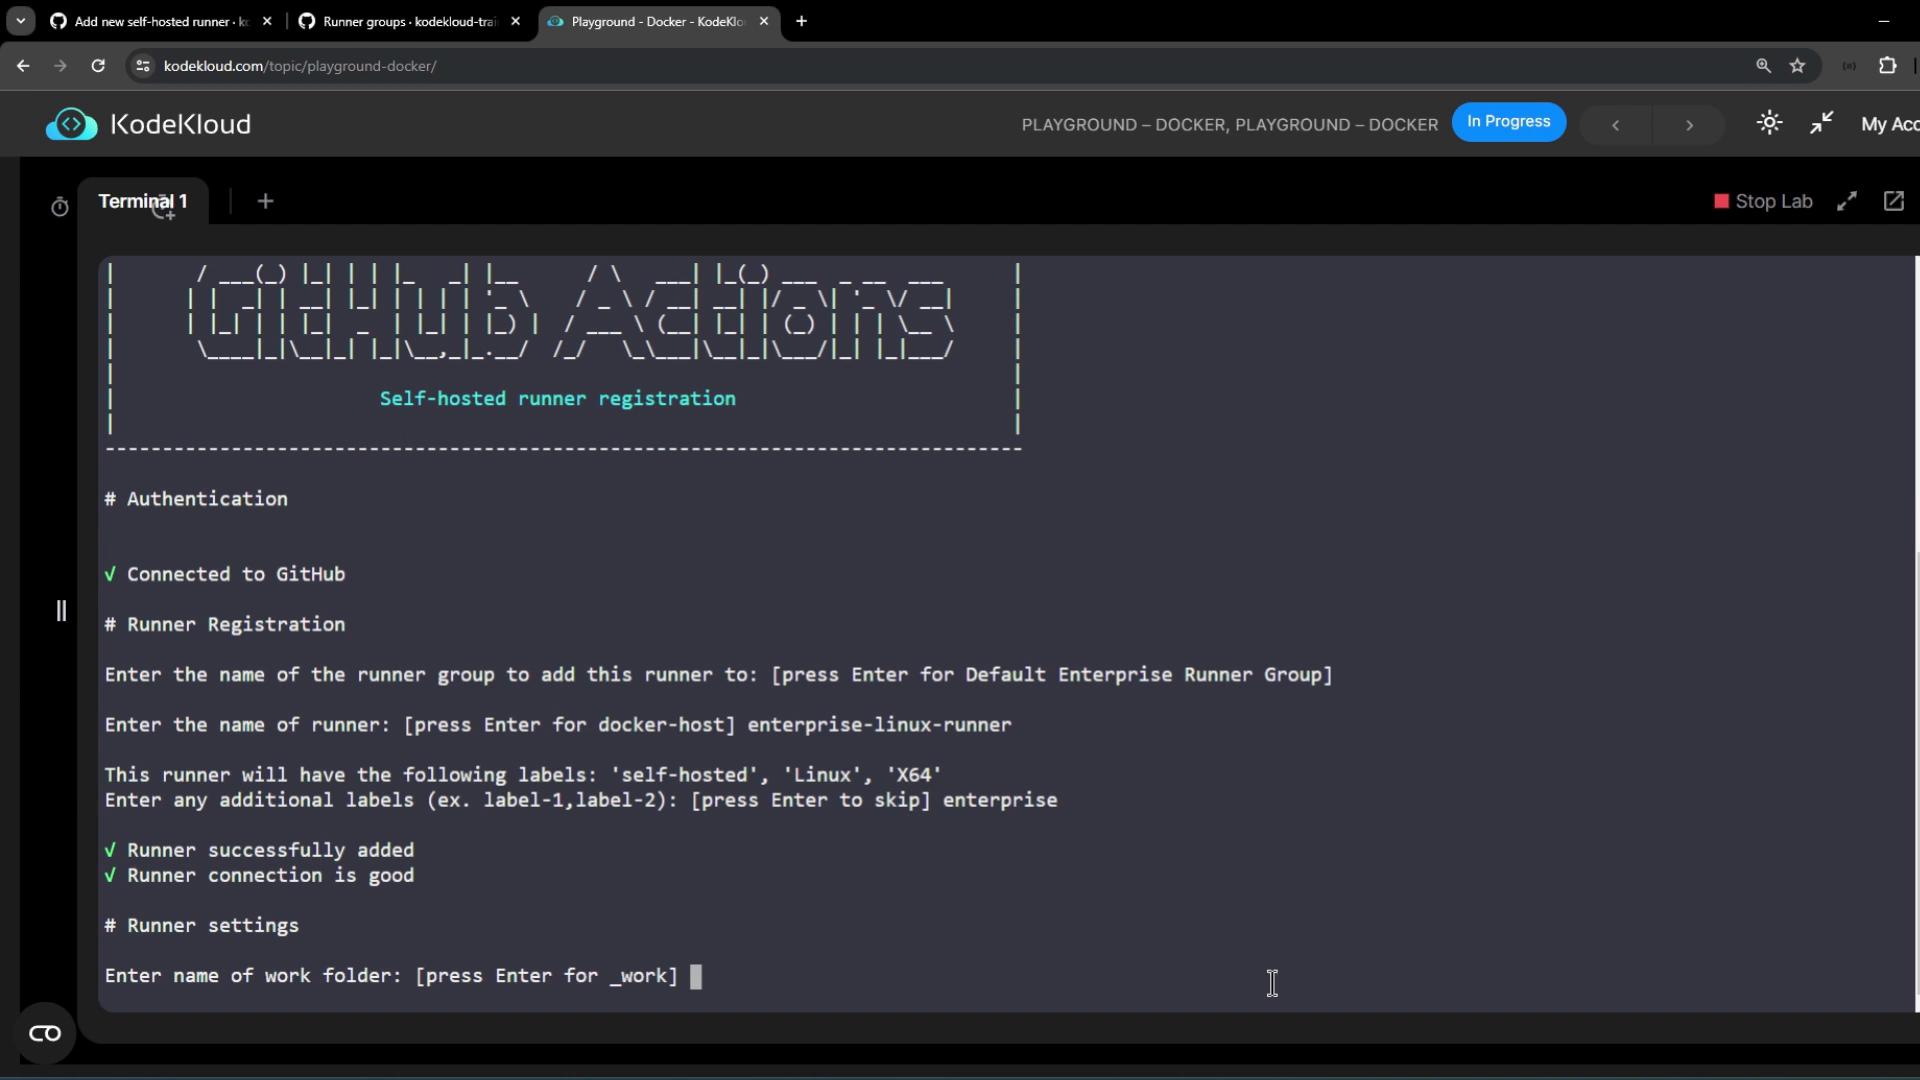
<Frame>
  ![The image shows a terminal window on the KodeKloud platform, displaying a GitHub Actions self-hosted runner registration process with successful connection and runner settings prompts.](https://kodekloud.com/kk-media/image/upload/v1752876273/notes-assets/images/GitHub-Actions-Certification-Managing-self-hosted-runners-using-groups-Part1/kodekloud-github-actions-runner-registration.jpg)
</Frame>

***

## 6. Verify Runner Registration

Back in the enterprise’s **Runners** list, your new self-hosted runner appears with labels and an idle status:

<Frame>
  ![The image shows a GitHub Actions settings page for an enterprise account, displaying options for managing runners, including a self-hosted Linux runner.](https://kodekloud.com/kk-media/image/upload/v1752876274/notes-assets/images/GitHub-Actions-Certification-Managing-self-hosted-runners-using-groups-Part1/github-actions-enterprise-settings-runners.jpg)
</Frame>

Switch to the organization’s **Runner groups** view to confirm it’s available there too:
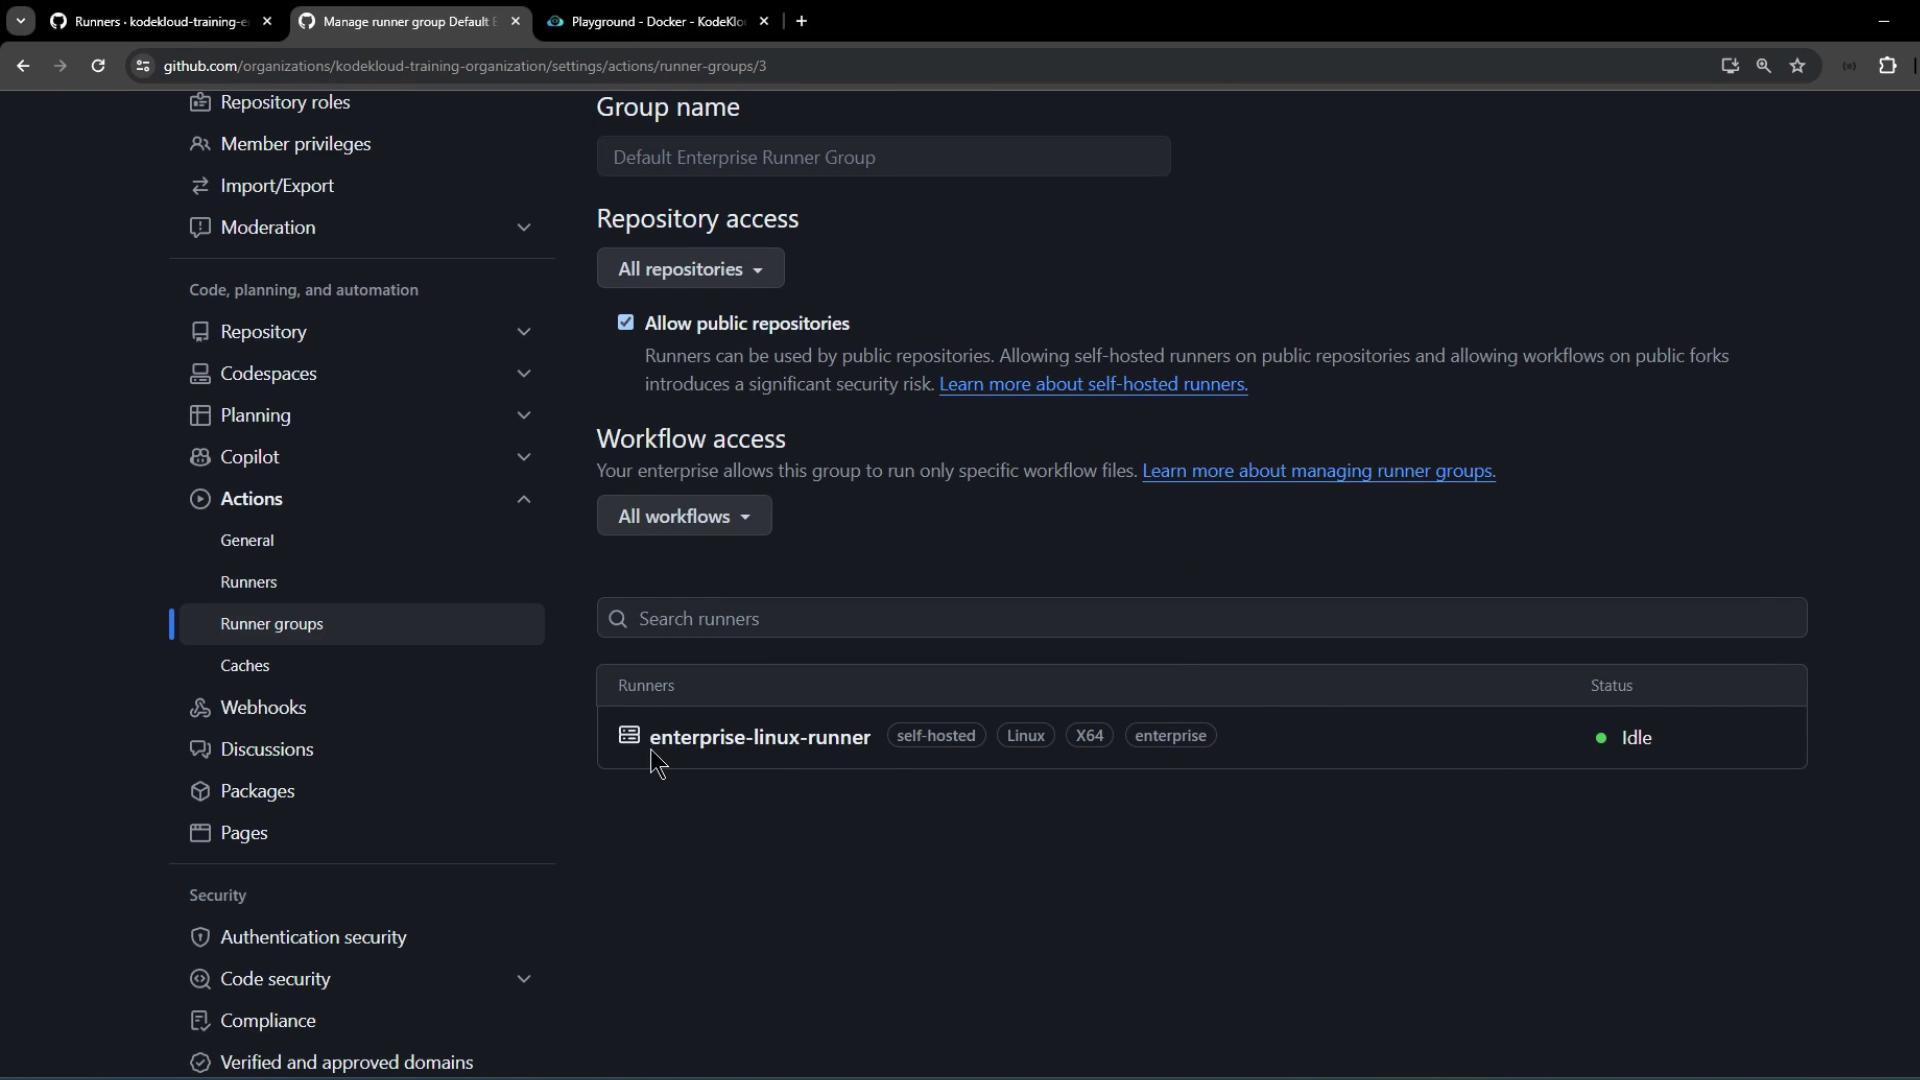
<Frame>
  ![The image shows a GitHub settings page for managing runner groups, with options for repository and workflow access, and a list of runners including an "enterprise-linux-runner" that is currently idle.](https://kodekloud.com/kk-media/image/upload/v1752876275/notes-assets/images/GitHub-Actions-Certification-Managing-self-hosted-runners-using-groups-Part1/github-settings-runner-groups-management.jpg)
</Frame>

***

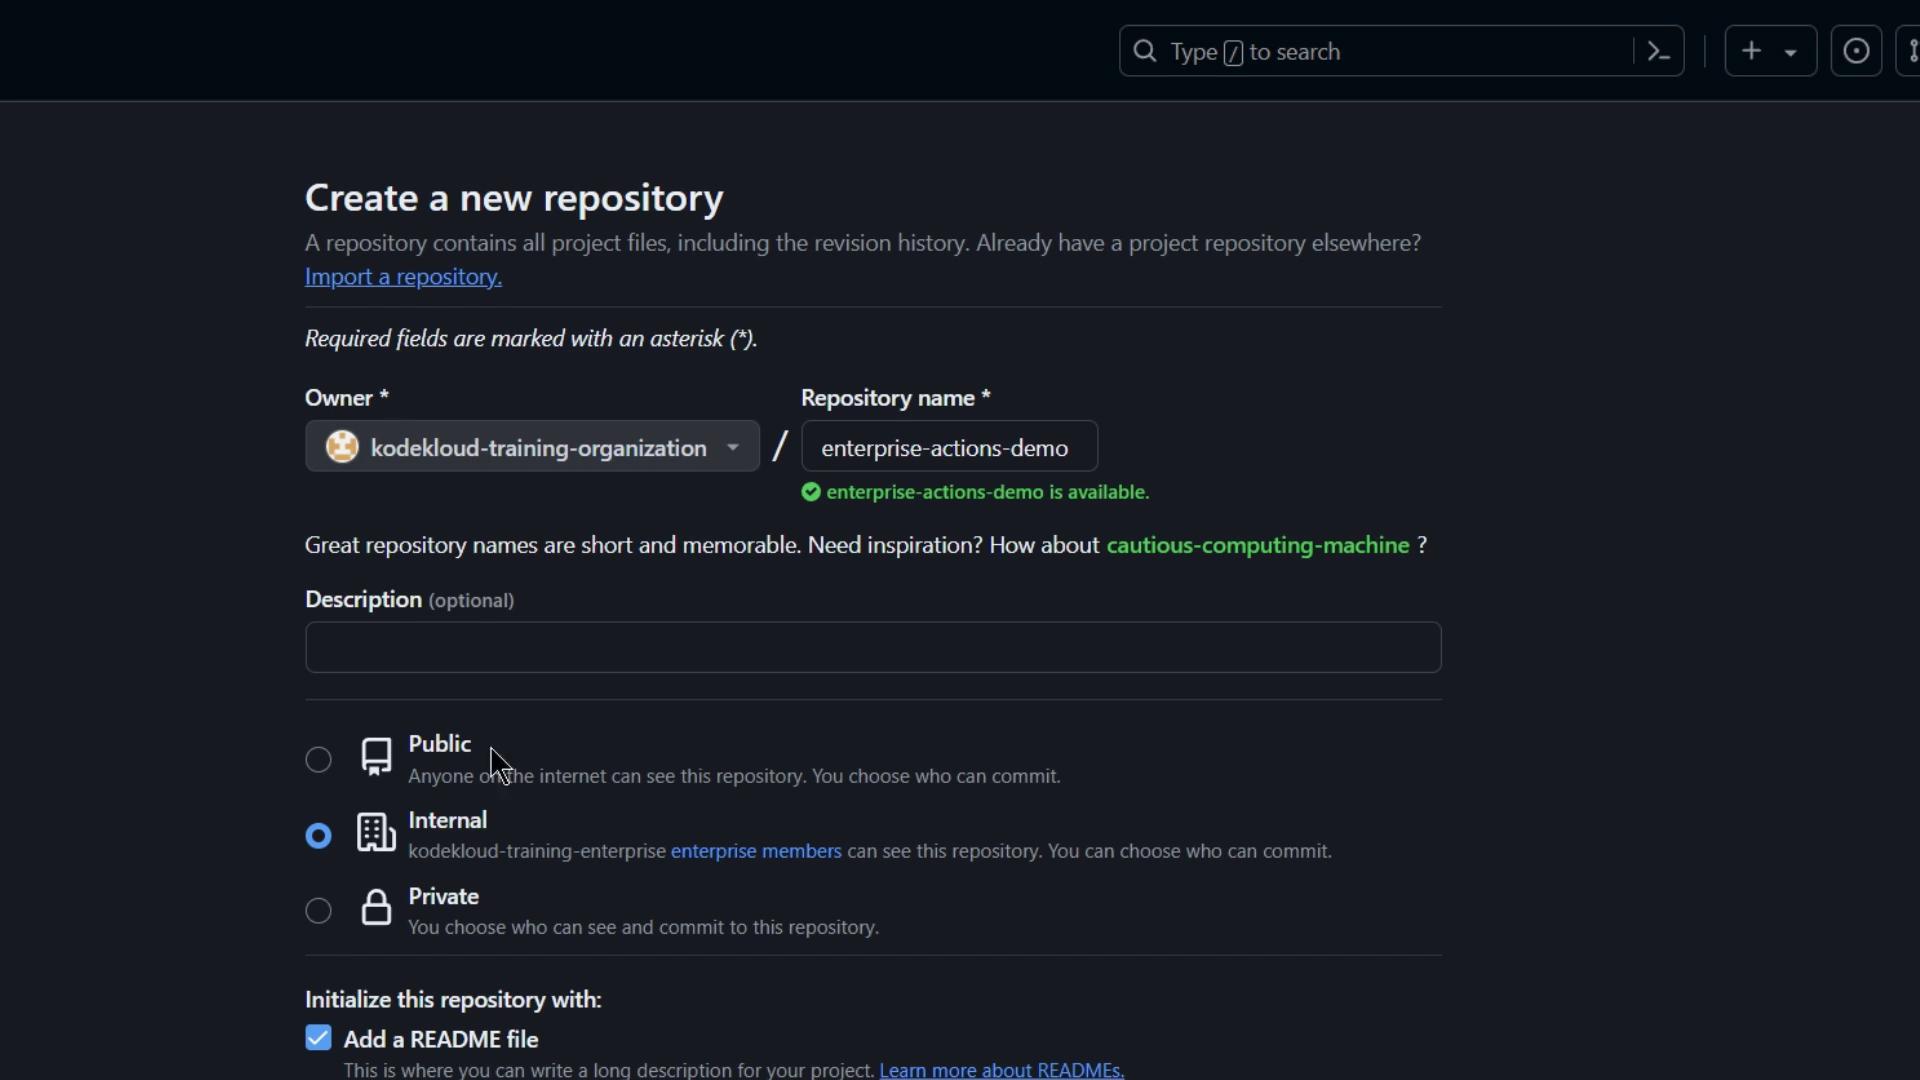
## 7. Create a New Repository and Workflow

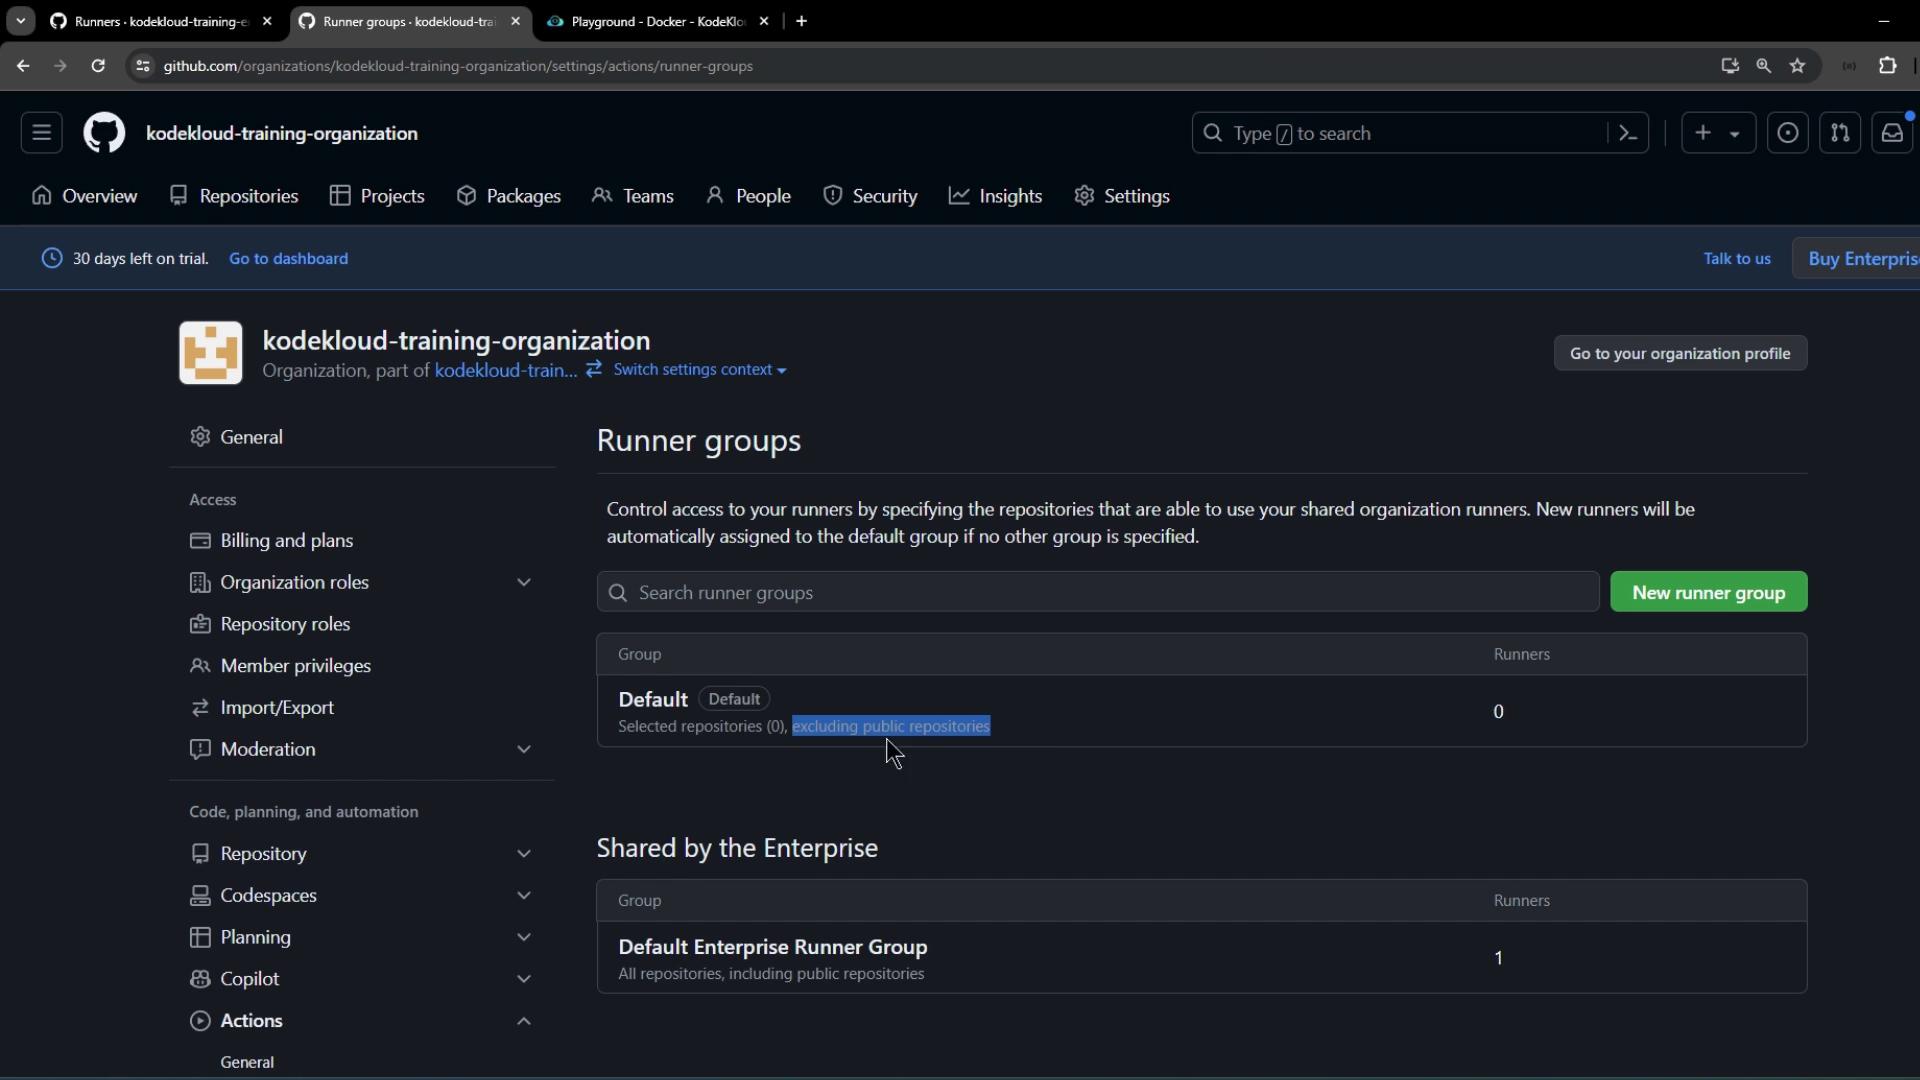
1. Disable the organization’s default runner for public repos to enforce enterprise runners.
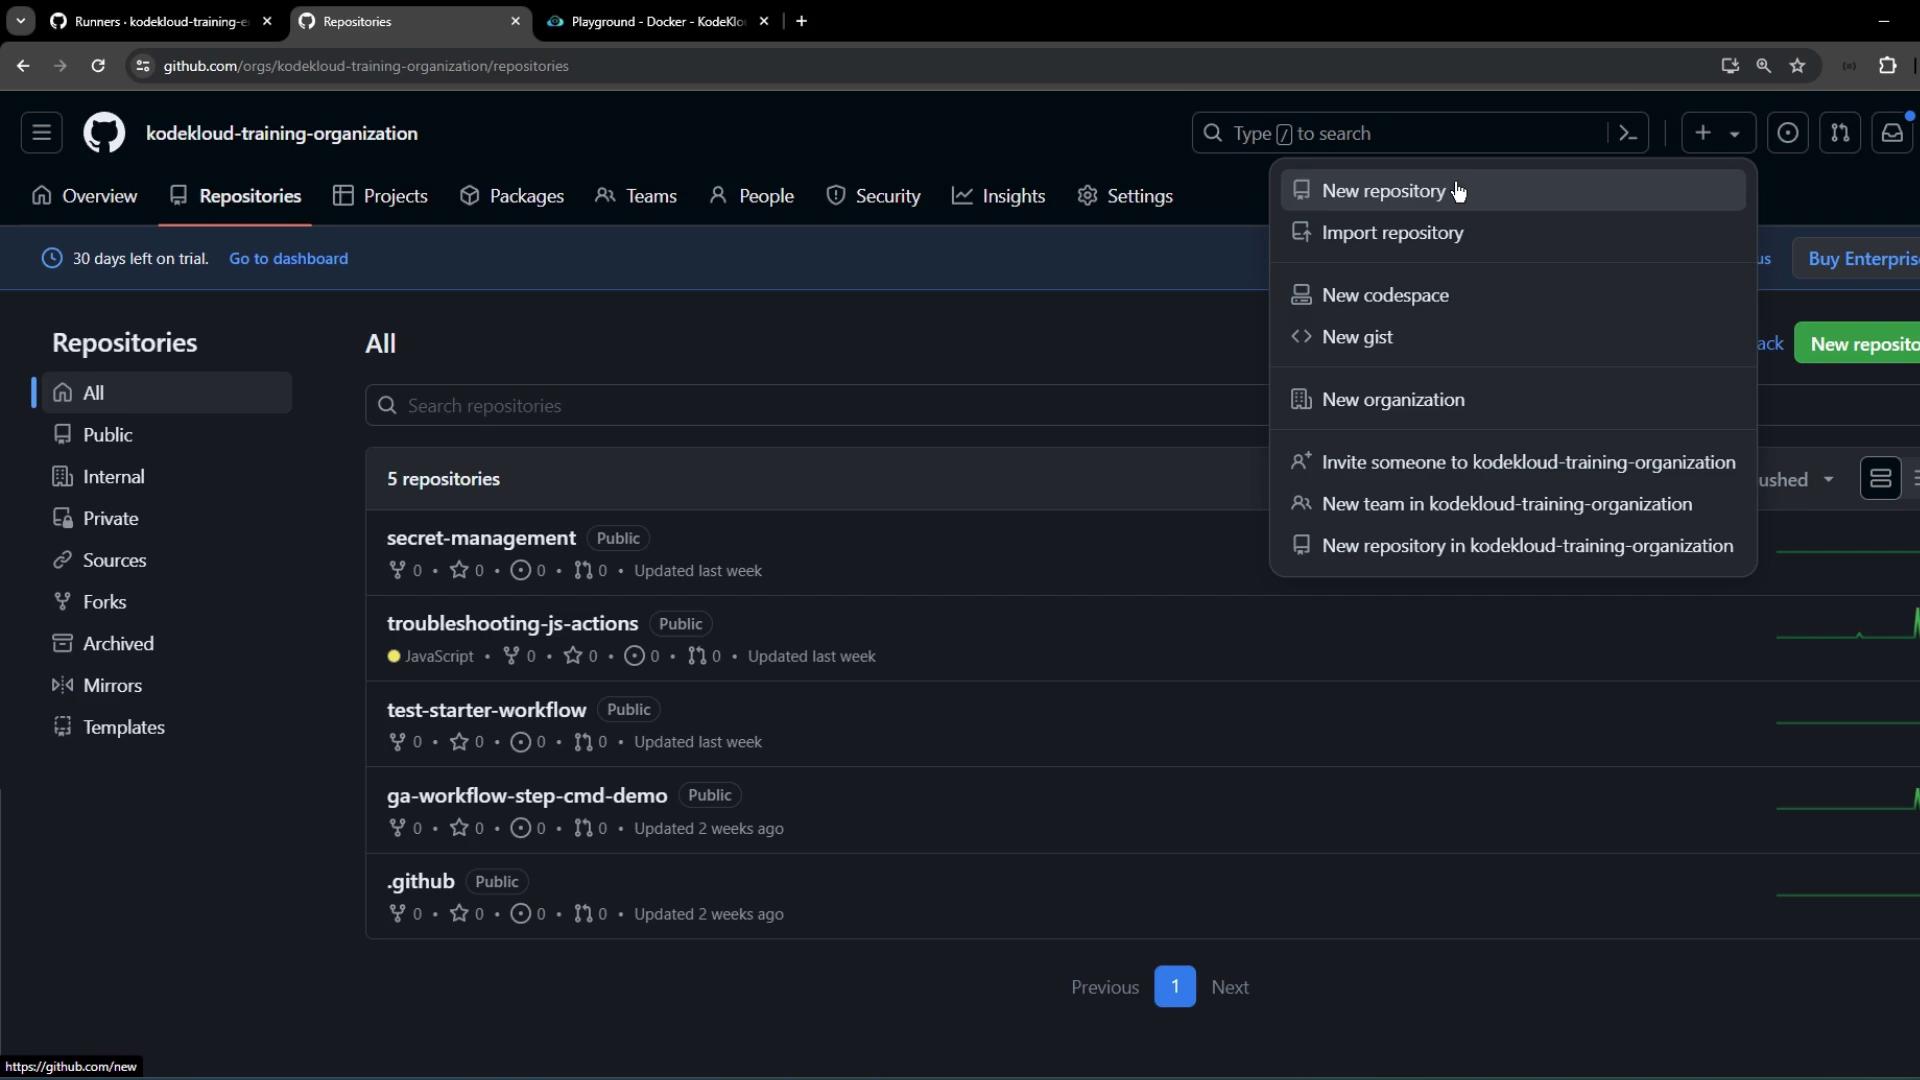
2. Go to **Repositories > New repository** in your organization:
<Frame>
  ![The image shows a GitHub settings page for an organization, specifically focusing on "Runner groups" for managing access to shared organization runners. It includes options to create a new runner group and displays existing groups with their details.](https://kodekloud.com/kk-media/image/upload/v1752876277/notes-assets/images/GitHub-Actions-Certification-Managing-self-hosted-runners-using-groups-Part1/github-settings-runner-groups-management-2.jpg)
</Frame>

<Frame>
  ![The image shows a GitHub organization page with a list of repositories and a dropdown menu for creating new repositories or organizations.](https://kodekloud.com/kk-media/image/upload/v1752876278/notes-assets/images/GitHub-Actions-Certification-Managing-self-hosted-runners-using-groups-Part1/github-organization-repositories-dropdown-menu.jpg)
</Frame>

<Frame>
  ![The image shows a GitHub interface for creating a new repository, with options to set the repository name, visibility, and initialize with a README file.](https://kodekloud.com/kk-media/image/upload/v1752876279/notes-assets/images/GitHub-Actions-Certification-Managing-self-hosted-runners-using-groups-Part1/github-new-repository-interface.jpg)
</Frame>

3. Initialize with a README and clone locally:

```bash theme={null}
git clone git@github.com:kodekloud-training-organization/demo-repo.git
cd demo-repo
```

4. Add a workflow at `.github/workflows/demo.yaml`:

```yaml theme={null}
name: Exploring GitHub Enterprise Action Features

on:
  push:
  workflow_dispatch:

jobs:
  demo_job:
    runs-on: self-hosted
    steps:
      - name: Hello
        run: echo "Hello GitHub Enterprise!!"

      - name: External Call using cURL
        run: curl -v http://httpbin.org/ip
```

5. Commit and push:

```bash theme={null}
git add .
git commit -m "Add demo workflow for enterprise runner"
git push
```

***

## 8. Review Workflow Execution

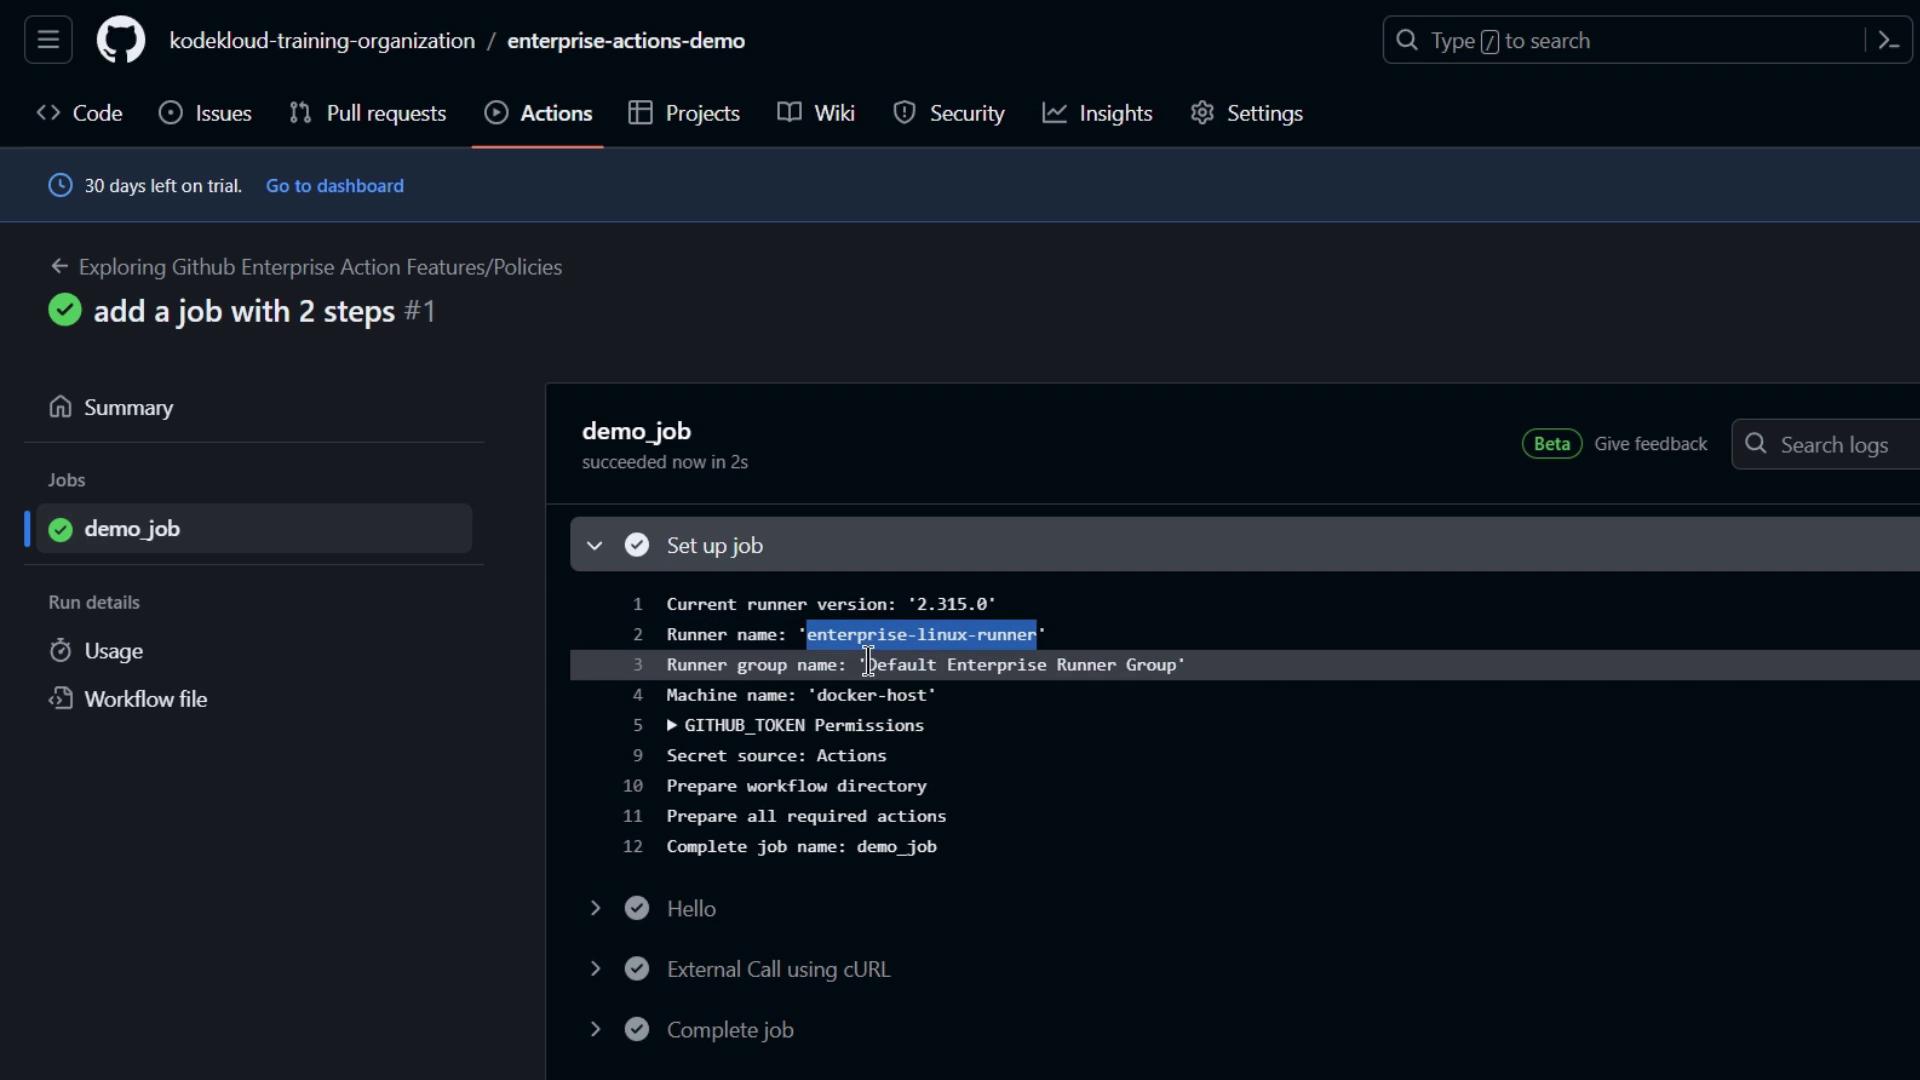
Navigate to the repository’s **Actions** tab. You should see `demo_job` queued and running on your self-hosted enterprise runner:
<Frame>
  ![The image shows a GitHub Actions interface with a job named "demo\_job" that has successfully completed. It includes details about the runner and setup steps.](https://kodekloud.com/kk-media/image/upload/v1752876280/notes-assets/images/GitHub-Actions-Certification-Managing-self-hosted-runners-using-groups-Part1/github-actions-demo-job-successful.jpg)
</Frame>

***

## Next Steps

In **Part 2**, we’ll cover how to move runners between groups and update labels directly from the GitHub UI.

***

## Links and References

* [GitHub Actions Runner Groups](https://docs.github.com/en/enterprise-server@latest/admin/configuration/using-runner-groups-in-an-enterprise)
* [Self-Hosted Runners Documentation](https://docs.github.com/actions/hosting-your-own-runners)
* [GitHub Enterprise Server](https://docs.github.com/en/enterprise-server)

<CardGroup>
  <Card title="Watch Video" icon="video" cta="Learn more" href="https://learn.kodekloud.com/user/courses/github-actions-certification/module/9b181319-216b-42b5-8069-9d56650f2d53/lesson/7ccb09f7-911c-454c-99a8-cf5f1ff9fac9" />
</CardGroup>