> ## Documentation Index
> Fetch the complete documentation index at: https://notes.kodekloud.com/llms.txt
> Use this file to discover all available pages before exploring further.
# Demo Configure a Codespace
> Guide to creating a GitHub Codespace, previewing and editing a web app in cloud VS Code, then committing and pushing UI changes to the repository
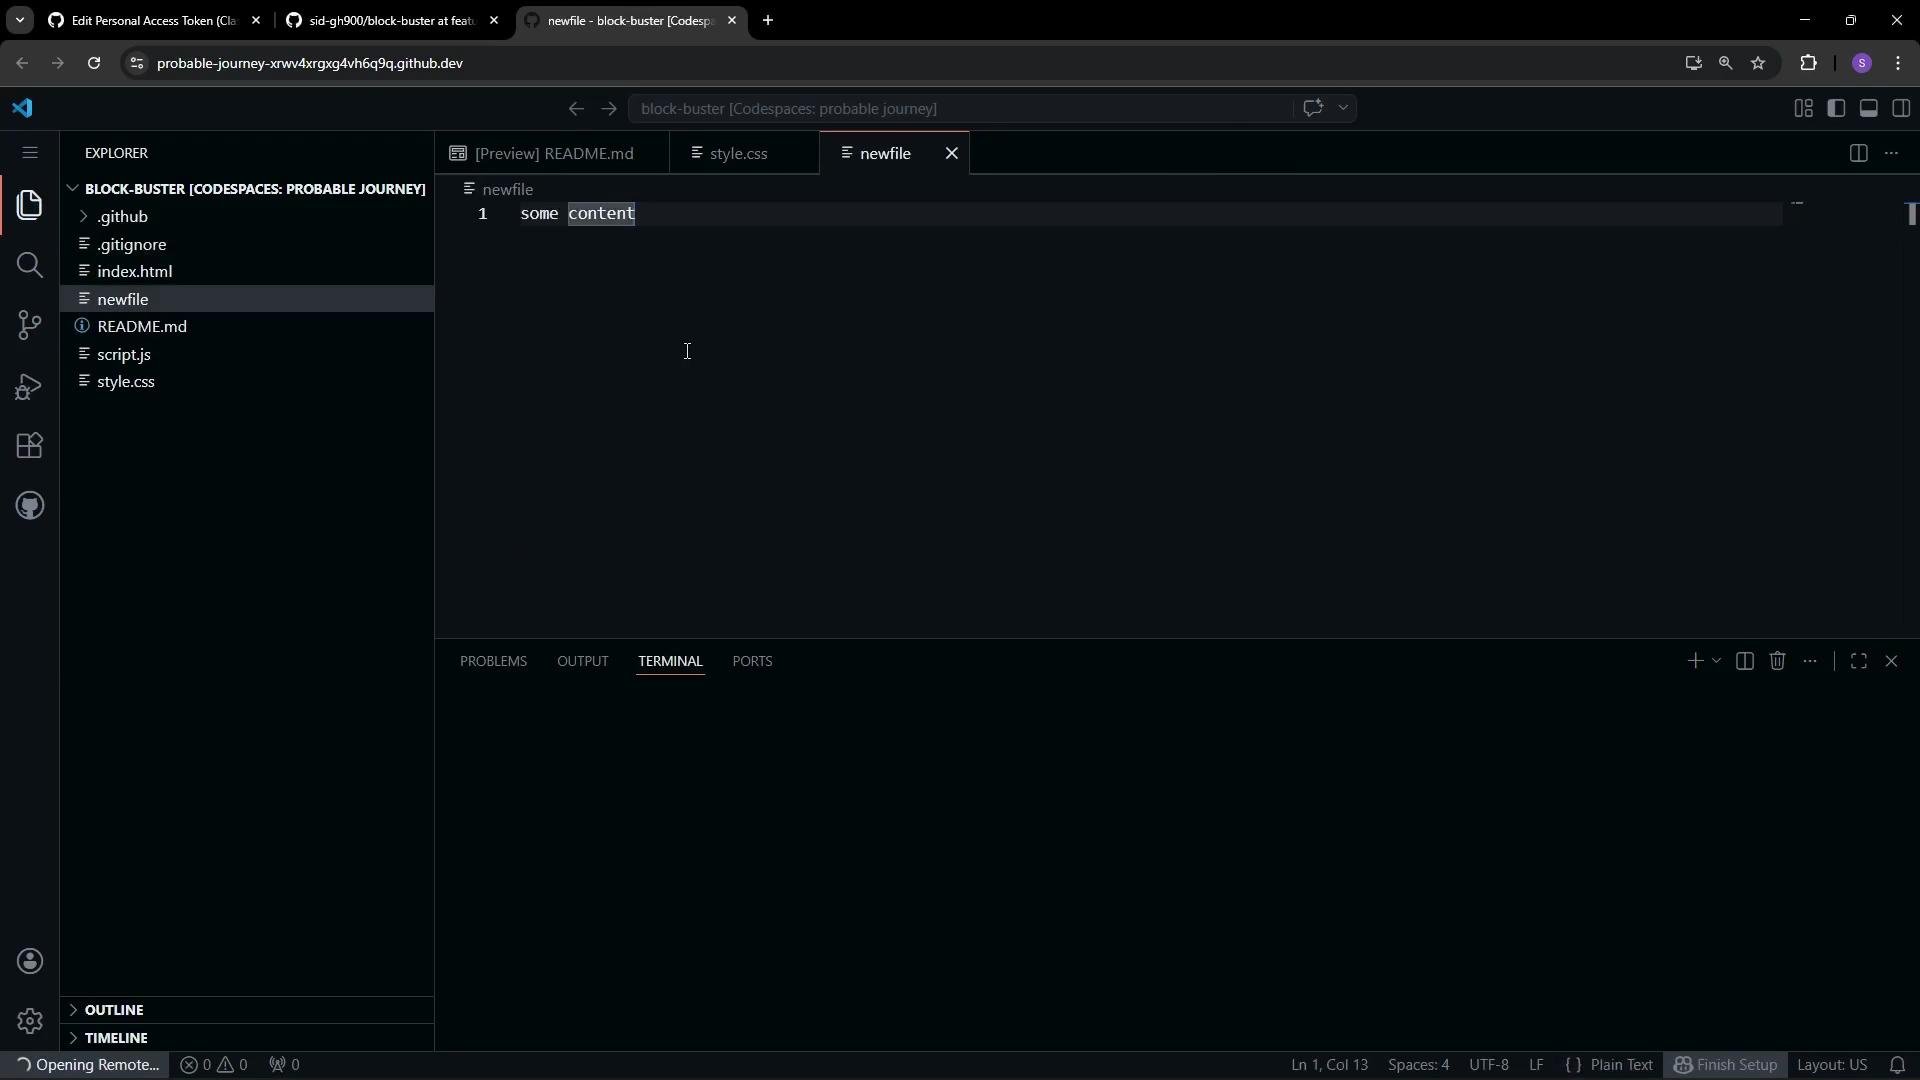
In this guide you'll create a GitHub Codespace for the example "block-buster" repository, preview the app in the browser, make a UI change in a feature branch, and push that branch back to GitHub. Using Codespaces lets you skip local environment setup and jump directly into a cloud-hosted VS Code instance with common developer tools preinstalled.
## 1. Create a Codespace
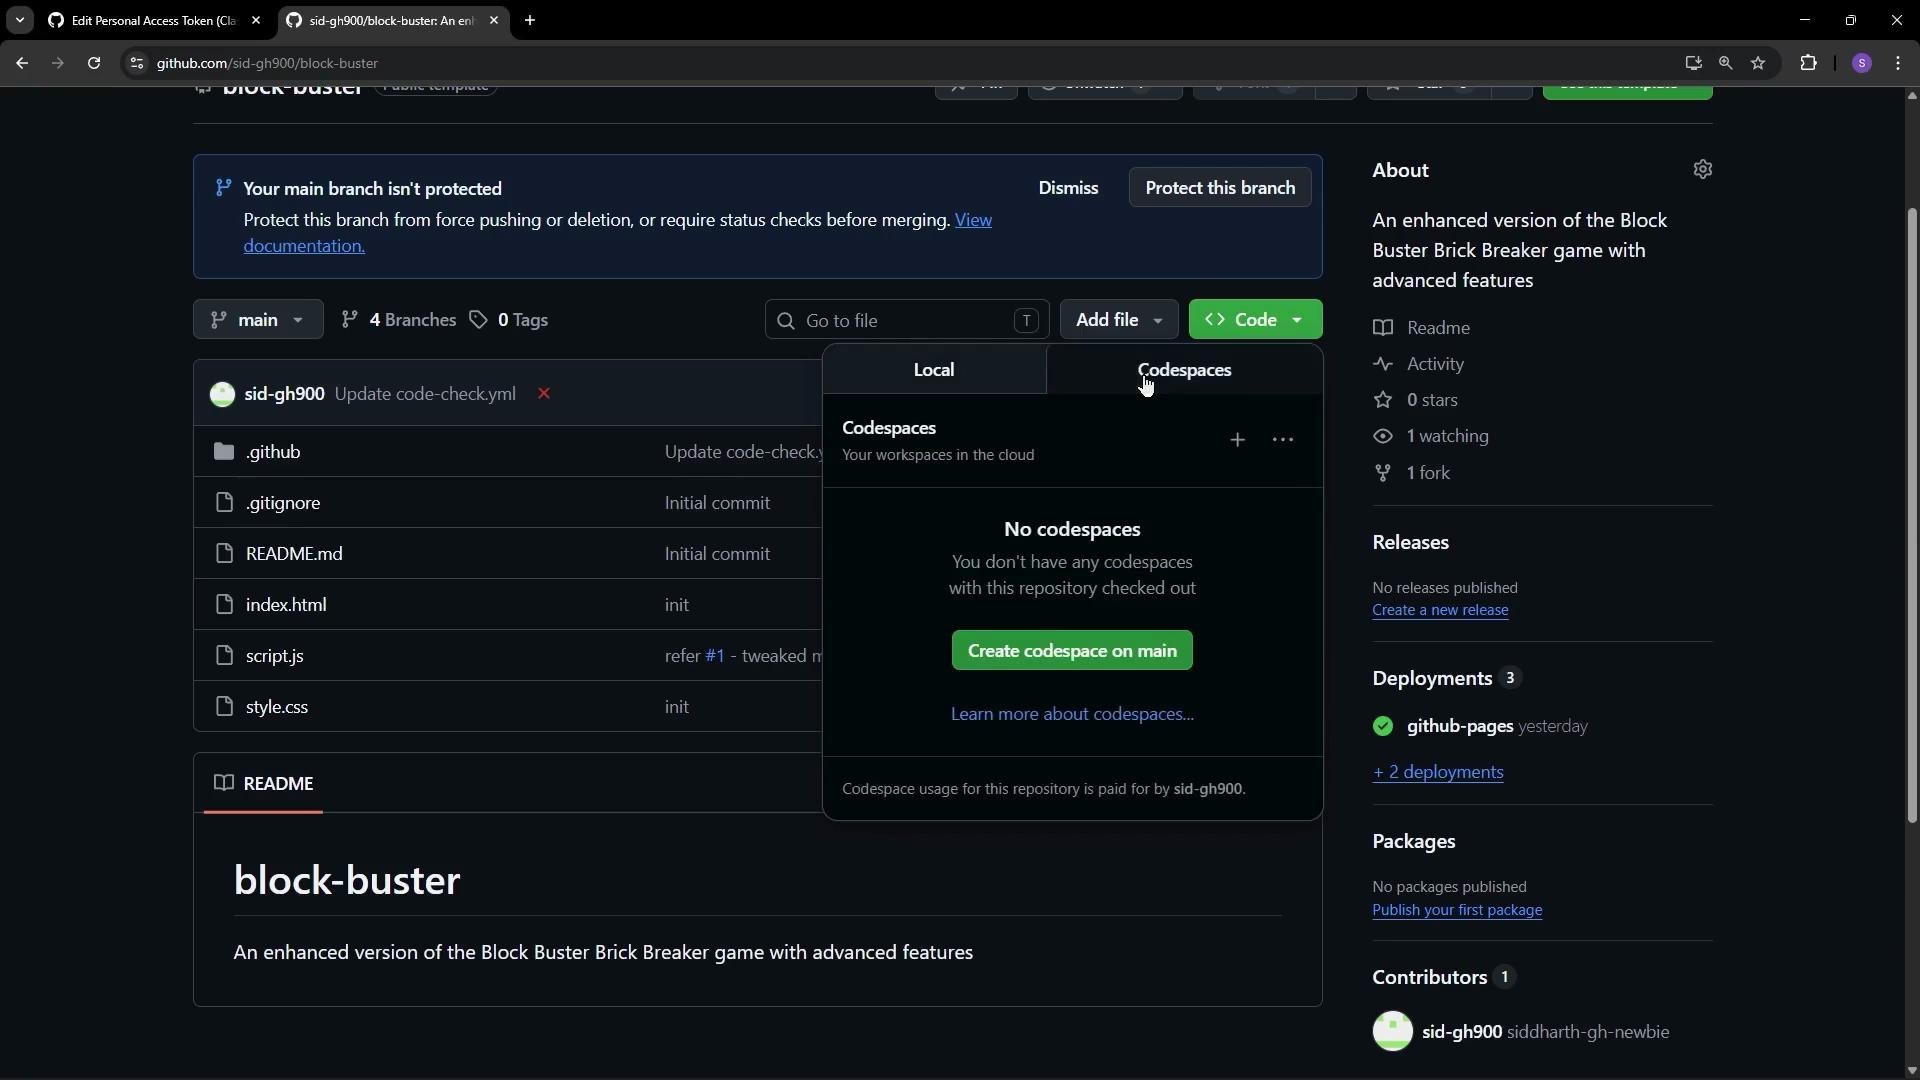
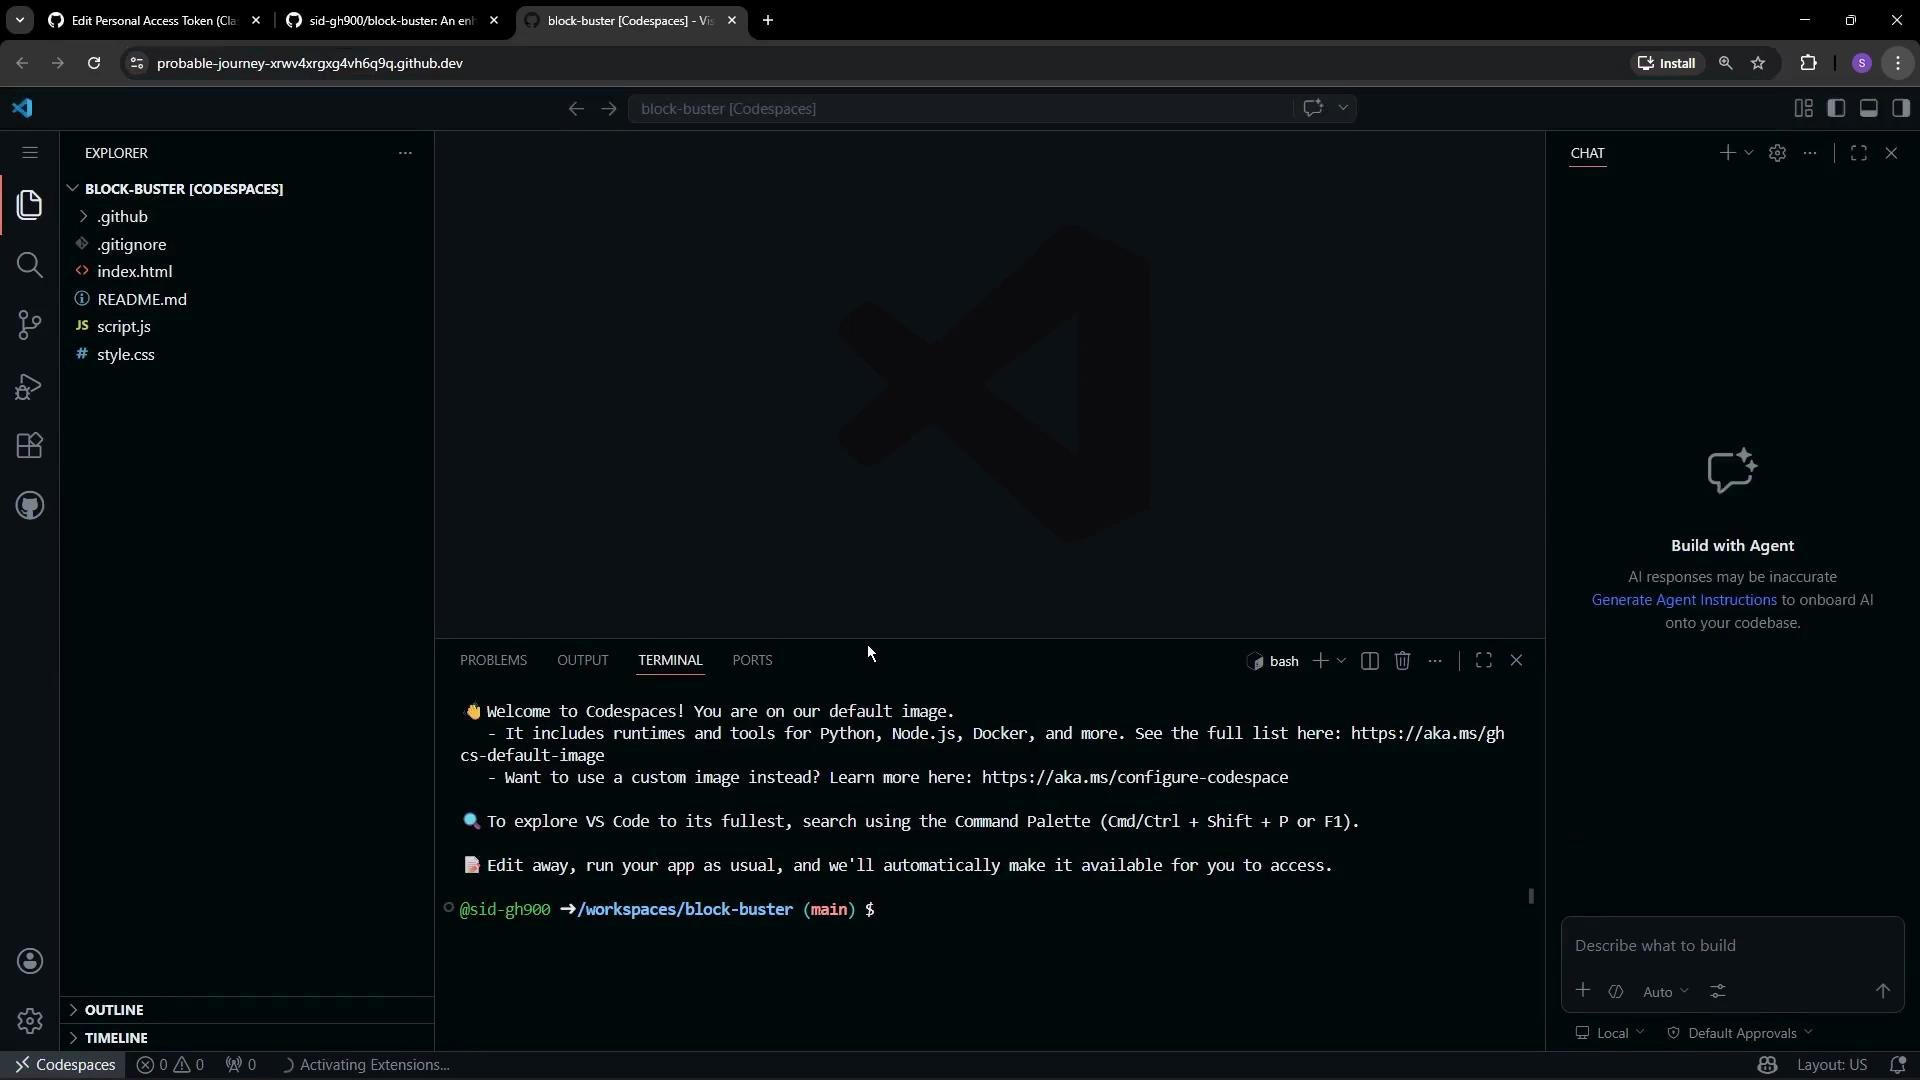
From the repository page open the Codespaces menu and click Create codespace (choose the main branch or another branch you prefer). After a short initialization step, GitHub launches a browser-hosted Visual Studio Code session with common tools and language runtimes already installed.
## 2. Verify common developer tools
Confirm that Node.js and the GitHub CLI are available in the Codespace terminal:
```bash theme={null}
# check Node.js and GitHub CLI versions
node -v
gh --version
```
Example output:
```bash theme={null}
$ node -v
v24.14.0
$ gh --version
gh version 2.8.0 (2026-03-10)
https://github.com/cli/cli/releases/tag/v2.8.0
```
Quick reference — useful commands:
| Purpose | Command |
| ------------------------ | ----------------------------------- |
| Check Node | `node -v` |
| Check GitHub CLI | `gh --version` |
| Create and switch branch | `git checkout -b feature-workspace` |
| Stage changes | `git add ` |
| Commit changes | `git commit -m "message"` |
| Push branch to remote | `git push -u origin ` |
## 3. Install optional VS Code extensions
Install any extensions you need inside the Codespace just like you would locally. For live HTML previews, consider:
* Live Preview: [https://marketplace.visualstudio.com/items?itemName=ms-vscode.live-server-preview](https://marketplace.visualstudio.com/items?itemName=ms-vscode.live-server-preview)
* Live Server: [https://marketplace.visualstudio.com/items?itemName=ritwickdey.LiveServer](https://marketplace.visualstudio.com/items?itemName=ritwickdey.LiveServer)
Open the Extensions view in Codespaces and install the extension that matches your workflow.
## 4. Preview the app
The project already includes a simple HTML entry point. Open the file in the editor and use Live Server / Live Preview to launch a browser tab that shows the running game:
```html theme={null}
Block Buster - Enhanced Edition
BLOCK BUSTER
Enhanced Edition with Random Levels & Power-ups
```
Open the app with your chosen preview extension and a new browser tab will display the game.
## 5. Make a UI change in a feature branch
Create and switch to a new branch before editing:
```bash theme={null}
# create and switch to a feature branch
git checkout -b feature-workspace
```
Open `style.css` (or `style.scss`) and locate the `:root` variables. The existing variables might look like this:
```css theme={null}
:root {
--primary-gradient: linear-gradient(135deg, #667eea 0%, #764ba2 100%);
--secondary-gradient: linear-gradient(135deg, #f09f3f 0%, #f5576c 100%);
--dark-bg: #0f1f20;
--card-bg: rgba(255, 255, 255, 0.2);
--card-border: rgba(255, 255, 255, 0.2);
--accent-cyan: #00d4fa;
--accent-lime: #8fdc5f;
--accent-purple: #c24cf6;
--text-primary: #ffffff;
--text-secondary: #bbbb0c;
--power-multi: #ff6bb6;
}
```
To switch the UI accent color, update the variables — here is an example pinker theme:
```css theme={null}
:root {
--primary-gradient: linear-gradient(180deg, #764ba2 100%);
--secondary-gradient: linear-gradient(180deg, #f5576c 100%);
--dark-bg: #0a0a0a;
--card-bg: #ffffff;
--card-border: #eaeaea;
--accent-cyan: #1eb1b7;
--accent-lime: #78d20a;
--accent-purple: #c24cf6;
--text-primary: #ffffff;
--text-secondary: #bbbb0c;
--power-multi: #f6bbcb;
}
```
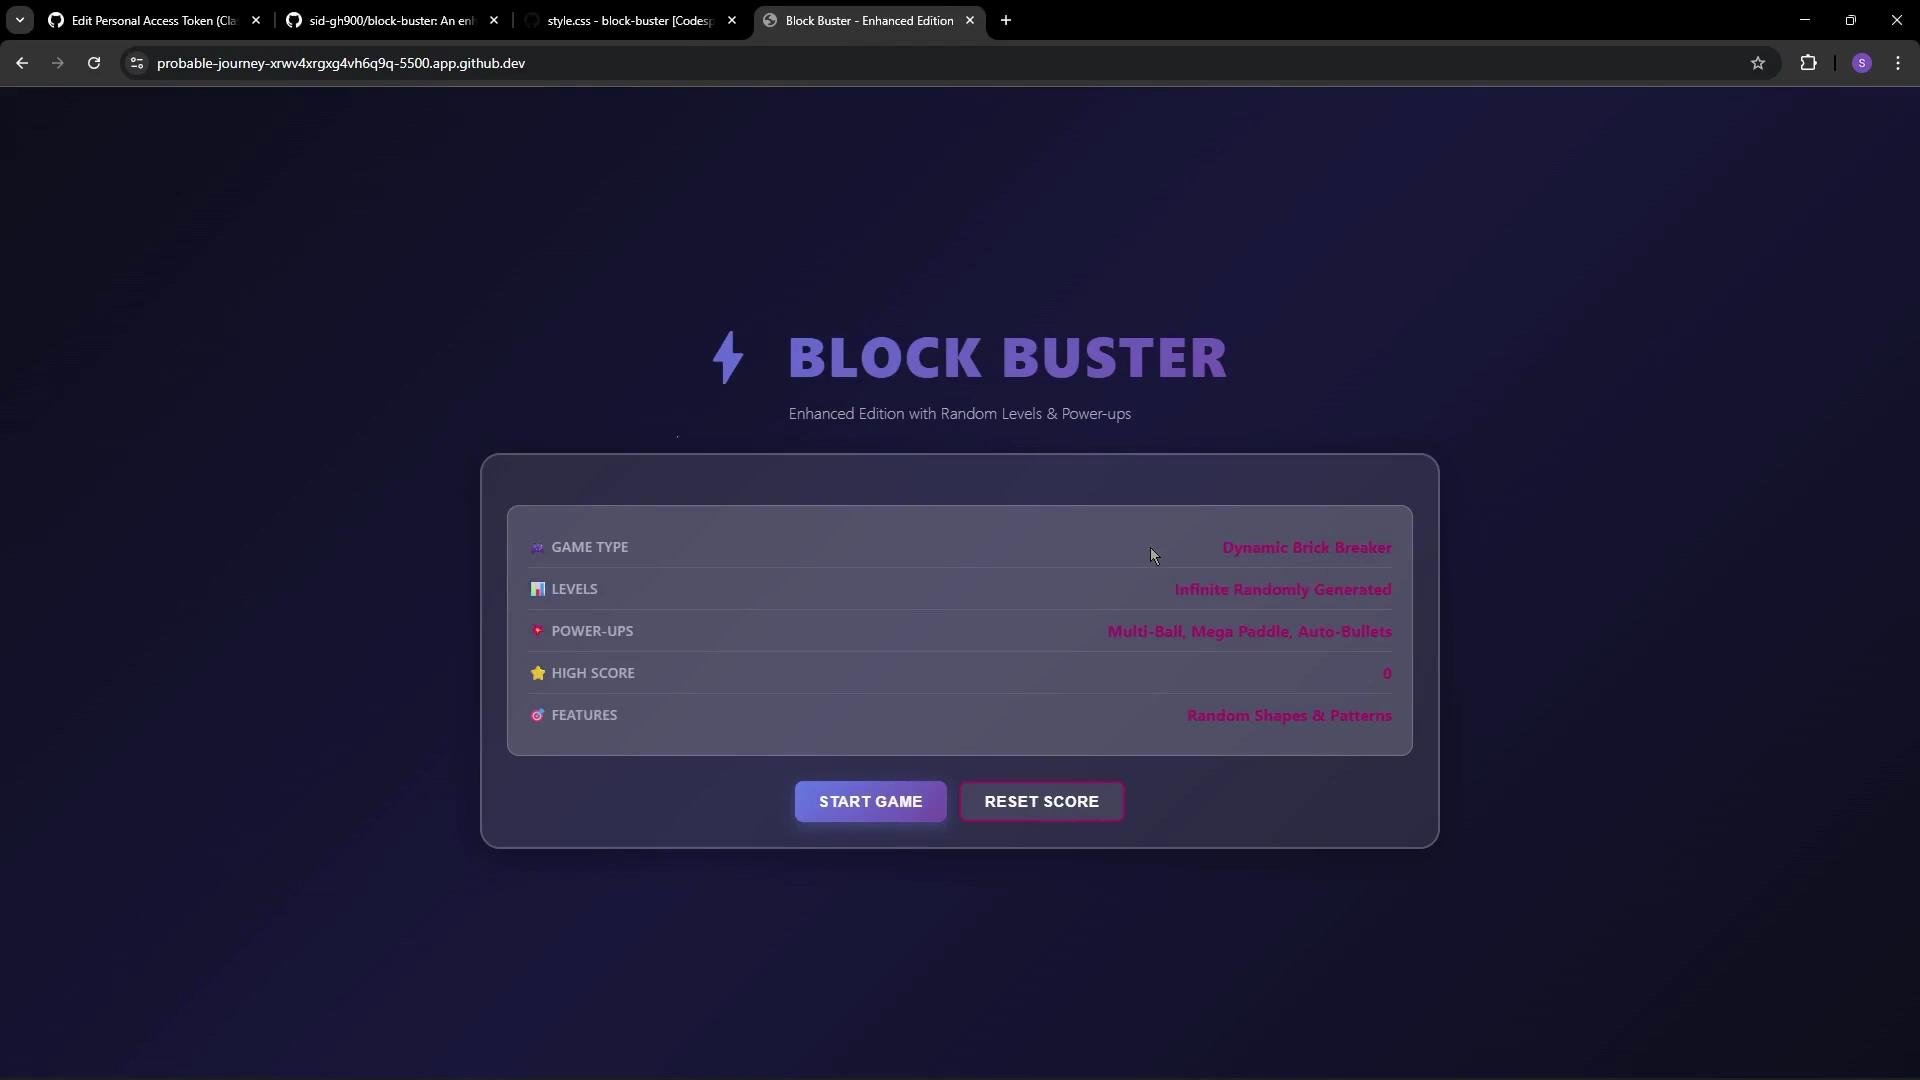
Save the file and refresh the Live Preview tab — CSS variables update immediately so you can iterate quickly.
## 6. Commit and publish your branch
When you're satisfied with the change, stage, commit, and push the branch:
```bash theme={null}
git add style.css
git commit -m "Update accent colors for UI theme"
git push -u origin feature-workspace
```
VS Code may prompt to publish the branch for you (creating the upstream). It can also offer to open a pull request — you can create that PR immediately or from the GitHub UI later.
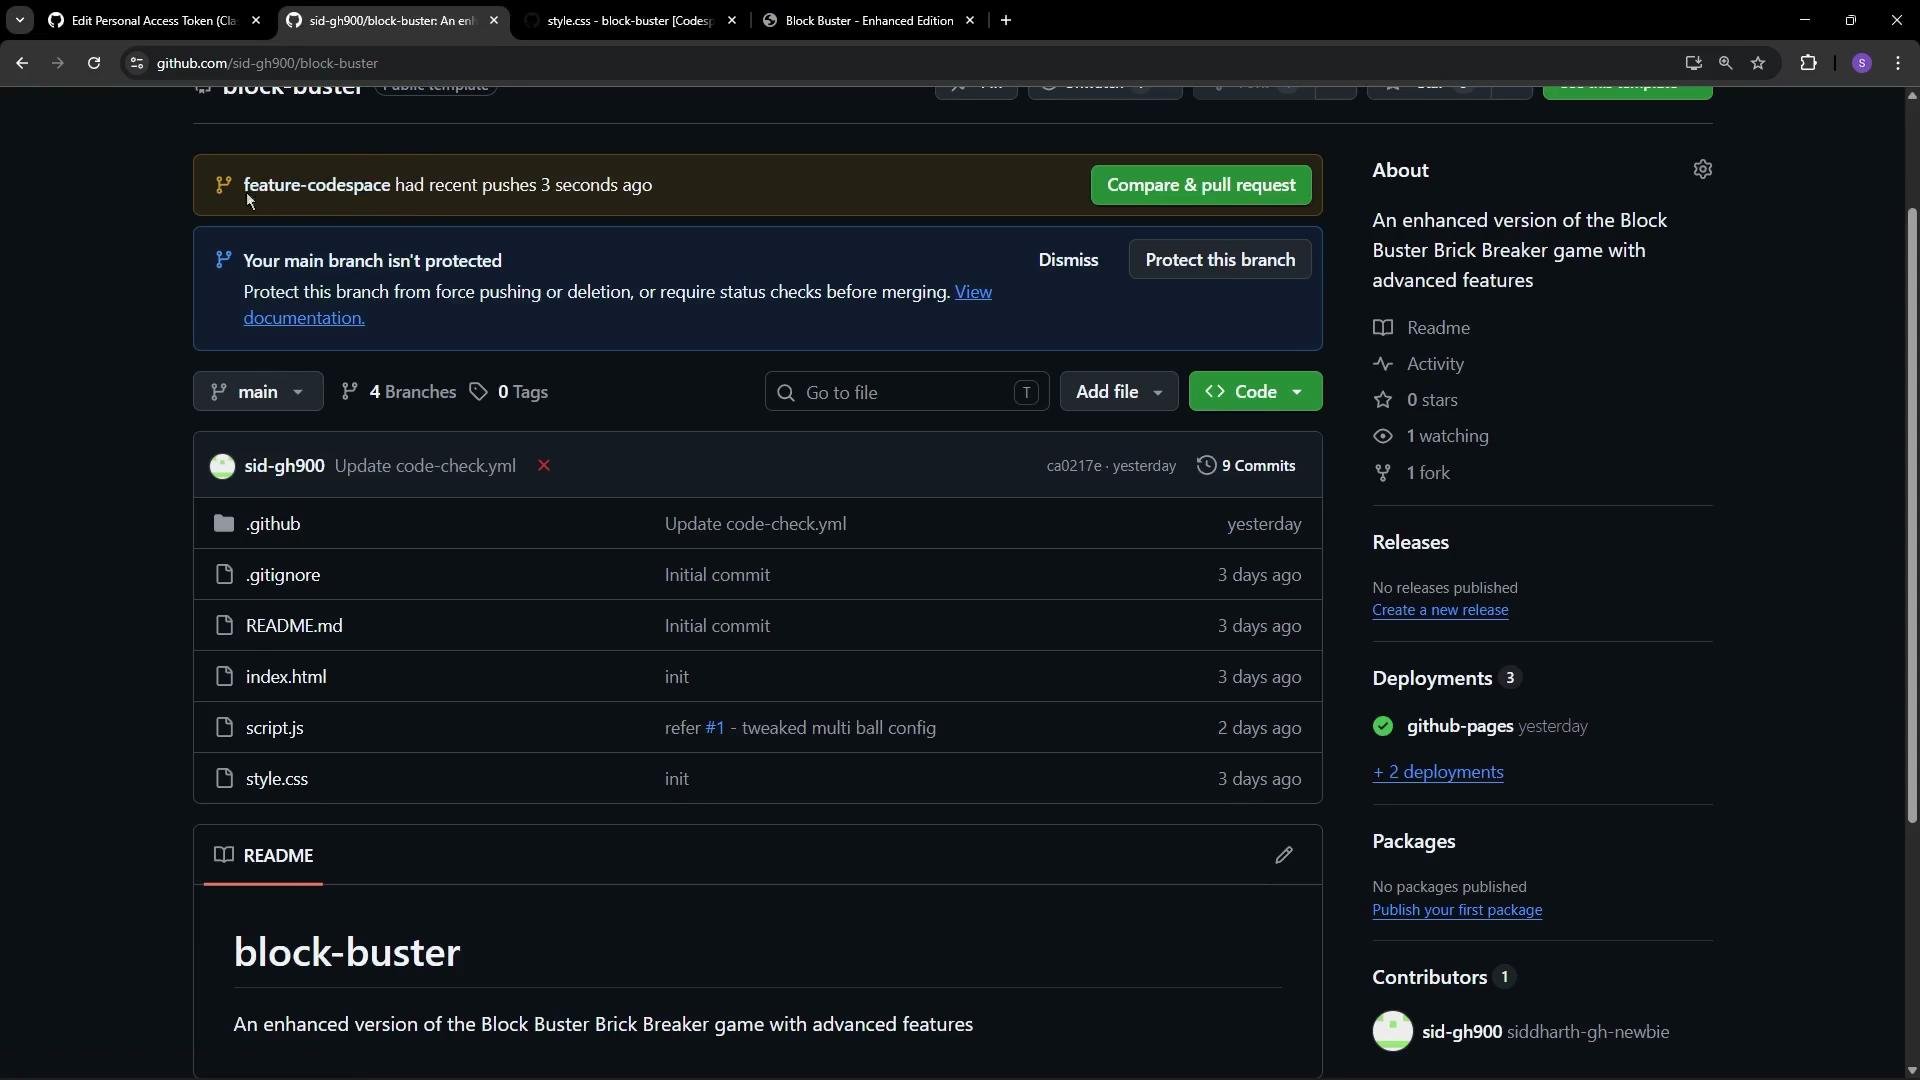
After pushing, confirm the branch and commit appear on GitHub.
## 7. Codespace lifecycle: stopped vs deleted
A convenient detail of Codespaces is that stopping a Codespace preserves the VM state (open files and uncommitted changes) so you can resume work later. However, deleting the Codespace permanently removes its data.
Before deleting a Codespace, commit and push any changes you want to keep. Stopping preserves open files and uncommitted work for your next start, but deleting removes all Codespace data permanently.
## Summary
* Create a Codespace to get an instant cloud-hosted VS Code environment.
* Verify Node.js and `gh` are available, and install any needed extensions.
* Use Live Server / Live Preview to iterate on UI changes quickly.
* Branch, commit, and push changes back to GitHub.
* Stop Codespaces to preserve state; delete only when you no longer need the instance.
## Links and References
* [GitHub Codespaces documentation](https://docs.github.com/en/codespaces)
* [Visual Studio Code](https://code.visualstudio.com/)
* [Node.js](https://nodejs.org/)
* [GitHub CLI](https://cli.github.com/)
* Live Preview: [https://marketplace.visualstudio.com/items?itemName=ms-vscode.live-server-preview](https://marketplace.visualstudio.com/items?itemName=ms-vscode.live-server-preview)
* Live Server: [https://marketplace.visualstudio.com/items?itemName=ritwickdey.LiveServer](https://marketplace.visualstudio.com/items?itemName=ritwickdey.LiveServer)
 ## 1. Create a Codespace
From the repository page open the Codespaces menu and click Create codespace (choose the main branch or another branch you prefer). After a short initialization step, GitHub launches a browser-hosted Visual Studio Code session with common tools and language runtimes already installed.
## 1. Create a Codespace
From the repository page open the Codespaces menu and click Create codespace (choose the main branch or another branch you prefer). After a short initialization step, GitHub launches a browser-hosted Visual Studio Code session with common tools and language runtimes already installed.
 ## 2. Verify common developer tools
Confirm that Node.js and the GitHub CLI are available in the Codespace terminal:
```bash theme={null}
# check Node.js and GitHub CLI versions
node -v
gh --version
```
Example output:
```bash theme={null}
$ node -v
v24.14.0
$ gh --version
gh version 2.8.0 (2026-03-10)
https://github.com/cli/cli/releases/tag/v2.8.0
```
Quick reference — useful commands:
| Purpose | Command |
| ------------------------ | ----------------------------------- |
| Check Node | `node -v` |
| Check GitHub CLI | `gh --version` |
| Create and switch branch | `git checkout -b feature-workspace` |
| Stage changes | `git add
## 2. Verify common developer tools
Confirm that Node.js and the GitHub CLI are available in the Codespace terminal:
```bash theme={null}
# check Node.js and GitHub CLI versions
node -v
gh --version
```
Example output:
```bash theme={null}
$ node -v
v24.14.0
$ gh --version
gh version 2.8.0 (2026-03-10)
https://github.com/cli/cli/releases/tag/v2.8.0
```
Quick reference — useful commands:
| Purpose | Command |
| ------------------------ | ----------------------------------- |
| Check Node | `node -v` |
| Check GitHub CLI | `gh --version` |
| Create and switch branch | `git checkout -b feature-workspace` |
| Stage changes | `git add 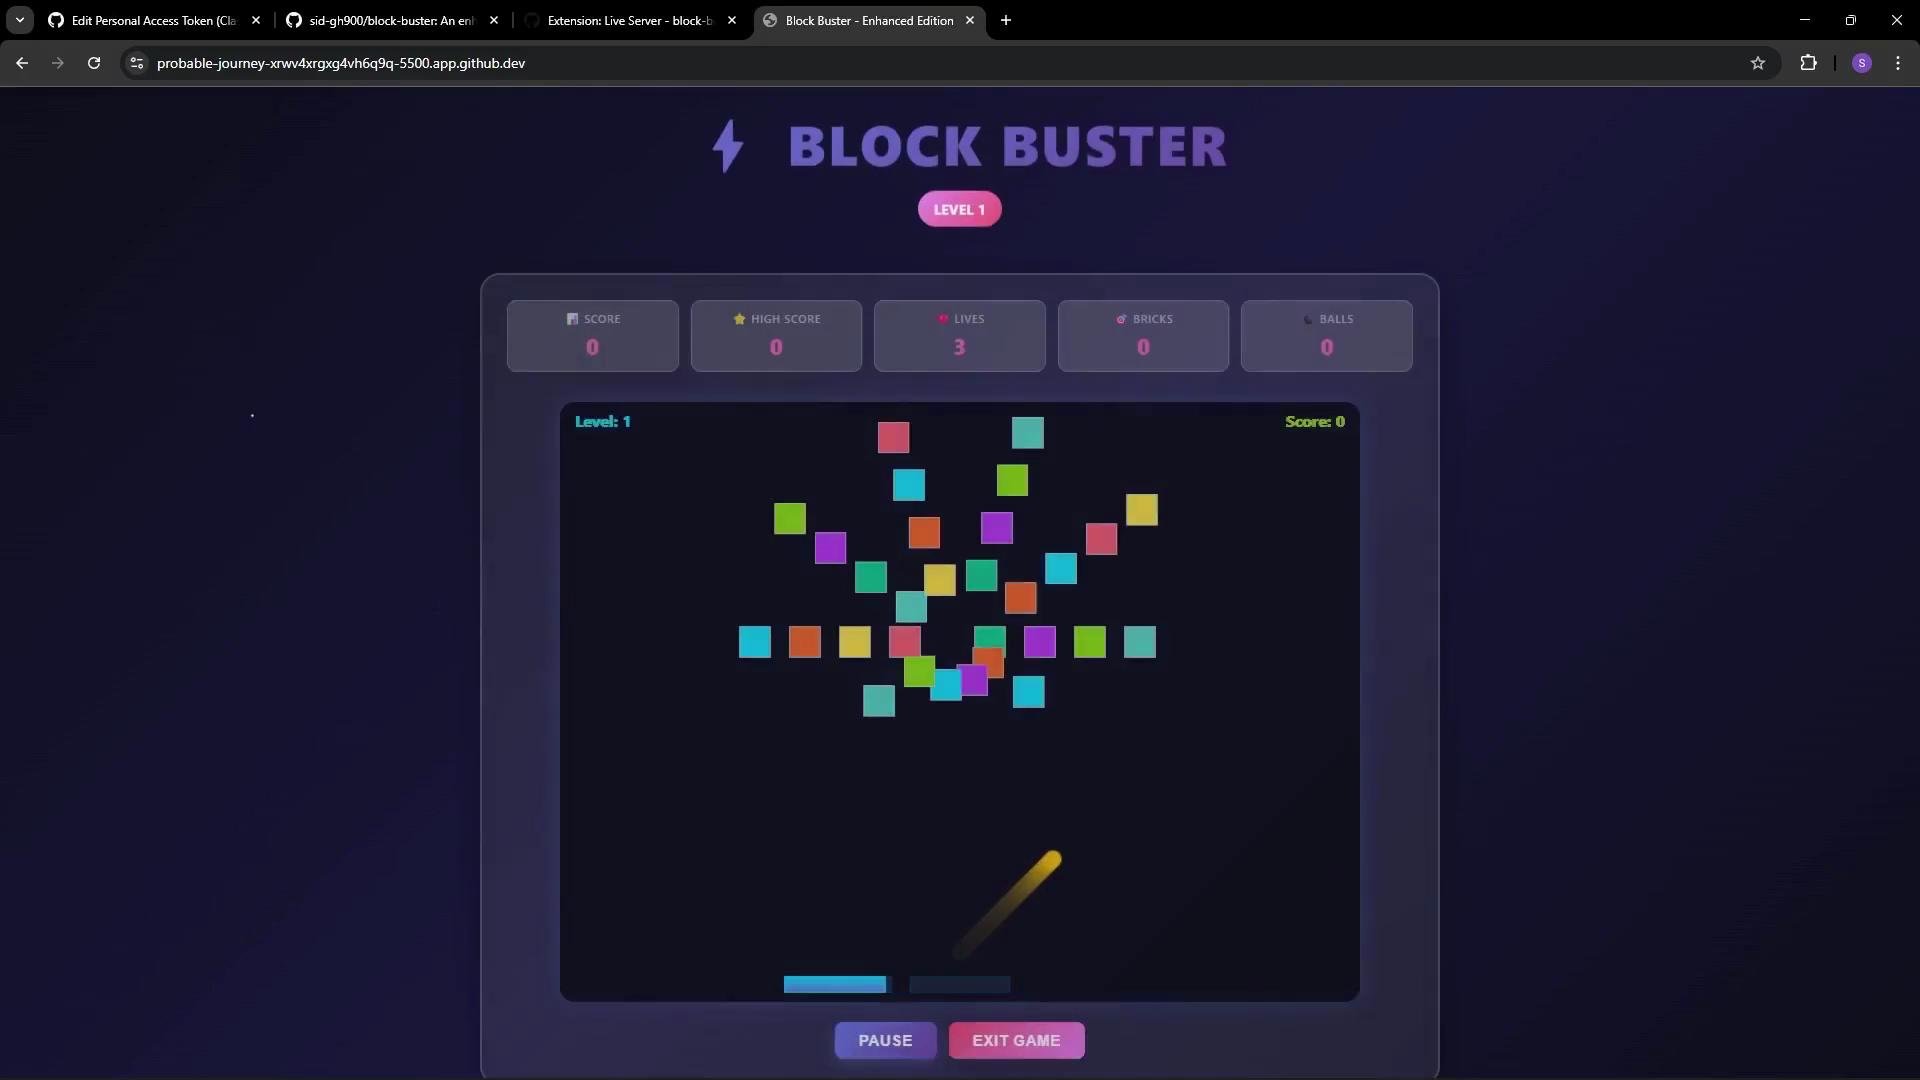 ## 5. Make a UI change in a feature branch
Create and switch to a new branch before editing:
```bash theme={null}
# create and switch to a feature branch
git checkout -b feature-workspace
```
Open `style.css` (or `style.scss`) and locate the `:root` variables. The existing variables might look like this:
```css theme={null}
:root {
--primary-gradient: linear-gradient(135deg, #667eea 0%, #764ba2 100%);
--secondary-gradient: linear-gradient(135deg, #f09f3f 0%, #f5576c 100%);
--dark-bg: #0f1f20;
--card-bg: rgba(255, 255, 255, 0.2);
--card-border: rgba(255, 255, 255, 0.2);
--accent-cyan: #00d4fa;
--accent-lime: #8fdc5f;
--accent-purple: #c24cf6;
--text-primary: #ffffff;
--text-secondary: #bbbb0c;
--power-multi: #ff6bb6;
}
```
To switch the UI accent color, update the variables — here is an example pinker theme:
```css theme={null}
:root {
--primary-gradient: linear-gradient(180deg, #764ba2 100%);
--secondary-gradient: linear-gradient(180deg, #f5576c 100%);
--dark-bg: #0a0a0a;
--card-bg: #ffffff;
--card-border: #eaeaea;
--accent-cyan: #1eb1b7;
--accent-lime: #78d20a;
--accent-purple: #c24cf6;
--text-primary: #ffffff;
--text-secondary: #bbbb0c;
--power-multi: #f6bbcb;
}
```
Save the file and refresh the Live Preview tab — CSS variables update immediately so you can iterate quickly.
## 5. Make a UI change in a feature branch
Create and switch to a new branch before editing:
```bash theme={null}
# create and switch to a feature branch
git checkout -b feature-workspace
```
Open `style.css` (or `style.scss`) and locate the `:root` variables. The existing variables might look like this:
```css theme={null}
:root {
--primary-gradient: linear-gradient(135deg, #667eea 0%, #764ba2 100%);
--secondary-gradient: linear-gradient(135deg, #f09f3f 0%, #f5576c 100%);
--dark-bg: #0f1f20;
--card-bg: rgba(255, 255, 255, 0.2);
--card-border: rgba(255, 255, 255, 0.2);
--accent-cyan: #00d4fa;
--accent-lime: #8fdc5f;
--accent-purple: #c24cf6;
--text-primary: #ffffff;
--text-secondary: #bbbb0c;
--power-multi: #ff6bb6;
}
```
To switch the UI accent color, update the variables — here is an example pinker theme:
```css theme={null}
:root {
--primary-gradient: linear-gradient(180deg, #764ba2 100%);
--secondary-gradient: linear-gradient(180deg, #f5576c 100%);
--dark-bg: #0a0a0a;
--card-bg: #ffffff;
--card-border: #eaeaea;
--accent-cyan: #1eb1b7;
--accent-lime: #78d20a;
--accent-purple: #c24cf6;
--text-primary: #ffffff;
--text-secondary: #bbbb0c;
--power-multi: #f6bbcb;
}
```
Save the file and refresh the Live Preview tab — CSS variables update immediately so you can iterate quickly.
 ## 6. Commit and publish your branch
When you're satisfied with the change, stage, commit, and push the branch:
```bash theme={null}
git add style.css
git commit -m "Update accent colors for UI theme"
git push -u origin feature-workspace
```
VS Code may prompt to publish the branch for you (creating the upstream). It can also offer to open a pull request — you can create that PR immediately or from the GitHub UI later.
After pushing, confirm the branch and commit appear on GitHub.
## 6. Commit and publish your branch
When you're satisfied with the change, stage, commit, and push the branch:
```bash theme={null}
git add style.css
git commit -m "Update accent colors for UI theme"
git push -u origin feature-workspace
```
VS Code may prompt to publish the branch for you (creating the upstream). It can also offer to open a pull request — you can create that PR immediately or from the GitHub UI later.
After pushing, confirm the branch and commit appear on GitHub.
 ## 7. Codespace lifecycle: stopped vs deleted
A convenient detail of Codespaces is that stopping a Codespace preserves the VM state (open files and uncommitted changes) so you can resume work later. However, deleting the Codespace permanently removes its data.
## 7. Codespace lifecycle: stopped vs deleted
A convenient detail of Codespaces is that stopping a Codespace preserves the VM state (open files and uncommitted changes) so you can resume work later. However, deleting the Codespace permanently removes its data.