> ## Documentation Index
> Fetch the complete documentation index at: https://notes.kodekloud.com/llms.txt
> Use this file to discover all available pages before exploring further.

# Create and Run a Basic Pipeline

> Learn to set up a simple CI/CD pipeline on GitLab, covering group creation, project initialization, configuration, and pipeline execution.

In this guide, you’ll learn how to set up a simple CI/CD pipeline on GitLab. We’ll walk through:

1. Creating a **GitLab Group**
2. Initializing a **GitLab Project**
3. Configuring your **.gitlab-ci.yml** file
4. Reviewing pipeline execution

By the end, you’ll have a working pipeline that builds, tests, and deploys automatically.

## 1. Create a GitLab Group

First, organize your demos under a top-level group called `demos-group`:

1. Go to **Groups → Create group**.
2. Set **Group name** to `demos-group`.\
   The **Group URL** will be `gitlab.com/demos-group`.
3. Choose **Visibility Level**: **Public**.
4. Click **Create group**.

<Frame>
  ![The image shows a GitLab interface for creating a new top-level group, with fields for group name, URL, and visibility settings. A warning message indicates that the group name should not contain a period for SCIM integration.](https://kodekloud.com/kk-media/image/upload/v1752876972/notes-assets/images/GitLab-CICD-Architecting-Deploying-and-Optimizing-Pipelines-Create-and-Run-a-Basic-Pipeline/gitlab-create-top-level-group.jpg)
</Frame>

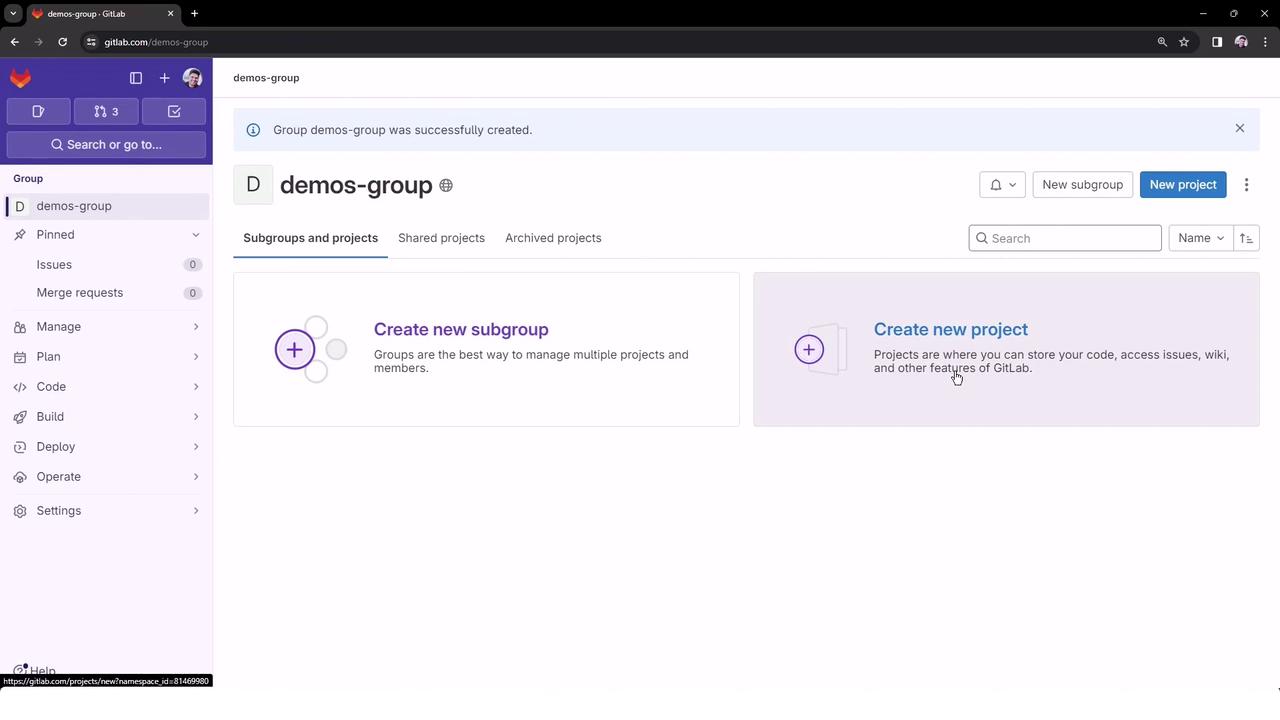
Once created, you’ll see the group dashboard:
<Frame>
  ![The image shows a GitLab interface where a group named "demos-group" has been successfully created. It offers options to create a new subgroup or a new project.](https://kodekloud.com/kk-media/image/upload/v1752876973/notes-assets/images/GitLab-CICD-Architecting-Deploying-and-Optimizing-Pipelines-Create-and-Run-a-Basic-Pipeline/gitlab-demos-group-interface.jpg)
</Frame>

<Callout icon="lightbulb" color="#1CB2FE">
  Group names should avoid special characters (e.g., periods) if you plan to integrate with SCIM or other identity providers.
</Callout>

## 2. Create a New Project

Inside `demos-group`, create a project named `hello-world`:

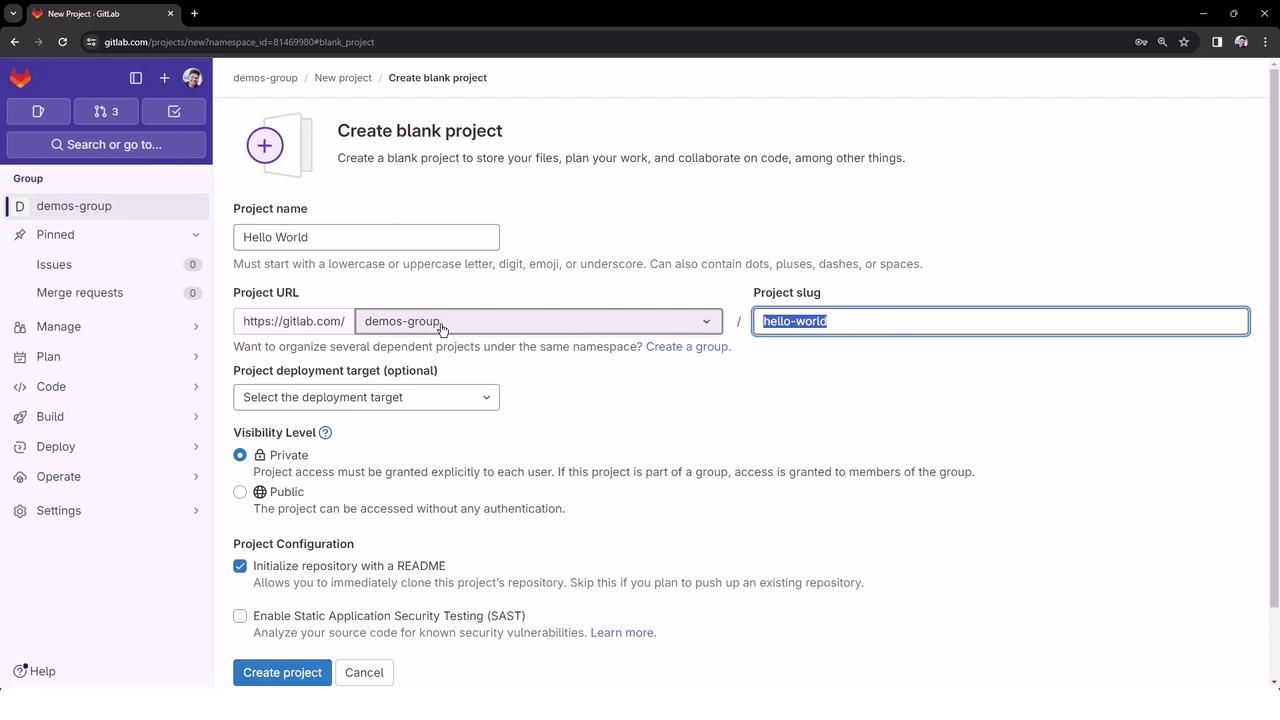
1. Click **New project → Create blank project**.
2. Enter **Project name**: `hello-world`\
   The **Project URL** becomes `gitlab.com/demos-group/hello-world`.
3. Set **Visibility**: **Public**.
4. Check **Initialize repository with a README**.
5. Click **Create project**.
<Frame>
  ![The image shows a GitLab interface for creating a blank project, with fields for project name, URL, and visibility settings. Options for initializing a repository with a README and enabling security testing are also visible.](https://kodekloud.com/kk-media/image/upload/v1752876975/notes-assets/images/GitLab-CICD-Architecting-Deploying-and-Optimizing-Pipelines-Create-and-Run-a-Basic-Pipeline/gitlab-blank-project-interface.jpg)
</Frame>

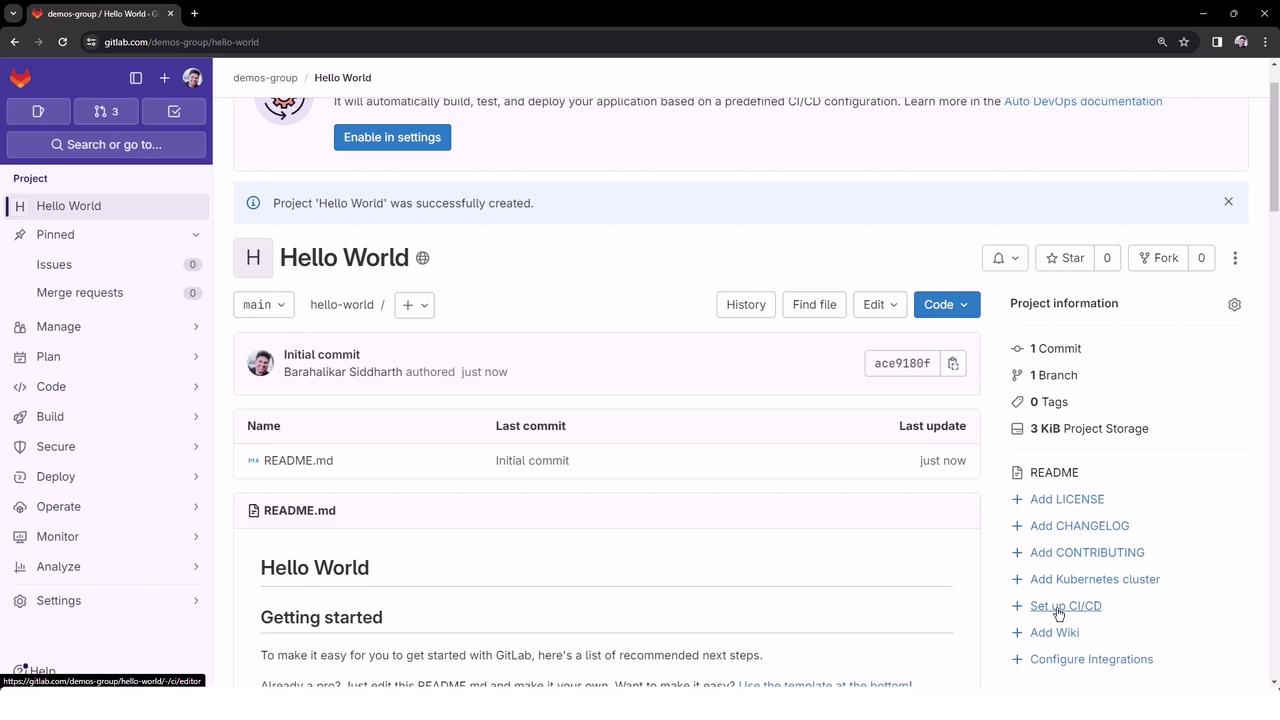
Your project page will display the README and initial instructions:
<Frame>
  ![The image shows a GitLab project page for a "Hello World" repository. It includes details like the initial commit, project information, and a README file.](https://kodekloud.com/kk-media/image/upload/v1752876976/notes-assets/images/GitLab-CICD-Architecting-Deploying-and-Optimizing-Pipelines-Create-and-Run-a-Basic-Pipeline/gitlab-hello-world-repo-page.jpg)
</Frame>

If you already have local code, push it with:

```bash theme={null}
git remote add origin https://gitlab.com/demos-group/hello-world.git
git branch -M main
git push -uf origin main
```

## 3. Set Up CI/CD Pipeline

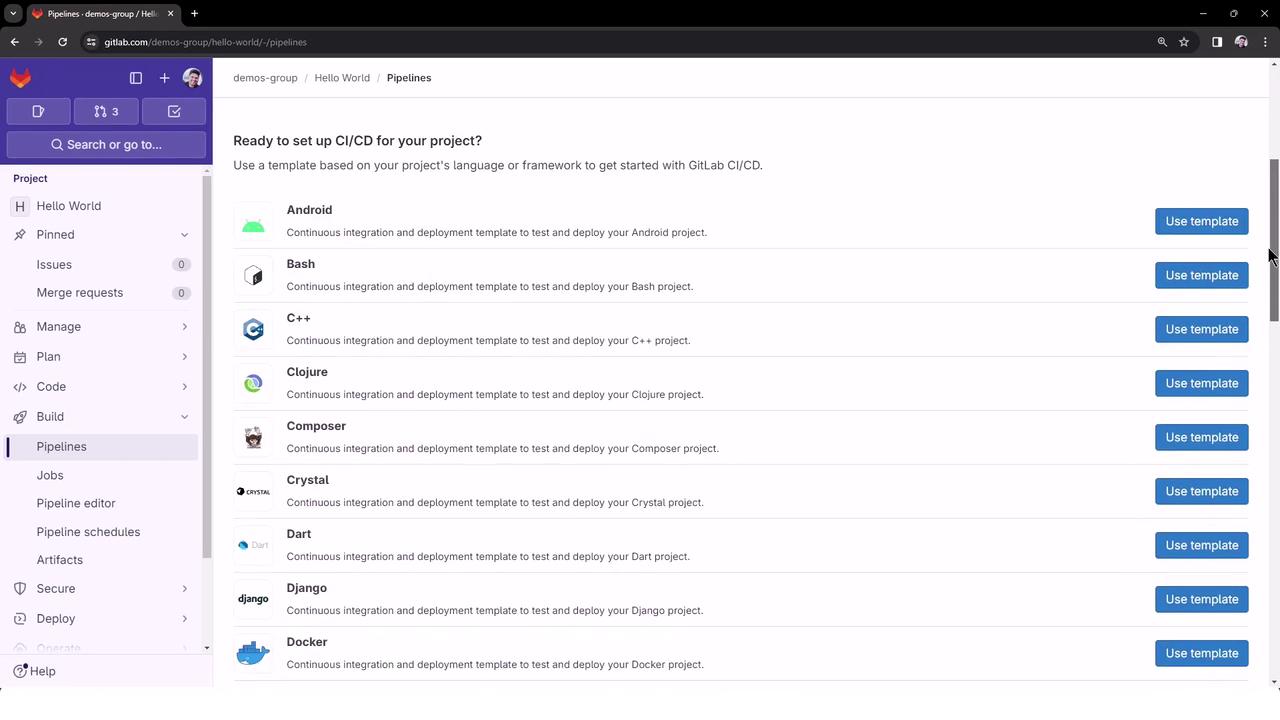
Click **CI/CD → Pipelines → Setup CI/CD** (or **Configure pipeline**) to open the editor. You’ll see a list of templates and an empty `.gitlab-ci.yml` file:

<Frame>
  ![The image shows a GitLab interface with a focus on the Pipeline Editor, suggesting the creation of a CI/CD pipeline by configuring a .gitlab-ci.yml file. The sidebar displays project navigation options like "Plan" and "Code."](https://kodekloud.com/kk-media/image/upload/v1752876977/notes-assets/images/GitLab-CICD-Architecting-Deploying-and-Optimizing-Pipelines-Create-and-Run-a-Basic-Pipeline/gitlab-pipeline-editor-ci-cd.jpg)
</Frame>

Browse available templates:

<Frame>
  ![The image shows a GitLab interface with a list of CI/CD templates for various programming languages and frameworks, such as Android, Bash, and C++. Each entry has a "Use template" button.](https://kodekloud.com/kk-media/image/upload/v1752876978/notes-assets/images/GitLab-CICD-Architecting-Deploying-and-Optimizing-Pipelines-Create-and-Run-a-Basic-Pipeline/gitlab-cicd-templates-interface.jpg)
</Frame>

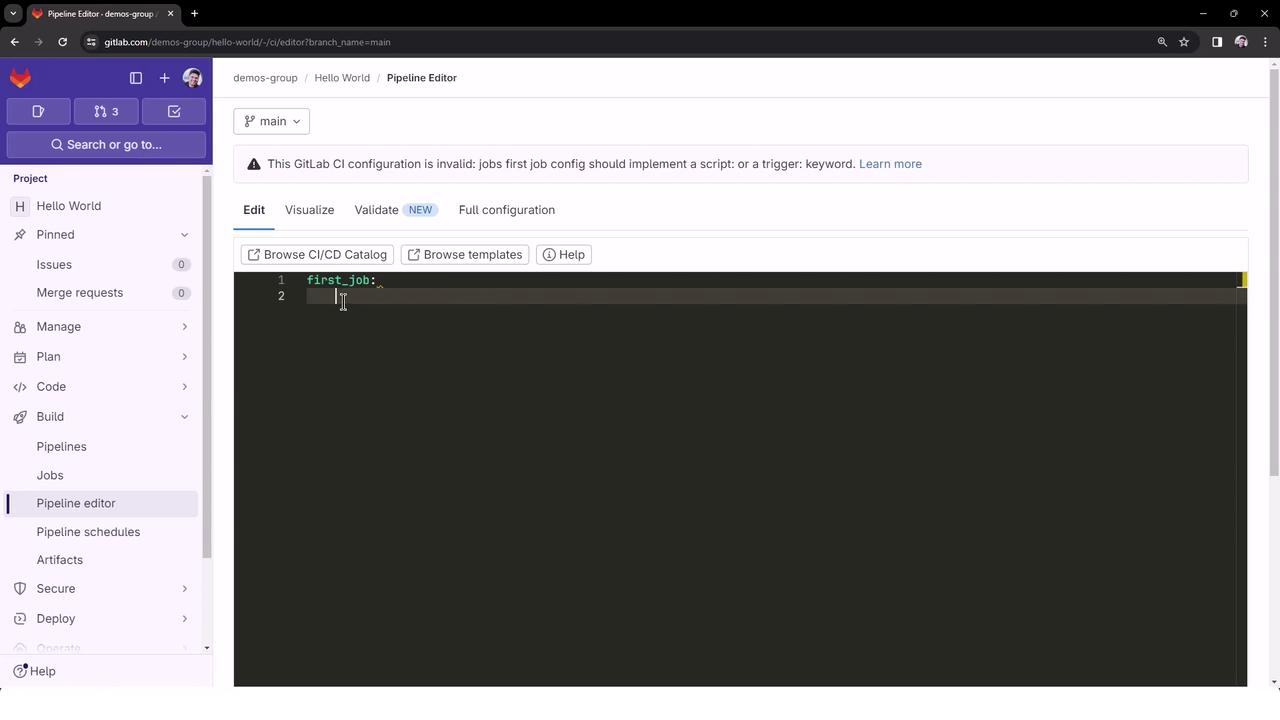
If you leave the file empty, GitLab shows an error:
<Frame>
  ![The image shows a GitLab Pipeline Editor with an invalid CI configuration error message, indicating that a job configuration is missing a script or trigger keyword.](https://kodekloud.com/kk-media/image/upload/v1752876979/notes-assets/images/GitLab-CICD-Architecting-Deploying-and-Optimizing-Pipelines-Create-and-Run-a-Basic-Pipeline/gitlab-pipeline-editor-ci-error.jpg)
</Frame>

### Define a Minimal Pipeline

Add the following to `.gitlab-ci.yml` at the repository root:

```yaml theme={null}
stages:
  - build
  - test
  - deploy

first_job:
  stage: build
  script:
    - echo "This is our first GitLab CI Job"
    - ls
    - cat README.md
```

Commit directly to `main`. This push triggers a pipeline run automatically.

### Pipeline Stages Overview

| Stage  | Purpose                                     |
| ------ | ------------------------------------------- |
| build  | Compile or prepare artifacts                |
| test   | Run unit tests and code validation          |
| deploy | Deploy to staging or production environment |

## 4. Inspect the Repository and Pipeline

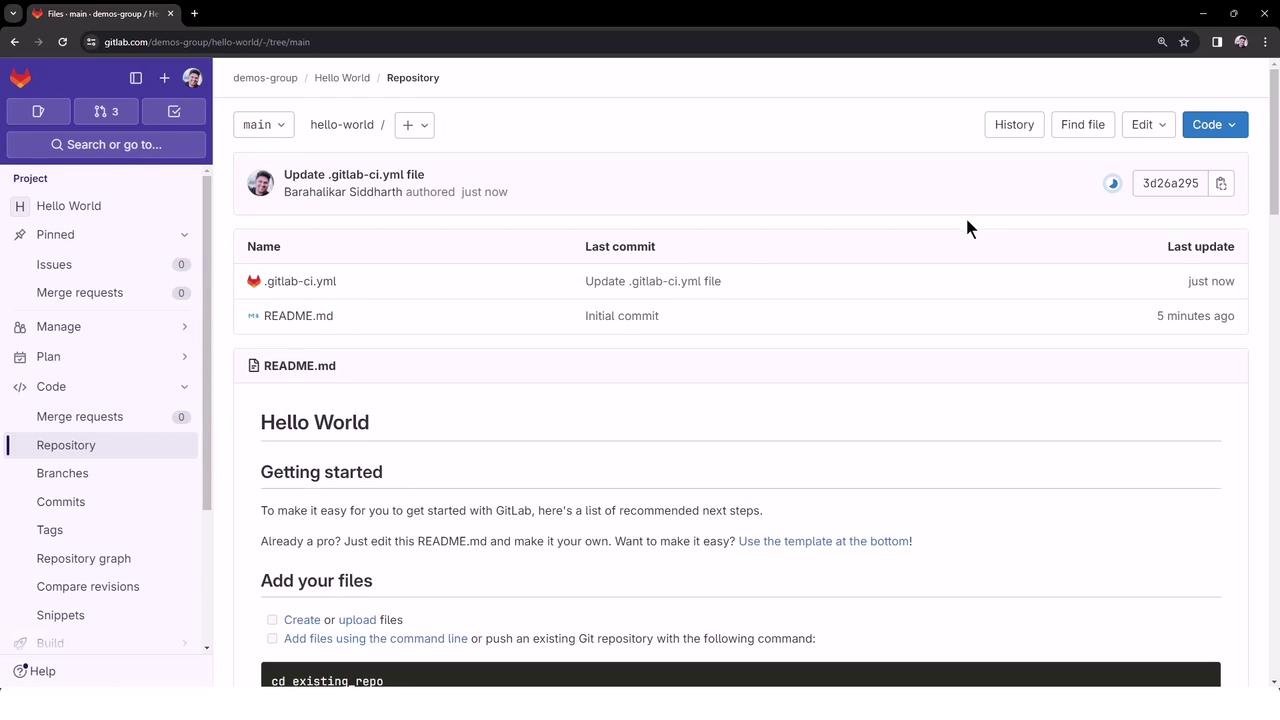
Back in **Code → Files**, confirm `README.md` and `.gitlab-ci.yml` are present:
<Frame>
  ![The image shows a GitLab repository interface with a file list and a README.md file open, displaying instructions for getting started with GitLab.](https://kodekloud.com/kk-media/image/upload/v1752876980/notes-assets/images/GitLab-CICD-Architecting-Deploying-and-Optimizing-Pipelines-Create-and-Run-a-Basic-Pipeline/gitlab-repository-file-list-readme.jpg)
</Frame>

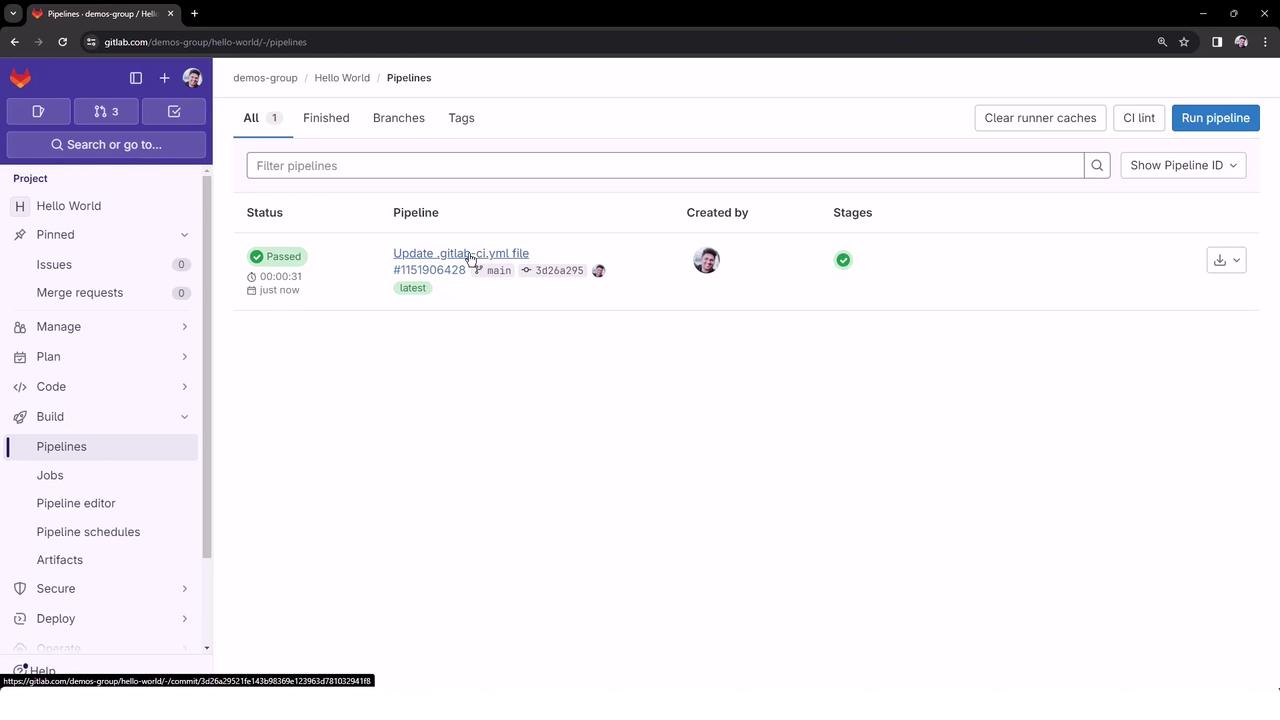
Then navigate to **CI/CD → Pipelines**. You’ll see your new pipeline with a **Passed** status once it finishes:
<Frame>
  ![The image shows a GitLab pipeline interface with a "Passed" status for a recent update to a .gitlab-ci.yml file. The sidebar includes options like Issues, Merge requests, and Pipelines.](https://kodekloud.com/kk-media/image/upload/v1752876981/notes-assets/images/GitLab-CICD-Architecting-Deploying-and-Optimizing-Pipelines-Create-and-Run-a-Basic-Pipeline/gitlab-pipeline-passed-status.jpg)
</Frame>

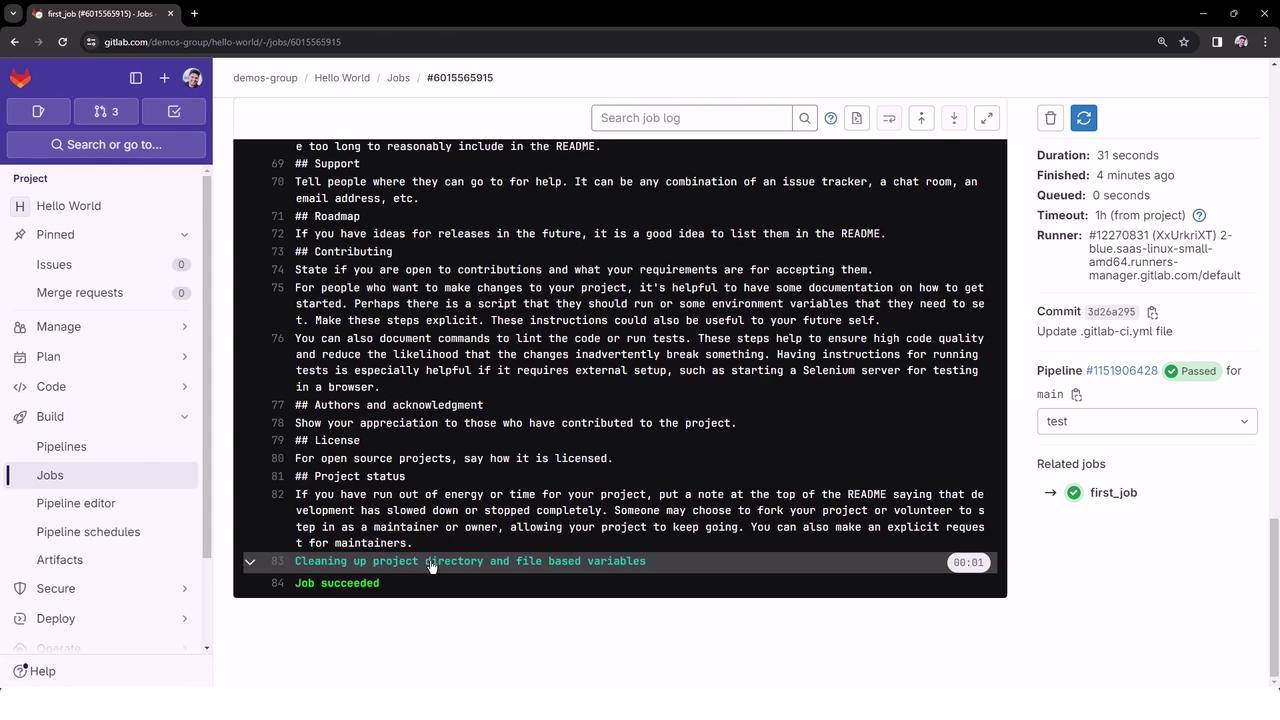
Click the pipeline ID to drill into stages and jobs. Selecting **first\_job** reveals the full log:
<Frame>
  ![The image shows a GitLab interface displaying a job log for a project named "Hello World." The job has succeeded, and details such as duration, runner, and commit information are visible.](https://kodekloud.com/kk-media/image/upload/v1752876982/notes-assets/images/GitLab-CICD-Architecting-Deploying-and-Optimizing-Pipelines-Create-and-Run-a-Basic-Pipeline/gitlab-job-log-hello-world.jpg)
</Frame>

### Sample Job Output

```bash theme={null}
$ echo "This is our first GitLab CI Job"
This is our first GitLab CI Job
$ ls
README.md
$ cat README.md
## Hello World
## Getting started
To make it easy for you to get started with GitLab...
```

GitLab Shared Runners automatically provision a Docker container, fetch your code, run the `script` commands, then clean up after success.

## Next Steps

In the following lessons, we’ll explore:

* Advanced pipeline configurations
* Caching and artifacts
* Parallel and dynamic child pipelines

## Links and References

* [GitLab CI/CD Documentation](https://docs.gitlab.com/ee/ci/)
* [Using GitLab Shared Runners](https://docs.gitlab.com/runner/)
* [GitLab `.gitlab-ci.yml` Reference](https://docs.gitlab.com/ee/ci/yaml/)

<CardGroup>
  <Card title="Watch Video" icon="video" cta="Learn more" href="https://learn.kodekloud.com/user/courses/gitlab-ci-cd-architecting-deploying-and-optimizing-pipelines/module/fbf7cb8d-dcca-444e-a547-7bdb8b725634/lesson/f7400946-b6e9-44bd-9c3e-8d122d4668b3" />
</CardGroup>