> ## Documentation Index
> Fetch the complete documentation index at: https://notes.kodekloud.com/llms.txt
> Use this file to discover all available pages before exploring further.
# Create Application using UI
> Learn to create an ArgoCD application using its UI, focusing on deploying a demo application with Gitea as the Git service.
In this lesson, you will learn how to create an ArgoCD application using its user interface. For demonstration purposes, we will use Gitea—a self-hosted Git service—for all labs and demo sessions. Although any Git service (such as GitHub, Bitbucket, or GitLab) can be used, this guide will focus on Gitea.
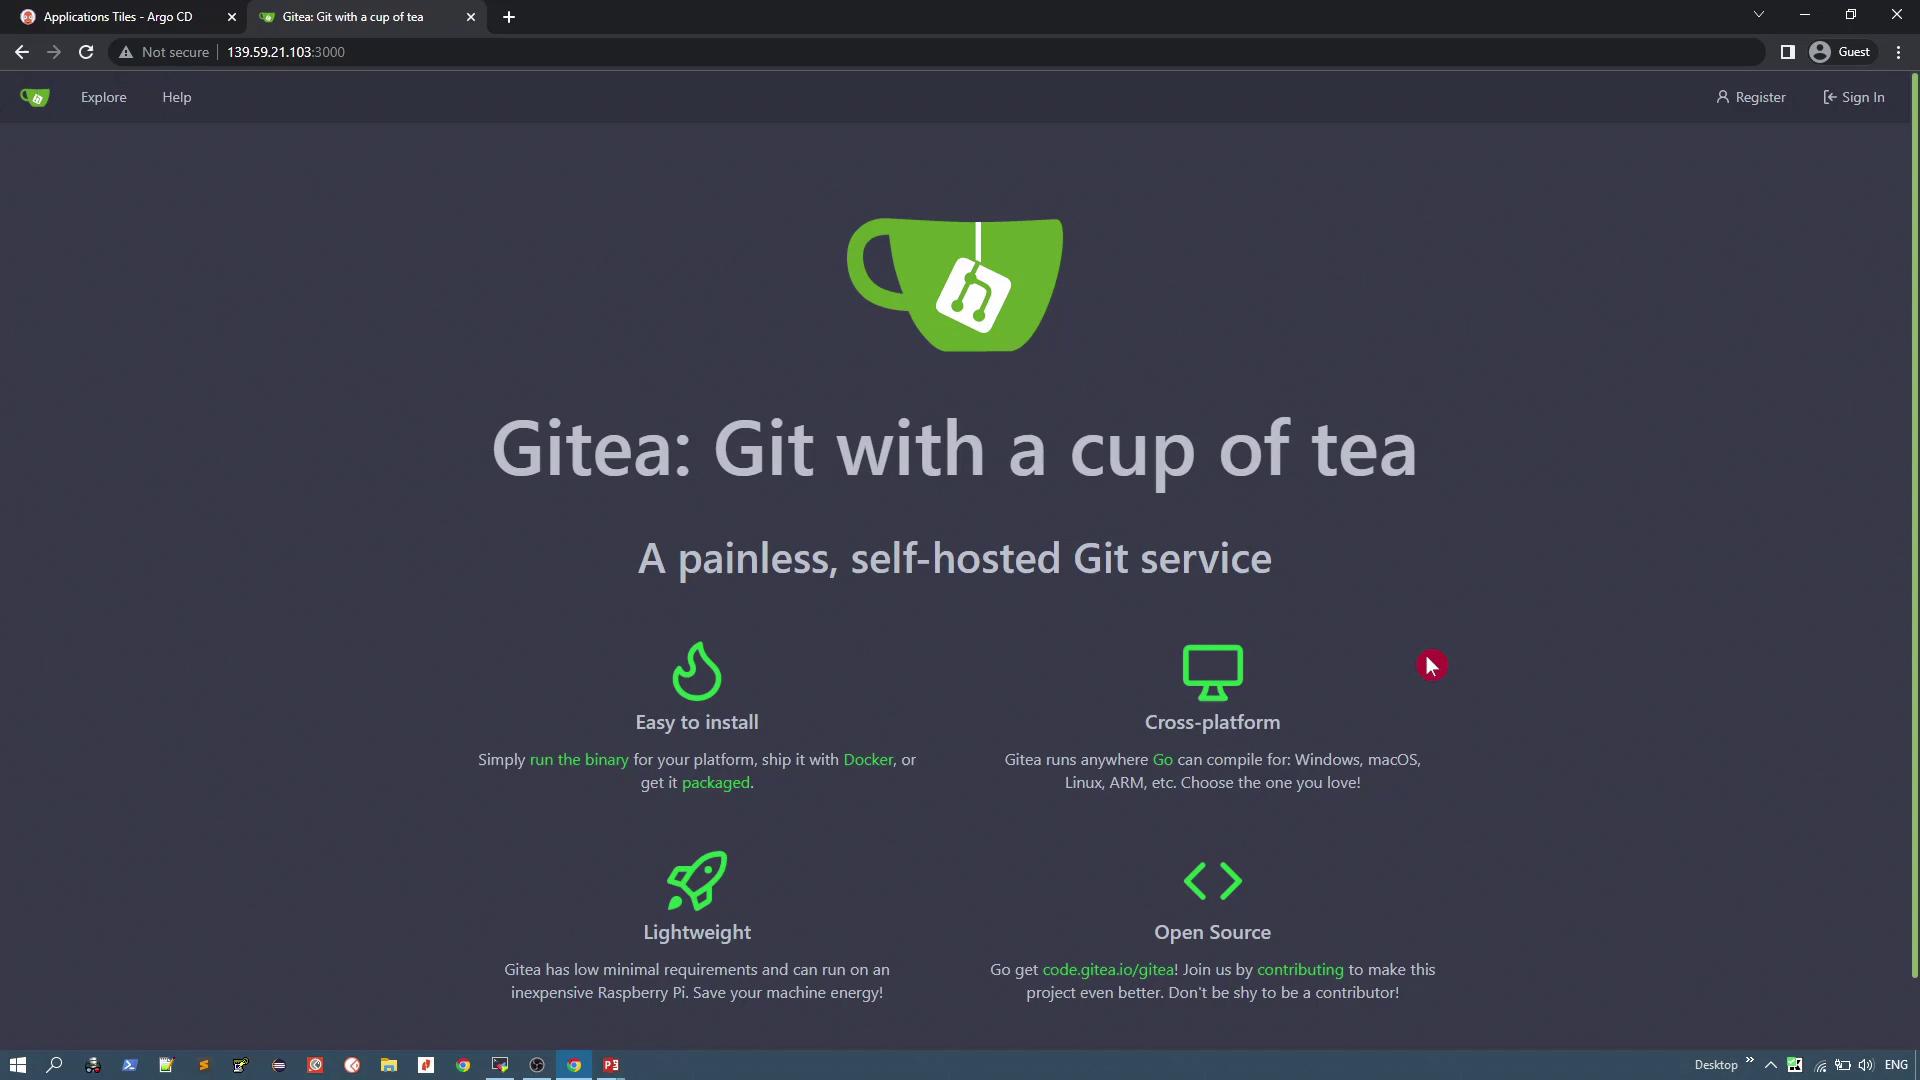
After signing into Gitea, locate the repository named **gitops-argocd**. This repository contains the demo exercises for the training. For our example, we will deploy an application using the "solar system" manifest stored inside the repository.
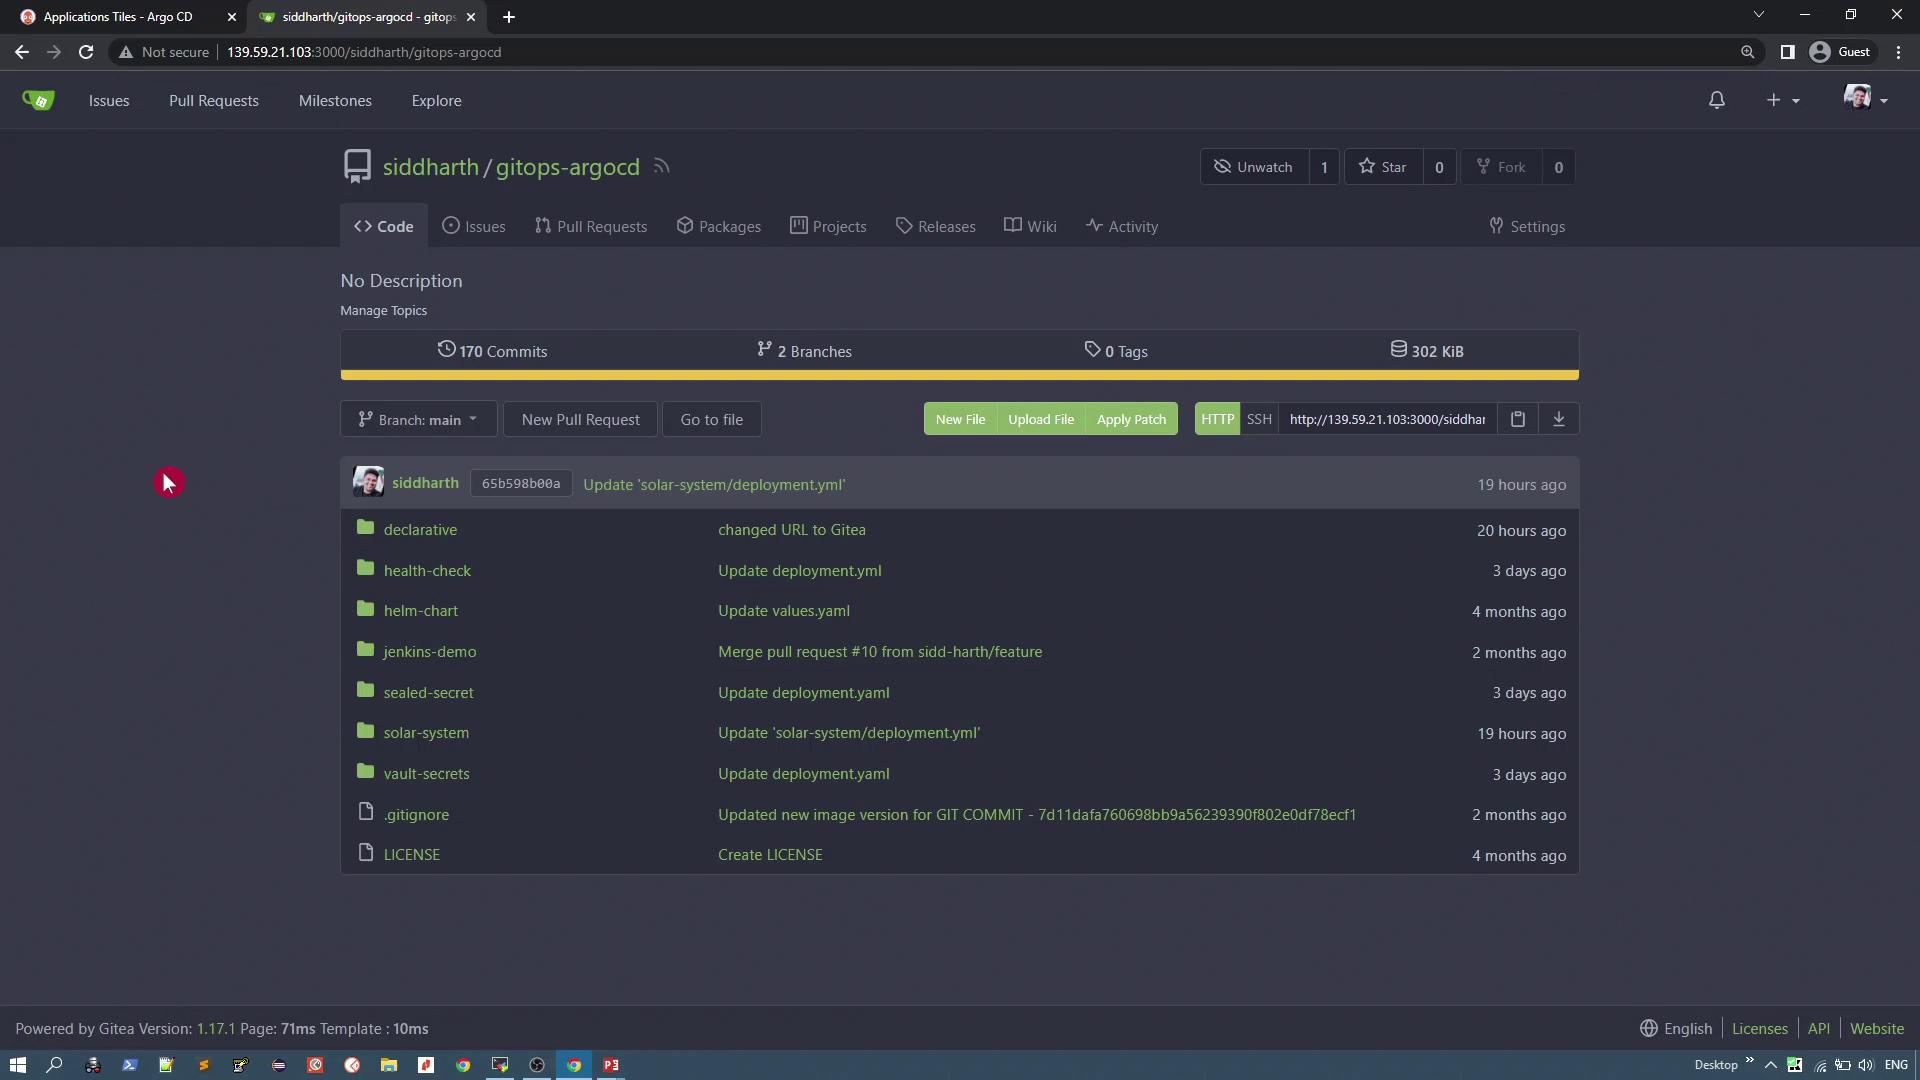
Within the repository, navigate to the `solar system` directory to find two Kubernetes manifests:
* **Deployment Manifest:** Configures a deployment that uses a custom image (version v3), deployed as a single replica, and exposes port 80.
* **Service Manifest:** Exposes the application via a NodePort.
Below is the content of the deployment manifest:
```yaml theme={null}
apiVersion: apps/v1
kind: Deployment
metadata:
labels:
app: solar-system
name: solar-system
spec:
replicas: 1
selector:
matchLabels:
app: solar-system
strategy: {}
template:
metadata:
labels:
app: solar-system
spec:
containers:
- image: siddharth67/solar-system:v3
name: solar-system
imagePullPolicy: Always
ports:
- containerPort: 80
```
And here is the service manifest:
```yaml theme={null}
apiVersion: v1
kind: Service
metadata:
labels:
app: solar-system
name: solar-system-service
spec:
ports:
- port: 80
protocol: TCP
targetPort: 80
selector:
app: solar-system
type: NodePort
```
## Creating the ArgoCD Application
To create an application using the ArgoCD UI:
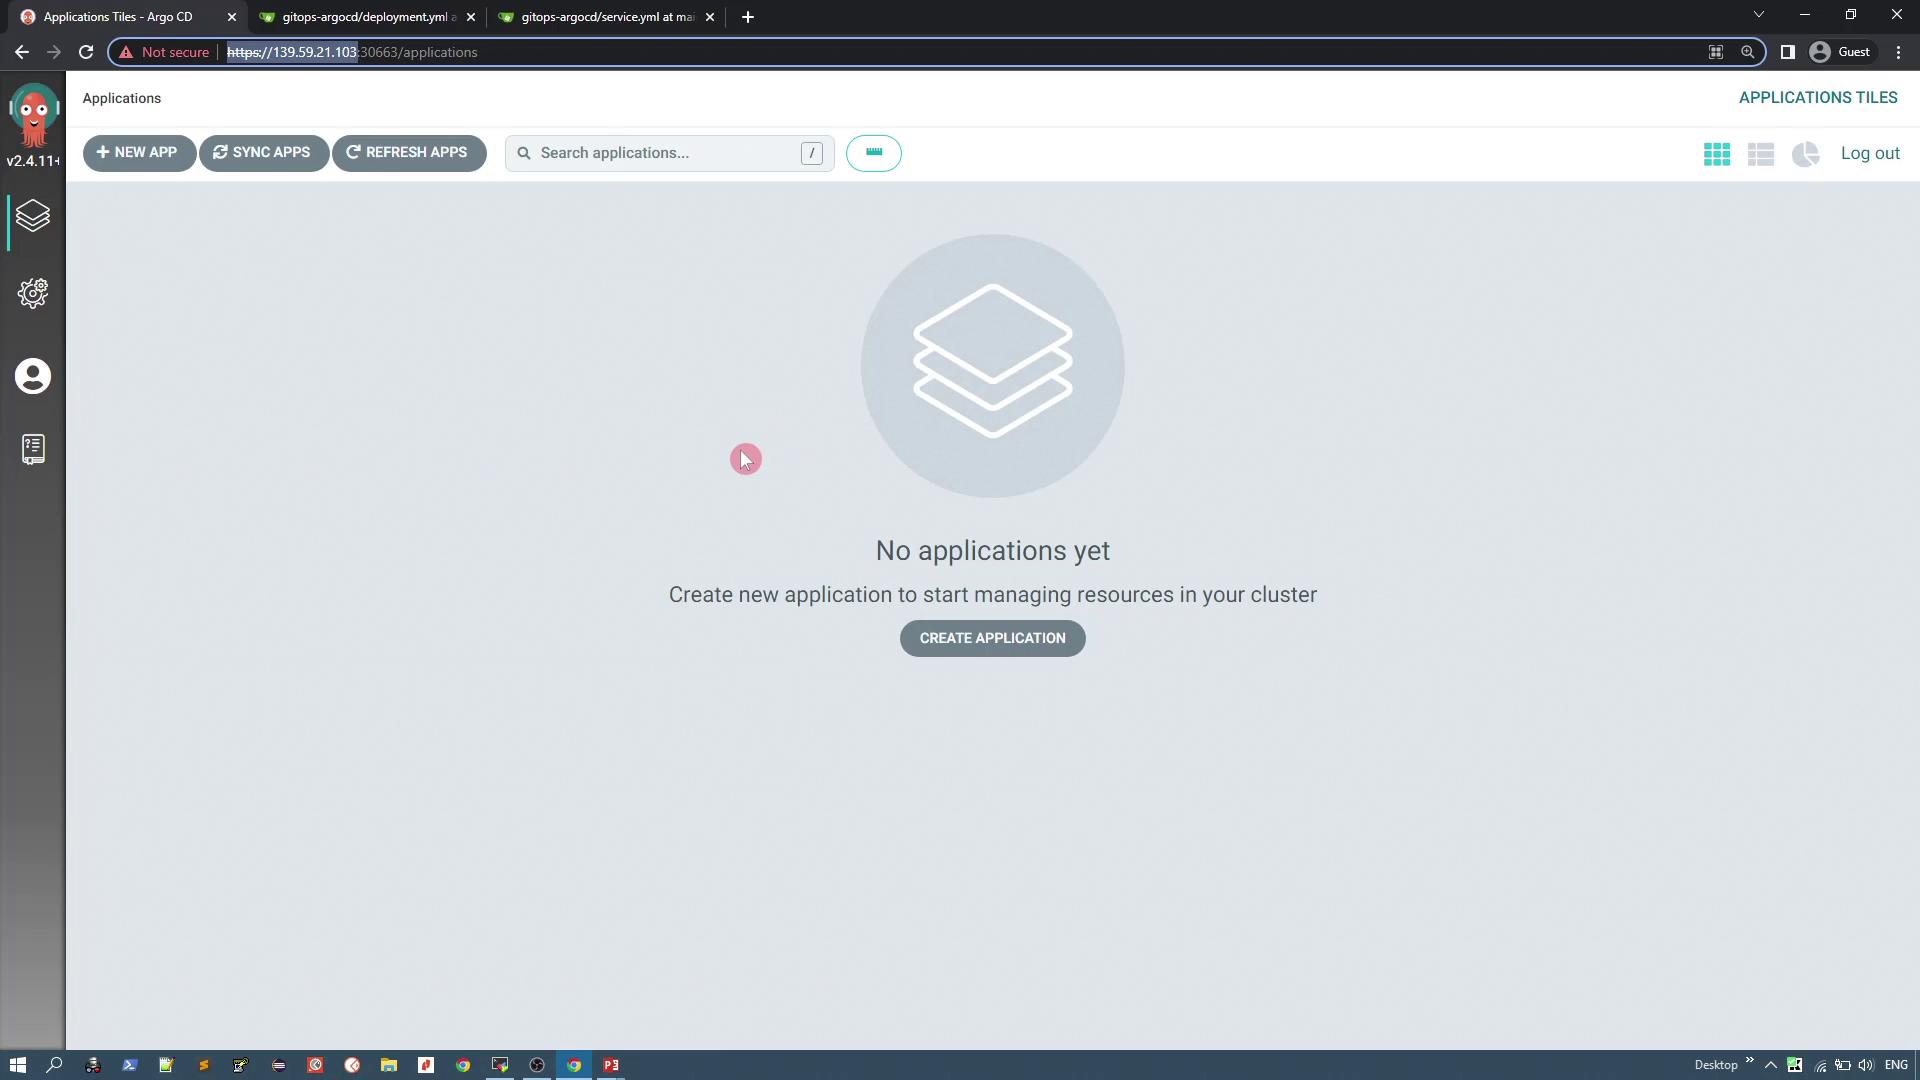
1. Click on **+ New App**.
2. Enter an application name (for example, "solar-system-app-1").
3. Select an ArgoCD project. By default, the "default" project is available.
4. Choose the synchronization policy. For this guide, select **Manual**.
5. Under **Source Settings**, select the repository you previously configured.
!!! note "Repository Configuration"
To connect your Git repository in ArgoCD, navigate to the **Manage Repositories** section. ArgoCD supports SSH, HTTPS, and GitHub App integrations. This demo uses HTTPS.
When configuring repository connections, enter the repository URL (up to the GitOps part of your URL). Username, password, and TLS certificates are optional and only required for private repositories.
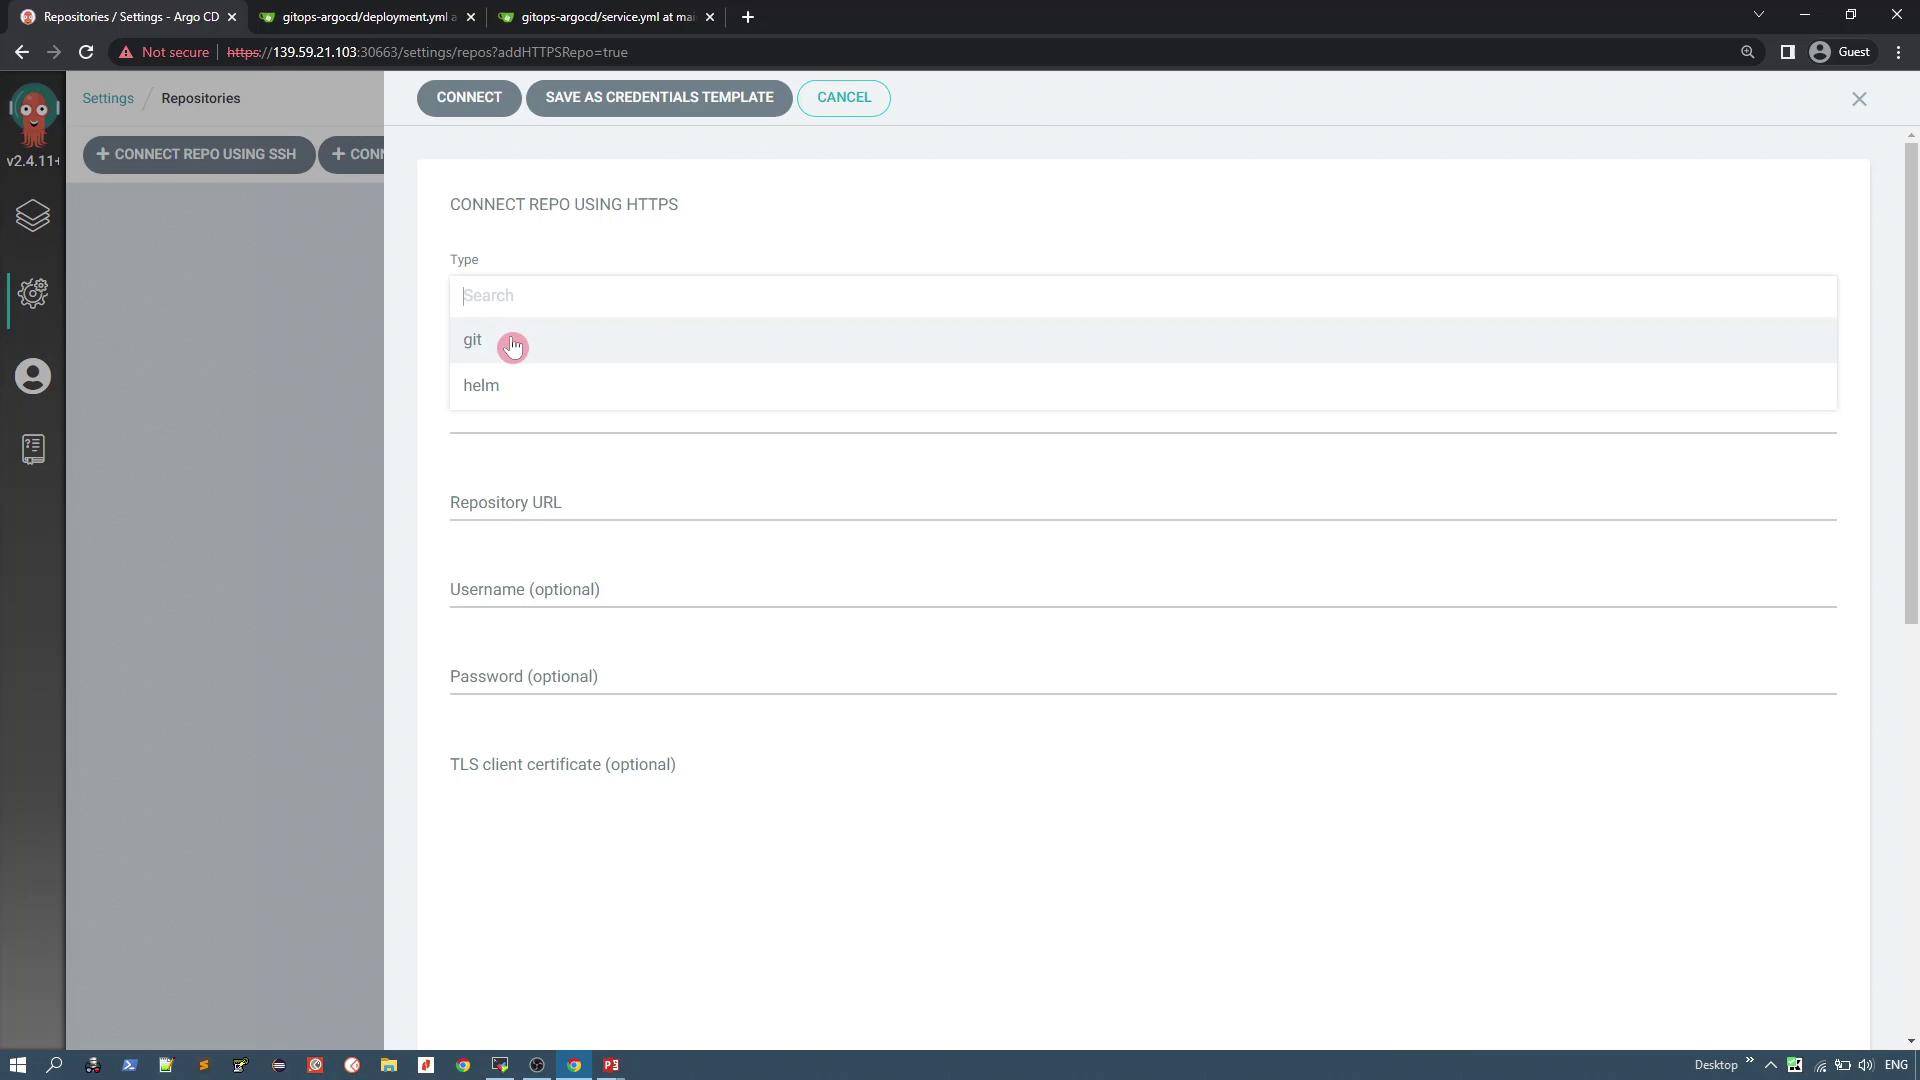
After providing proper details, click **Connect**. A successful connection status will be displayed.
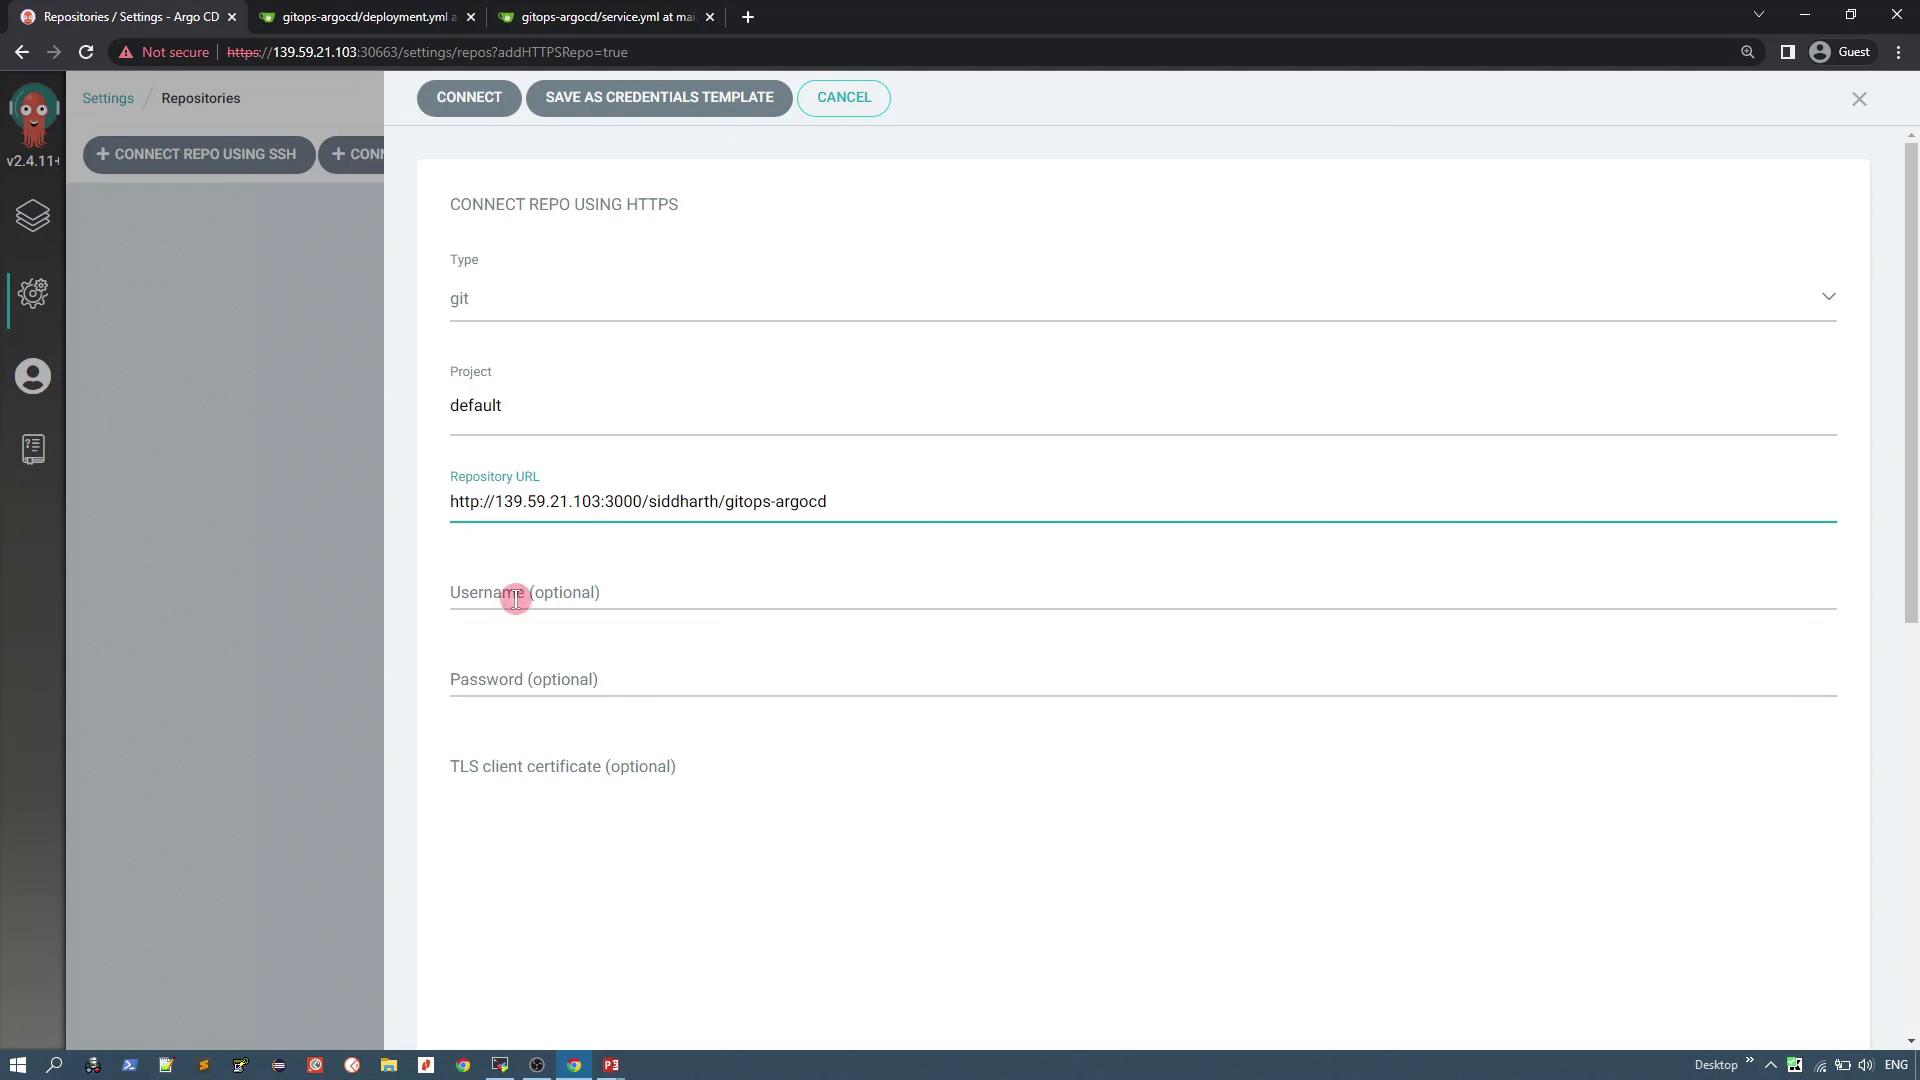
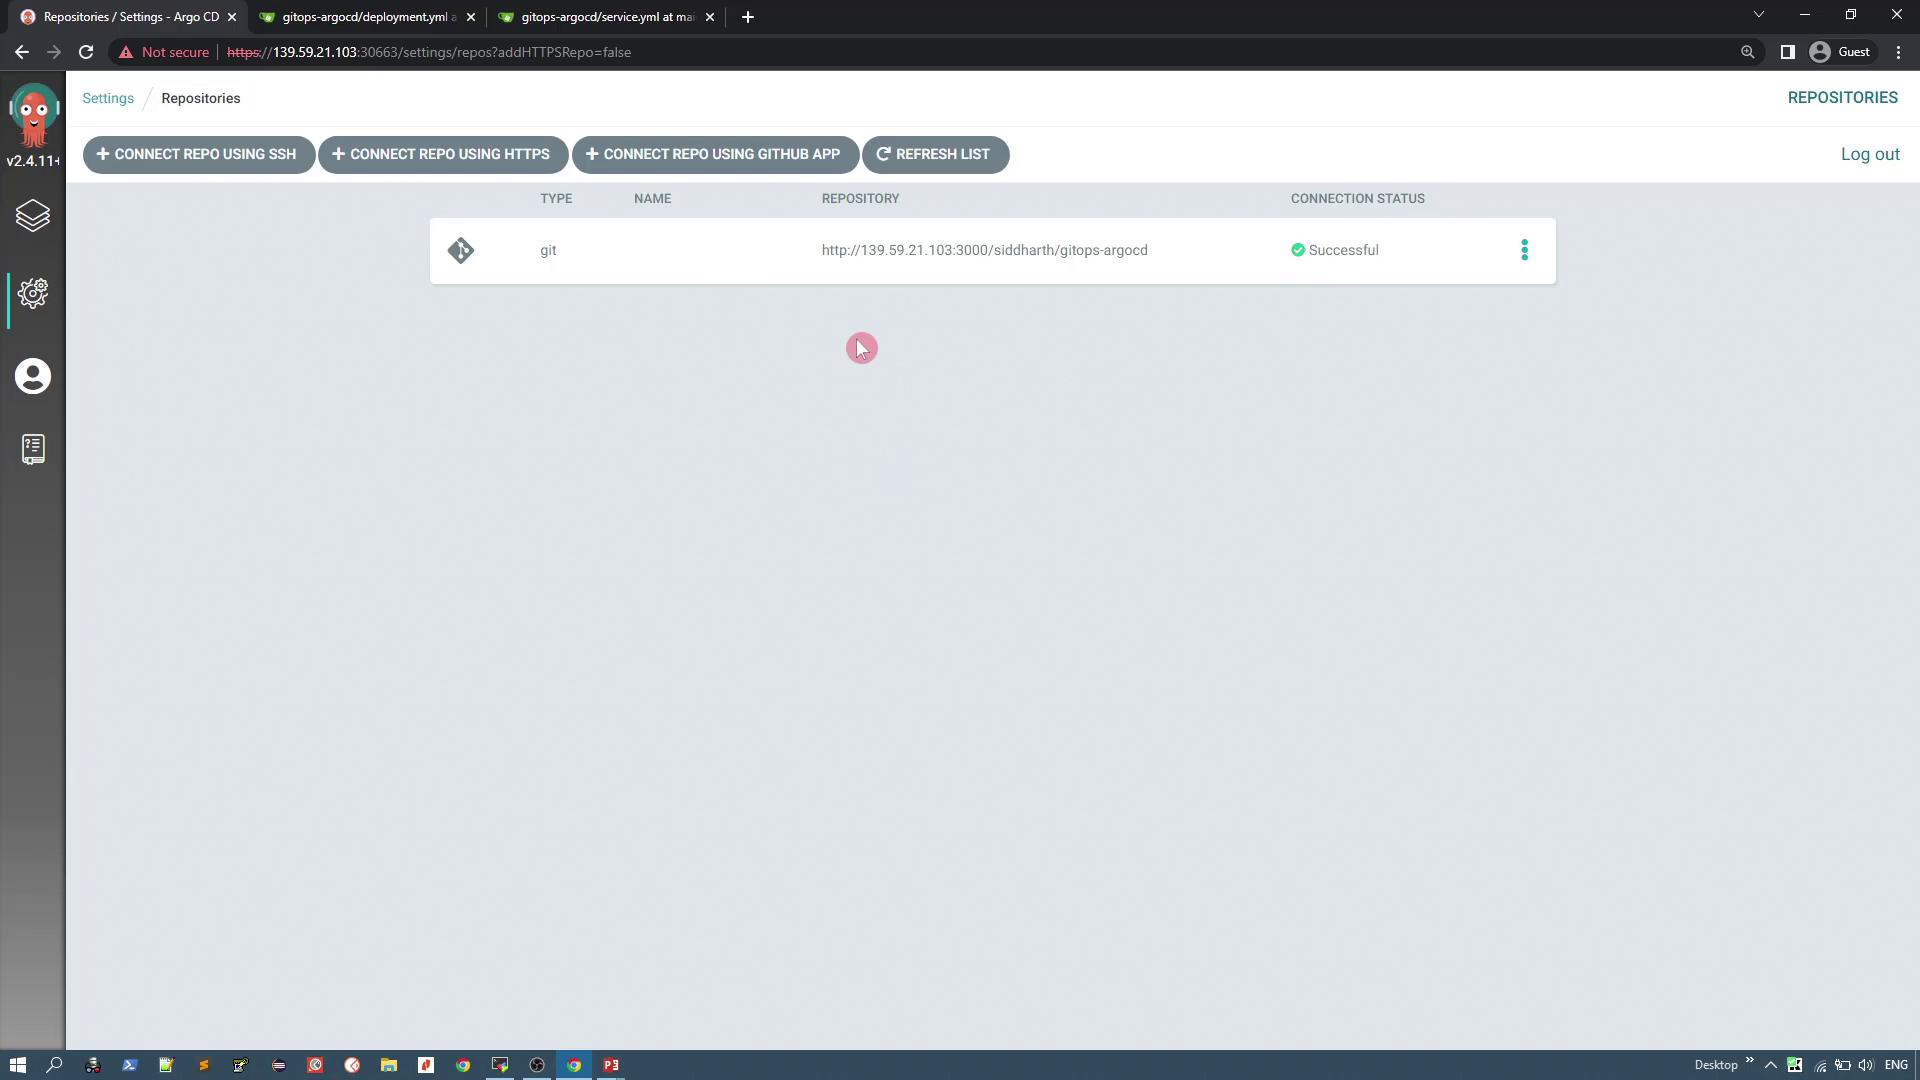
ArgoCD stores these connection details securely in Kubernetes secrets. To inspect these secrets, use the command below:
```bash theme={null}
kubectl -n argocd get secrets
```
For example, you might see:
```bash theme={null}
NAME TYPE DATA AGE
argocd-initial-admin-secret Opaque 1 60m
argocd-secret Opaque 5 61m
repo-3254474260 Opaque 3 52s
```
To view the details of a secret:
```bash theme={null}
kubectl -n argocd get secrets repo-3254474260 -o json
```
This secret includes fields such as "project", "type", and "url" (all base64 encoded), ensuring sensitive information remains secure.
Return to the ArgoCD UI and complete the application creation process:
1. Under **Source Configuration**, select the repository you connected.
2. Set the **Path** to the `solar system` directory within your repository.
3. Configure the **Destination** by selecting the Kubernetes cluster where ArgoCD is installed and specifying a namespace (e.g., "solar-system"). You can opt to auto-create the namespace during synchronization if it does not exist.
4. Leave additional plugin or directory options at their default values.
5. Click **Create**.
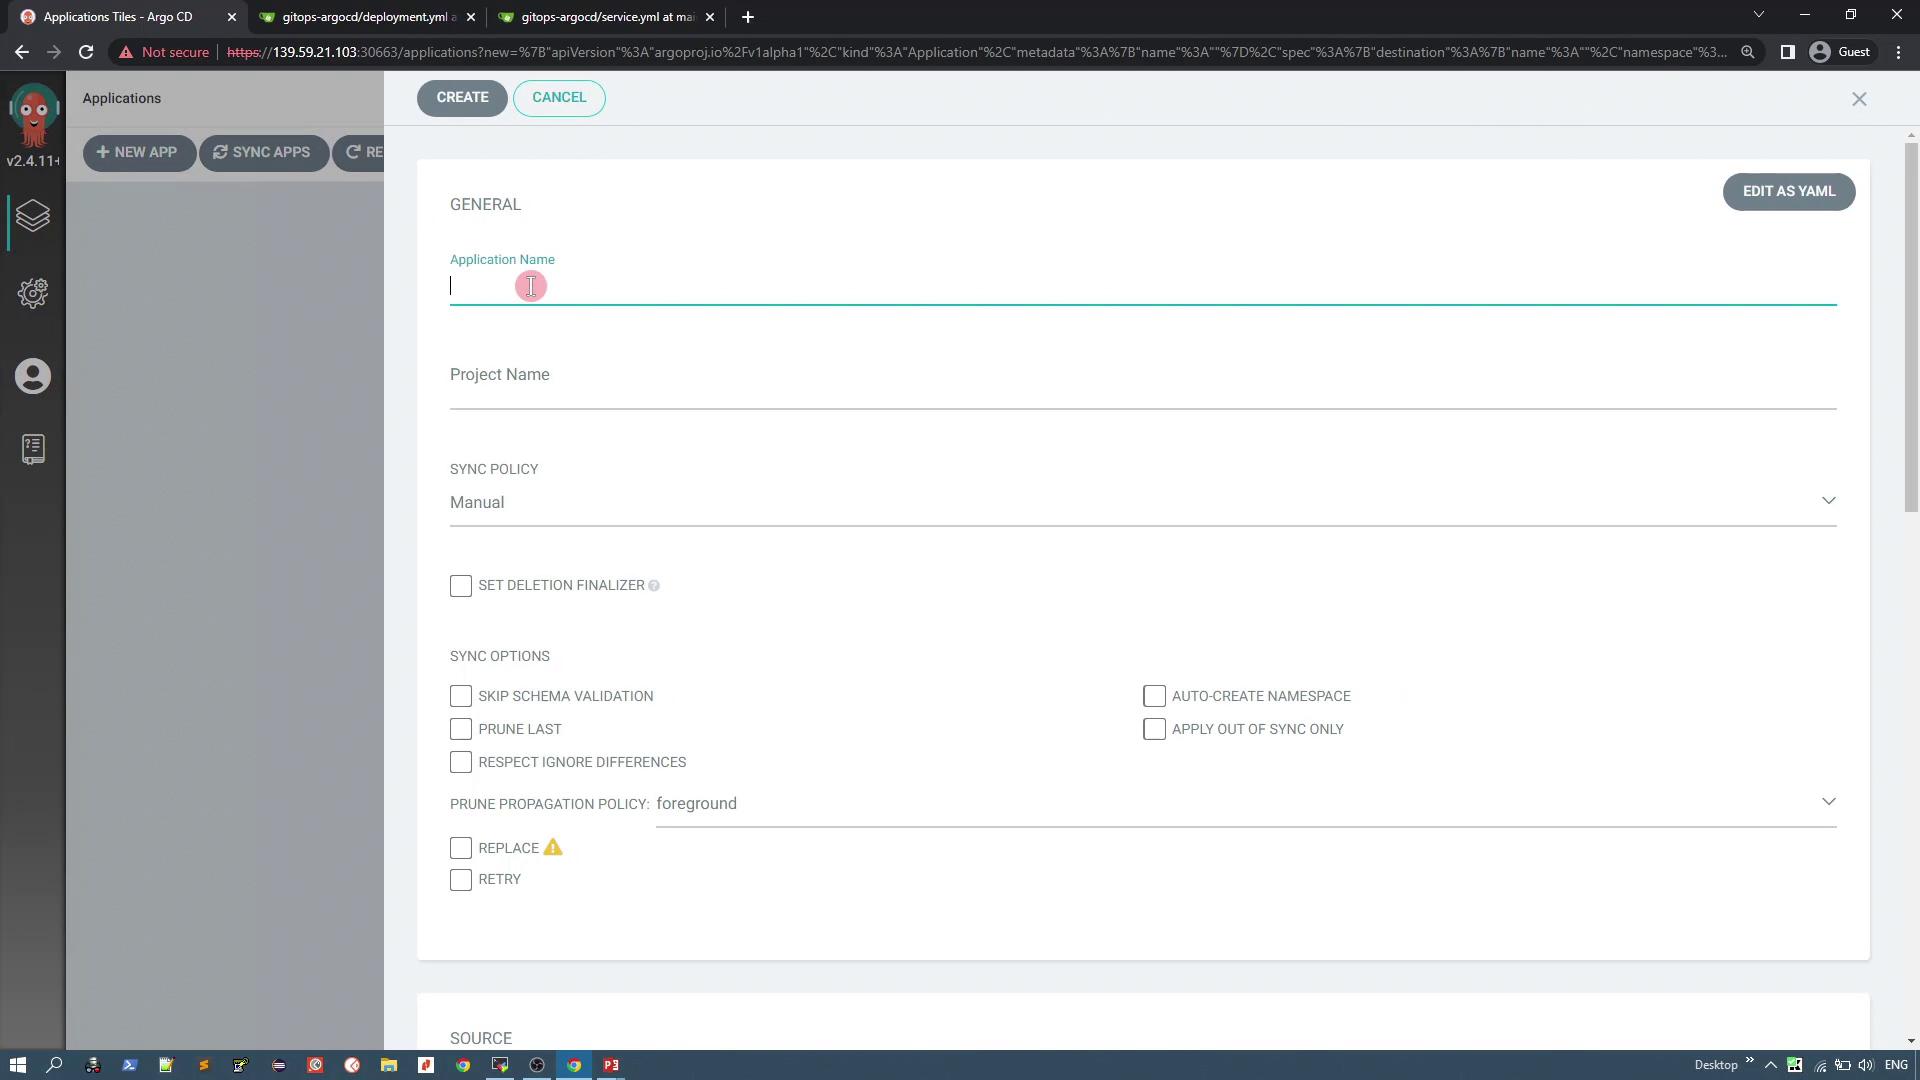
After creation, the application status may appear as "Missing" and the sync status as "OutOfSync" because the defined Kubernetes resources are not yet deployed. Verify by running:
```bash theme={null}
kubectl get ns
kubectl get pod -A
```
At this point, the "solar-system" namespace and its resources should not be present.
## Synchronizing the Application
To deploy the application:
1. Click the **Sync** button in the ArgoCD UI.
2. ArgoCD will detect two Kubernetes resources from your Git repository: the deployment and the service.
!!! warning "Missing Namespace Alert"
If the target namespace ("solar-system") does not exist during sync, the process may fail. Ensure you have either created the namespace manually or enabled the **Auto-create namespace** option.
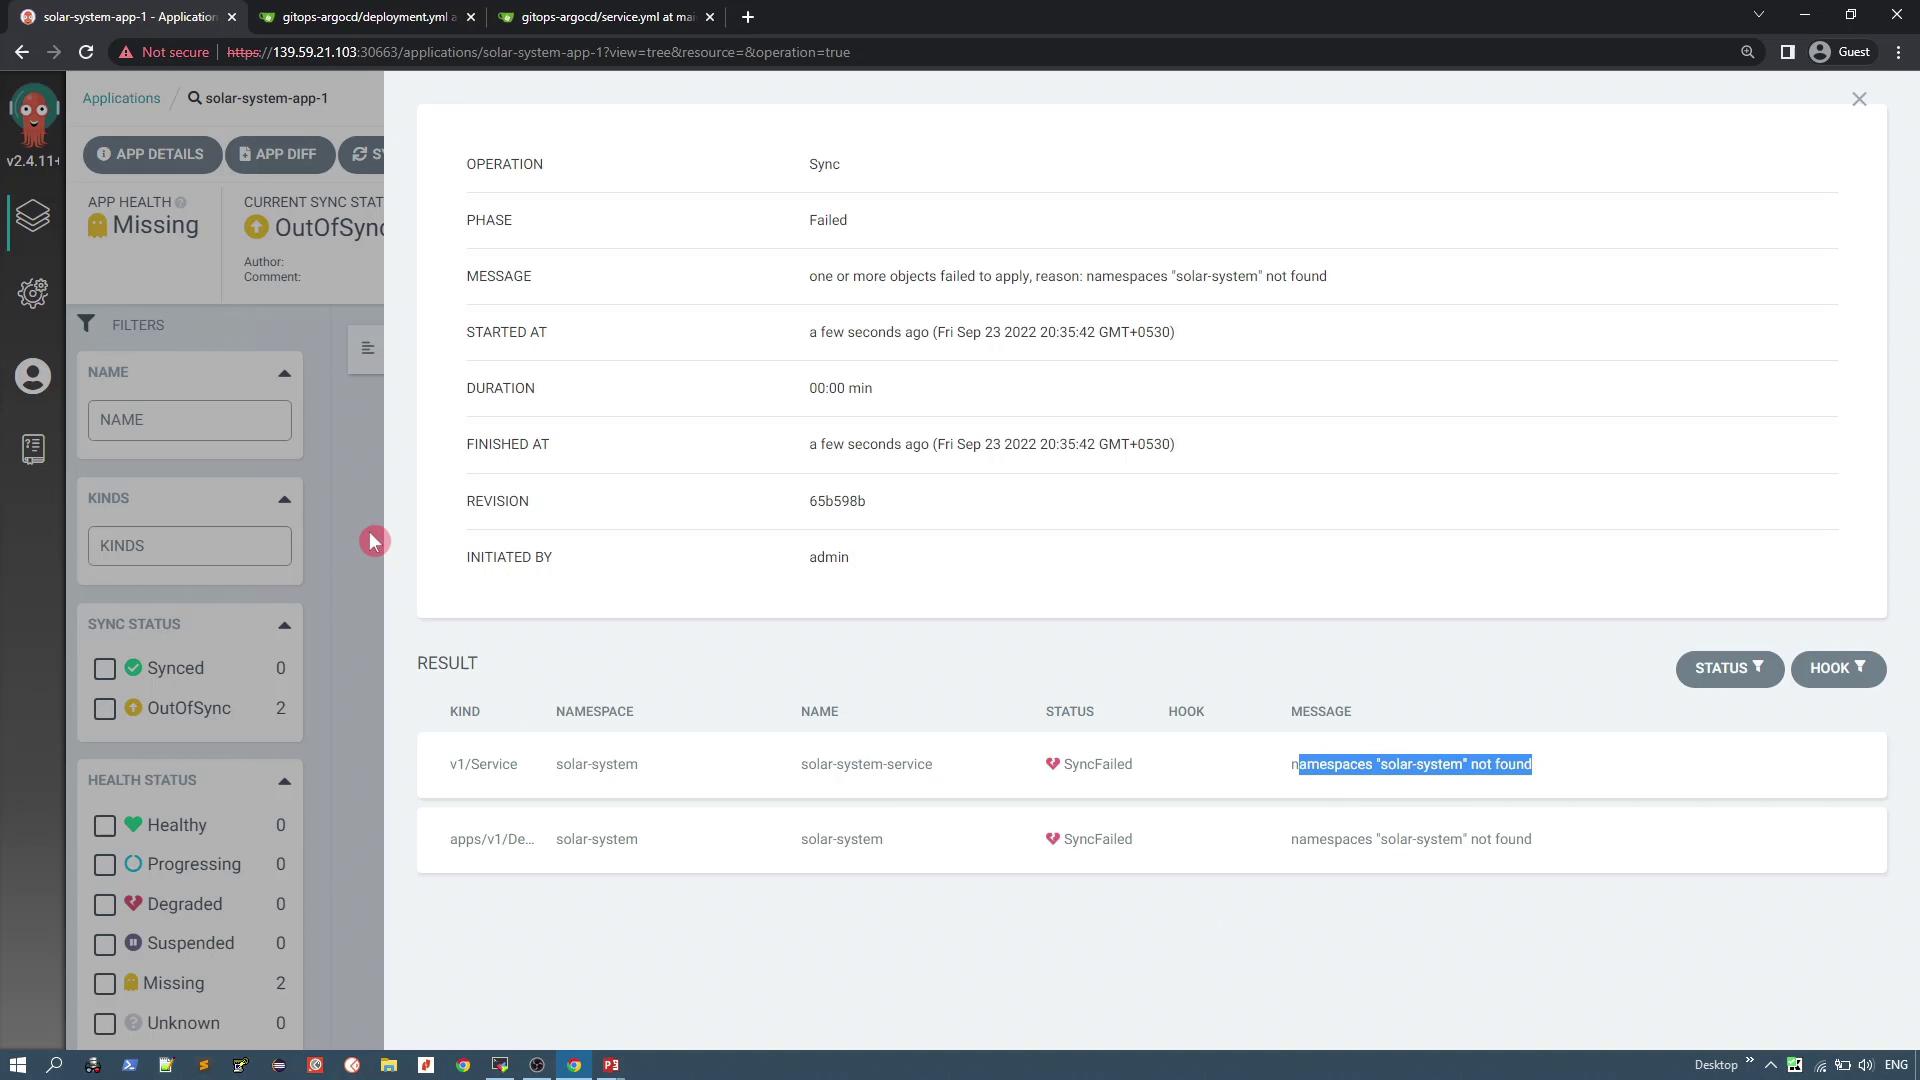
Once the namespace is available, ArgoCD will deploy the resources. The application health changes to "Healthy" and the sync status updates to "Synced".
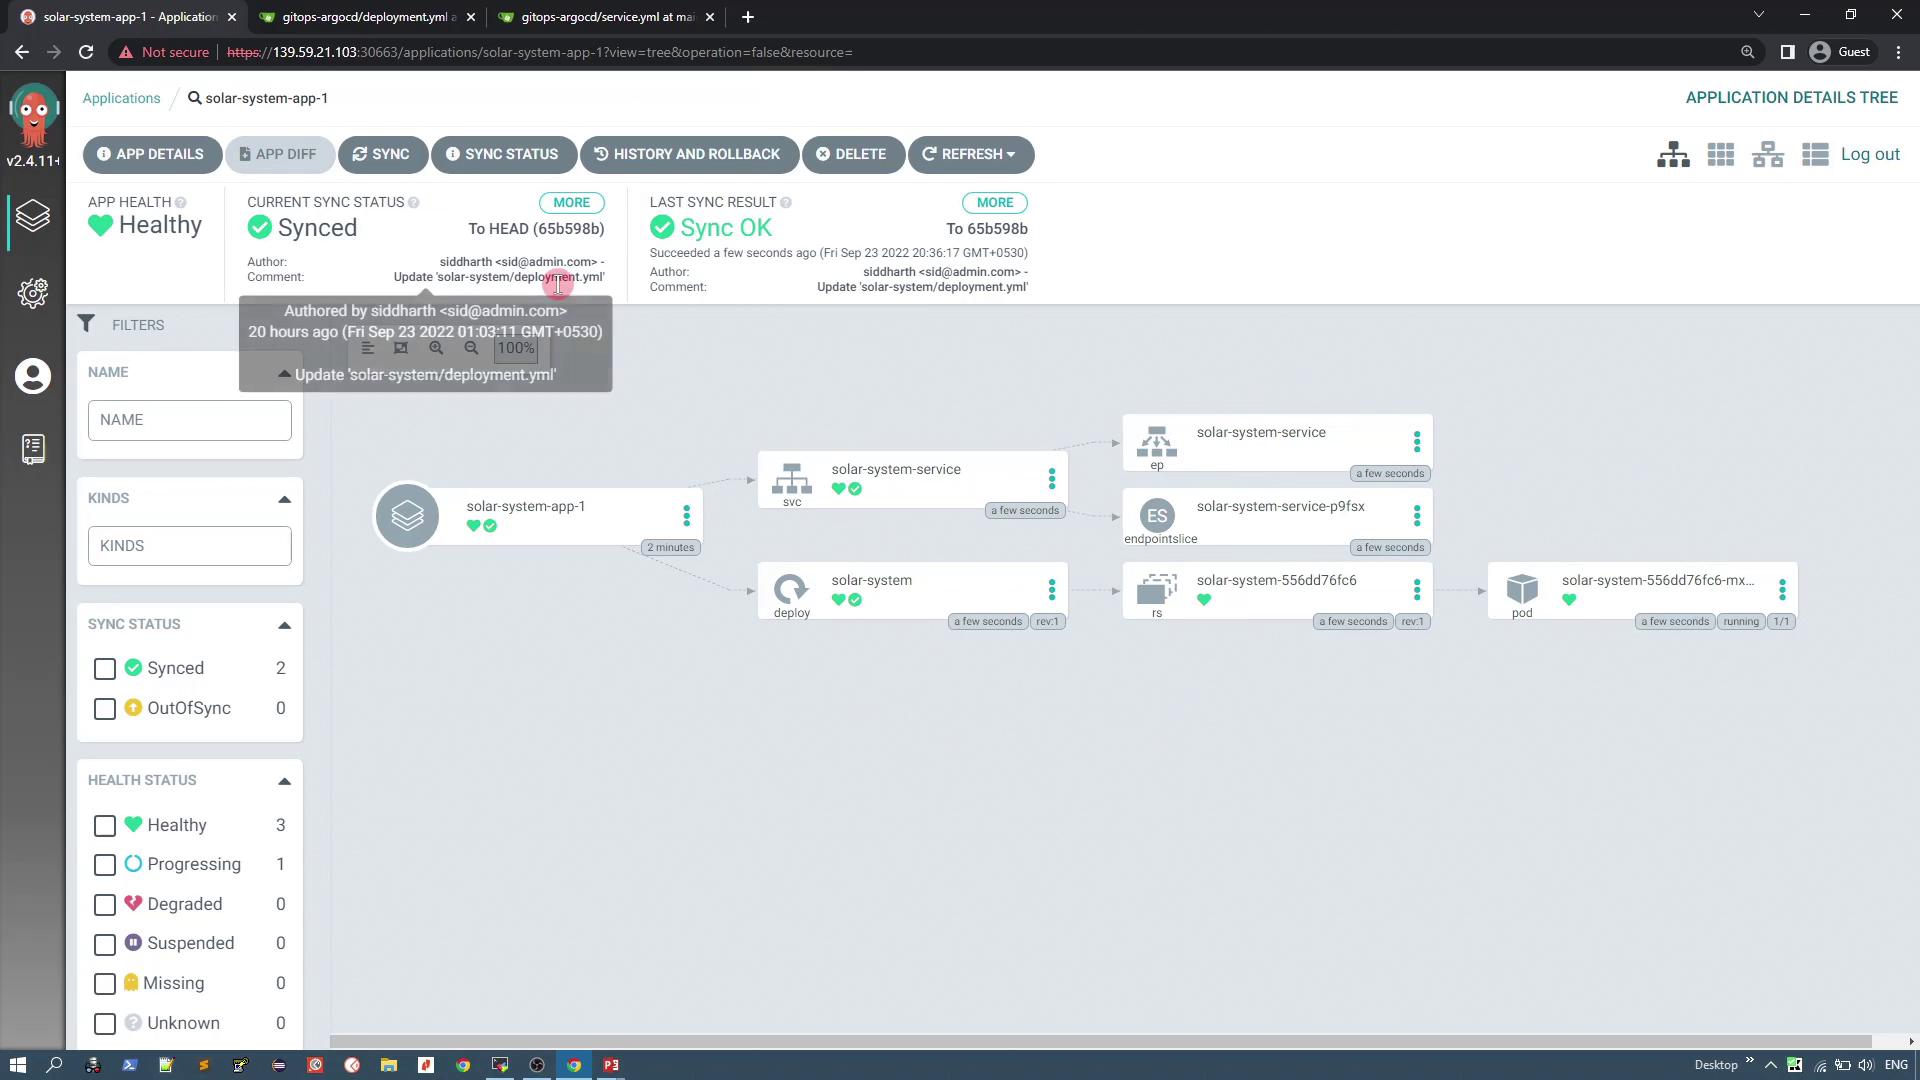
Verify the deployment by inspecting the namespace:
```bash theme={null}
kubectl get ns
kubectl -n solar-system get all
```
You can also inspect the live manifest details in ArgoCD by clicking on the service resource. A typical service manifest will resemble the following:
```yaml theme={null}
apiVersion: v1
kind: Service
metadata:
annotations:
kubectl.kubernetes.io/last-applied-configuration: >-
{"apiVersion":"v1","kind":"Service","metadata":{"annotations":{},"labels":{"app":"solar-system","app.kubernetes.io/instance":"solar-system-app-1"},"name":"solar-system-service","namespace":"solar-system"}}
labels:
app: solar-system
name: solar-system-service
namespace: solar-system
spec:
clusterIP: 10.108.211.169
ports:
- nodePort: 30280
port: 80
protocol: TCP
targetPort: 80
selector:
app: solar-system
type: NodePort
```
Access the service via the NodePort (for example, 30280) to view a PHP application representing the solar system. With the v3 image, the UI displays a limited set of planets (the Sun, Mercury, Venus, and Earth).
## Updating the Application Image
To simulate an update, modify the deployment manifest in your Git repository to change the image version from v3 to v6 (which displays six planets). Edit the deployment manifest as follows:
```yaml theme={null}
apiVersion: apps/v1
kind: Deployment
metadata:
labels:
app: solar-system
name: solar-system
spec:
replicas: 1
selector:
matchLabels:
app: solar-system
strategy: {}
template:
metadata:
labels:
app: solar-system
spec:
containers:
- image: siddharth67/solar-system:v6
name: solar-system
imagePullPolicy: Always
ports:
- containerPort: 80
```
Commit your changes with a message like "Updated the image to v6".
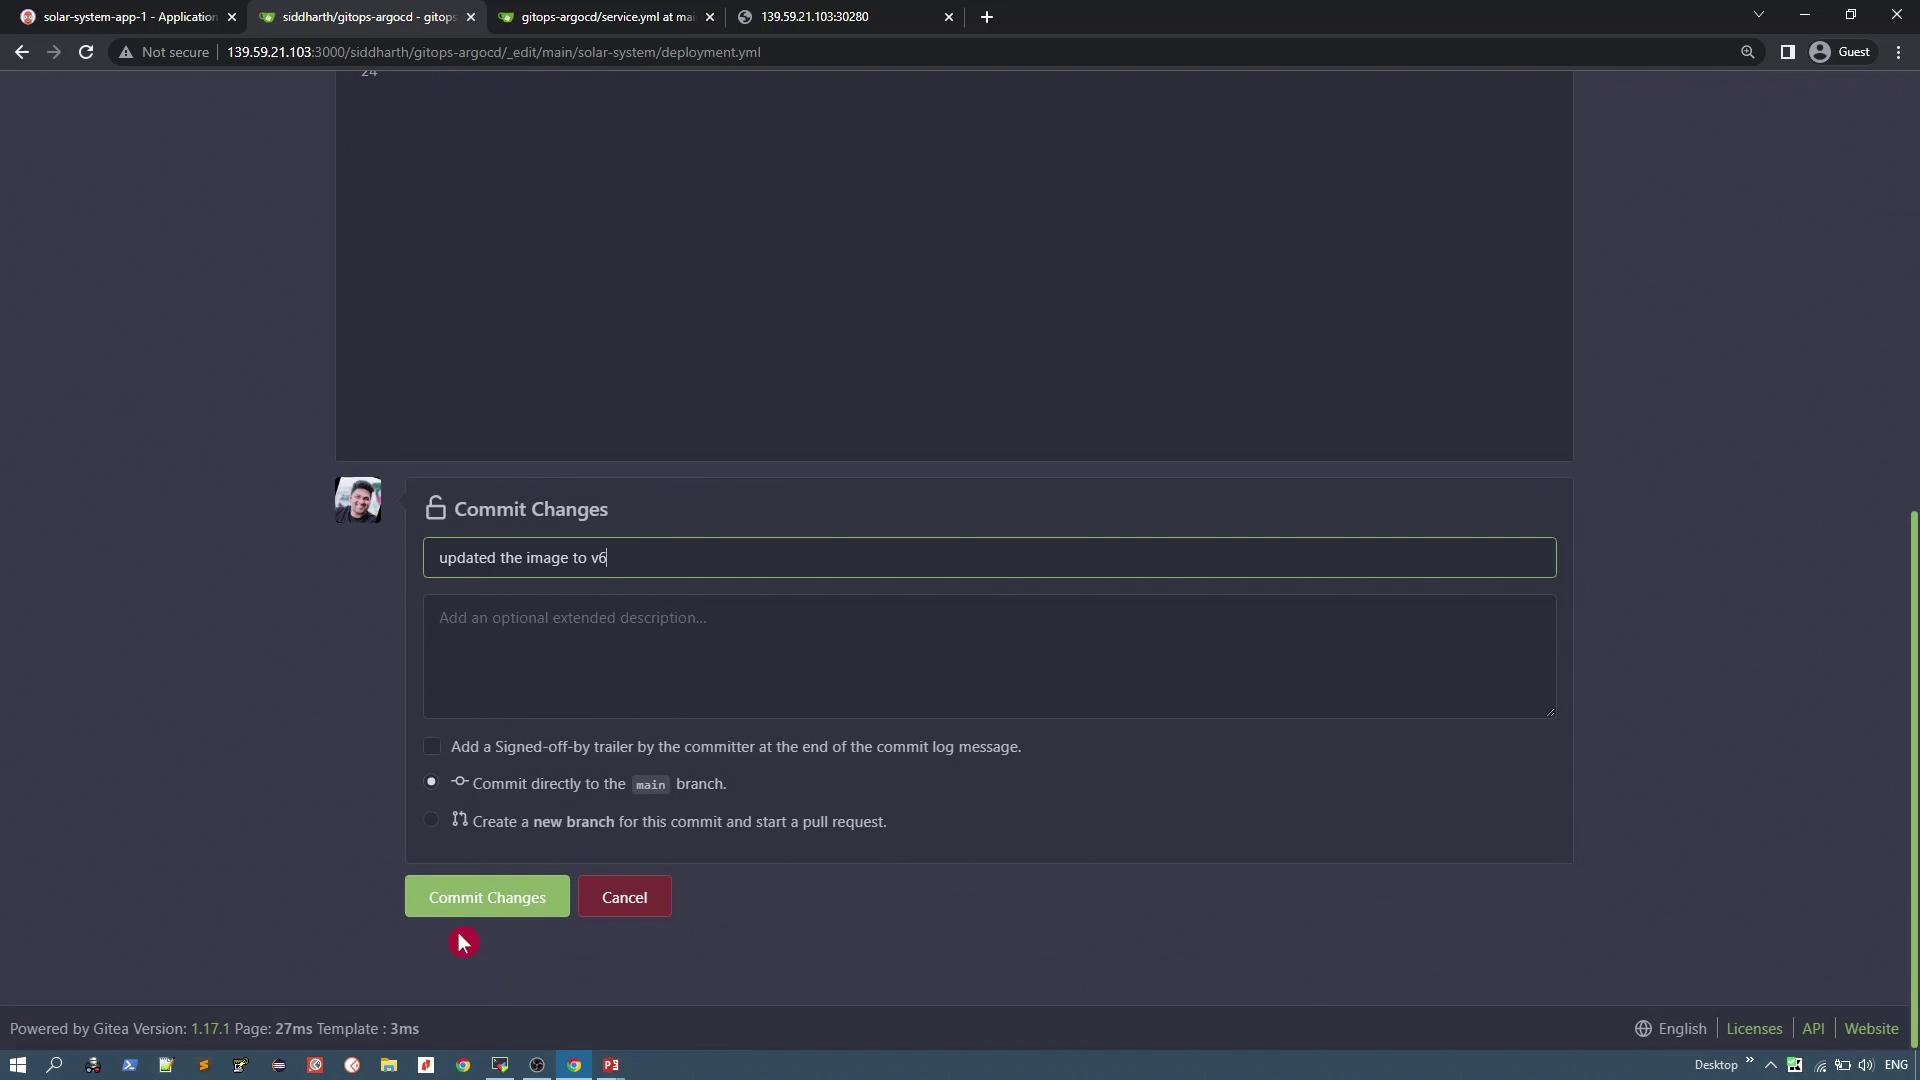
After committing, ArgoCD automatically checks the repository at regular intervals. To expedite the update, perform a hard refresh in the UI so that ArgoCD detects the changes. The sync status will once again be marked as "OutOfSync".
Click the **Synchronize** button. ArgoCD then deploys the updated resources, creates a new replica set, and starts a new pod with the updated image.
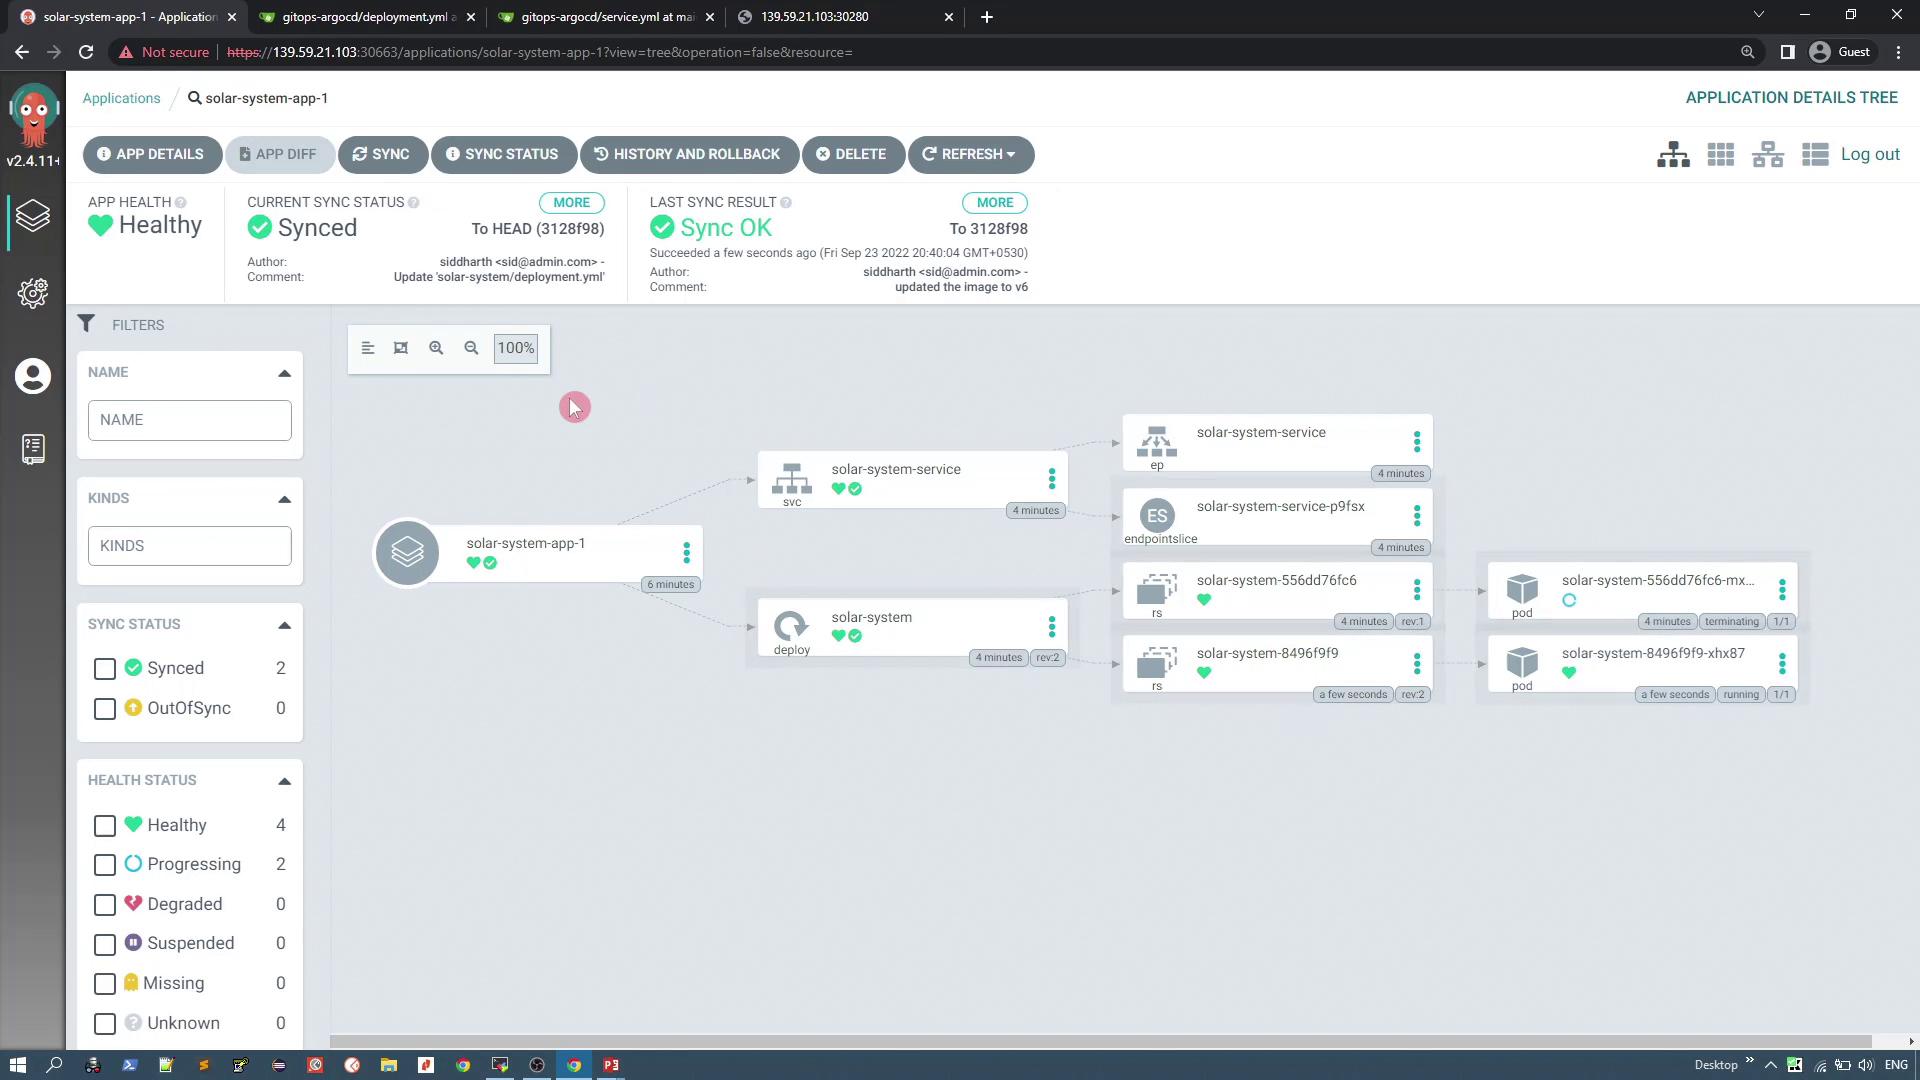
If the update results in unexpected behavior—such as an incorrect display of planets—you can roll back to a previous version. In the ArgoCD UI, click **History and Rollbacks**, select a previous revision (for example, the one deployed five minutes ago), and confirm the rollback.
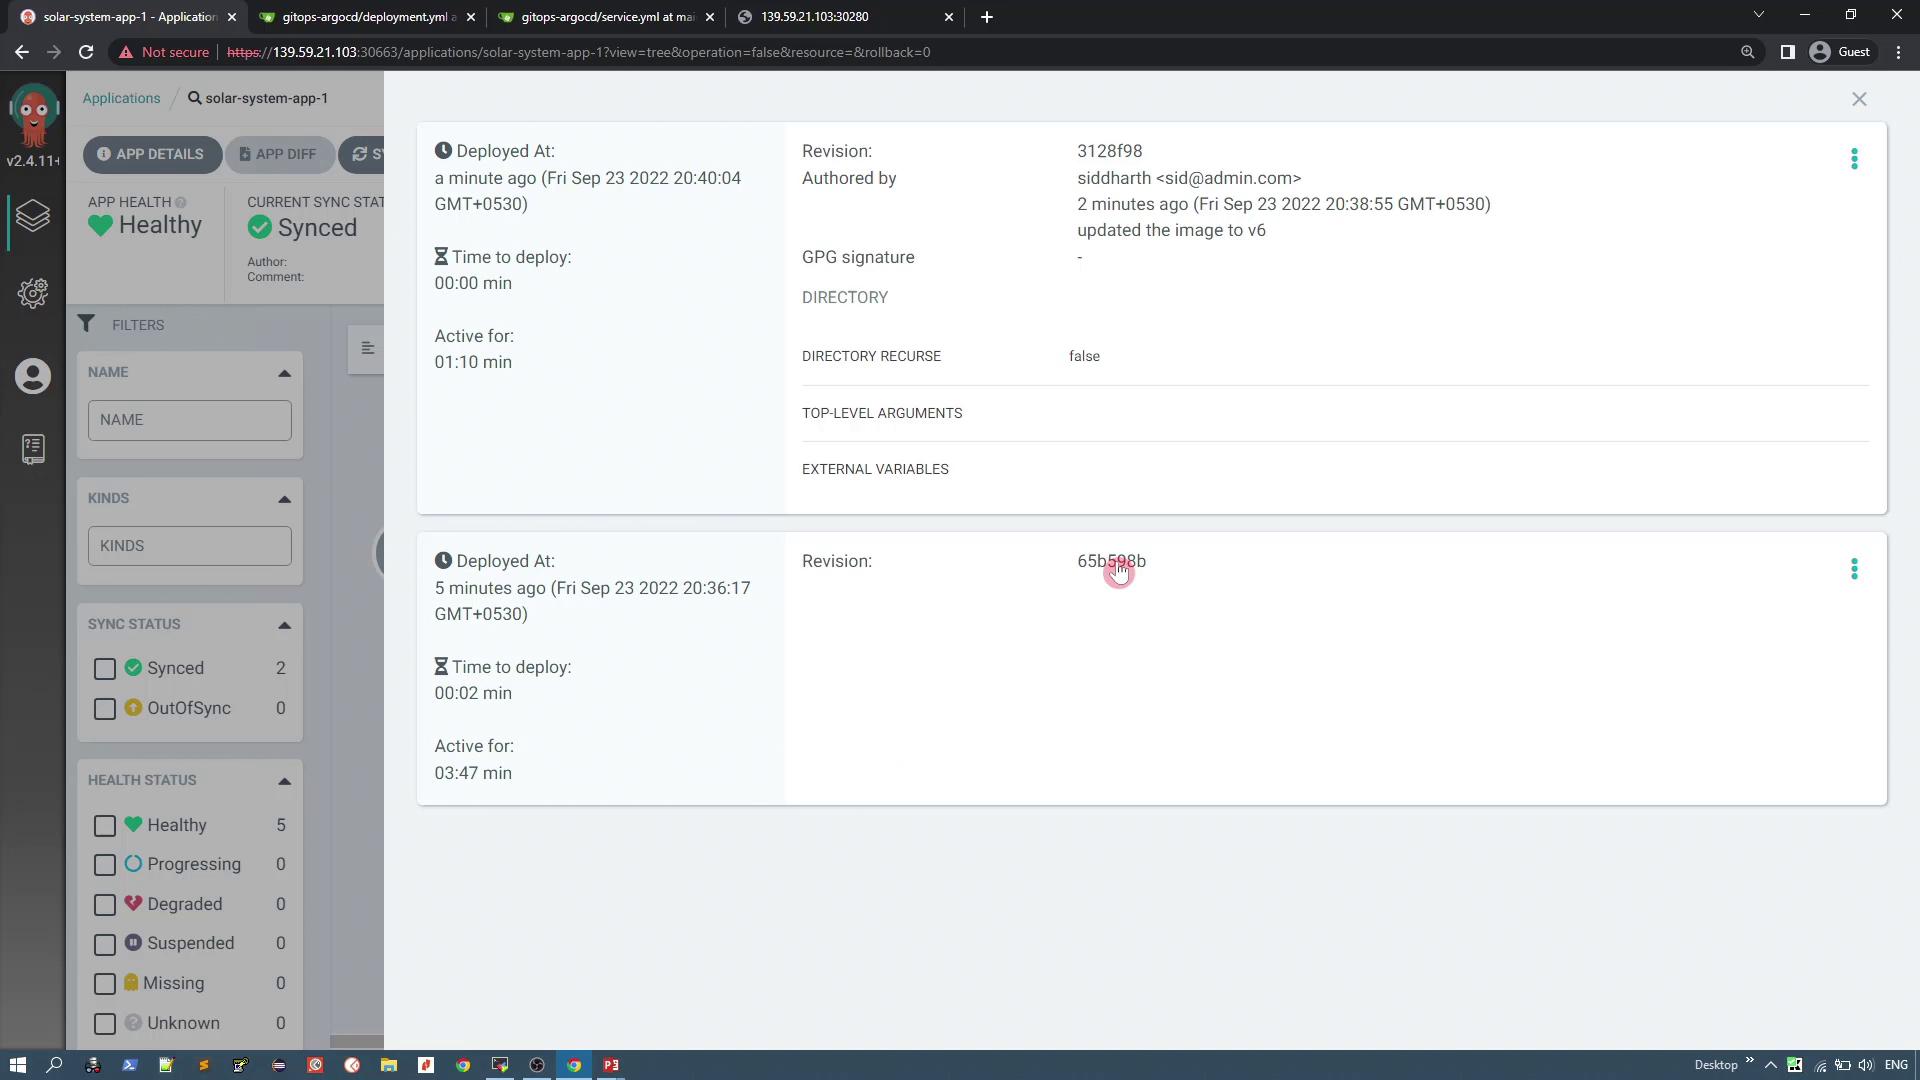
After the rollback, the application status updates accordingly and the original display of planets is restored.
## Deleting the Application
To delete the application in ArgoCD:
1. Delete the application via the ArgoCD UI.
2. All the associated Kubernetes resources (deployment, replica set, pod, and service) are automatically removed from the cluster.
3. Note that the target namespace (e.g., "solar-system") remains intact.
Verify the deletion by running the following commands:
```bash theme={null}
kubectl get ns
kubectl -n solar-system get all
```
Expected output before deletion:
```bash theme={null}
kubectl -n solar-system get all
NAME READY STATUS RESTARTS AGE
pod/solar-system-556d76fc6-mxk6z 1/1 Running 0 34s
service/solar-system-service NodePort 10.108.211.169 80:30280/TCP 34s
deployment.apps/solar-system 1/1 1 1 34s
replicaset.apps/solar-system-556dd76fc6 1 1 1 34s
```
And after deletion:
```bash theme={null}
kubectl -n solar-system get all
No resources found in solar-system namespace.
```
Listing namespaces will confirm that "solar-system" still exists:
```bash theme={null}
kubectl get ns
NAME STATUS AGE
argocd Active 71m
default Active 19h
kube-node-lease Active 19h
kube-public Active 19h
kube-system Active 19h
solar-system Active 6m40s
```
In upcoming lessons, you will explore creating the same application using the ArgoCD CLI and further automating the continuous deployment process.
Thank you.