GitOps with ArgoCD

ArgoCD with Jenkins CI Pipeline

CICD Pipeline Demo

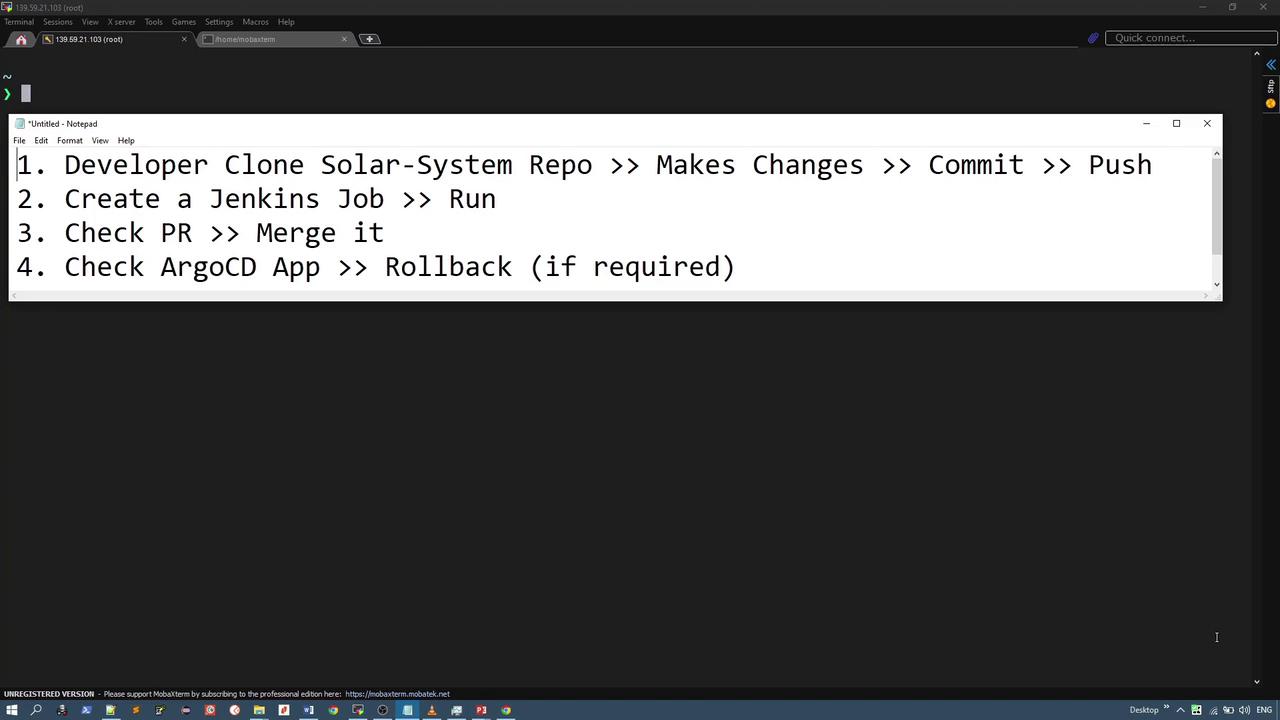
In this tutorial, we demonstrate how a CI/CD pipeline can leverage GitOps principles using ArgoCD through a practical example. The demo follows a streamlined four-step process:

  1. A developer clones the Solr system repository, makes modifications, and pushes them to a feature branch.
  2. A Jenkins job builds the application using a Jenkinsfile.
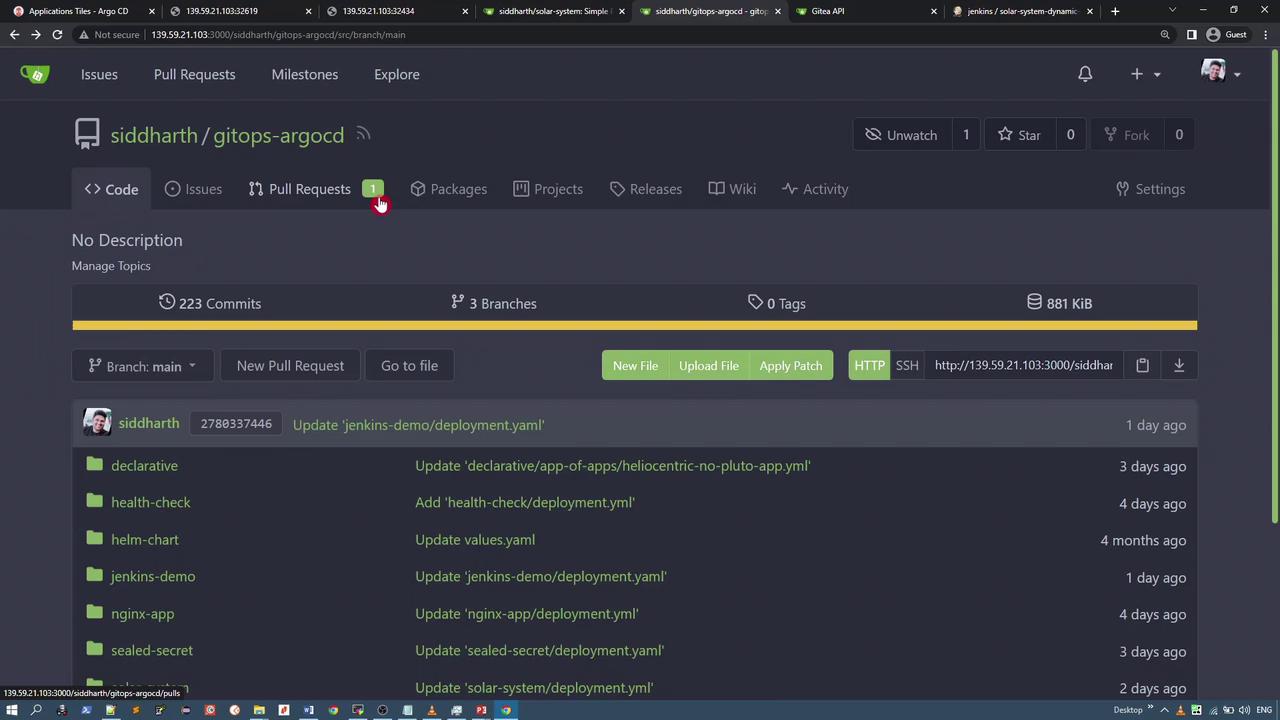
  3. A pull request is created in the Kubernetes manifest repository; once reviewed, it’s merged.
  4. The ArgoCD application detects the changes, synchronizes the new configuration, and performs a rollback if needed.

Each stage is detailed below, complete with diagrams and code examples.


Step 1: Developer Workflow & Repository Update

The process begins with the developer cloning the Solr system repository, making the necessary updates, and pushing them. The diagram below illustrates the overall software development and deployment process:

The image shows a notepad with a four-step process for software development and deployment, including cloning a repository, creating a Jenkins job, checking a pull request, and managing an ArgoCD app.

Developer Task Overview

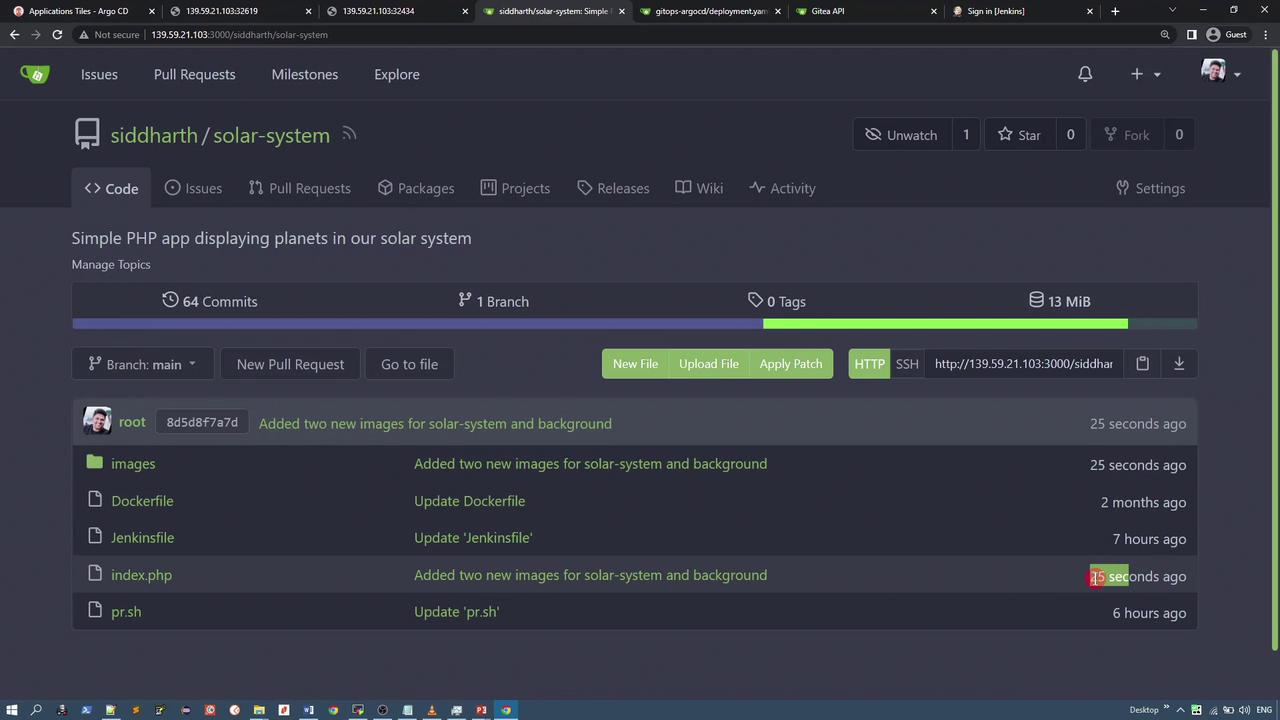
A user story requires replacing a static solar system image with an animated version. The repository includes key files like Dockerfile, Jenkinsfile, index.php, and images.

First, the developer inspects a local directory that contains the new image files:

ll changes
total 700
drwxr-xr-x 2 root root  4096 Sep 25 19:39 ./
drwx----- 13 root root  4096 Sep 25 19:39 ./
-rw-r--r--  1 root root 339116 Sep 25 13:55 animated-solar-system.png
-rw-r--r--  1 root root 364624 Sep 25 13:22 bg.gif

Since the application is a simple PHP app, the console is used to execute file operations. The repository is cloned as follows:

git clone http://139.59.21.103:3000/siddharth/solar-system

After changing into the repository directory, the structure is:

total 32
drwxr-xr-x 4 root root 4096 Sep 25 19:44 ./
drwxr-xr-x 3 root root 4096 Sep 25 19:44 ../
drwxr-xr-x 4 root root 4096 Sep 25 19:44 .git/
-rw-r--r-- 1 root root  274 Sep 25 19:44 Dockerfile
-rw-r--r-- 1 root root  515 Sep 25 19:44 Jenkinsfile
drwxr-xr-x 2 root root 4096 Sep 25 19:44 images/
-rw-r--r-- 1 root root  483 Sep 25 19:44 index.php
-rw-r--r-- 1 root root  517 Sep 25 19:44 pr.sh

The developer then copies the new images into the images directory:

cp /root/changes/animated-solar-system.png images/
cp /root/changes/bg.gif images/

After copying, listing the images directory confirms the transfer:

l images/
total 2584
drwxr-xr-x  5 root root  4096 Sep 25 19:45 ./
drwxr-xr-x  1 root root  4096 Sep 25 19:44 ../
-rw-r--r--  1 root root  339116 Sep 25 19:44 animated-solar-system.png
-rw-r--r--  1 root root  7347895 Sep 25 19:44 background.png
-rw-r--r--  1 root root  364642 Sep 25 19:44 bg.gif
...

Next, the index.php file is updated to reference the new animated image and background GIF:

<?php
echo "<!DOCTYPE html>
<html>
<head>
<meta name='viewport' content='width=device-width, initial-scale=1'>
<style>
#solar-system {
    background: url('http://139.59.21.103:3000/siddharth/solar-system/raw/branch/main/images/animated-solar-system.png') center;
    background-repeat: no-repeat;
    background-size: cover;
    content: '';
    position: static;
    animation: spin 25s linear infinite;
    width: 50vw;
    height: 50vw;
}

@keyframes spin {
    100% { transform: rotate(360deg); }
}

body {
    display: flex;
    align-items: center;
    justify-content: center;
    background: url('http://139.59.21.103:3000/siddharth/solar-system/raw/branch/main/images/bg.gif');
}

/* 
.shadow {
    animation: rainbow 2s linear infinite;
} 
*/
</style>
</head>
</html>";
?>

Before committing, the developer checks the repository status:

git status

The status indicates modifications to index.php and shows the two untracked images. The changes are then committed:

git commit -m "Added two new images for solar-system and background"

Finally, the commit is pushed to the repository's feature branch. The following snapshot shows the repository interface after the push:

The image shows a repository interface for a project named "solar-system" on a code hosting platform, displaying recent commits and file updates. The project is described as a simple PHP app for displaying planets in the solar system.

Tip

Ensure all image paths in your HTML or CSS are updated correctly to reflect new file locations.


Step 2: Jenkins Job Setup and Build Process

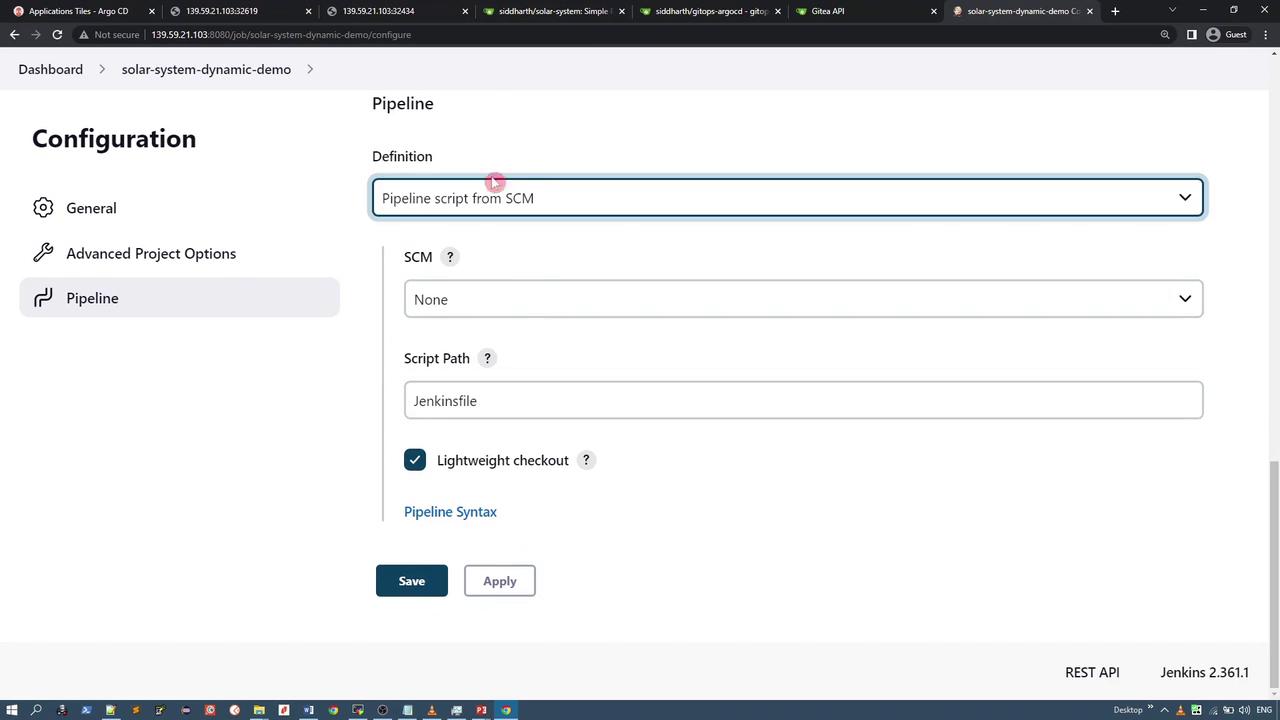
With the updated code in the repository, the next step is setting up the Jenkins job. A new pipeline project called "solar system dynamic demo" is created with the following configuration:

The image shows a Jenkins configuration page for a pipeline, with options for defining the pipeline script from SCM, specifying the script path, and enabling lightweight checkout.

Build Process Details

During the Jenkins build, multiple stages are executed. Here’s an overview:

  • Unit Tests: These may be simple echo commands or actual test cases if using frameworks such as Spring Boot, Node.js, or Python.

  • Build Stage: A Docker image is created using the repository's Dockerfile. An example output is:

    docker build -t solar-system .
    Sending build context to Docker daemon  20.82MB
    Step 1/4 : FROM php:7.4-apache
     ---> 591eebf57822
    Step 2/4 : COPY index.php /var/www/html/
     ---> 83a9d0024550
    Step 3/4 : COPY images /var/www/html/images
     ---> e47a507ab999
    Step 4/4 : EXPOSE 80
     ---> 0d39eba8eff2
    Successfully built 0d39eba8eff2
    Successfully tagged solar-system:latest
    
  • Image Tagging: The newly built image is tagged to include the build ID and commit details:

    docker tag solar-system:latest siddharth67/solar-system:1-f42550fcabef2842074ee16fa005fec3e4d5e8e4
    
  • Push Stage: The image is pushed to Docker Hub with layered progress shown in the logs.

  • GitOps Update: Jenkins then clones the GitOps ArgoCD repository. On the first run, it performs a clone; on subsequent runs, it uses a pull:

    git clone -b feature-gitea http://139.59.21.103:3000/siddharth/gitops-argocd
    

    Once the manifest is cloned, the deployment file is updated to reference the new image:

    sed -i "s#siddharth67/#${IMAGE_REPO}/${NAME}:${VERSION}#g" deployment.yaml
    cat deployment.yaml
    
  • Committing and Pushing Manifest Changes:
    The Git configuration is updated and changes are committed and pushed as follows:

    git config --global user.email '[email protected]'
    git remote set-url origin http://[email protected]:3000/siddharth/gitops-argocd
    git checkout feature-gitea
    git add -A
    git commit -am "Updated image version for Build - $VERSION"
    git push origin feature-gitea
    
  • Pull Request Creation:
    A shell script (pr.sh) utilizes curl to raise a pull request automatically:

    bash pr.sh
    

    The output confirms that the pull request has been successfully created:

    Opening a Pull Request
    % Total    % Received % Xferd  Average Speed   Time    Time     Current
    ...
    {"id":13,"url":"http://139.59.21.103:3000/siddharth/gitops-argocd/pulls/10", ... }
    

A snapshot of the Git repository interface depicting commits, branches, and files is shown below:

The image shows a Git repository interface with details about commits, branches, and files. It includes options for creating new files, uploading, and applying patches.


Step 3: ArgoCD Application Sync and Deployment

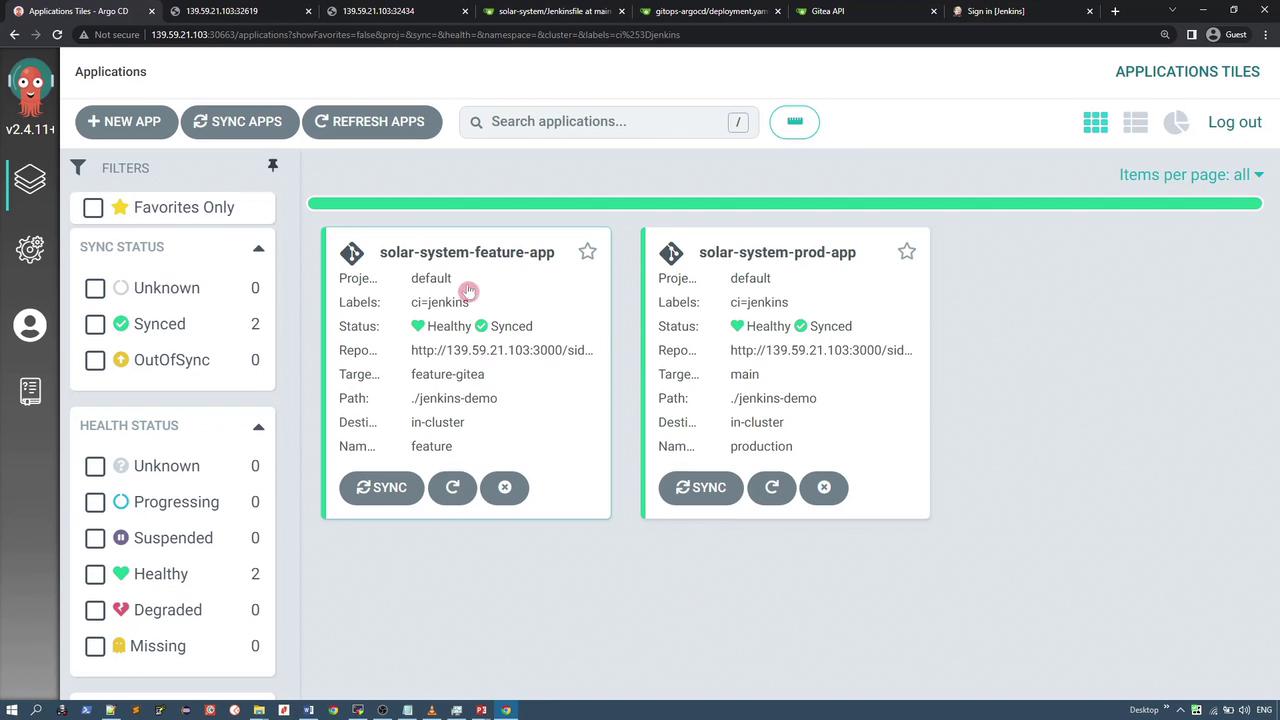
Once the pull request is merged, the ArgoCD application synchronizes the changes. Two applications are used:

  • One monitors the feature branch.
  • The other monitors the production (main) branch.

They are deployed to separate namespaces and exposed via NodePort. The following dashboard shows their status:

The image shows a dashboard from Argo CD displaying two applications, "solar-system-feature-app" and "solar-system-prod-app," both with a status of "Healthy" and "Synced." The interface includes options for syncing and refreshing apps, with filters for sync and health status.

After synchronizing the feature app, changes like the animated background and updated solar system view are visible. The Jenkins pipeline logs also display an updated deployment.yaml file, similar to:

apiVersion: apps/v1
kind: Deployment
metadata:
  labels:
    app: solar-system
  name: solar-system
spec:
  replicas: 1
  selector:
    matchLabels:
      app: solar-system
  strategy: {}
  template:
    metadata:
      labels:
        app: solar-system
    spec:
      containers:
        - image: siddharth67/solar-system:1-f425250fcabf2842074ee16fa805fec3e4d58e4
          name: solar-system
          ports:
            - containerPort: 80

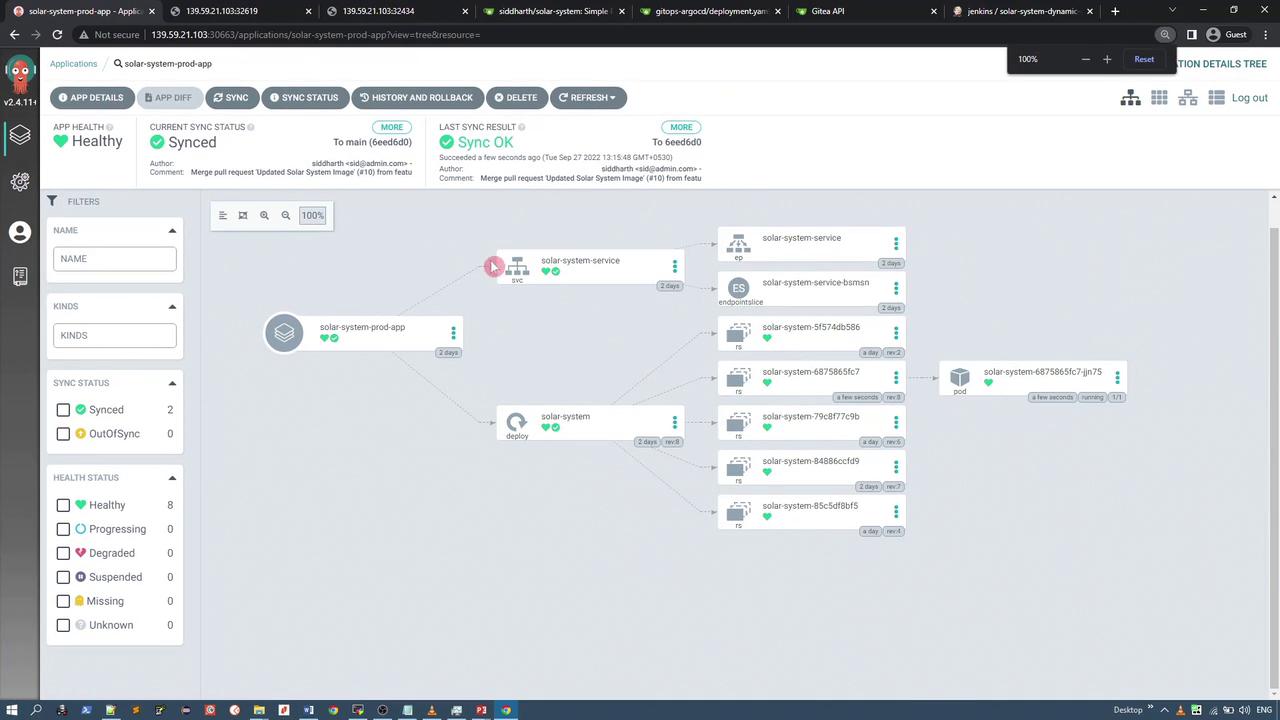
Following the merge into the main branch, the production ArgoCD application initially becomes out of sync. Synchronizing it updates the deployment accordingly. Below is a snapshot of the deployment management dashboard:

The image shows a dashboard interface of a deployment management tool, displaying the status and structure of a "solar-system-prod-app" application with various components and their sync and health statuses.


Step 4: Rollback (If Required)

Post-deployment, user feedback indicated that the flashy animated background was not ideal. Using the ArgoCD UI, an administrator can perform a rollback to a previously stable version by selecting the desired version from the application's history and clicking the rollback option.

Important

Always validate the UI changes after a rollback to ensure the production system remains stable.

Once confirmed, the production UI reverts to displaying the previously stable version of the solar system, ensuring users see the version they preferred.


Conclusion

This walkthrough illustrated how CI/CD pipelines integrate GitOps with ArgoCD to automate the entire release process – from code modification and Jenkins-driven builds to deployment updates and rollbacks. By leveraging tools like Jenkins for build automation and ArgoCD for deployment management, teams can ensure rapid, reliable, and reversible releases.

For more insights into CI/CD and GitOps, check out the following resources:

Thank you for following along with this detailed demonstration.

Watch Video

Watch video content

Previous
Jenkinsfile Walkthrough