> ## Documentation Index
> Fetch the complete documentation index at: https://notes.kodekloud.com/llms.txt
> Use this file to discover all available pages before exploring further.
# Creating a CodePipeline with Source and Build stage
> Guide to creating an AWS CodePipeline with CodeCommit source and CodeBuild build stages, validating builds, pushing fixes to trigger pipeline, and manually updating ECS service
Welcome — in this lesson we'll create a basic AWS CodePipeline with Source and Build stages, verify a build run, and push a code fix so the pipeline automatically picks it up. This walkthrough assumes you have an existing CodeCommit repository (for example `aws-microservice-project`) and a CodeBuild project (for example `AWS MicroserviceProject`). We'll also show a short Git workflow to push fixes from Cloud9.
## Background: why we needed to fix the app
Earlier we introduced a change that produced a broken task definition (task definition 6) because a few lines were commented out in the application. Below is the problematic version that was reverted from the repository for debugging:
```python theme={null}
from flask import Flask, render_template, request, redirect, url_for
import psycopg2
app = Flask(__name__)
# Default credentials
DEFAULT_USERNAME = "admin"
DEFAULT_PASSWORD = "password123"
@app.route('/login', methods=['GET', 'POST'])
def login():
error = None
if request.method == 'POST':
username = request.form['username']
password = request.form['password']
# Check if provided credentials match the default ones
if username == DEFAULT_USERNAME and password == DEFAULT_PASSWORD:
return redirect(url_for('welcome'))
else:
error = 'Invalid Credentials. Please try again.'
return render_template('login.html', error=error)
@app.route('/webpage')
def welcome():
return render_template('product.html')
@app.route('/place_order')
def place_order():
product_id = request.args.get('product')
return render_template('place_order.html', product_id=product_id)
```
We resolved this by restoring the required lines in the main repository (uncommenting the necessary code) and committing the corrected version.
## Create the pipeline in the AWS Console
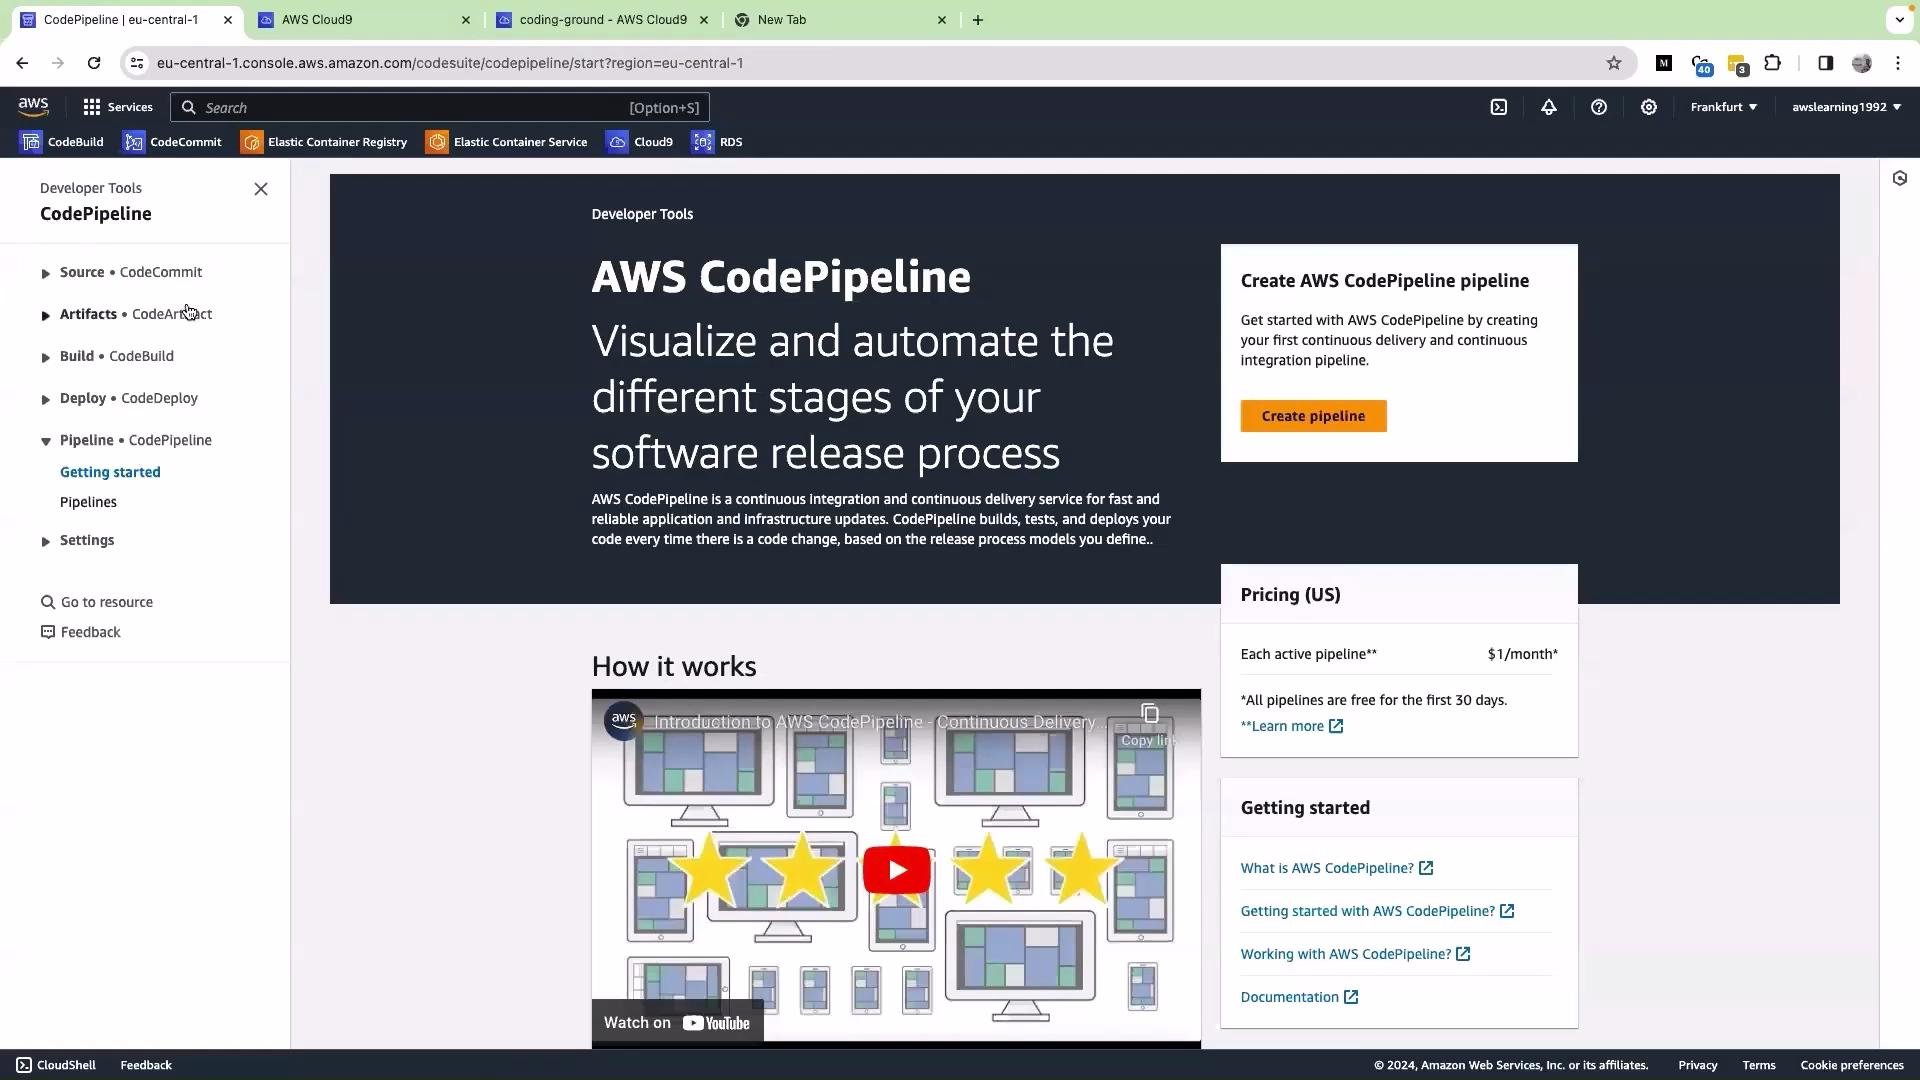
Follow these step-by-step instructions to create a simple pipeline that fetches code from CodeCommit and runs CodeBuild.
1. Open the AWS Management Console and navigate to **CodePipeline** (located near CodeBuild).
2. Click Pipelines -> **Create pipeline**.
3. Give the pipeline a descriptive name.
4. Open **Advanced settings** and keep defaults unless you need to change encryption, service role, or artifact store settings.
5. Click **Next** to configure the Source stage.
 ### Source stage: AWS CodeCommit
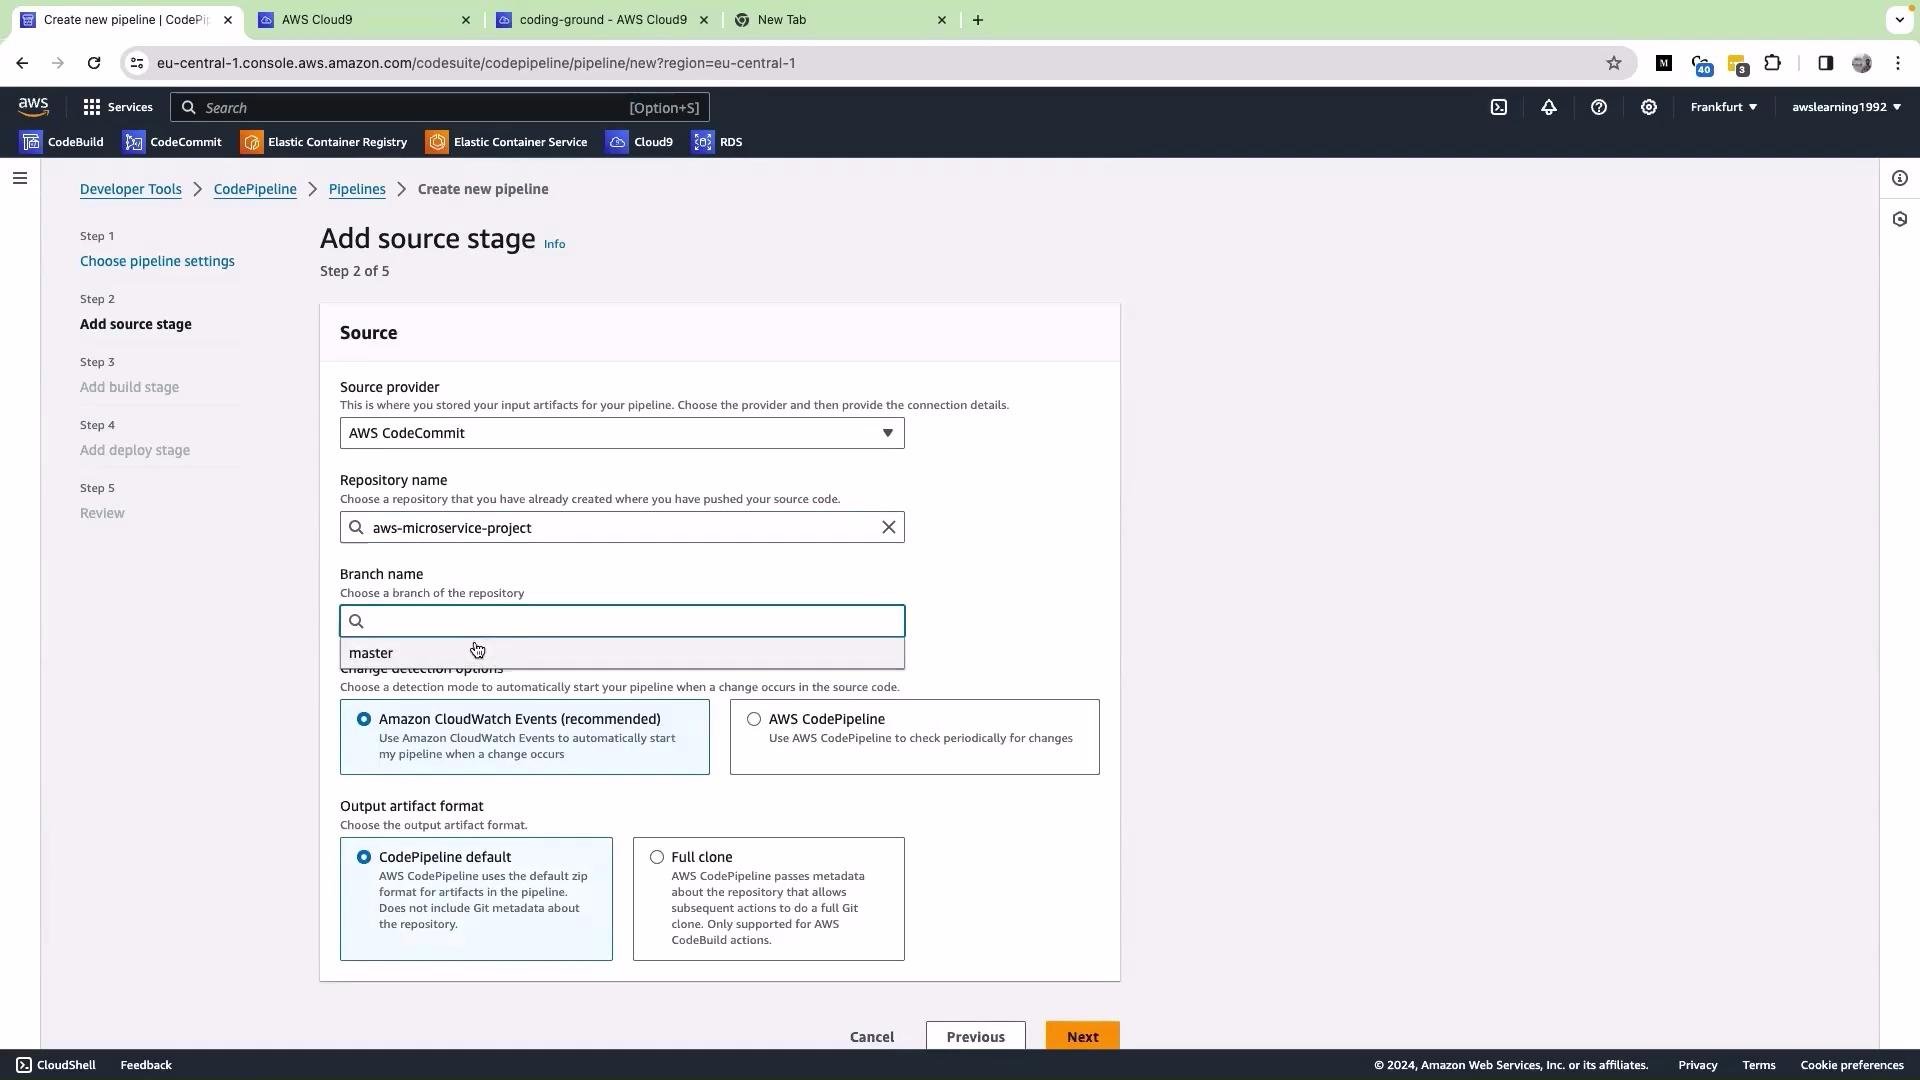
* For Source provider, select **AWS CodeCommit**.
* Choose the repository `aws-microservice-project`.
* Select the branch `master`.
### Source stage: AWS CodeCommit
* For Source provider, select **AWS CodeCommit**.
* Choose the repository `aws-microservice-project`.
* Select the branch `master`.
 6. Click **Next** to configure the Build stage.
### Build stage: AWS CodeBuild
* For Build provider select **AWS CodeBuild**.
* Choose the appropriate project (for example `AWS MicroserviceProject`).
* Click **Next**.
We do not want to deploy to ECS yet for this pipeline, so choose **Skip deploy stage**, then click **Create pipeline**.
When the pipeline is created it starts an initial execution automatically to validate the configured stages. You can monitor progress from the pipeline detail page.
6. Click **Next** to configure the Build stage.
### Build stage: AWS CodeBuild
* For Build provider select **AWS CodeBuild**.
* Choose the appropriate project (for example `AWS MicroserviceProject`).
* Click **Next**.
We do not want to deploy to ECS yet for this pipeline, so choose **Skip deploy stage**, then click **Create pipeline**.
When the pipeline is created it starts an initial execution automatically to validate the configured stages. You can monitor progress from the pipeline detail page.
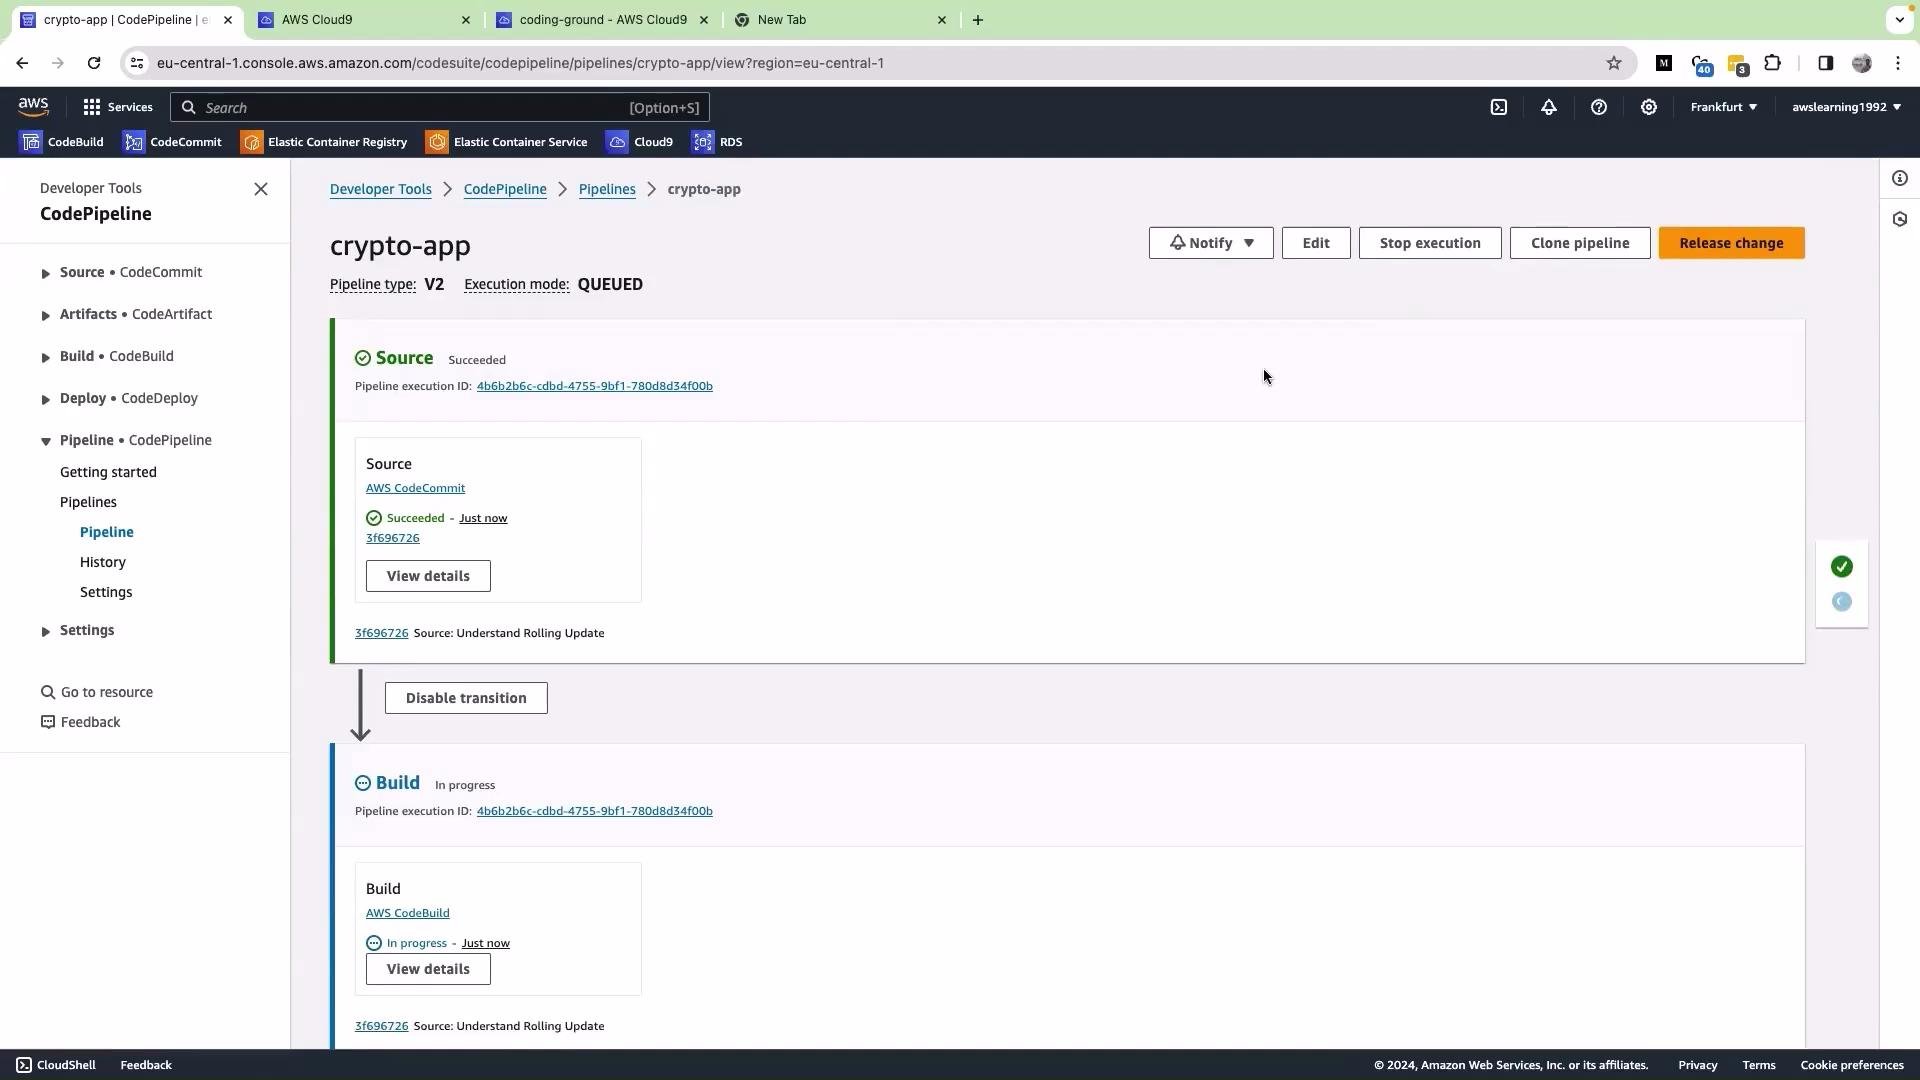 The Source stage should complete first, followed by the Build stage. In CodeBuild logs you'll see initialization commands and other build steps—for example:
```bash theme={null}
# Example log line from CodeBuild
Running command aws --version
```
Tip: you can disable transitions between stages if you need to pause pipeline progression (for example, temporarily disable the transition from Source to Build).
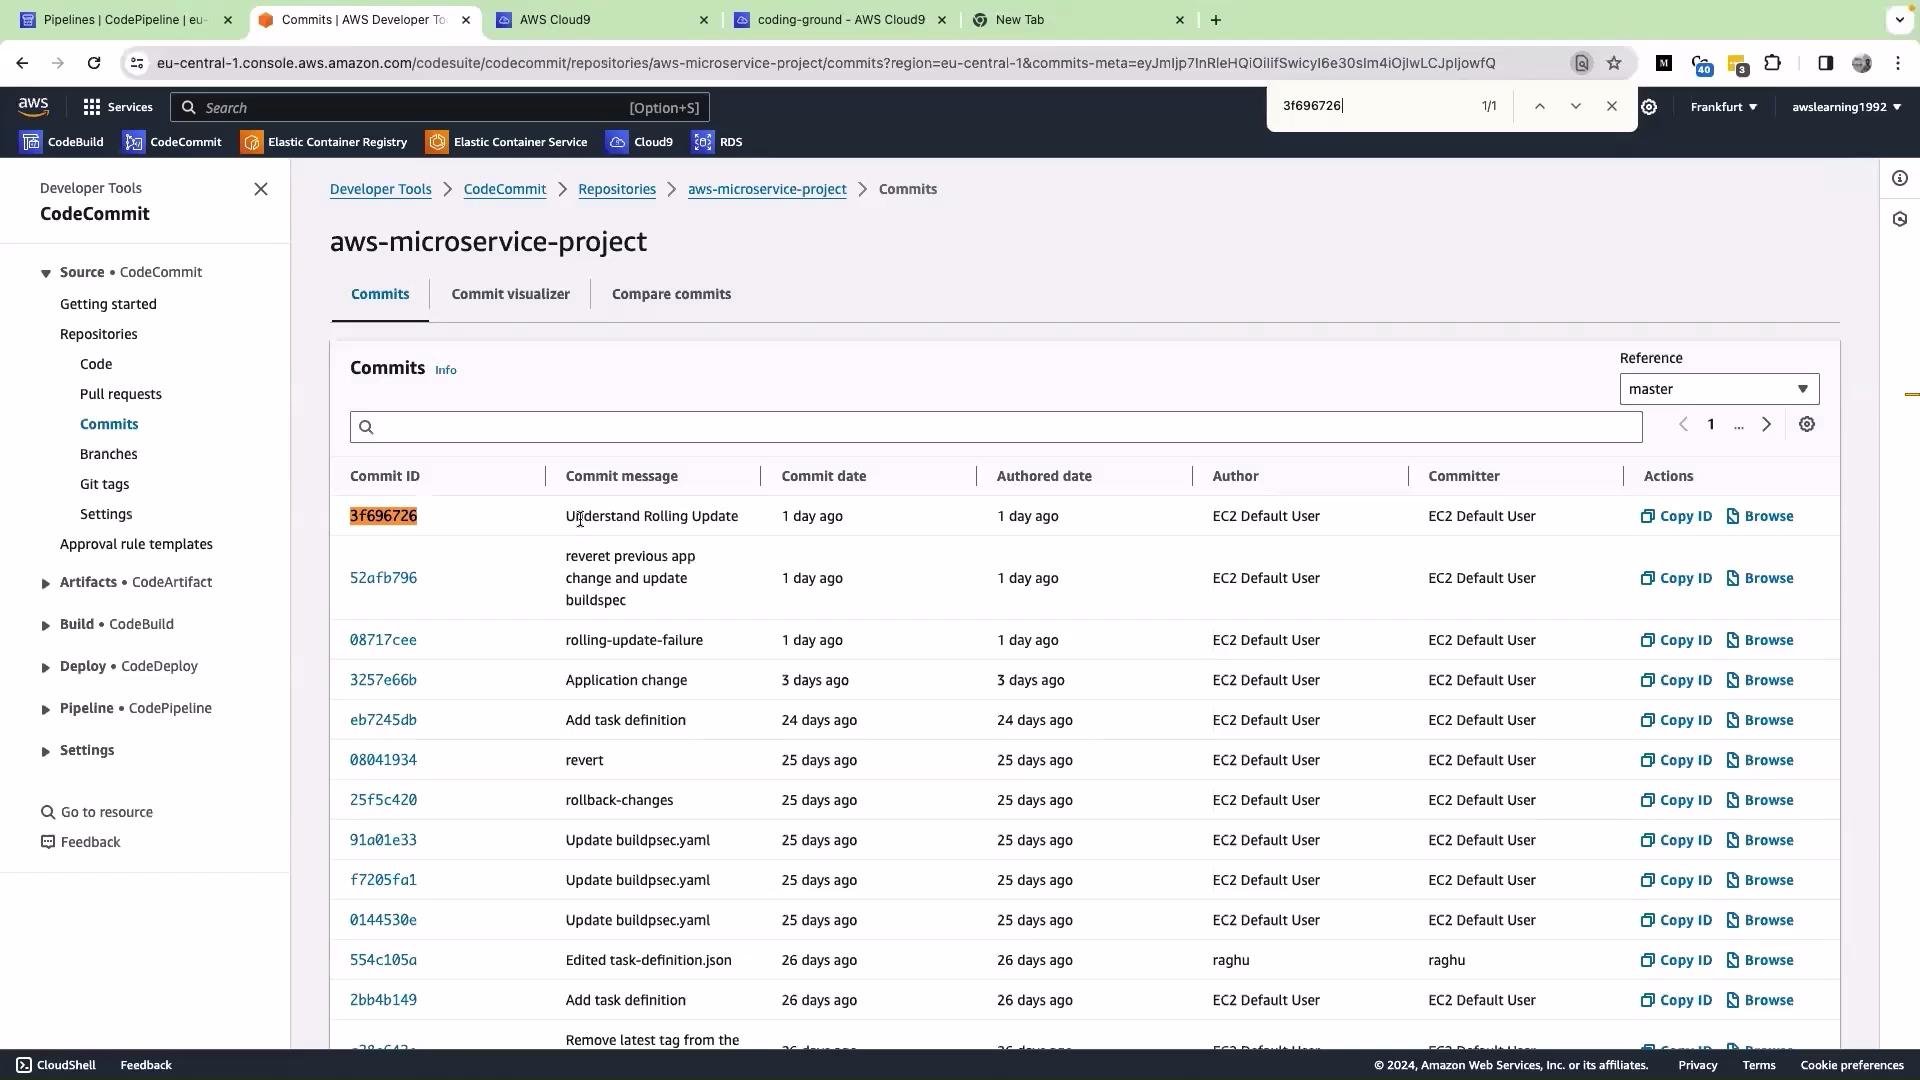
After the run completes successfully, the pipeline will display a successful status and show the commit hash that was built.
The Source stage should complete first, followed by the Build stage. In CodeBuild logs you'll see initialization commands and other build steps—for example:
```bash theme={null}
# Example log line from CodeBuild
Running command aws --version
```
Tip: you can disable transitions between stages if you need to pause pipeline progression (for example, temporarily disable the transition from Source to Build).
After the run completes successfully, the pipeline will display a successful status and show the commit hash that was built.
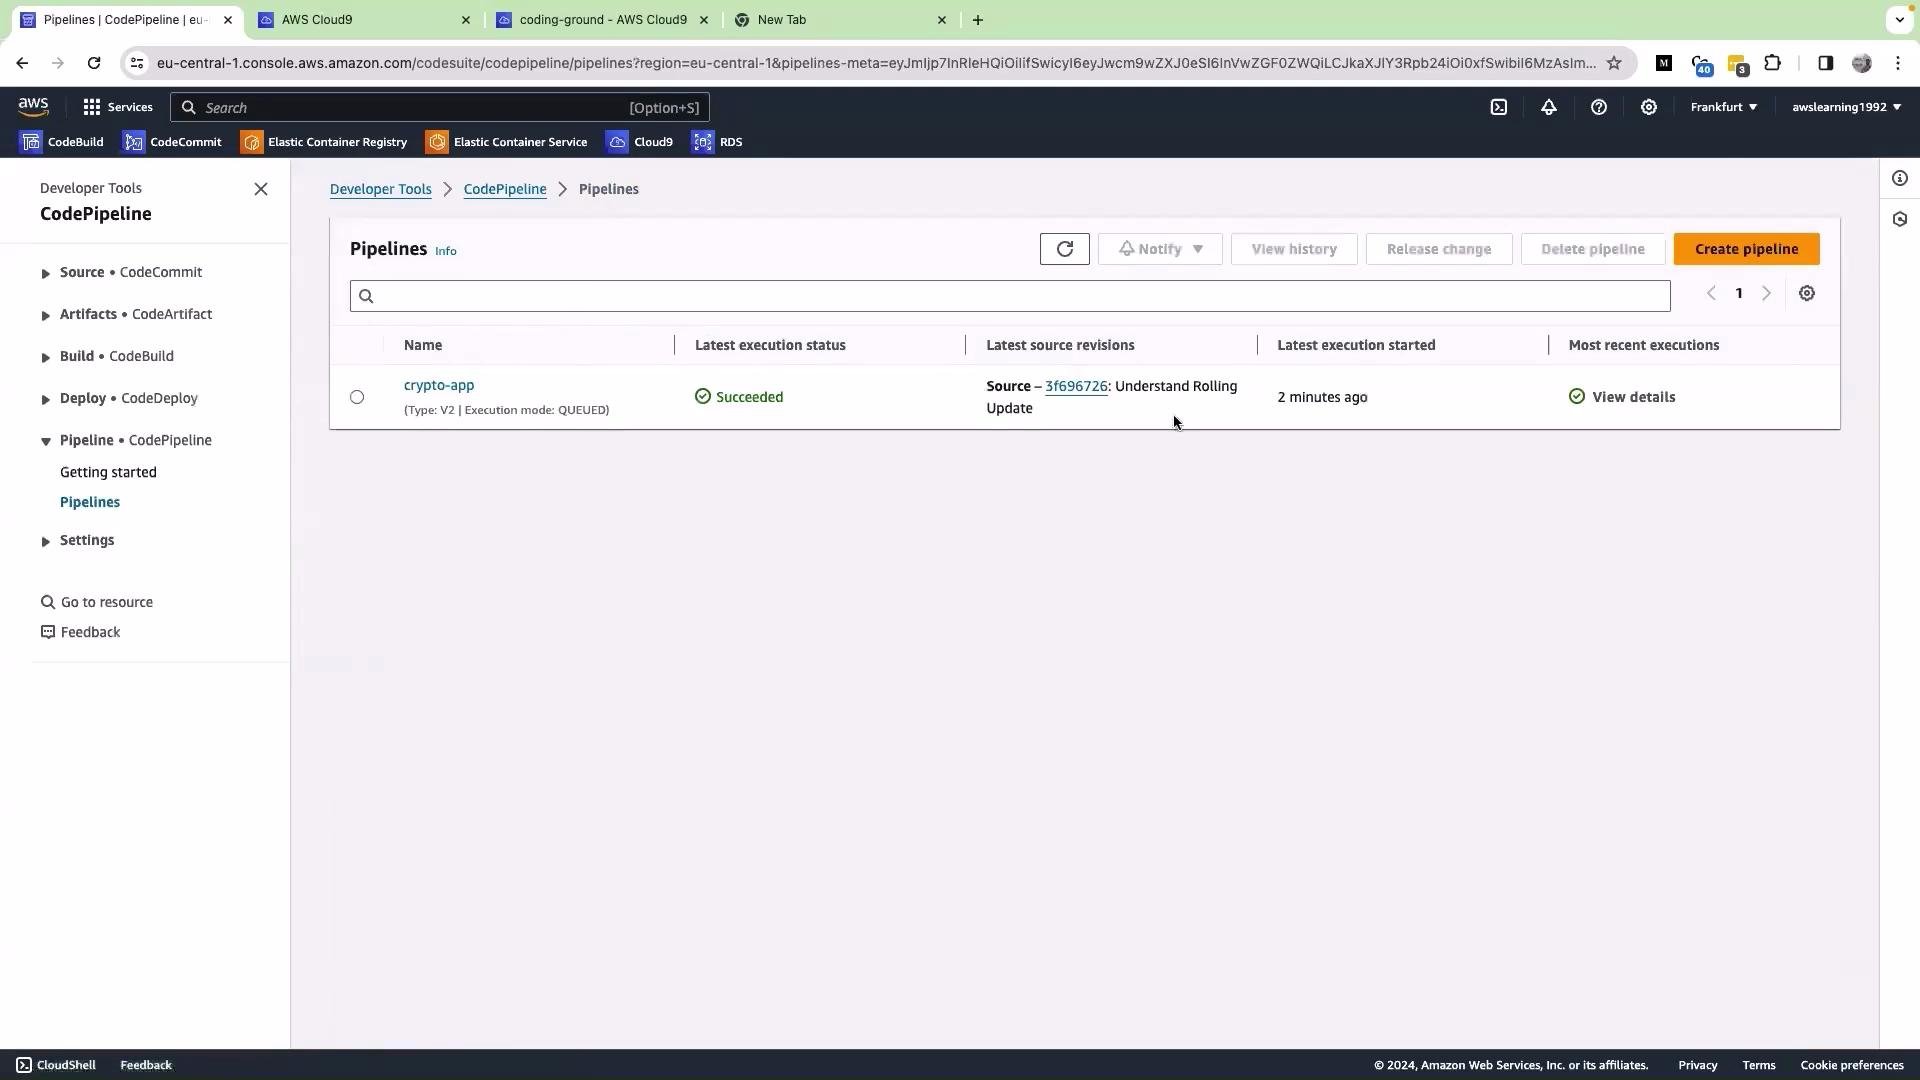 You can cross-check the commit details directly in CodeCommit—open the repository and view the commits list to confirm the pipeline picked up the intended commit.
 ## Pipeline summary
| Stage | AWS Service | Purpose |
| ------ | -------------- | ------------------------------------------------------------ |
| Source | AWS CodeCommit | Fetch code from `aws-microservice-project` on `master` |
| Build | AWS CodeBuild | Run build commands, tests, and produce artifacts |
| Deploy | (skipped) | Not included in this pipeline; manual ECS update shown later |
## Fix code in Cloud9 and push to trigger the pipeline
Make your code edits in Cloud9 (or your local environment), commit, and push to `master`. CodePipeline will automatically start a new execution when it detects the new commit.
Example Git workflow in your Cloud9 environment:
```bash theme={null}
# Inspect repo status
git status
# Stage all changes
git add .
# Commit fixes with a meaningful message
git commit -m "Fix: restore correct routes and templates"
# Ensure Git user is configured (example)
git config --global user.name "Your Name"
git config --global user.email "you@example.com"
# Push to master so CodePipeline can detect the change
git push origin master
```
CodePipeline automatically detects changes in the configured source repository and triggers a pipeline execution for each new commit on the tracked branch.
## Corrected application example
Below is the final (corrected) application code that was pushed to the repository and picked up by CodePipeline:
```python theme={null}
from flask import Flask, render_template, request, redirect, url_for
import psycopg2
app = Flask(__name__)
# Default credentials
DEFAULT_USERNAME = "admin"
DEFAULT_PASSWORD = "password123"
@app.route('/login', methods=['GET', 'POST'])
def login():
error = None
if request.method == 'POST':
username = request.form['username']
password = request.form['password']
# Check if provided credentials match the default ones
if username == DEFAULT_USERNAME and password == DEFAULT_PASSWORD:
return redirect(url_for('welcome'))
else:
error = 'Invalid Credentials. Please try again.'
return render_template('login.html', error=error)
@app.route('/webpage')
def welcome():
return render_template('product.html')
@app.route('/place_order')
def place_order():
product_id = request.args.get('product')
return render_template('place_order.html', product_id=product_id)
```
## Update ECS service (manual step)
After the pipeline build completes successfully and produces a new image/task definition revision (for example, revision 8), update your ECS service to use that task definition:
1. Open the ECS console and select your cluster.
2. Choose the service you want to update.
3. Click **Update** -> Select the new task definition revision (e.g., v8).
4. Click **Update Service** to start the deployment.
5. Monitor the deployment until it reaches a steady state.
A future lesson will show how to add an automated Deploy stage to CodePipeline to have this update done automatically.
## Links and references
* [AWS CodePipeline Documentation](https://docs.aws.amazon.com/codepipeline/latest/userguide/welcome.html)
* [AWS CodeBuild Documentation](https://docs.aws.amazon.com/codebuild/latest/userguide/welcome.html)
* [AWS CodeCommit Documentation](https://docs.aws.amazon.com/codecommit/latest/userguide/welcome.html)
* [Amazon ECS Documentation](https://docs.aws.amazon.com/AmazonECS/latest/developerguide/Welcome.html)
This lesson demonstrated creating a CI pipeline with Source and Build stages, validating a build, and pushing code changes to automatically trigger pipeline executions.
## Pipeline summary
| Stage | AWS Service | Purpose |
| ------ | -------------- | ------------------------------------------------------------ |
| Source | AWS CodeCommit | Fetch code from `aws-microservice-project` on `master` |
| Build | AWS CodeBuild | Run build commands, tests, and produce artifacts |
| Deploy | (skipped) | Not included in this pipeline; manual ECS update shown later |
## Fix code in Cloud9 and push to trigger the pipeline
Make your code edits in Cloud9 (or your local environment), commit, and push to `master`. CodePipeline will automatically start a new execution when it detects the new commit.
Example Git workflow in your Cloud9 environment:
```bash theme={null}
# Inspect repo status
git status
# Stage all changes
git add .
# Commit fixes with a meaningful message
git commit -m "Fix: restore correct routes and templates"
# Ensure Git user is configured (example)
git config --global user.name "Your Name"
git config --global user.email "you@example.com"
# Push to master so CodePipeline can detect the change
git push origin master
```
CodePipeline automatically detects changes in the configured source repository and triggers a pipeline execution for each new commit on the tracked branch.
## Corrected application example
Below is the final (corrected) application code that was pushed to the repository and picked up by CodePipeline:
```python theme={null}
from flask import Flask, render_template, request, redirect, url_for
import psycopg2
app = Flask(__name__)
# Default credentials
DEFAULT_USERNAME = "admin"
DEFAULT_PASSWORD = "password123"
@app.route('/login', methods=['GET', 'POST'])
def login():
error = None
if request.method == 'POST':
username = request.form['username']
password = request.form['password']
# Check if provided credentials match the default ones
if username == DEFAULT_USERNAME and password == DEFAULT_PASSWORD:
return redirect(url_for('welcome'))
else:
error = 'Invalid Credentials. Please try again.'
return render_template('login.html', error=error)
@app.route('/webpage')
def welcome():
return render_template('product.html')
@app.route('/place_order')
def place_order():
product_id = request.args.get('product')
return render_template('place_order.html', product_id=product_id)
```
## Update ECS service (manual step)
After the pipeline build completes successfully and produces a new image/task definition revision (for example, revision 8), update your ECS service to use that task definition:
1. Open the ECS console and select your cluster.
2. Choose the service you want to update.
3. Click **Update** -> Select the new task definition revision (e.g., v8).
4. Click **Update Service** to start the deployment.
5. Monitor the deployment until it reaches a steady state.
A future lesson will show how to add an automated Deploy stage to CodePipeline to have this update done automatically.
## Links and references
* [AWS CodePipeline Documentation](https://docs.aws.amazon.com/codepipeline/latest/userguide/welcome.html)
* [AWS CodeBuild Documentation](https://docs.aws.amazon.com/codebuild/latest/userguide/welcome.html)
* [AWS CodeCommit Documentation](https://docs.aws.amazon.com/codecommit/latest/userguide/welcome.html)
* [Amazon ECS Documentation](https://docs.aws.amazon.com/AmazonECS/latest/developerguide/Welcome.html)
This lesson demonstrated creating a CI pipeline with Source and Build stages, validating a build, and pushing code changes to automatically trigger pipeline executions.