> ## Documentation Index
> Fetch the complete documentation index at: https://notes.kodekloud.com/llms.txt
> Use this file to discover all available pages before exploring further.
# Run DB initialization script
> Guide to initialize a PostgreSQL users table with dummy accounts for a login microservice, including cloning the repo, running a helper script, and verifying via DBeaver.
Hello and welcome back.
In this lesson we will run an initialization script to create a few dummy users in our PostgreSQL database. This helps the login microservice have test accounts available during development and QA.
Overview
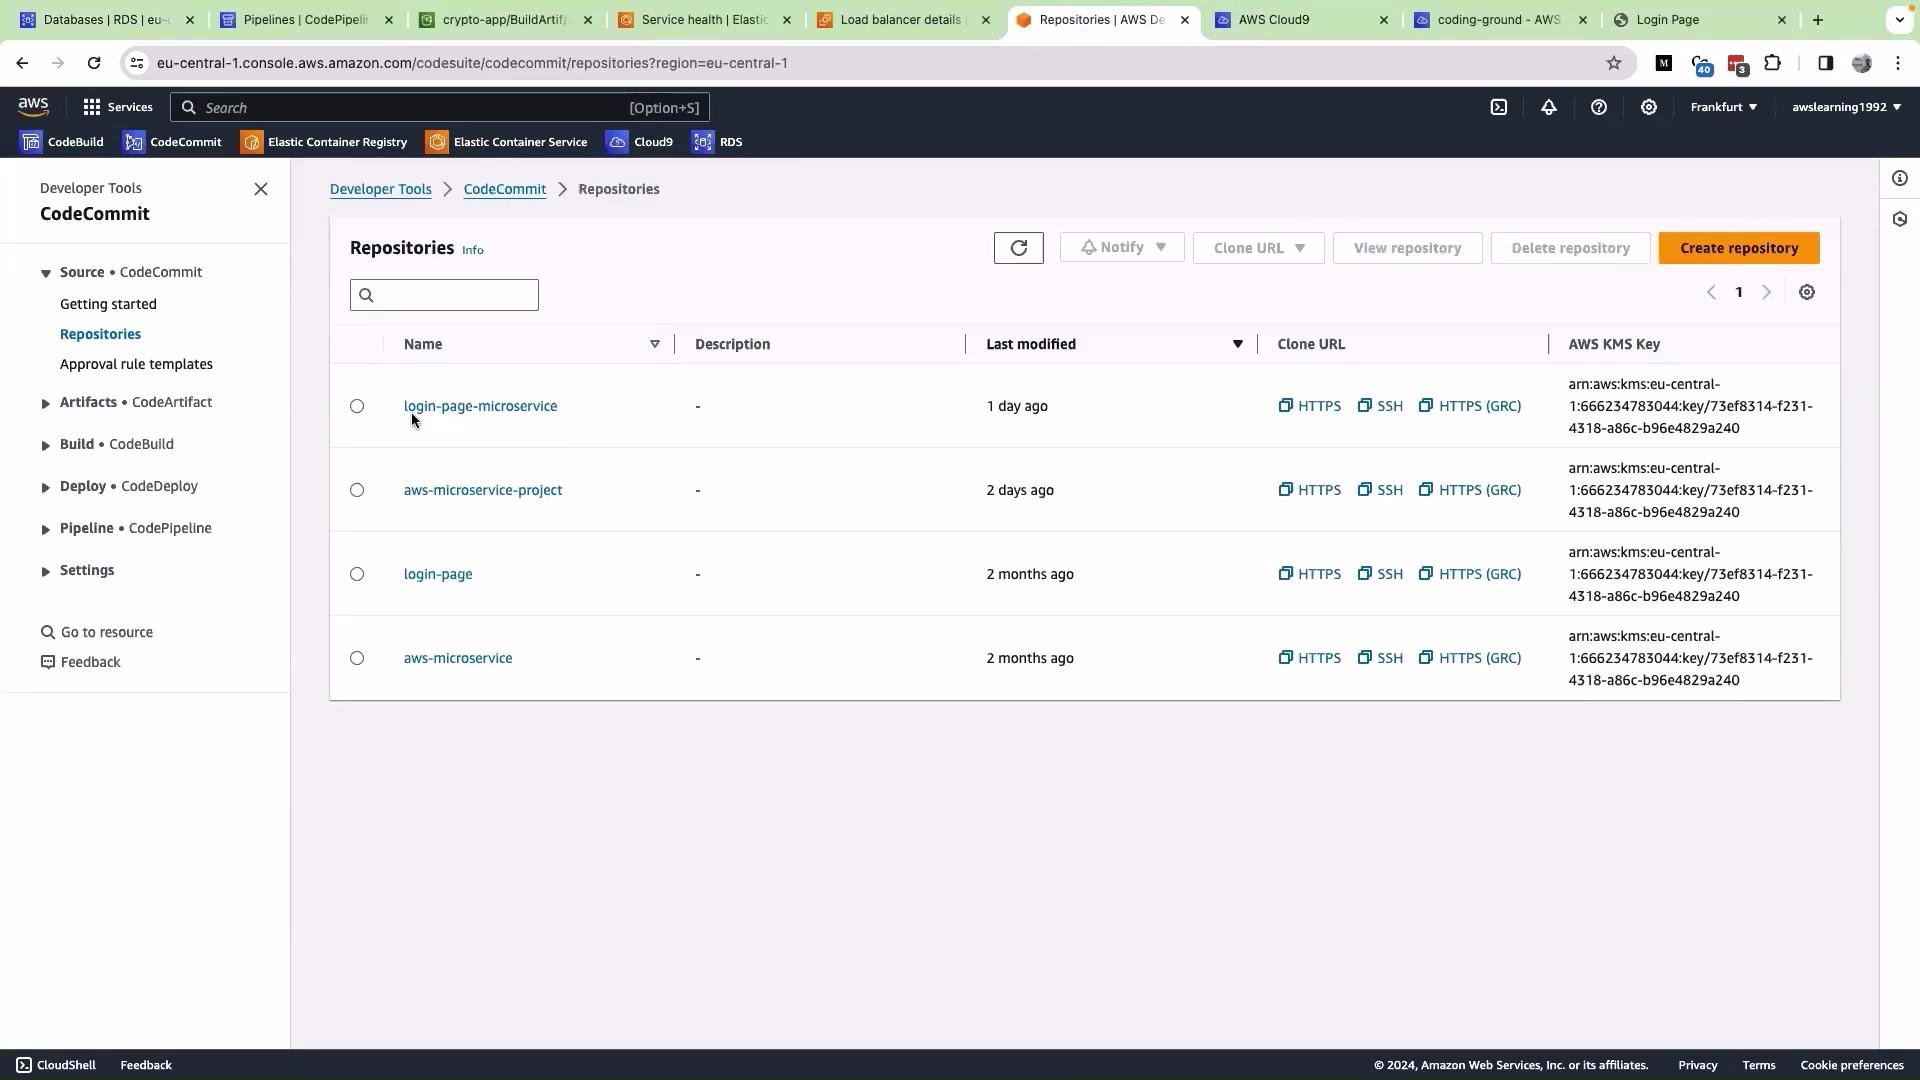
* Locate the CodeCommit repository in the AWS Console.
* Clone the repo into your Cloud9 environment (or another terminal).
* Save and run the helper script that creates the `users` table and inserts dummy accounts.
* Verify the inserted rows using a SQL client such as DBeaver.
Open the AWS CodeCommit repository (in my account it's called `login-page-microservice`). You should see the same repository in your exercise account.
 Prerequisites
* AWS Cloud9 (or any machine with terminal access to your repo).
* Python 3 and `pip3`.
* `psycopg2` installed (or `psycopg2-binary`).
* Network access to your PostgreSQL instance (RDS endpoint or other host).
* A SQL client like DBeaver for verification.
Helper script (save as `helper_script.py`)
Below is a clean, robust helper script that:
* reads DB connection settings from environment variables,
* creates the `users` table if it doesn't exist,
* inserts dummy users using `ON CONFLICT DO NOTHING` to avoid duplicate-key errors.
```python theme={null}
# helper_script.py
import os
import psycopg2
# Read DB connection info from environment variables, with optional fallbacks.
DB_HOST = os.environ.get('AWS_RDS_HOST', 'your-rds-host.example.rds.amazonaws.com')
DB_PORT = os.environ.get('AWS_RDS_PORT', '5432')
DB_USER = os.environ.get('AWS_RDS_USERNAME', 'postgres')
DB_PASSWORD = os.environ.get('AWS_RDS_PASSWORD', 'change_me')
DB_NAME = os.environ.get('AWS_RDS_DB_NAME', 'microservice')
# Connect to the PostgreSQL database
conn = psycopg2.connect(
host=DB_HOST,
port=DB_PORT,
dbname=DB_NAME,
user=DB_USER,
password=DB_PASSWORD
)
cur = conn.cursor()
# Create the users table if it does not exist
cur.execute('''
CREATE TABLE IF NOT EXISTS users (
id SERIAL PRIMARY KEY,
name VARCHAR(100) NOT NULL,
email VARCHAR(100) UNIQUE NOT NULL,
password VARCHAR(100) NOT NULL
);
''')
# Dummy users to insert
dummy_users = [
('Alice_dummy', 'alice_dummy@example.com', 'password123_dummy'),
('Bob_dummy', 'bob_dummy@example.com', 'password456_dummy'),
('Charlie_dummy', 'charlie_dummy@example.com', 'password789_dummy')
]
# Insert dummy users, ignoring duplicates on email
for user in dummy_users:
cur.execute('''
INSERT INTO users (name, email, password)
VALUES (%s, %s, %s)
ON CONFLICT (email) DO NOTHING
''', user)
conn.commit()
cur.close()
conn.close()
```
Environment variables reference
| Environment variable | Purpose | Example |
| -------------------- | --------------------------------- | ----------------------------------------- |
| `AWS_RDS_HOST` | Database hostname or RDS endpoint | `your-rds-host.example.rds.amazonaws.com` |
| `AWS_RDS_PORT` | Database port | `5432` |
| `AWS_RDS_USERNAME` | Database user | `postgres` |
| `AWS_RDS_PASSWORD` | Database password | `change_me` |
| `AWS_RDS_DB_NAME` | Database name | `microservice` |
Important: use environment variables or a secrets manager for credentials; avoid hardcoding secrets.
Clone and run from Cloud9 (or any terminal in the repo)
1. Clone the CodeCommit repository into your environment (HTTPS example):
```bash theme={null}
git clone https://git-codecommit.eu-central-1.amazonaws.com/v1/repos/login-page-microservice
```
You should see output similar to:
```bash theme={null}
Cloning into 'login-page-microservice'...
remote: Counting objects: 10, done.
Unpacking objects: 100% (10/10), done.
```
2. If `psycopg2` is missing, install dependencies from `requirements.txt`:
```bash theme={null}
pip3 install -r requirements.txt
```
Common error before installing dependencies:
```bash theme={null}
Traceback (most recent call last):
File "helper_script.py", line 1, in
import psycopg2
ModuleNotFoundError: No module named 'psycopg2'
```
3. Ensure environment variables are set (example Bash):
```bash theme={null}
export AWS_RDS_HOST='your-rds-host.example.rds.amazonaws.com'
export AWS_RDS_PORT='5432'
export AWS_RDS_USERNAME='postgres'
export AWS_RDS_PASSWORD='change_me'
export AWS_RDS_DB_NAME='microservice'
```
4. Run the helper script:
```bash theme={null}
python3 helper_script.py
```
If the script runs successfully it typically returns to the command prompt without additional output — this indicates the script executed and committed changes to the database.
Always prefer using environment variables for credentials (or a secrets manager). Avoid hardcoding passwords or database hosts directly in scripts.
Verify the inserted rows with DBeaver
To confirm the table and data:
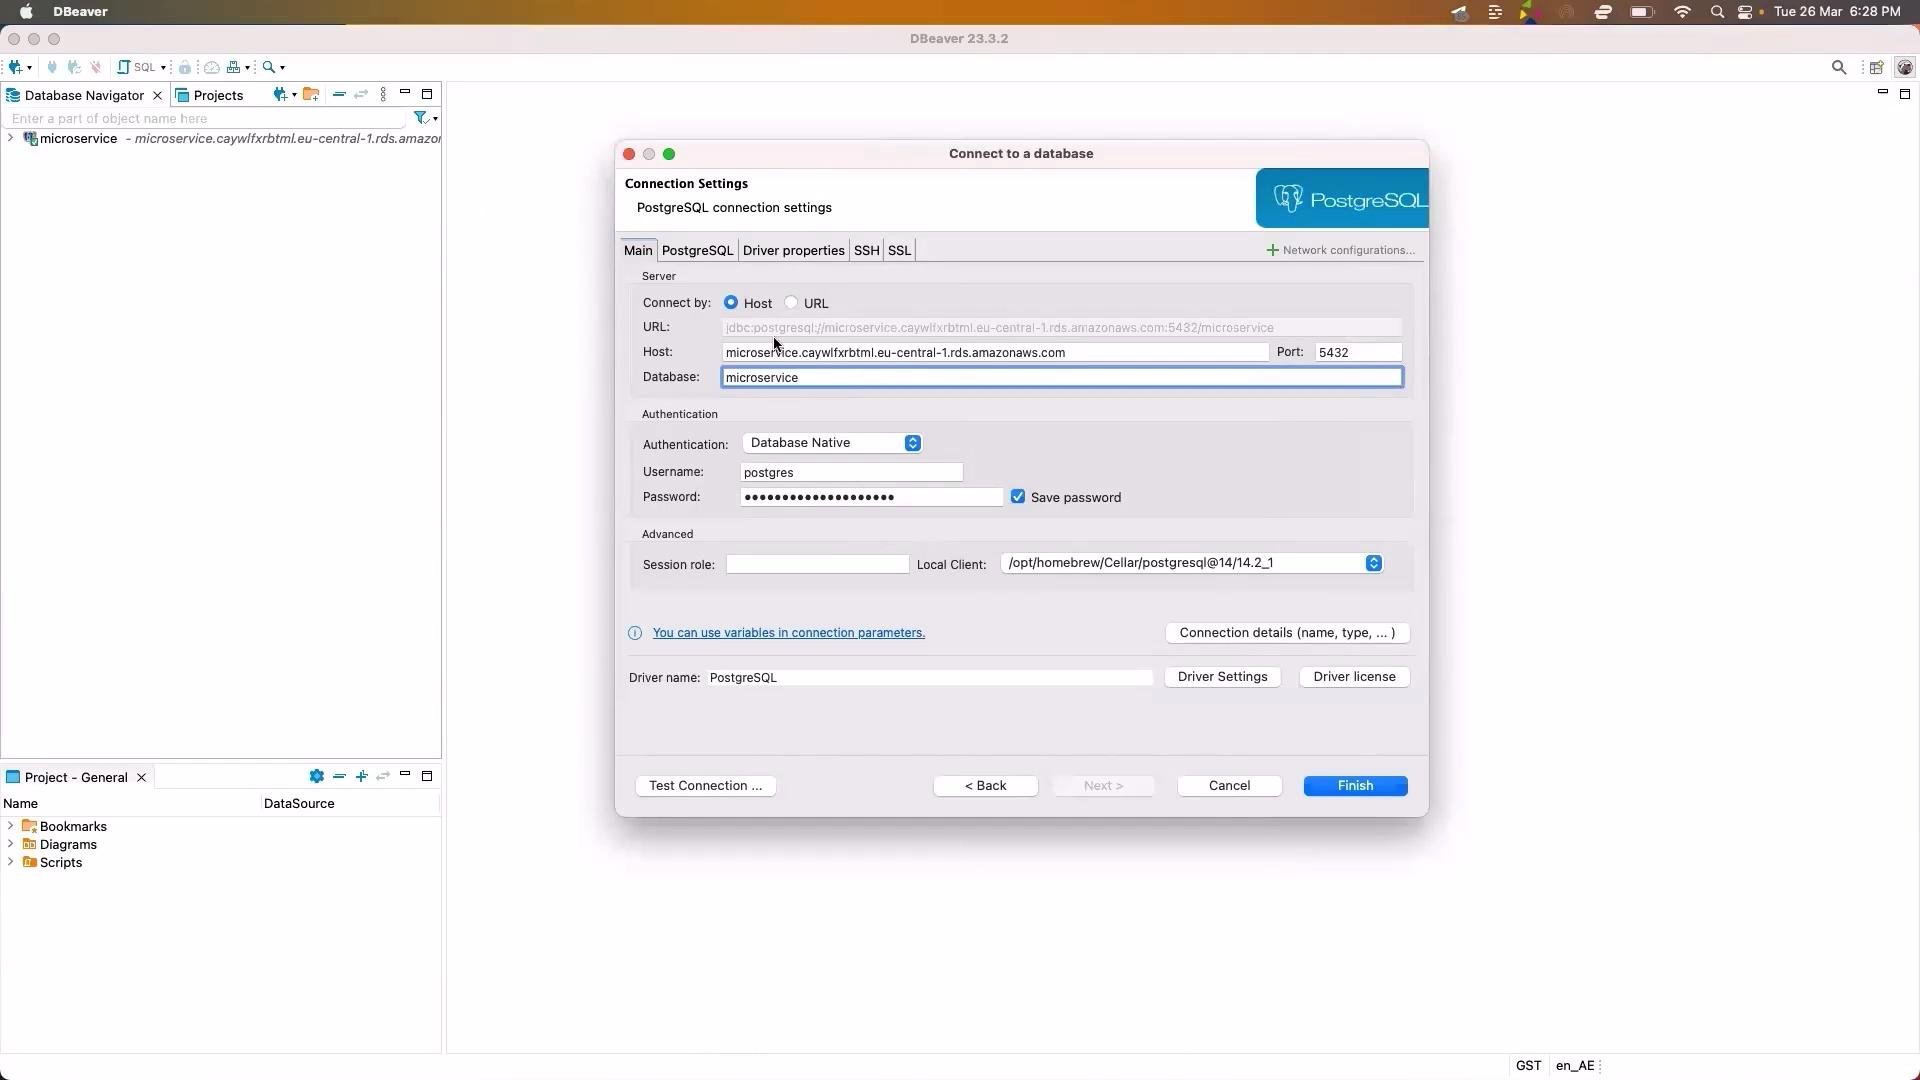
* Open DBeaver and create a new PostgreSQL connection.
* Provide host, port, username, password, and database name (for example `microservice`).
* Expand the connection: Databases → microservice → Schemas → public → Tables to find the `users` table.
Prerequisites
* AWS Cloud9 (or any machine with terminal access to your repo).
* Python 3 and `pip3`.
* `psycopg2` installed (or `psycopg2-binary`).
* Network access to your PostgreSQL instance (RDS endpoint or other host).
* A SQL client like DBeaver for verification.
Helper script (save as `helper_script.py`)
Below is a clean, robust helper script that:
* reads DB connection settings from environment variables,
* creates the `users` table if it doesn't exist,
* inserts dummy users using `ON CONFLICT DO NOTHING` to avoid duplicate-key errors.
```python theme={null}
# helper_script.py
import os
import psycopg2
# Read DB connection info from environment variables, with optional fallbacks.
DB_HOST = os.environ.get('AWS_RDS_HOST', 'your-rds-host.example.rds.amazonaws.com')
DB_PORT = os.environ.get('AWS_RDS_PORT', '5432')
DB_USER = os.environ.get('AWS_RDS_USERNAME', 'postgres')
DB_PASSWORD = os.environ.get('AWS_RDS_PASSWORD', 'change_me')
DB_NAME = os.environ.get('AWS_RDS_DB_NAME', 'microservice')
# Connect to the PostgreSQL database
conn = psycopg2.connect(
host=DB_HOST,
port=DB_PORT,
dbname=DB_NAME,
user=DB_USER,
password=DB_PASSWORD
)
cur = conn.cursor()
# Create the users table if it does not exist
cur.execute('''
CREATE TABLE IF NOT EXISTS users (
id SERIAL PRIMARY KEY,
name VARCHAR(100) NOT NULL,
email VARCHAR(100) UNIQUE NOT NULL,
password VARCHAR(100) NOT NULL
);
''')
# Dummy users to insert
dummy_users = [
('Alice_dummy', 'alice_dummy@example.com', 'password123_dummy'),
('Bob_dummy', 'bob_dummy@example.com', 'password456_dummy'),
('Charlie_dummy', 'charlie_dummy@example.com', 'password789_dummy')
]
# Insert dummy users, ignoring duplicates on email
for user in dummy_users:
cur.execute('''
INSERT INTO users (name, email, password)
VALUES (%s, %s, %s)
ON CONFLICT (email) DO NOTHING
''', user)
conn.commit()
cur.close()
conn.close()
```
Environment variables reference
| Environment variable | Purpose | Example |
| -------------------- | --------------------------------- | ----------------------------------------- |
| `AWS_RDS_HOST` | Database hostname or RDS endpoint | `your-rds-host.example.rds.amazonaws.com` |
| `AWS_RDS_PORT` | Database port | `5432` |
| `AWS_RDS_USERNAME` | Database user | `postgres` |
| `AWS_RDS_PASSWORD` | Database password | `change_me` |
| `AWS_RDS_DB_NAME` | Database name | `microservice` |
Important: use environment variables or a secrets manager for credentials; avoid hardcoding secrets.
Clone and run from Cloud9 (or any terminal in the repo)
1. Clone the CodeCommit repository into your environment (HTTPS example):
```bash theme={null}
git clone https://git-codecommit.eu-central-1.amazonaws.com/v1/repos/login-page-microservice
```
You should see output similar to:
```bash theme={null}
Cloning into 'login-page-microservice'...
remote: Counting objects: 10, done.
Unpacking objects: 100% (10/10), done.
```
2. If `psycopg2` is missing, install dependencies from `requirements.txt`:
```bash theme={null}
pip3 install -r requirements.txt
```
Common error before installing dependencies:
```bash theme={null}
Traceback (most recent call last):
File "helper_script.py", line 1, in
import psycopg2
ModuleNotFoundError: No module named 'psycopg2'
```
3. Ensure environment variables are set (example Bash):
```bash theme={null}
export AWS_RDS_HOST='your-rds-host.example.rds.amazonaws.com'
export AWS_RDS_PORT='5432'
export AWS_RDS_USERNAME='postgres'
export AWS_RDS_PASSWORD='change_me'
export AWS_RDS_DB_NAME='microservice'
```
4. Run the helper script:
```bash theme={null}
python3 helper_script.py
```
If the script runs successfully it typically returns to the command prompt without additional output — this indicates the script executed and committed changes to the database.
Always prefer using environment variables for credentials (or a secrets manager). Avoid hardcoding passwords or database hosts directly in scripts.
Verify the inserted rows with DBeaver
To confirm the table and data:
* Open DBeaver and create a new PostgreSQL connection.
* Provide host, port, username, password, and database name (for example `microservice`).
* Expand the connection: Databases → microservice → Schemas → public → Tables to find the `users` table.
 Open an SQL editor against the `microservice` database and run:
```sql theme={null}
select * from users;
```
Open an SQL editor against the `microservice` database and run:
```sql theme={null}
select * from users;
```
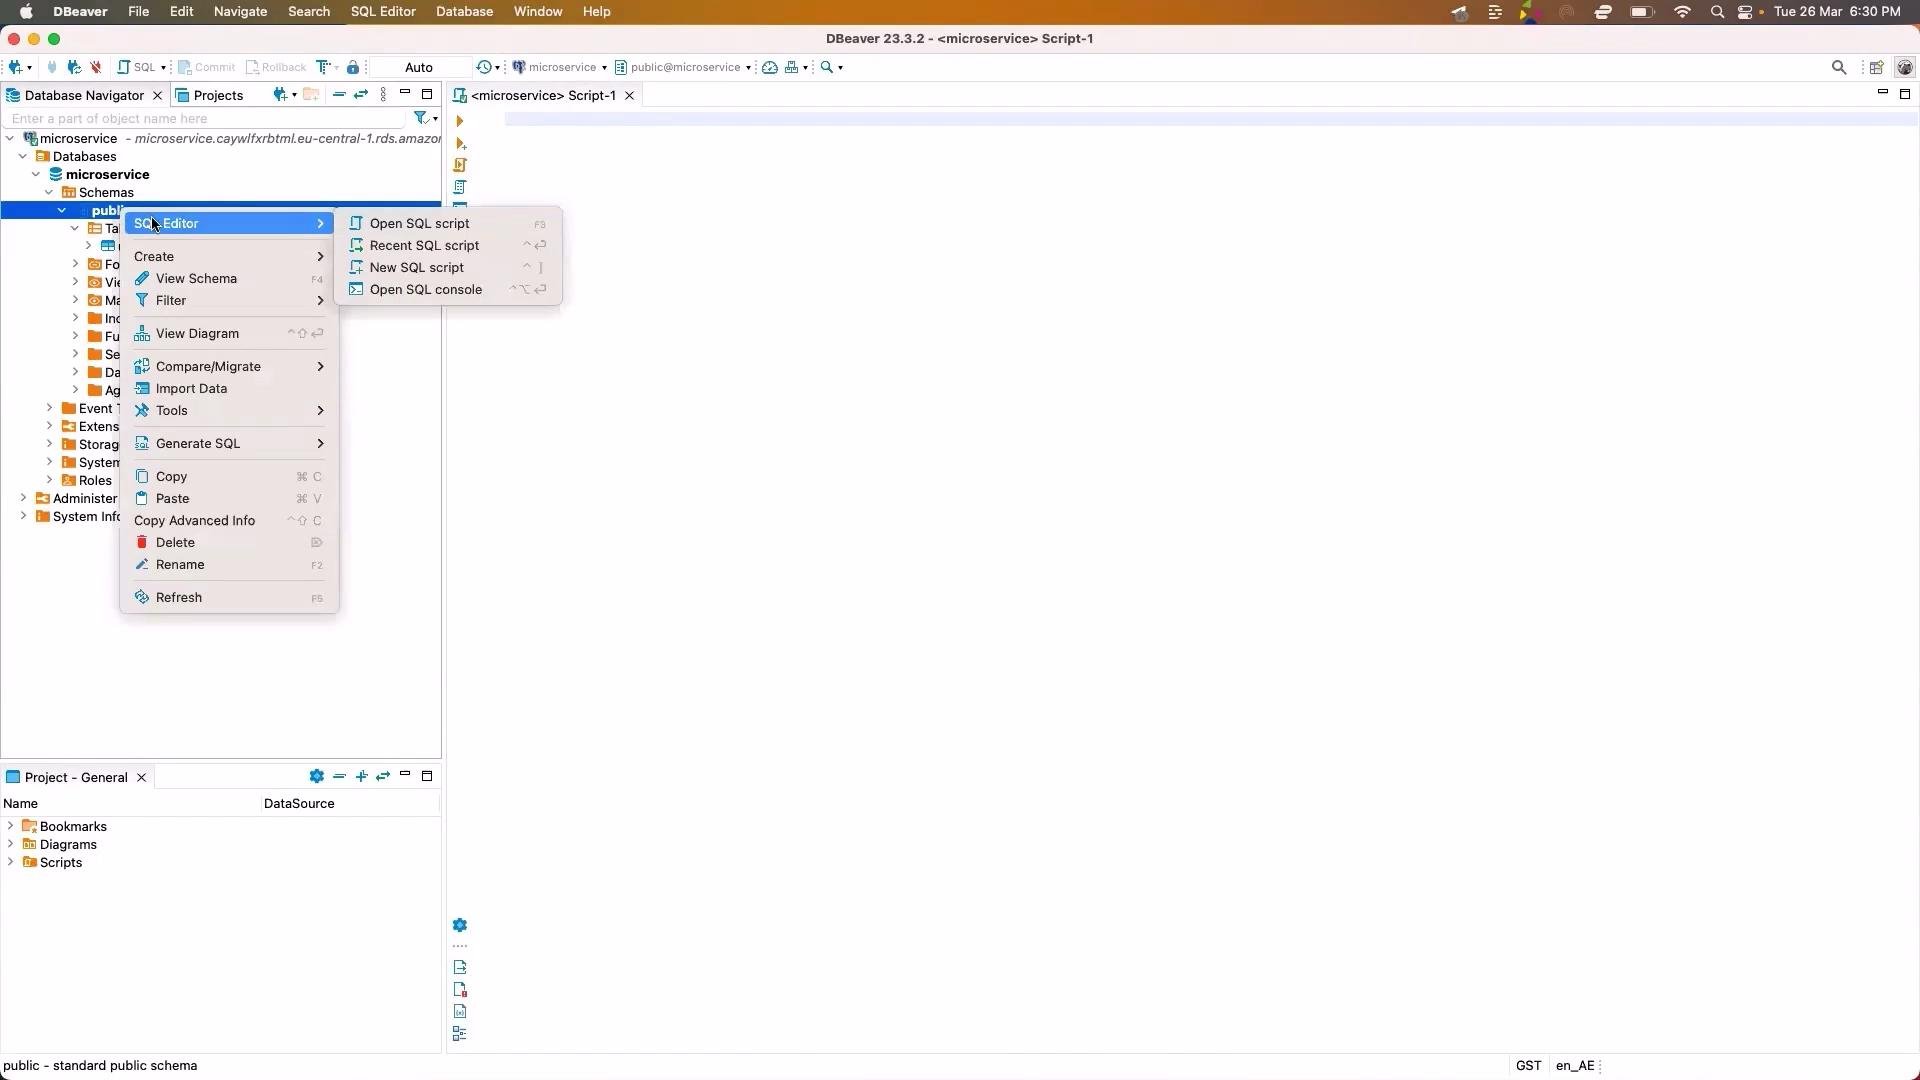 You should see the three dummy users in the result set. Use one of these accounts to log into the application for testing.
Troubleshooting: duplicate-key error
If you run a previous version of the script repeatedly without conflict handling, you may encounter a UniqueViolation on the `email` column. Example:
```text theme={null}
psycopg2.errors.UniqueViolation: duplicate key value violates unique constraint "users_email_key"
DETAIL: Key (email)=(alice_dummy@example.com) already exists.
```
If you see a unique constraint error, either update the script to upsert or use `ON CONFLICT DO NOTHING` (as shown above), or clear the table before reinserting data if that is acceptable for your workflow.
Next steps
* Review how the login microservice queries the `users` table and integrates authentication.
* Promote the initialization script into a deployment automation step if you want repeatable environment setups (consider migrations tools such as Flyway or Alembic for production schema changes).
Links and references
* [AWS CodeCommit documentation](https://docs.aws.amazon.com/codecommit/)
* [AWS Cloud9](https://aws.amazon.com/cloud9/)
* [psycopg2 on PyPI](https://pypi.org/project/psycopg2/)
* [DBeaver](https://dbeaver.io/)
* [AWS RDS for PostgreSQL](https://docs.aws.amazon.com/AmazonRDS/latest/UserGuide/CHAP_PostgreSQL.html)
You should see the three dummy users in the result set. Use one of these accounts to log into the application for testing.
Troubleshooting: duplicate-key error
If you run a previous version of the script repeatedly without conflict handling, you may encounter a UniqueViolation on the `email` column. Example:
```text theme={null}
psycopg2.errors.UniqueViolation: duplicate key value violates unique constraint "users_email_key"
DETAIL: Key (email)=(alice_dummy@example.com) already exists.
```
If you see a unique constraint error, either update the script to upsert or use `ON CONFLICT DO NOTHING` (as shown above), or clear the table before reinserting data if that is acceptable for your workflow.
Next steps
* Review how the login microservice queries the `users` table and integrates authentication.
* Promote the initialization script into a deployment automation step if you want repeatable environment setups (consider migrations tools such as Flyway or Alembic for production schema changes).
Links and references
* [AWS CodeCommit documentation](https://docs.aws.amazon.com/codecommit/)
* [AWS Cloud9](https://aws.amazon.com/cloud9/)
* [psycopg2 on PyPI](https://pypi.org/project/psycopg2/)
* [DBeaver](https://dbeaver.io/)
* [AWS RDS for PostgreSQL](https://docs.aws.amazon.com/AmazonRDS/latest/UserGuide/CHAP_PostgreSQL.html)