> ## Documentation Index
> Fetch the complete documentation index at: https://notes.kodekloud.com/llms.txt
> Use this file to discover all available pages before exploring further.
# Setup CodePipeline for login application
> Guide to set up an AWS CodePipeline and CodeBuild workflow that builds, tags, and pushes a Dockerized Flask login microservice to Amazon ECR for deployment.
Welcome — this guide walks through creating an AWS CodePipeline that builds and pushes a container image for a Flask-based login microservice. You'll learn how to:
* Verify the Flask application routes are present.
* Add a Dockerfile to containerize the app.
* Add a `buildspec.yml` so CodeBuild can build and push the image to ECR.
* Create the ECR repository and configure a CodePipeline that pulls from CodeCommit and invokes CodeBuild.
This workflow assumes your source is hosted in AWS CodeCommit and that you will use AWS CodeBuild to build and push the Docker image to Amazon ECR.
Prepare the Flask application routes (app.py)
Confirm these route handlers exist in your application (for example, in `app.py`). They are the minimal routes used by this microservice:
```python theme={null}
from flask import Flask, render_template, request, redirect, url_for
app = Flask(__name__)
@app.route('/login')
def login():
return render_template('login.html')
@app.route('/login_post', methods=['POST'])
def login_post():
email = request.form['email']
password = request.form['password']
conn = get_db_connection()
cursor = conn.cursor()
cursor.execute("SELECT * FROM users WHERE email = %s AND password = %s", (email, password))
user = cursor.fetchone()
cursor.close()
conn.close()
if user:
return redirect(url_for('product'))
return redirect(url_for('login'))
@app.route('/product')
def product():
return redirect("http://35.156.49.246:5000/welcome_page")
# return "Hello, this is the product page."
if __name__ == "__main__":
app.run(debug=True, host="0.0.0.0", port=5000)
```
This example checks passwords directly in the database and may use plaintext passwords. For production, always store passwords hashed (e.g., bcrypt) and use secure authentication flows. Also validate and sanitize inputs to prevent SQL injection — use parameterized queries and an ORM when possible.
Files to add to the repository
* `Dockerfile` — containerize the Flask app.
* `buildspec.yml` — instructs CodeBuild how to build the image, authenticate to ECR, push the image, and emit `imagedefinitions.json` used by deployment stages.
* Application code (`app.py`, templates, `requirements.txt`, etc.) — already present in your repo.
Create the Dockerfile
Add a `Dockerfile` at the repository root to build the container image. A minimal example:
```dockerfile theme={null}
FROM python:3.10-slim
# Set the working directory in the container
WORKDIR /usr/src/app
# Copy the current directory contents into the container at /usr/src/app
COPY . .
# Install any needed packages specified in requirements.txt
RUN pip install --no-cache-dir -r requirements.txt
# Make port 5000 available to the world outside this container
EXPOSE 5000
# Define environment variable
ENV FLASK_APP=app.py
ENV FLASK_RUN_HOST=0.0.0.0
# Run flask application
CMD ["flask", "run"]
```
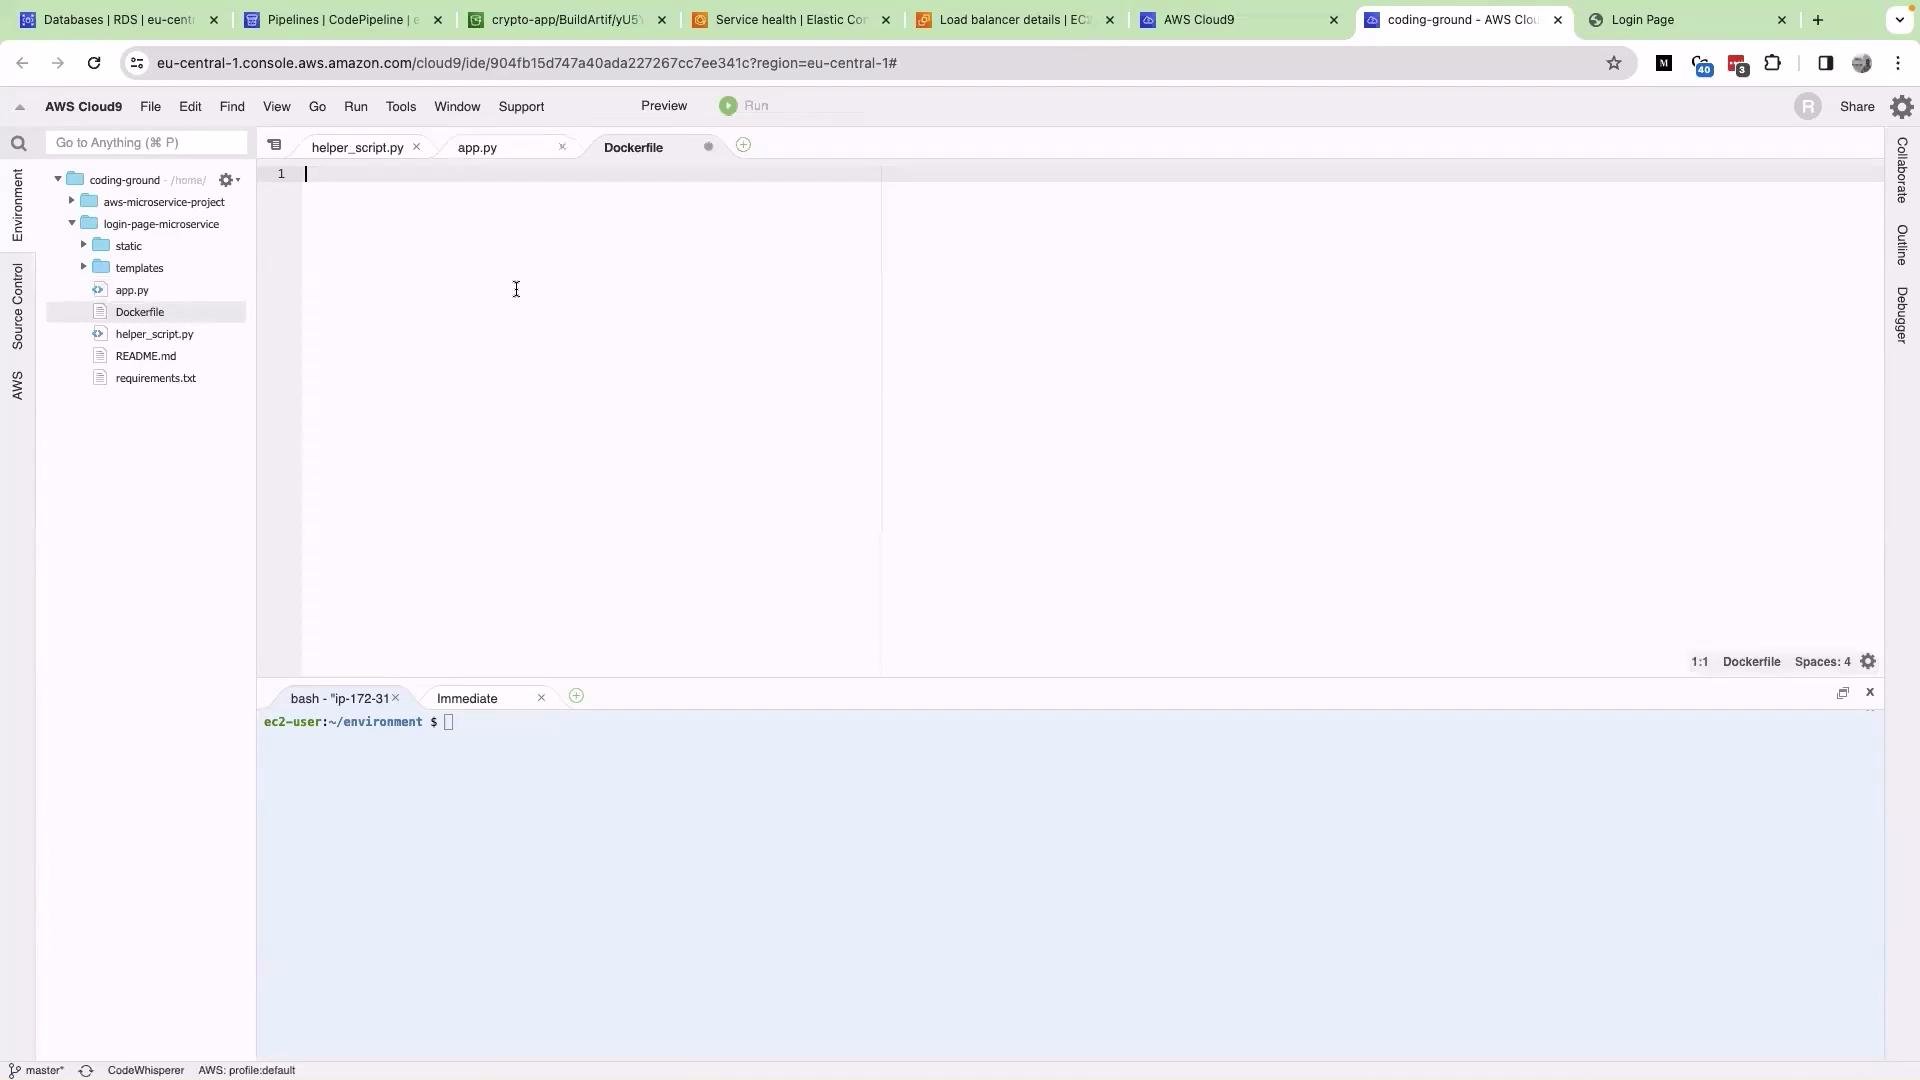 What the Dockerfile does
* Uses an official Python slim base image.
* Establishes `/usr/src/app` as the working directory.
* Copies your source into the image.
* Installs Python dependencies from `requirements.txt`.
* Exposes port `5000` and configures Flask environment variables.
* Launches the Flask app using `flask run`.
Create the buildspec.yml
Create `buildspec.yml` at the repo root. This file controls CodeBuild phases: authenticate to ECR, build and tag the image, push tags, and produce `imagedefinitions.json` for downstream deploy steps.
Note: Replace the example ECR repository URI and account ID with your own. In this example, `666234783044.dkr.ecr.eu-central-1.amazonaws.com/kodekloud-login-page` is used as a placeholder.
```yaml theme={null}
version: 0.2
phases:
install:
runtime-versions:
python: 3.8
pre_build:
commands:
- echo Logging in to Amazon ECR...
- aws --version
- aws ecr get-login-password --region $AWS_DEFAULT_REGION | docker login --username AWS --password-stdin 666234783044.dkr.ecr.eu-central-1.amazonaws.com/kodekloud-login-page
- COMMIT_HASH=$(echo $CODEBUILD_RESOLVED_SOURCE_VERSION | cut -c 1-7)
- IMAGE_TAG="$COMMIT_HASH-latest"
build:
commands:
- echo Build started on `date`
- echo Building the Docker image...
- docker build -t $REPOSITORY_URI:latest .
- docker tag $REPOSITORY_URI:latest $REPOSITORY_URI:$IMAGE_TAG
post_build:
commands:
- echo Build completed on `date`
- echo Pushing the Docker image...
- docker push $REPOSITORY_URI:latest
- docker push $REPOSITORY_URI:$IMAGE_TAG
- printf '[{"name":"kodeKloud-login-page","imageUri":"%s"}]' $REPOSITORY_URI:$IMAGE_TAG > imagedefinitions.json
artifacts:
files:
- imagedefinitions.json
```
Use `aws ecr get-login-password` (AWS CLI v2) instead of the deprecated `aws ecr get-login`. Ensure environment variables such as `AWS_DEFAULT_REGION` and `REPOSITORY_URI` are provided in the CodeBuild project settings or as build environment variables.
Environment variables used by the build
| Variable | Purpose | Example |
| ----------------------------------- | -------------------------------------------------------------- | ---------------------------------------------------------------------- |
| `REPOSITORY_URI` | ECR repository URI used for tagging and pushing images | `666234783044.dkr.ecr.eu-central-1.amazonaws.com/kodekloud-login-page` |
| `AWS_DEFAULT_REGION` | AWS region for `aws` CLI commands and login | `eu-central-1` |
| `CODEBUILD_RESOLVED_SOURCE_VERSION` | Provided by CodeBuild; used to create a short commit-based tag | (auto-provided by CodeBuild) |
Create the ECR repository
If you don't have an ECR repo yet, create one in the ECR console:
1. Open the Amazon ECR service in the AWS Console.
2. Click "Create repository".
3. Enter the repository name (for example, `kodekloud-login-page`) and create it.
4. Copy the repository URI (for example, `666234783044.dkr.ecr.eu-central-1.amazonaws.com/kodekloud-login-page`) and set it as the `REPOSITORY_URI` environment variable for your CodeBuild project.
Commit and push your changes to CodeCommit
From your Cloud9 environment or a local terminal, add the new files and push to your CodeCommit repository:
```bash theme={null}
git status
git add .
git commit -m "Add Dockerfile and buildspec.yml"
git push origin master
```
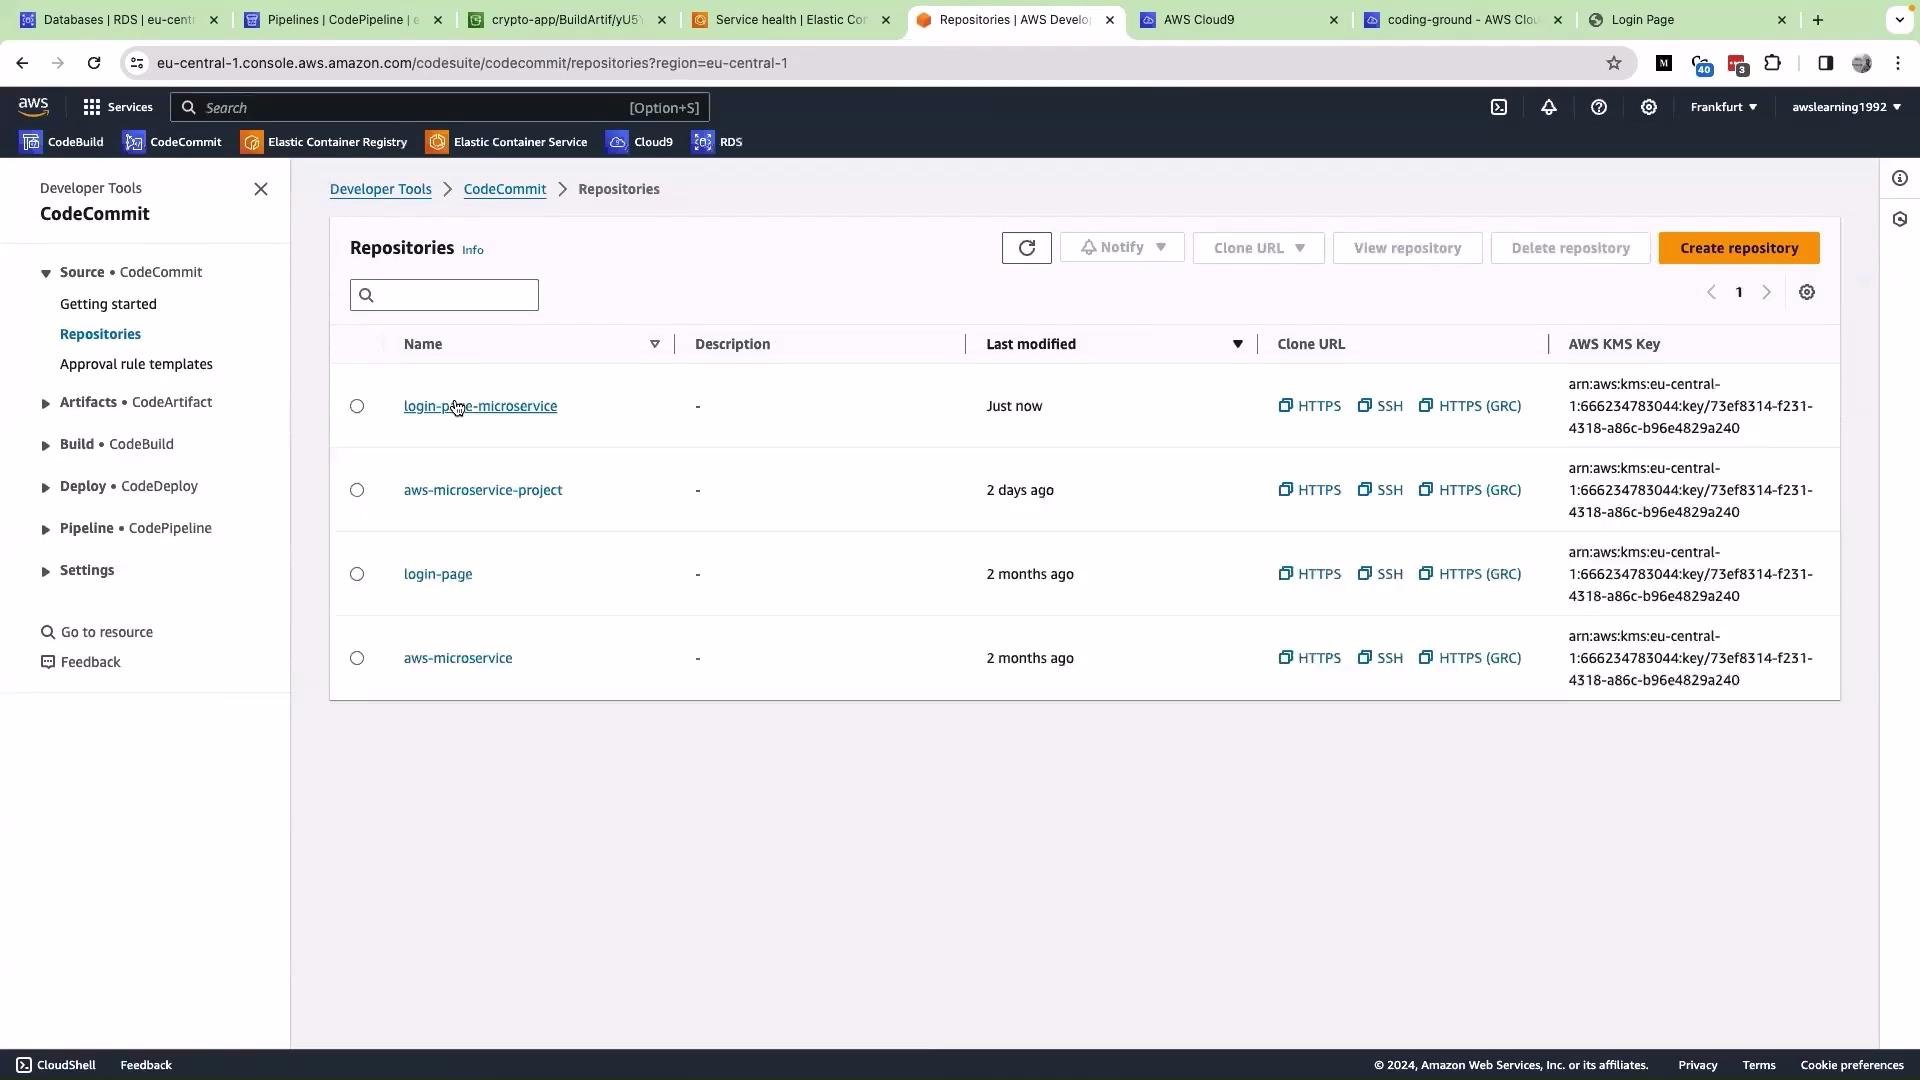
Go to CodeCommit to verify the files
Open the AWS CodeCommit console and confirm `Dockerfile` and `buildspec.yml` appear in the repository.
What the Dockerfile does
* Uses an official Python slim base image.
* Establishes `/usr/src/app` as the working directory.
* Copies your source into the image.
* Installs Python dependencies from `requirements.txt`.
* Exposes port `5000` and configures Flask environment variables.
* Launches the Flask app using `flask run`.
Create the buildspec.yml
Create `buildspec.yml` at the repo root. This file controls CodeBuild phases: authenticate to ECR, build and tag the image, push tags, and produce `imagedefinitions.json` for downstream deploy steps.
Note: Replace the example ECR repository URI and account ID with your own. In this example, `666234783044.dkr.ecr.eu-central-1.amazonaws.com/kodekloud-login-page` is used as a placeholder.
```yaml theme={null}
version: 0.2
phases:
install:
runtime-versions:
python: 3.8
pre_build:
commands:
- echo Logging in to Amazon ECR...
- aws --version
- aws ecr get-login-password --region $AWS_DEFAULT_REGION | docker login --username AWS --password-stdin 666234783044.dkr.ecr.eu-central-1.amazonaws.com/kodekloud-login-page
- COMMIT_HASH=$(echo $CODEBUILD_RESOLVED_SOURCE_VERSION | cut -c 1-7)
- IMAGE_TAG="$COMMIT_HASH-latest"
build:
commands:
- echo Build started on `date`
- echo Building the Docker image...
- docker build -t $REPOSITORY_URI:latest .
- docker tag $REPOSITORY_URI:latest $REPOSITORY_URI:$IMAGE_TAG
post_build:
commands:
- echo Build completed on `date`
- echo Pushing the Docker image...
- docker push $REPOSITORY_URI:latest
- docker push $REPOSITORY_URI:$IMAGE_TAG
- printf '[{"name":"kodeKloud-login-page","imageUri":"%s"}]' $REPOSITORY_URI:$IMAGE_TAG > imagedefinitions.json
artifacts:
files:
- imagedefinitions.json
```
Use `aws ecr get-login-password` (AWS CLI v2) instead of the deprecated `aws ecr get-login`. Ensure environment variables such as `AWS_DEFAULT_REGION` and `REPOSITORY_URI` are provided in the CodeBuild project settings or as build environment variables.
Environment variables used by the build
| Variable | Purpose | Example |
| ----------------------------------- | -------------------------------------------------------------- | ---------------------------------------------------------------------- |
| `REPOSITORY_URI` | ECR repository URI used for tagging and pushing images | `666234783044.dkr.ecr.eu-central-1.amazonaws.com/kodekloud-login-page` |
| `AWS_DEFAULT_REGION` | AWS region for `aws` CLI commands and login | `eu-central-1` |
| `CODEBUILD_RESOLVED_SOURCE_VERSION` | Provided by CodeBuild; used to create a short commit-based tag | (auto-provided by CodeBuild) |
Create the ECR repository
If you don't have an ECR repo yet, create one in the ECR console:
1. Open the Amazon ECR service in the AWS Console.
2. Click "Create repository".
3. Enter the repository name (for example, `kodekloud-login-page`) and create it.
4. Copy the repository URI (for example, `666234783044.dkr.ecr.eu-central-1.amazonaws.com/kodekloud-login-page`) and set it as the `REPOSITORY_URI` environment variable for your CodeBuild project.
Commit and push your changes to CodeCommit
From your Cloud9 environment or a local terminal, add the new files and push to your CodeCommit repository:
```bash theme={null}
git status
git add .
git commit -m "Add Dockerfile and buildspec.yml"
git push origin master
```
Go to CodeCommit to verify the files
Open the AWS CodeCommit console and confirm `Dockerfile` and `buildspec.yml` appear in the repository.
 Create the CodePipeline
Steps to create a simple pipeline that builds and pushes your image:
1. Open AWS CodePipeline.
2. Click "Create pipeline".
3. Provide a pipeline name such as `login-page-microservice`.
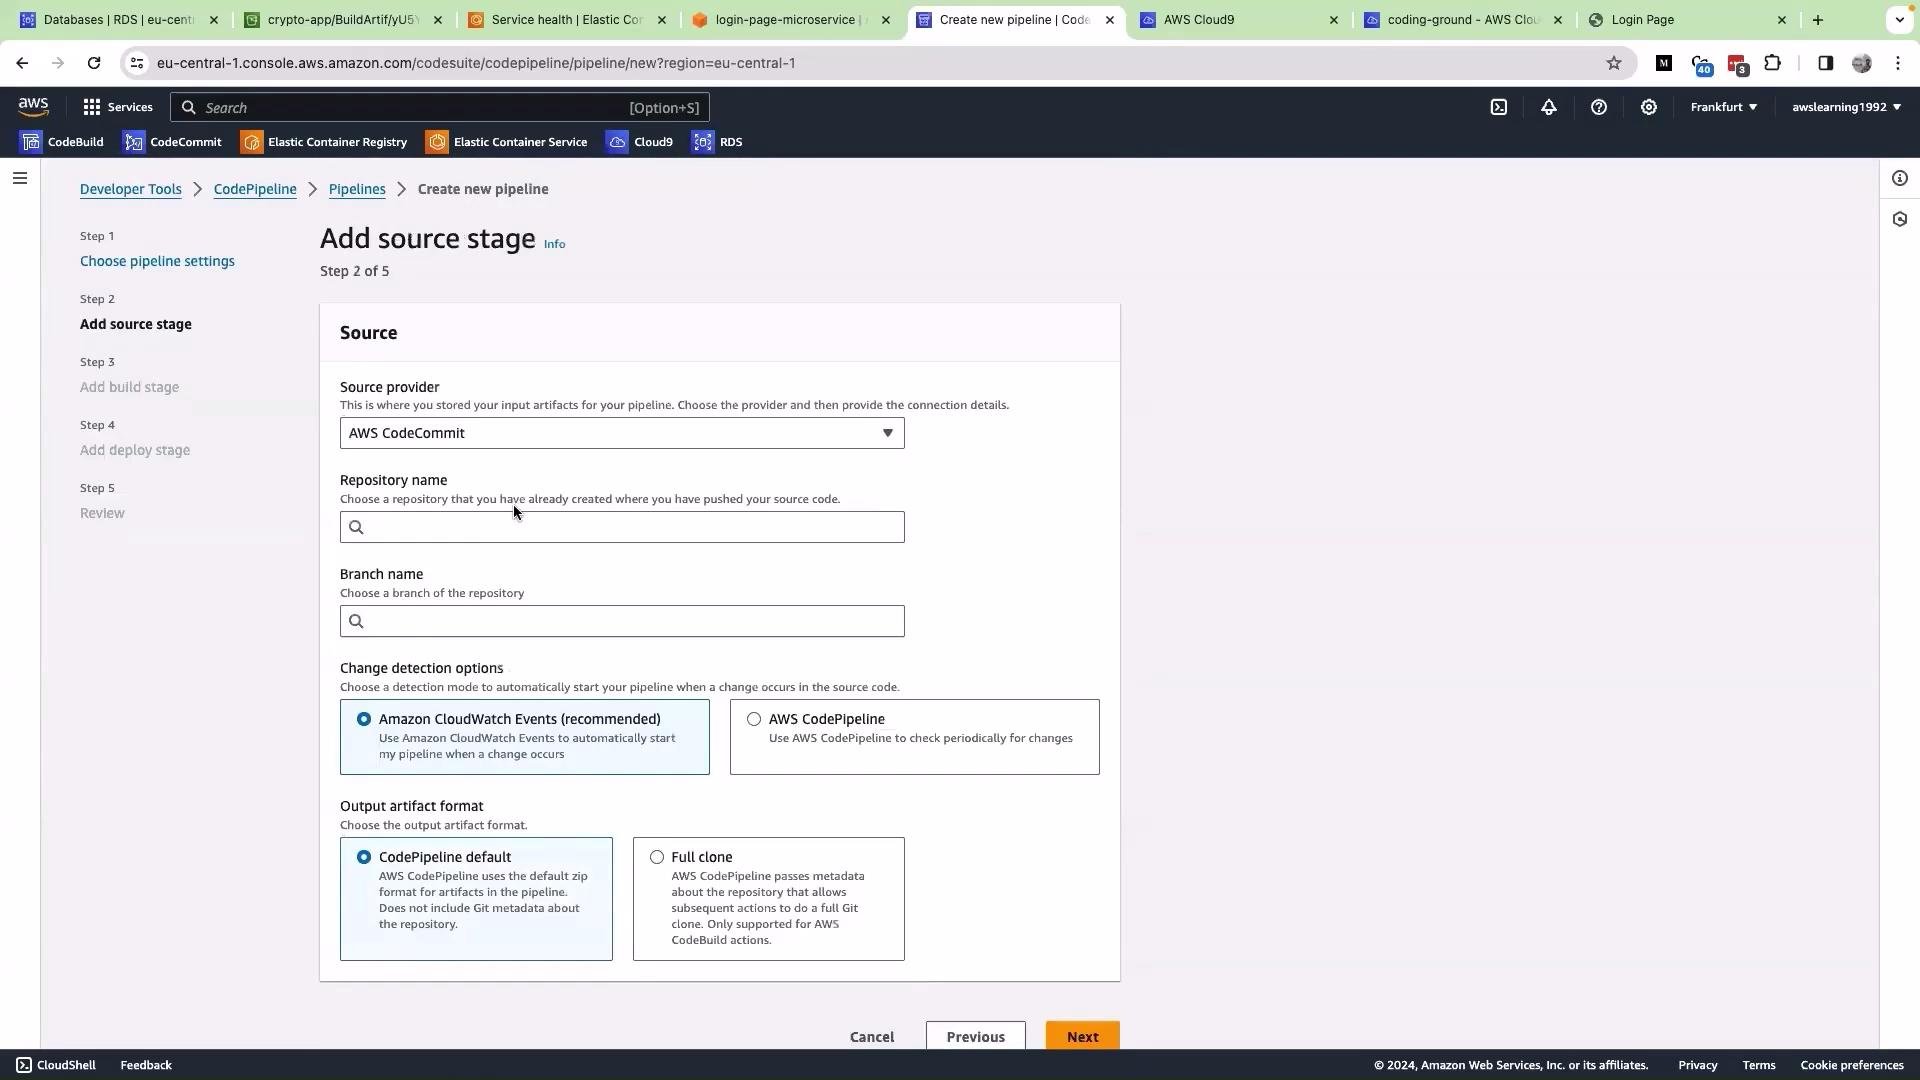
4. For Source provider choose `CodeCommit`, select your repository (e.g., `login-page-microservice`) and branch (e.g., `master`).
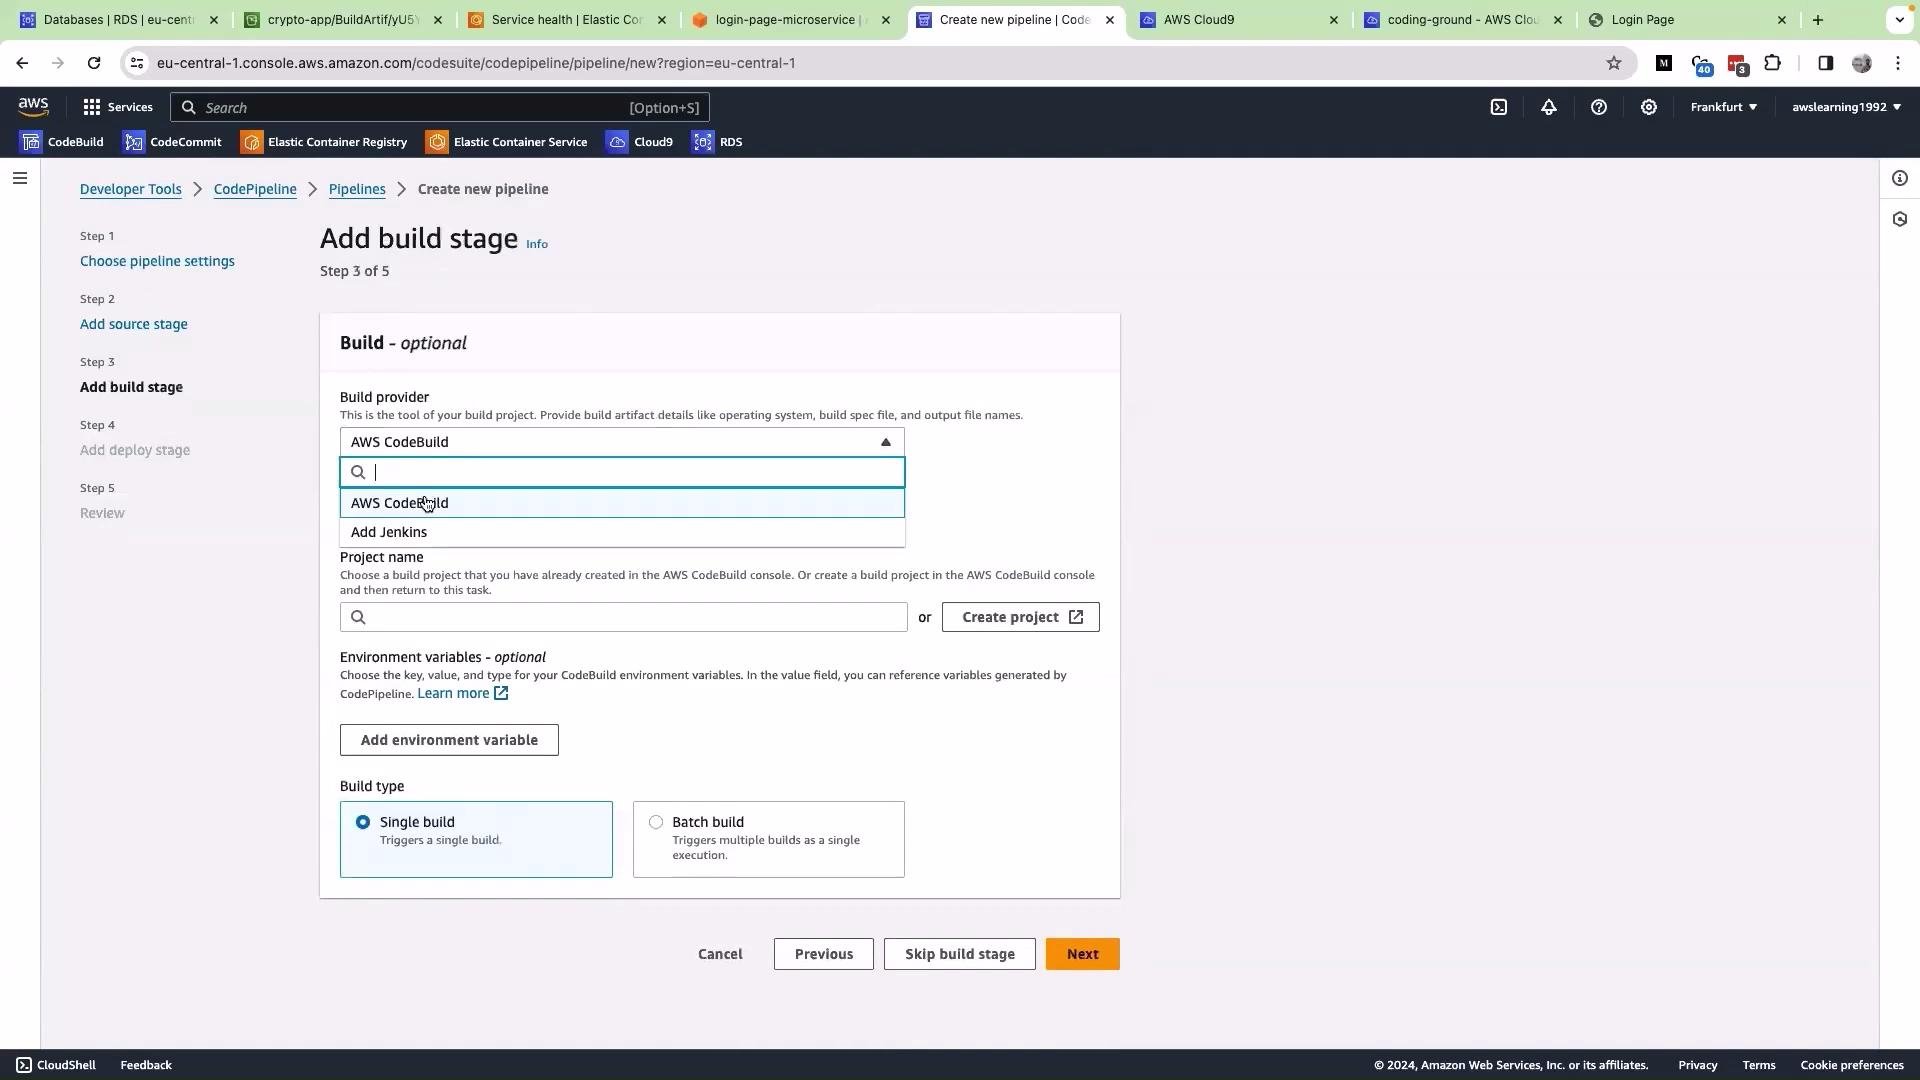
5. For Build provider choose `AWS CodeBuild` and select (or create) a CodeBuild project. Ensure the project references the repository and has `REPOSITORY_URI` and `AWS_DEFAULT_REGION` configured as environment variables.
6. (Optional) Skip the Deploy stage for now — you can add an ECS/EKS/CloudFormation/CodeDeploy stage later.
7. Create the pipeline.
When configuring the source stage, select the repository and branch. The UI appears like this:
Create the CodePipeline
Steps to create a simple pipeline that builds and pushes your image:
1. Open AWS CodePipeline.
2. Click "Create pipeline".
3. Provide a pipeline name such as `login-page-microservice`.
4. For Source provider choose `CodeCommit`, select your repository (e.g., `login-page-microservice`) and branch (e.g., `master`).
5. For Build provider choose `AWS CodeBuild` and select (or create) a CodeBuild project. Ensure the project references the repository and has `REPOSITORY_URI` and `AWS_DEFAULT_REGION` configured as environment variables.
6. (Optional) Skip the Deploy stage for now — you can add an ECS/EKS/CloudFormation/CodeDeploy stage later.
7. Create the pipeline.
When configuring the source stage, select the repository and branch. The UI appears like this:
 When creating or selecting the build stage, verify the build project and configure environment variables and the buildspec if necessary:
 Pipeline execution and build
After pipeline creation, CodePipeline will detect the source change and trigger the pipeline automatically. The sequence:
* Source stage: CodeCommit triggers when you push changes.
* Build stage: CodeBuild runs `buildspec.yml` to build, tag, and push Docker images to ECR.
* (Optional) Deploy stage: consume `imagedefinitions.json` to update tasks or manifests.
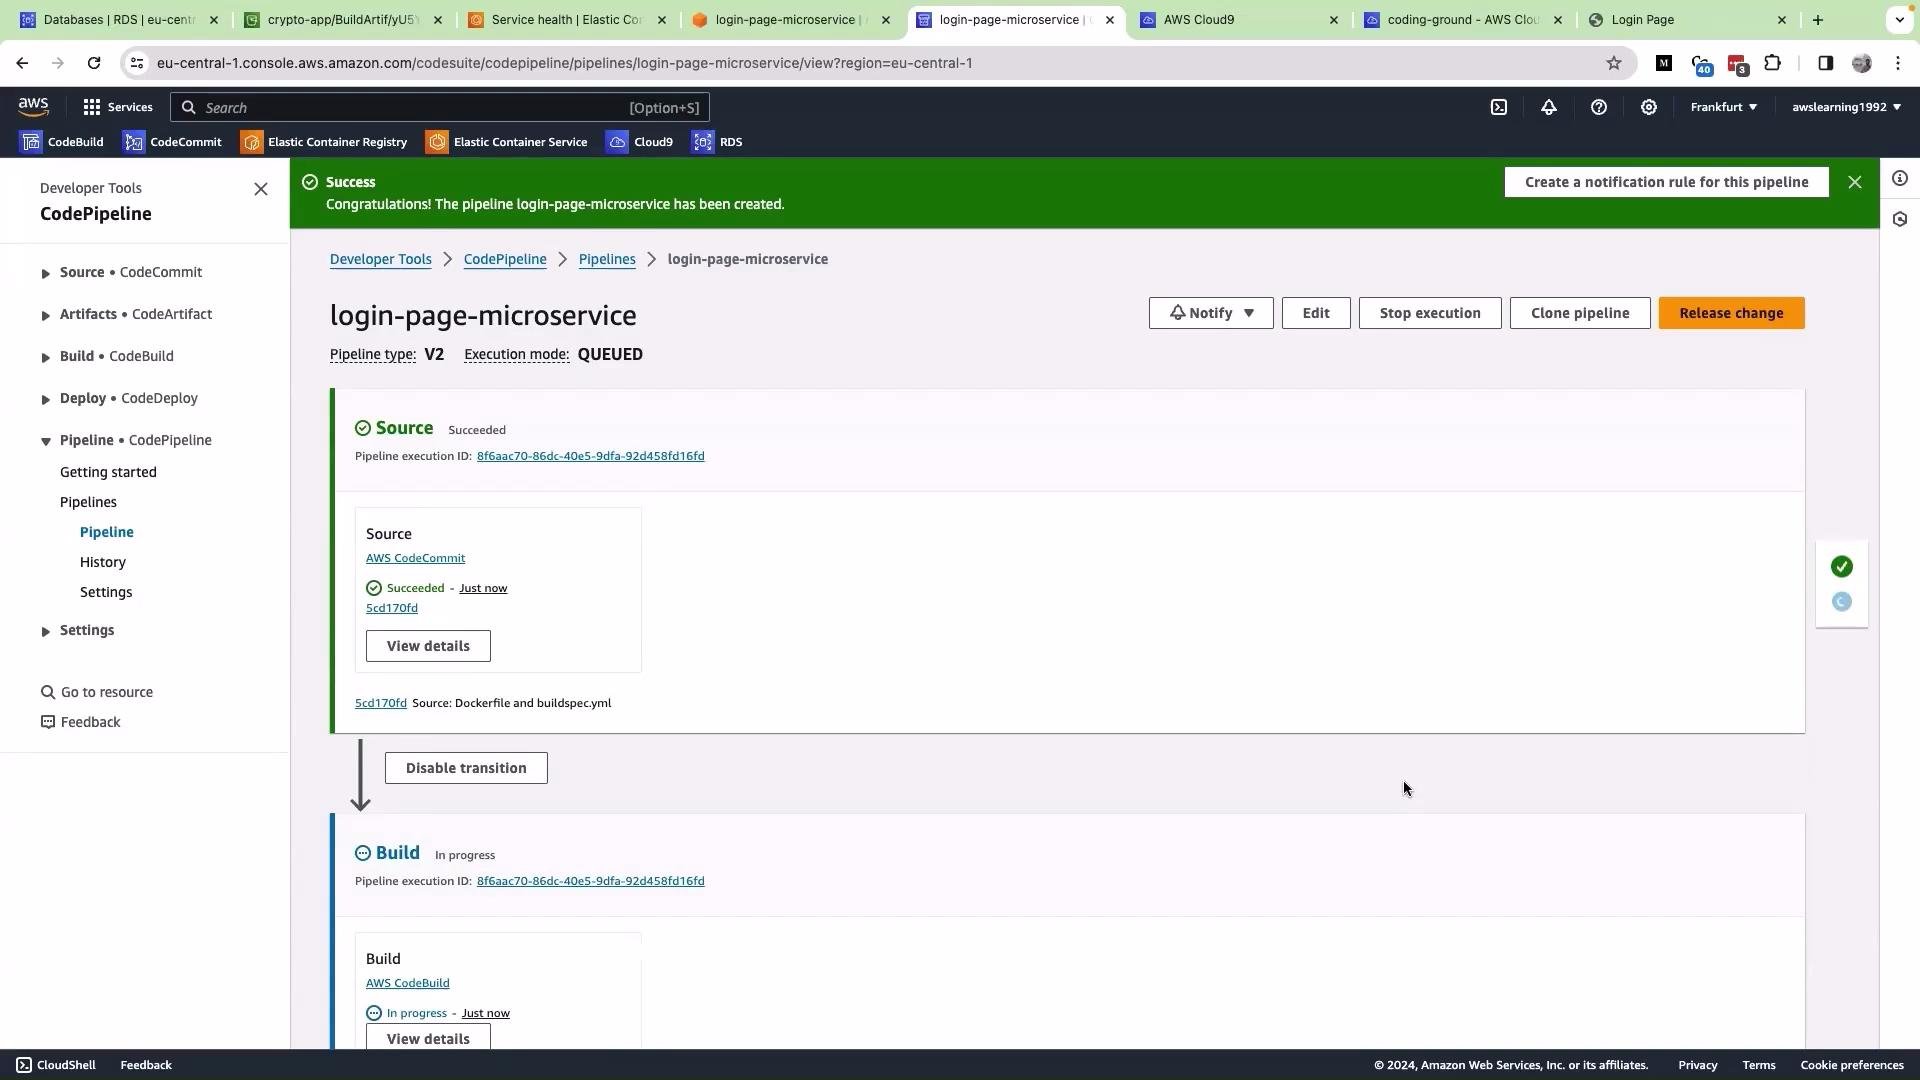
You can view pipeline progress in the console and stream CodeBuild logs to see build output and Docker push progress. The pipeline UI shows the status for each stage:
Pipeline execution and build
After pipeline creation, CodePipeline will detect the source change and trigger the pipeline automatically. The sequence:
* Source stage: CodeCommit triggers when you push changes.
* Build stage: CodeBuild runs `buildspec.yml` to build, tag, and push Docker images to ECR.
* (Optional) Deploy stage: consume `imagedefinitions.json` to update tasks or manifests.
You can view pipeline progress in the console and stream CodeBuild logs to see build output and Docker push progress. The pipeline UI shows the status for each stage:
 Validate the image in ECR
When the build completes successfully:
1. Open the Amazon ECR console.
2. Navigate to your repository and verify that the pushed image tags exist (for example, `latest` and a commit-based tag like `abc1234-latest`).
3. Use the image URI when deploying to ECS, EKS, or EC2.
Next steps and deployment options
With images available in ECR you can deploy via:
* Amazon ECS (Fargate or EC2 launch types) using a task definition and service.
* Amazon EKS by updating your Kubernetes Deployment image.
* EC2 / Docker by pulling the image on an instance and running it.
Refer to the documentation for detailed deployment steps for your chosen platform.
Links and References
* [AWS CodePipeline User Guide](https://docs.aws.amazon.com/codepipeline/latest/userguide/welcome.html)
* [AWS CodeBuild User Guide](https://docs.aws.amazon.com/codebuild/latest/userguide/welcome.html)
* [Amazon ECR User Guide](https://docs.aws.amazon.com/AmazonECR/latest/userguide/what-is-ecr.html)
* [Flask Documentation](https://flask.palletsprojects.com/)
* [AWS CLI v2 ECR Login](https://docs.aws.amazon.com/cli/latest/reference/ecr/get-login-password.html)
Validate the image in ECR
When the build completes successfully:
1. Open the Amazon ECR console.
2. Navigate to your repository and verify that the pushed image tags exist (for example, `latest` and a commit-based tag like `abc1234-latest`).
3. Use the image URI when deploying to ECS, EKS, or EC2.
Next steps and deployment options
With images available in ECR you can deploy via:
* Amazon ECS (Fargate or EC2 launch types) using a task definition and service.
* Amazon EKS by updating your Kubernetes Deployment image.
* EC2 / Docker by pulling the image on an instance and running it.
Refer to the documentation for detailed deployment steps for your chosen platform.
Links and References
* [AWS CodePipeline User Guide](https://docs.aws.amazon.com/codepipeline/latest/userguide/welcome.html)
* [AWS CodeBuild User Guide](https://docs.aws.amazon.com/codebuild/latest/userguide/welcome.html)
* [Amazon ECR User Guide](https://docs.aws.amazon.com/AmazonECR/latest/userguide/what-is-ecr.html)
* [Flask Documentation](https://flask.palletsprojects.com/)
* [AWS CLI v2 ECR Login](https://docs.aws.amazon.com/cli/latest/reference/ecr/get-login-password.html)