> ## Documentation Index
> Fetch the complete documentation index at: https://notes.kodekloud.com/llms.txt
> Use this file to discover all available pages before exploring further.
# Build and test dockerfile locally inside Cloud9
> Guide to building, running, and testing a Flask Docker image in AWS Cloud9, exposing port, adjusting EC2 security group, and committing Dockerfile to Git.
In this lesson you'll build and run a Docker image for a Python (Flask) app inside an AWS Cloud9 environment. We will:
* Build a Docker image locally inside the Cloud9 EC2 instance.
* Run the container and map its port to the EC2 instance.
* Open the EC2 security group so you can access the app from your browser.
* Commit the Dockerfile and related changes back to your Git repository.
Docker CLI is already available in the Cloud9 environment. Follow the steps below.
## Dockerfile for the Flask app
This Dockerfile uses the official Python 3.10 slim image, installs dependencies from `requirements.txt`, exposes port 5000, and runs the Flask development server.
```dockerfile theme={null}
# Use an official Python runtime as a parent image
FROM python:3.10-slim
# Set the working directory in the container
WORKDIR /usr/src/app
# Copy the current directory contents into the container at /usr/src/app
COPY . .
# Install any needed packages specified in requirements.txt
RUN pip install --no-cache-dir -r requirements.txt
# Make port 5000 available to the world outside this container
EXPOSE 5000
# Define environment variables for Flask
ENV FLASK_APP=app.py
ENV FLASK_RUN_HOST=0.0.0.0
# Run the Flask development server
CMD ["flask", "run"]
```
## Build the Docker image
Build the image locally and tag it (example tag: `my-app`):
```bash theme={null}
docker build -t my-app .
```
Sample (trimmed) build output:
```bash theme={null}
$ docker build -t my-app .
[+] Building 2.6 (4/8)
=> [internal] load build definition from Dockerfile
=> => transferring dockerfile: 638B
=> [internal] load .dockerignore
=> => transferring context: 2B
=> [internal] load metadata for docker.io/library/python:3.10-slim
=> CACHED [1/4] FROM docker.io/library/python:3.10-slim
=> CACHED [2/4] RUN pip install --no-cache-dir -r requirements.txt
=> CACHED [3/4] COPY . .
=> CACHED [4/4] CMD ["flask", "run"]
=> exporting to image
=> => naming to docker.io/library/my-app
```
After the build completes, the image resides on the EC2 instance backing Cloud9.
## Run the container
Start the container and map container port 5000 to the EC2 instance port 5000:
```bash theme={null}
docker run -p 5000:5000 my-app
```
Sample runtime output (Flask development server):
```bash theme={null}
* Serving Flask app 'app.py' (lazy loading)
* Environment: production
WARNING: This is a development server. Do not use it in a production deployment.
* Debug mode: off
* Running on all addresses (0.0.0.0)
* Running on http://127.0.0.1:5000/ (Press CTRL+C to quit)
* Running on http://172.17.0.2:5000/ (Press CTRL+C to quit)
172.17.0.1 - - [17/Feb/2024 12:15:15] "GET / HTTP/1.1" 200 -
172.17.0.1 - - [17/Feb/2024 12:15:16] "GET /favicon.ico HTTP/1.1" 404 -
```
Do not use Flask's built-in development server in production. For external deployments, use a production-ready WSGI server such as Gunicorn or uWSGI (for example, `gunicorn -w 4 app:app`).
## Make the app reachable from your browser
Cloud9 runs on an EC2 instance. To access the containerized app from your browser:
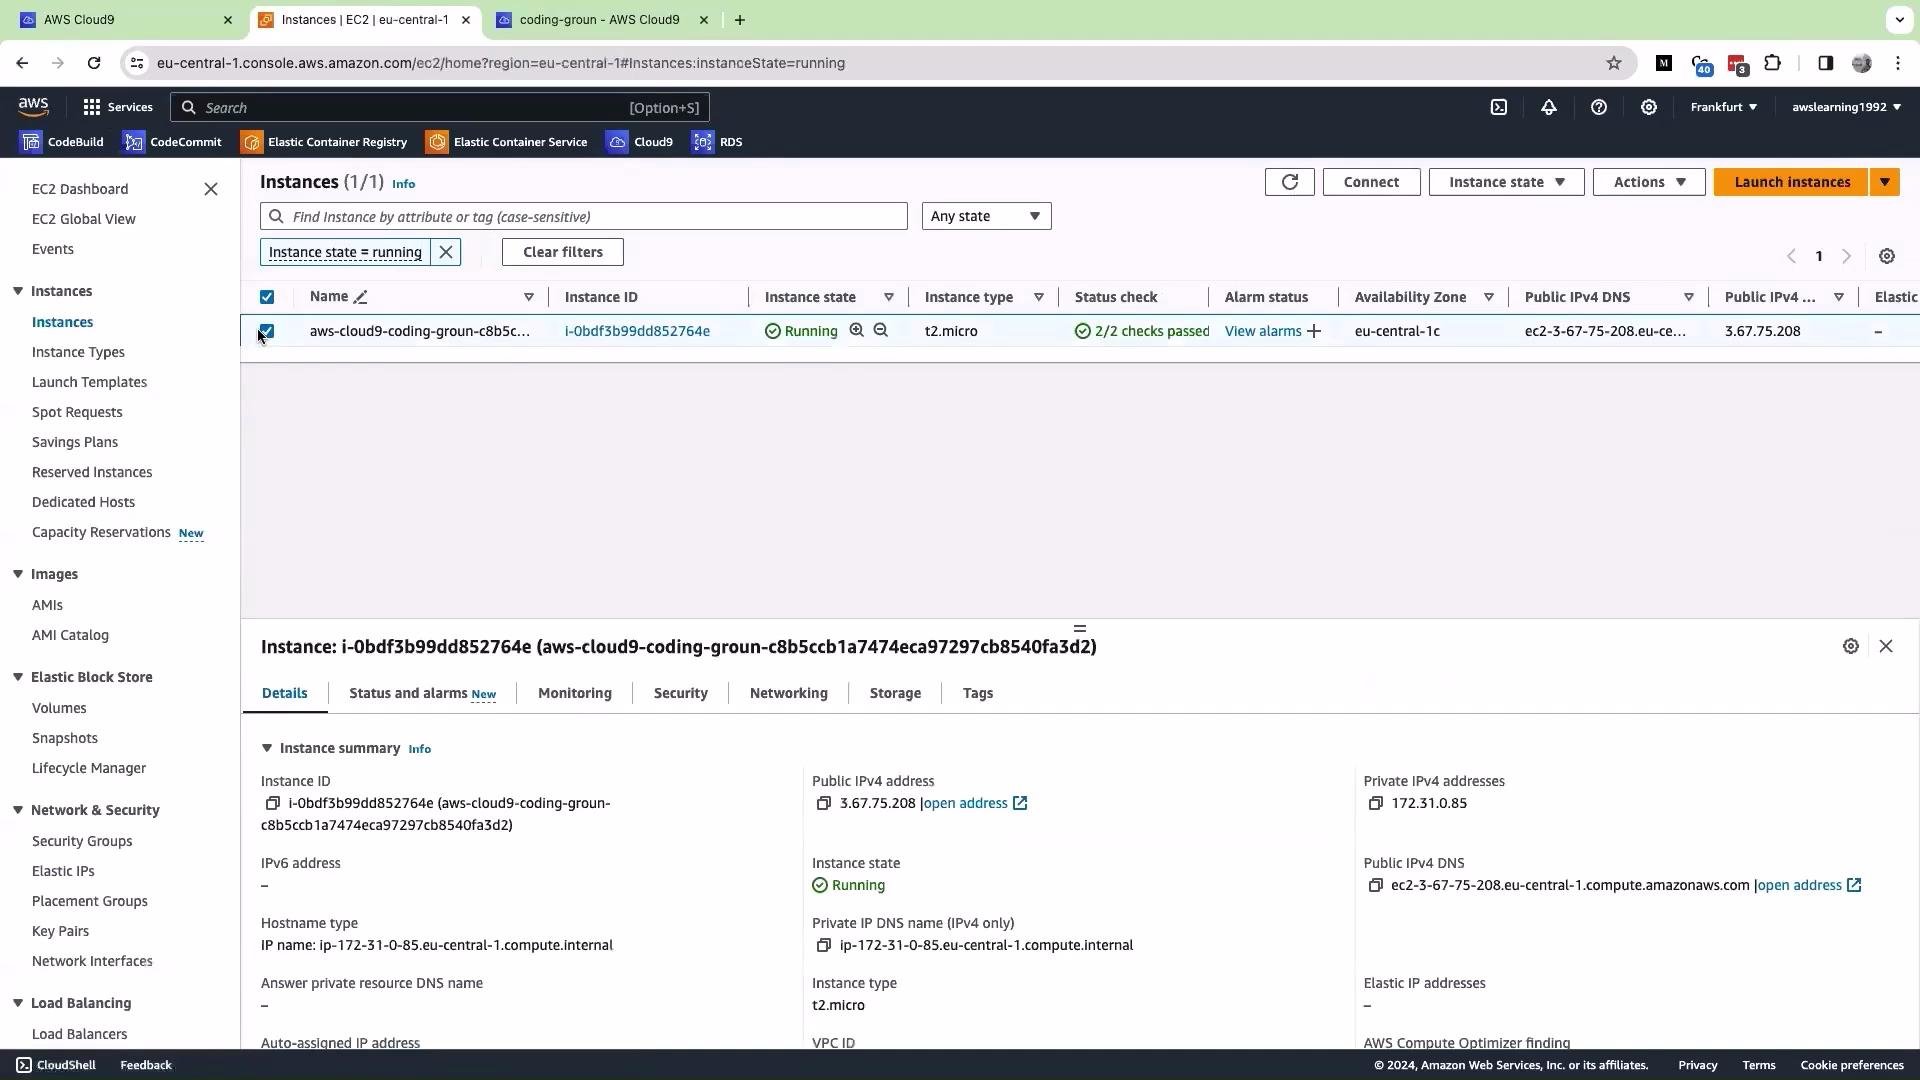
1. Find the EC2 instance that backs your Cloud9 environment and open its instance details.
2. If port 5000 is not allowed in the instance's security group, add an inbound rule for TCP port 5000 (or restrict access to your IP).
 Edit the security group inbound rules to add Custom TCP port 5000, then save the changes.
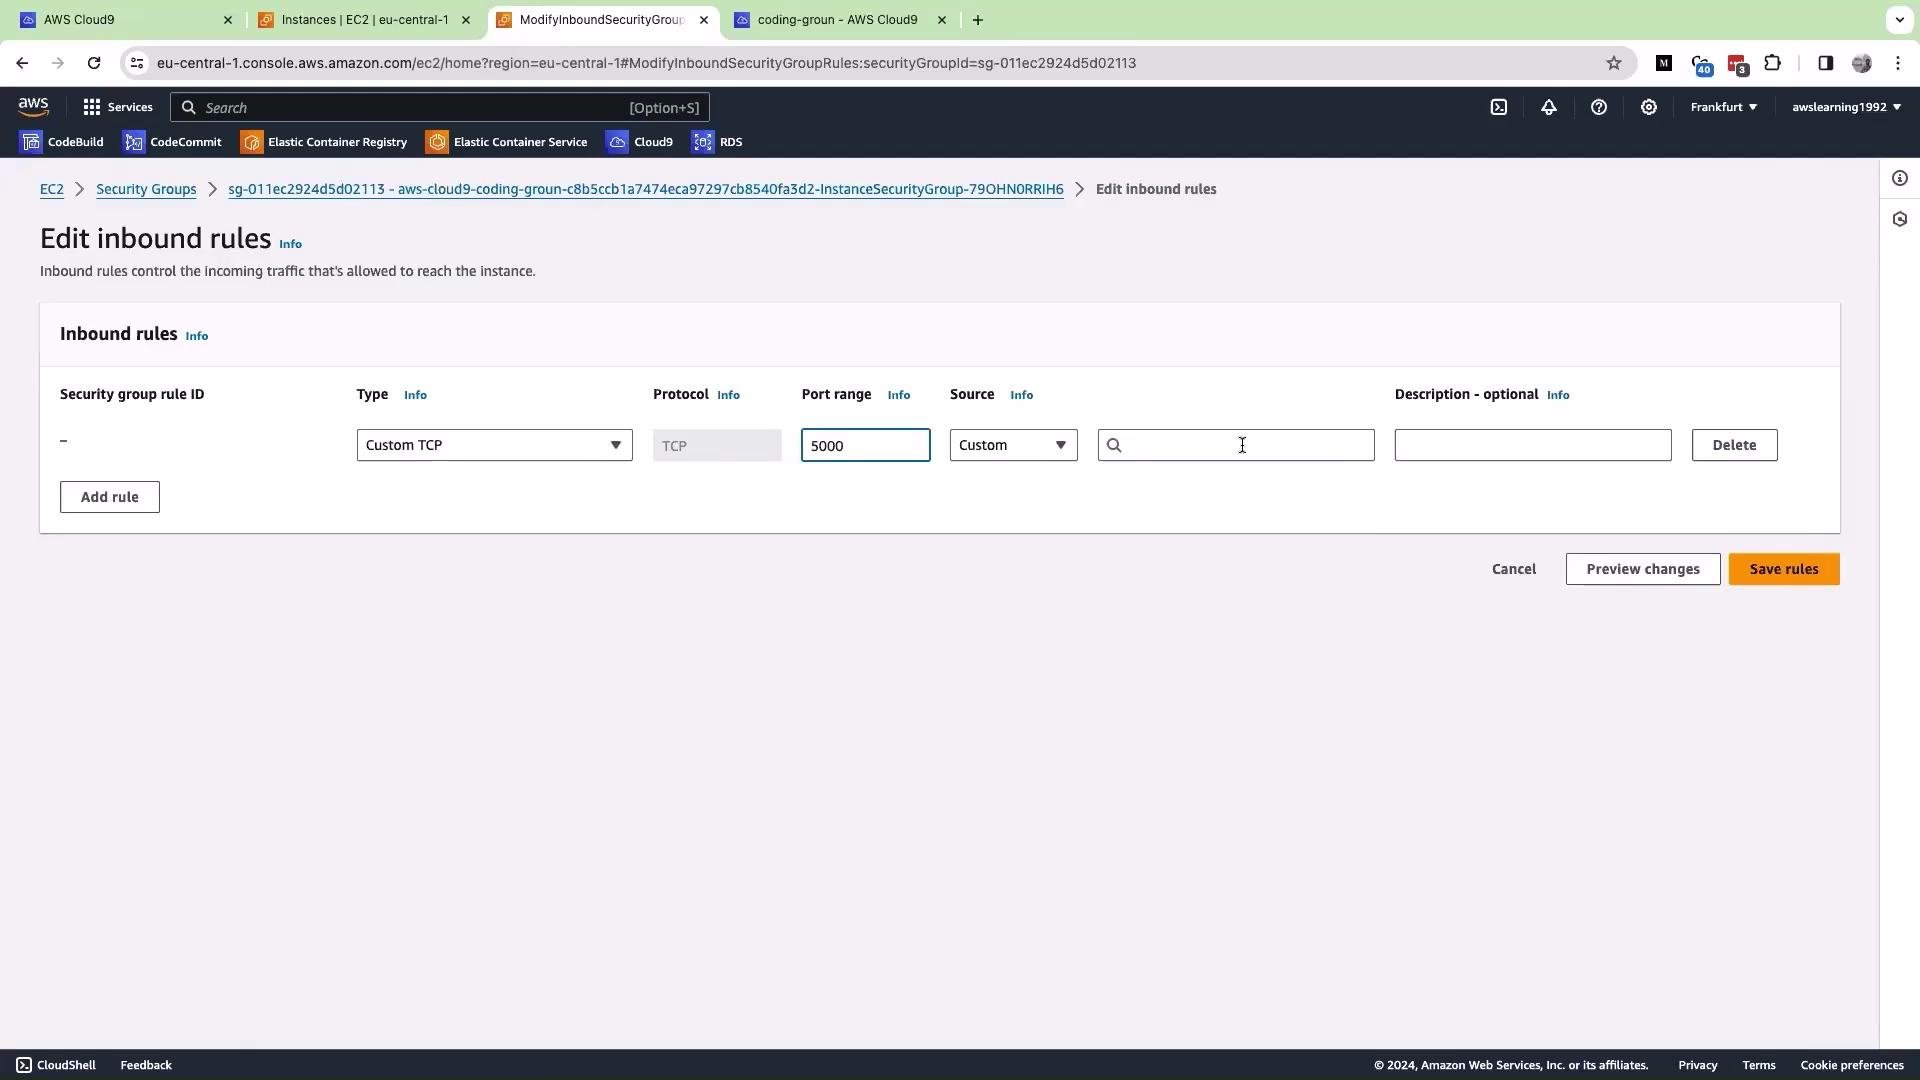 Opening ports to the public internet increases attack surface. Prefer restricting inbound access to a specific IP range (your workstation IP) when adding port 5000 to the security group.
After the security group change, copy the EC2 public IPv4 address and open `http://:5000` in your browser. The app should load and behave like a local run.
Example flow inside the sample app:
* Log in using the sample credentials.
* Browse the product page, place an order, submit order details, and confirm the order — the shipped/confirmation flow is implemented by the app.
## Default credentials and sample Flask routes
The sample app implements a simple login and order flow with these default credentials:
```python theme={null}
from flask import Flask, render_template, request, redirect, url_for
app = Flask(__name__)
# Default credentials
DEFAULT_USERNAME = "admin"
DEFAULT_PASSWORD = "password123"
@app.route('/', methods=['GET', 'POST'])
def login():
error = None
if request.method == 'POST':
username = request.form.get('username')
password = request.form.get('password')
# Check if provided credentials match the default ones
if username == DEFAULT_USERNAME and password == DEFAULT_PASSWORD:
return redirect(url_for('welcome'))
else:
error = 'Invalid Credentials. Please try again.'
return render_template('login.html', error=error)
@app.route('/welcomepage')
def welcome():
return render_template('product.html')
@app.route('/place_order', methods=['POST'])
def place_order():
product_id = request.form.get('product')
# Render order form for product (example)
return render_template('order_form.html', product_id=product_id)
@app.route('/submit_order', methods=['POST'])
def submit_order():
product_id = request.form.get('product_id')
name = request.form.get('name')
address = request.form.get('address')
quantity = request.form.get('quantity')
# Here you would process the order, e.g., save it to a database
return render_template('order_confirmation.html', product_id=product_id, name=name)
```
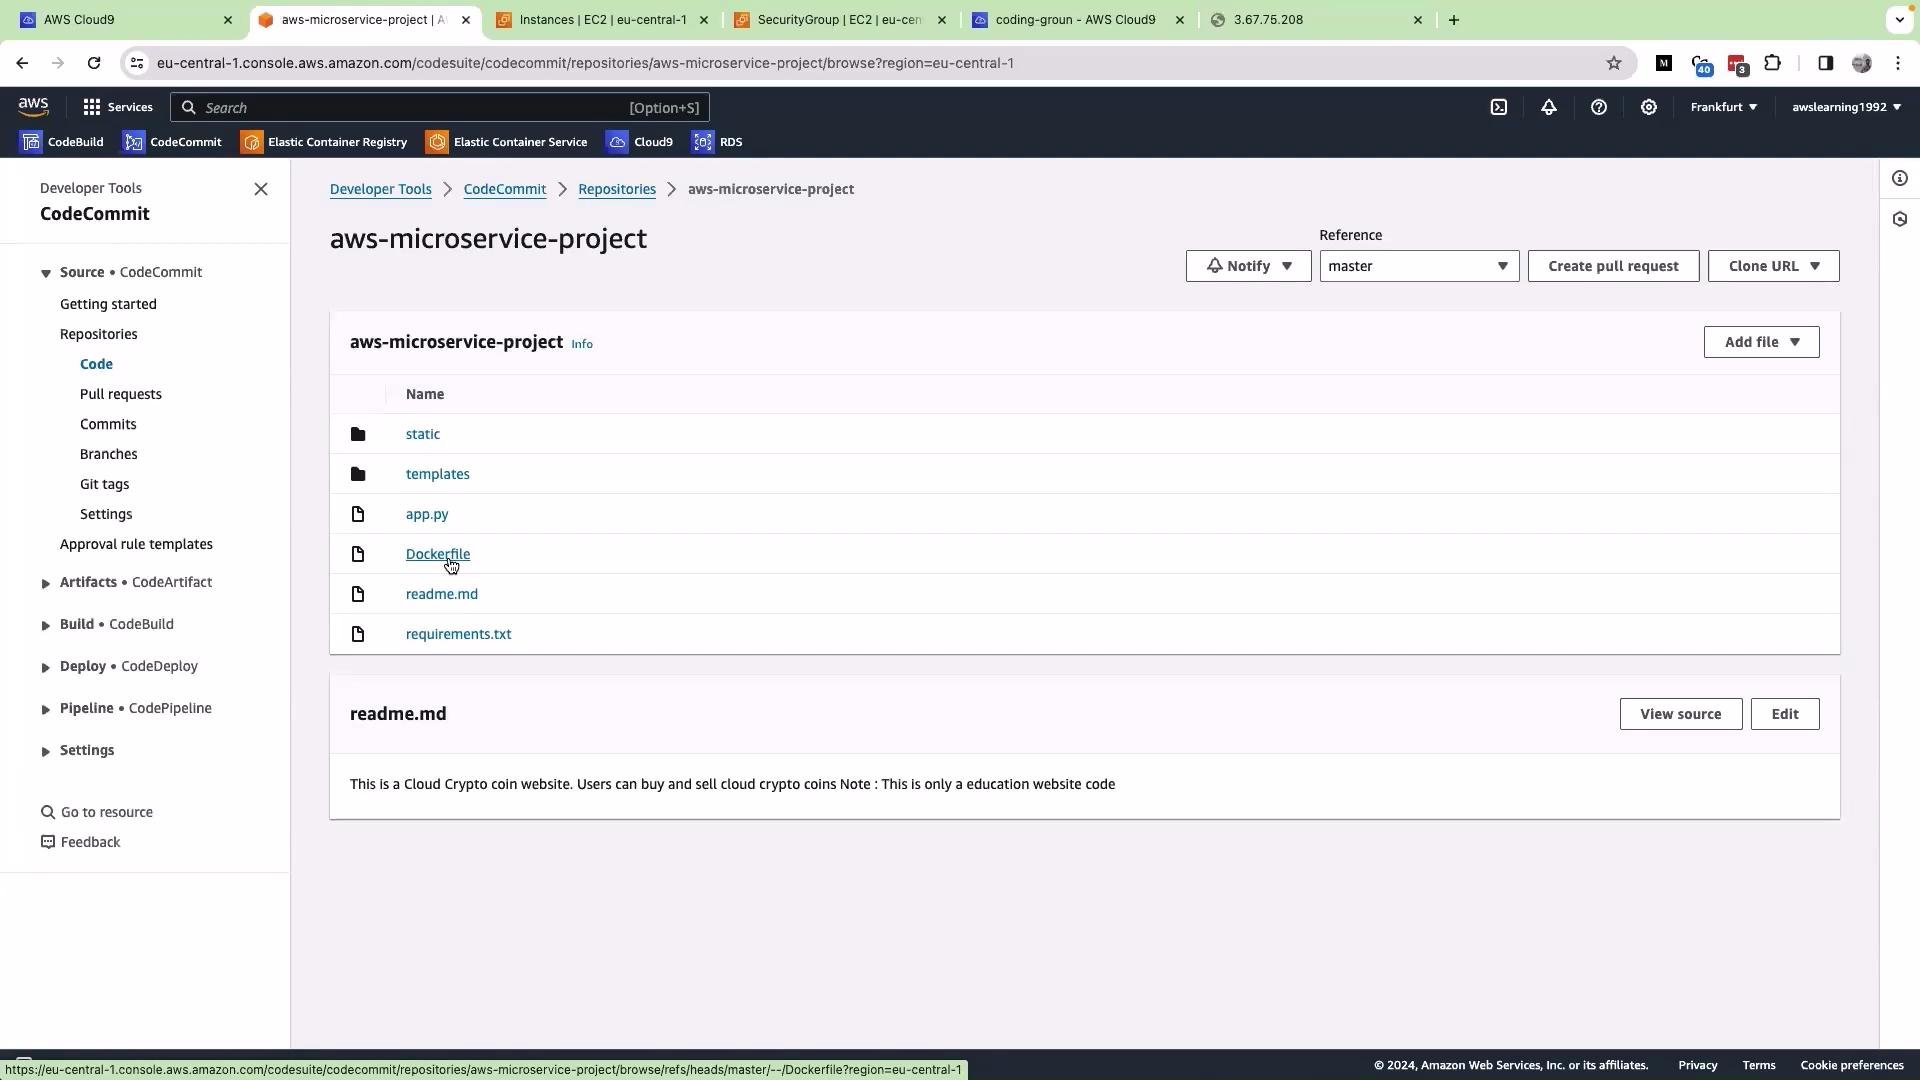
## Commit the Dockerfile back to Git
From the Cloud9 terminal, verify status, add, commit, and push the Dockerfile and any related changes:
```bash theme={null}
git status
```
Sample `git status` showing untracked files:
```bash theme={null}
$ git status
On branch master
Your branch is up to date with 'origin/master'.
Untracked files:
(use "git add ..." to include in what will be committed)
Dockerfile
requirements.txt
nothing added to commit but untracked files present (use "git add" to track)
```
Add, commit, and push:
```bash theme={null}
git add .
git commit -m "create Dockerfile"
git push origin master
```
Then confirm the files are present in your remote repository.
Opening ports to the public internet increases attack surface. Prefer restricting inbound access to a specific IP range (your workstation IP) when adding port 5000 to the security group.
After the security group change, copy the EC2 public IPv4 address and open `http://:5000` in your browser. The app should load and behave like a local run.
Example flow inside the sample app:
* Log in using the sample credentials.
* Browse the product page, place an order, submit order details, and confirm the order — the shipped/confirmation flow is implemented by the app.
## Default credentials and sample Flask routes
The sample app implements a simple login and order flow with these default credentials:
```python theme={null}
from flask import Flask, render_template, request, redirect, url_for
app = Flask(__name__)
# Default credentials
DEFAULT_USERNAME = "admin"
DEFAULT_PASSWORD = "password123"
@app.route('/', methods=['GET', 'POST'])
def login():
error = None
if request.method == 'POST':
username = request.form.get('username')
password = request.form.get('password')
# Check if provided credentials match the default ones
if username == DEFAULT_USERNAME and password == DEFAULT_PASSWORD:
return redirect(url_for('welcome'))
else:
error = 'Invalid Credentials. Please try again.'
return render_template('login.html', error=error)
@app.route('/welcomepage')
def welcome():
return render_template('product.html')
@app.route('/place_order', methods=['POST'])
def place_order():
product_id = request.form.get('product')
# Render order form for product (example)
return render_template('order_form.html', product_id=product_id)
@app.route('/submit_order', methods=['POST'])
def submit_order():
product_id = request.form.get('product_id')
name = request.form.get('name')
address = request.form.get('address')
quantity = request.form.get('quantity')
# Here you would process the order, e.g., save it to a database
return render_template('order_confirmation.html', product_id=product_id, name=name)
```
## Commit the Dockerfile back to Git
From the Cloud9 terminal, verify status, add, commit, and push the Dockerfile and any related changes:
```bash theme={null}
git status
```
Sample `git status` showing untracked files:
```bash theme={null}
$ git status
On branch master
Your branch is up to date with 'origin/master'.
Untracked files:
(use "git add ..." to include in what will be committed)
Dockerfile
requirements.txt
nothing added to commit but untracked files present (use "git add" to track)
```
Add, commit, and push:
```bash theme={null}
git add .
git commit -m "create Dockerfile"
git push origin master
```
Then confirm the files are present in your remote repository.
 ## Next steps — production deployment
The image stored on the Cloud9 EC2 instance is local to that instance. For production deployment you should:
* Push the image to a container registry (for example, Amazon ECR).
* Deploy to a container service such as Amazon ECS, Amazon EKS, or AWS Fargate.
Useful links:
* Amazon ECR: [https://aws.amazon.com/ecr/](https://aws.amazon.com/ecr/)
* Amazon ECS: [https://aws.amazon.com/ecs/](https://aws.amazon.com/ecs/)
* Amazon EKS: [https://aws.amazon.com/eks/](https://aws.amazon.com/eks/)
* AWS Fargate: [https://aws.amazon.com/fargate/](https://aws.amazon.com/fargate/)
Quick reference — common commands
| Action | Command |
| -------------------------------------- | -------------------------------------------------------------------------------------------------------------------------------------------------------------------------------------------------------------------------------------------------- |
| Build image | `docker build -t my-app .` |
| Run container (map port) | `docker run -p 5000:5000 my-app` |
| List images | `docker images` |
| Push local image to ECR (example flow) | Authenticate: `aws ecr get-login-password ... \| docker login --username AWS --password-stdin .dkr.ecr..amazonaws.com`
## Next steps — production deployment
The image stored on the Cloud9 EC2 instance is local to that instance. For production deployment you should:
* Push the image to a container registry (for example, Amazon ECR).
* Deploy to a container service such as Amazon ECS, Amazon EKS, or AWS Fargate.
Useful links:
* Amazon ECR: [https://aws.amazon.com/ecr/](https://aws.amazon.com/ecr/)
* Amazon ECS: [https://aws.amazon.com/ecs/](https://aws.amazon.com/ecs/)
* Amazon EKS: [https://aws.amazon.com/eks/](https://aws.amazon.com/eks/)
* AWS Fargate: [https://aws.amazon.com/fargate/](https://aws.amazon.com/fargate/)
Quick reference — common commands
| Action | Command |
| -------------------------------------- | -------------------------------------------------------------------------------------------------------------------------------------------------------------------------------------------------------------------------------------------------- |
| Build image | `docker build -t my-app .` |
| Run container (map port) | `docker run -p 5000:5000 my-app` |
| List images | `docker images` |
| Push local image to ECR (example flow) | Authenticate: `aws ecr get-login-password ... \| docker login --username AWS --password-stdin .dkr.ecr..amazonaws.com`
Tag & push: `docker tag my-app:latest :latest` then `docker push :latest` |
That is it for this lesson — see you in the next one.