> ## Documentation Index
> Fetch the complete documentation index at: https://notes.kodekloud.com/llms.txt
> Use this file to discover all available pages before exploring further.
# Demo Check Service Status from the Catalog
> This guide explains how to verify service status in HashiCorp Consul using the UI, DNS, and HTTP API while adding a second node to the cluster.
In this guide, we’ll explore how to verify the status of your services in HashiCorp Consul using the UI, DNS interface, and HTTP API. We’ll also walk through adding a second node to the cluster and confirming that multiple service instances are correctly registered.
## Viewing Services in the Consul UI
We have a client node named **web-server-01** which registers the `front-end-eCommerce` service. On the Consul UI home screen, you’ll see two entries:
* **consul** (2 instances)
* **front-end-eCommerce** (1 instance)
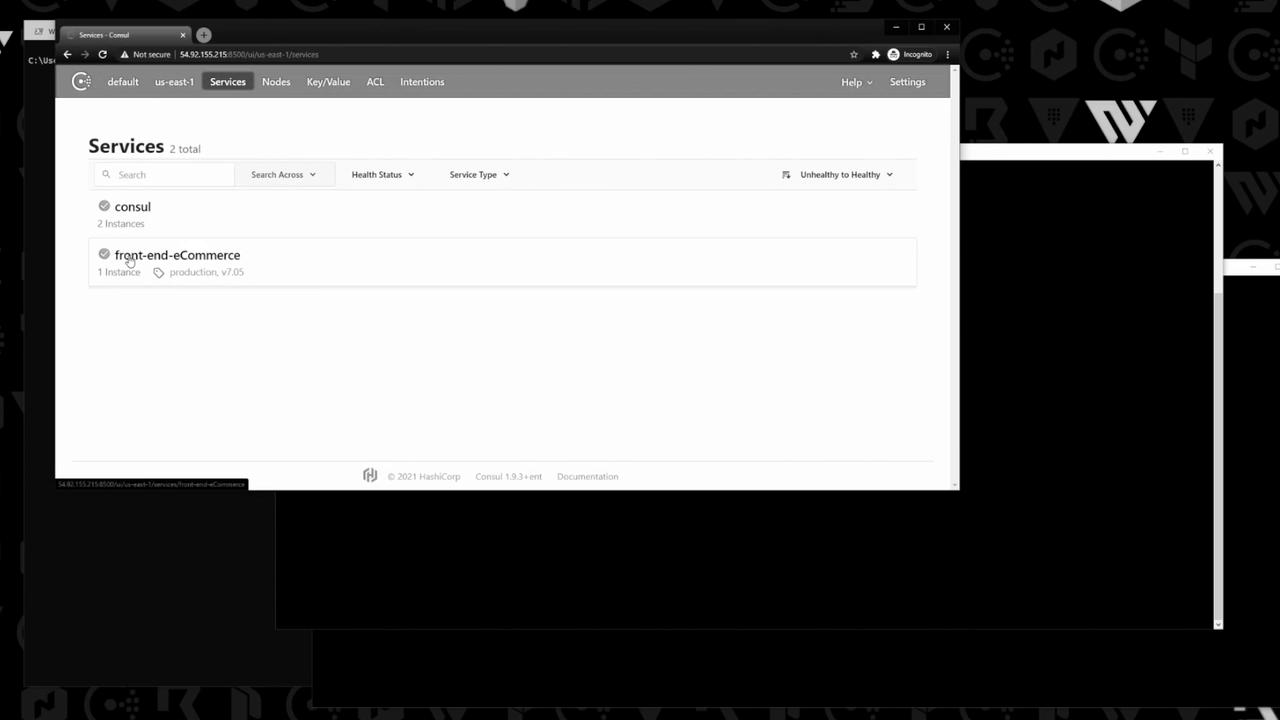
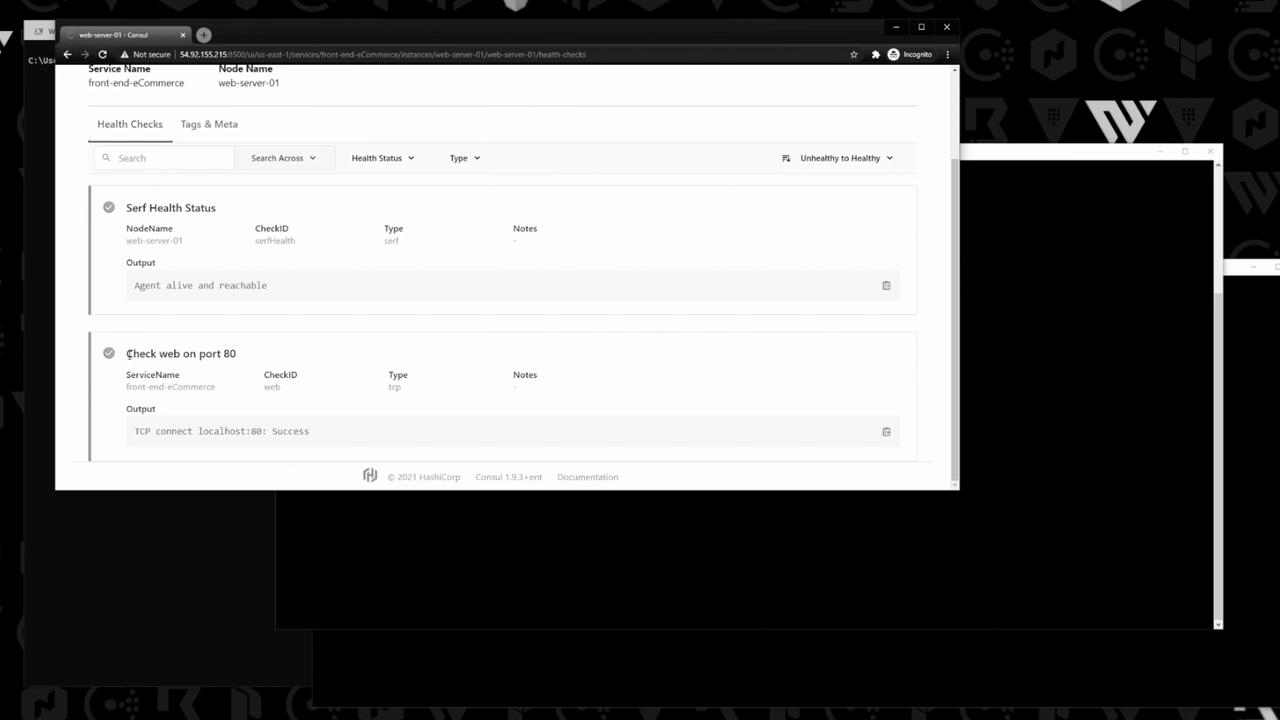
Click **front-end-eCommerce** to view the service details and health check (`check web on port 80`), which passes since Apache is running on the host.
## Querying the Service Catalog
You can also query Consul programmatically via DNS or the HTTP API. Below is a quick comparison:
| Query Method | Command | Output Format |
| -------------------- | -------------------------------------------------------------------------------------- | ------------------------ |
| DNS (port 8600) | `dig @ -p 8600 front-end-eCommerce.service.consul A` | A records (IP addresses) |
| HTTP API (port 8500) | `curl http://:8500/v1/catalog/service/front-end-eCommerce?ns=default \| jq` | JSON array |
### DNS Lookup
Consul’s built-in DNS server listens on port 8600 by default. Ensure your firewall allows UDP/TCP traffic on this port.
Run:
```bash theme={null}
dig @10.0.101.110 -p 8600 front-end-eCommerce.service.consul A
```
Sample output:
```bash theme={null}
;; ANSWER SECTION:
front-end-eCommerce.service.consul. 0 IN A 10.0.101.177
```
### HTTP API Query
Fetch the service catalog via HTTP:
```bash theme={null}
curl --request GET \
http://54.92.155.215:8500/v1/catalog/service/front-end-eCommerce?ns=default \
| jq
```
Example response:
```json theme={null}
[
{
"Node": "web-server-01",
"Address": "10.0.101.177",
"ServiceName": "front-end-eCommerce",
"ServiceTags": ["v7.05", "production"],
"ServiceAddress": "10.0.101.177",
"ServiceTaggedAddresses": {
"lan_ipv4": { "Address": "10.0.101.177", "Port": 80 }
}
}
]
```
This output shows the node name, IP address, and metadata for each instance.
## Adding a Second Server
Let’s register **web-server-02** with the same `front-end-eCommerce` service.
| Step | Command | Expected Result |
| -------------------- | --------------------------------------------------- | ----------------------------------------- |
| Start Consul agent | `sudo systemctl start consul` | Agent is running |
| Join the cluster | `consul join 10.0.101.110` | `web-server-02` shows in `consul members` |
| Register the service | `consul services register service-with-health.json` | Service appears in UI |
## Verifying Multiple Instances
### In the UI
Refresh the Consul UI. **front-end-eCommerce** now displays two healthy instances: **web-server-01** and **web-server-02**.
### Via HTTP API
Re-run the catalog query:
```bash theme={null}
curl http://54.92.155.215:8500/v1/catalog/service/front-end-eCommerce?ns=default | jq
```
You’ll see both nodes:
```json theme={null}
[
{ "Node": "web-server-01", "Address": "10.0.101.177", … },
{ "Node": "web-server-02", "Address": "10.0.101.178", … }
]
```
### Via DNS
Query DNS again:
```bash theme={null}
dig @10.0.101.110 -p 8600 front-end-eCommerce.service.consul A
```
Sample **ANSWER SECTION**:
```text theme={null}
front-end-eCommerce.service.consul. 0 IN A 10.0.101.177
front-end-eCommerce.service.consul. 0 IN A 10.0.101.178
```
This confirms that both Consul DNS and the HTTP API correctly reflect the two running instances.
## Links and References
* [Consul Service Discovery (DNS)](https://www.consul.io/docs/discovery/dns)
* [Consul HTTP API: Catalog Services](https://www.consul.io/api/catalog)
* [HashiCorp Consul Documentation](https://www.consul.io/docs)