deny. Whether you’re using the UI, CLI, or HTTP API, tokens authenticate requests and authorize actions based on attached policies.
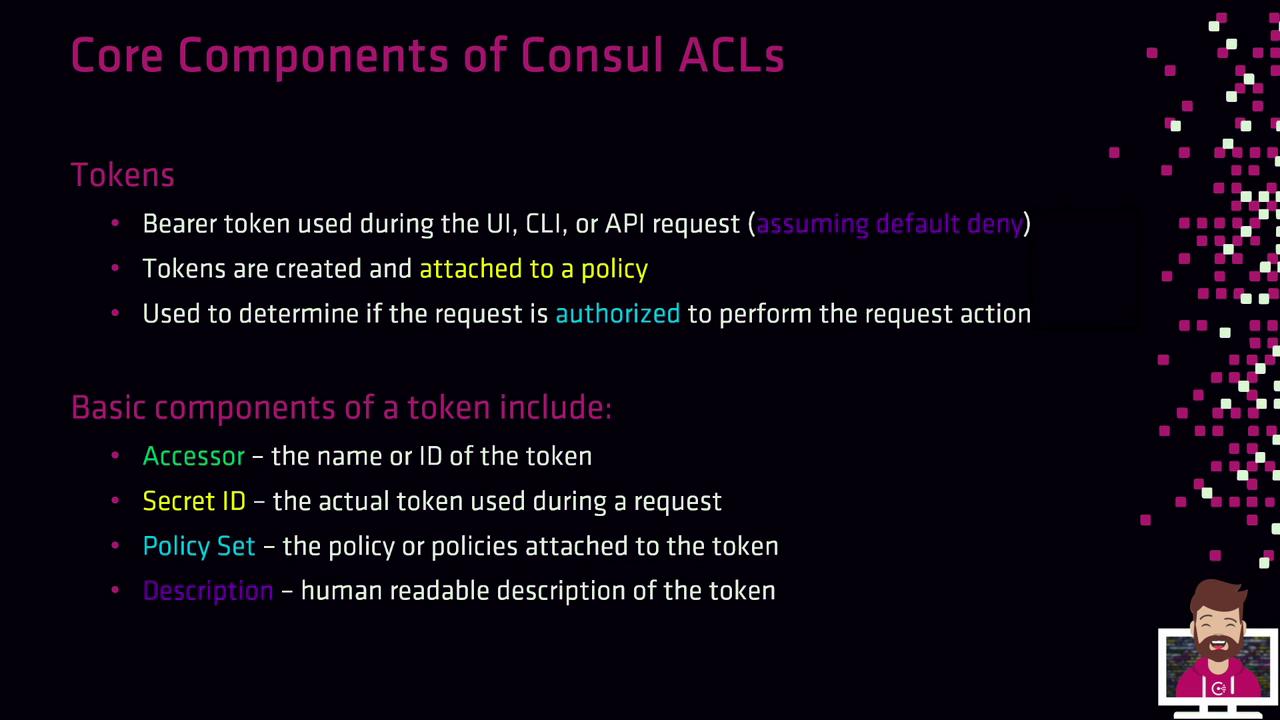
Token Fundamentals
- Bearer Token
Presented by a client on each request for authentication. - Accessor ID
Lookup identifier used to manage the token. - Secret ID
The actual credential you include in requests. - Policies
One or more named policies that define permitted actions. - Description
A human-readable note explaining the token’s purpose.
allow, tokens aren’t required. When set to deny, every request must include a valid Secret ID.
Default Tokens
Consul ships with two built-in tokens:| Token Name | ID Type | Scope | Notes |
|---|---|---|---|
| Bootstrap | Secret ID | Global management | Full privileges for initial setup. Store securely (e.g., Vault). |
| Anonymous | Secret ID | Read-only service discovery | Used when no token is presented; permissions editable. |
Keep the bootstrap token offline or in a secure vault. It has unrestricted
global-management rights and should only be used to create scoped tokens.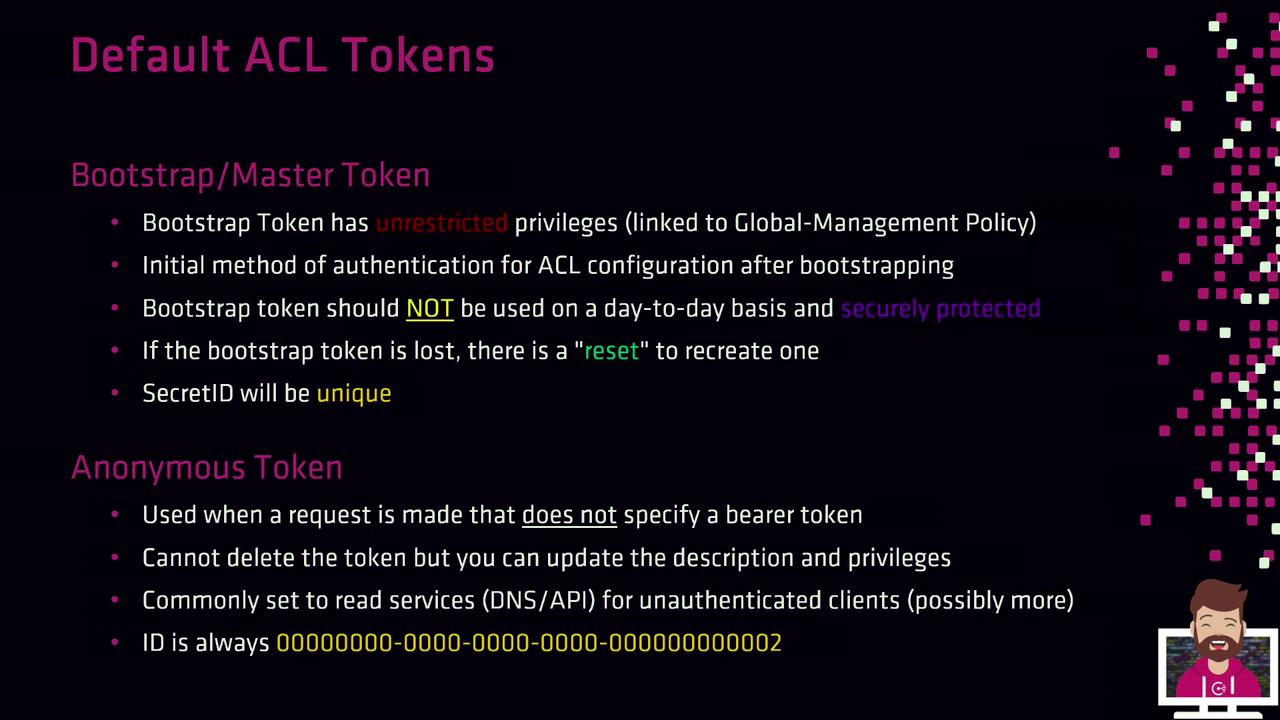
consul acl bootstrap) to generate a new token. Each invocation produces a unique Secret ID.
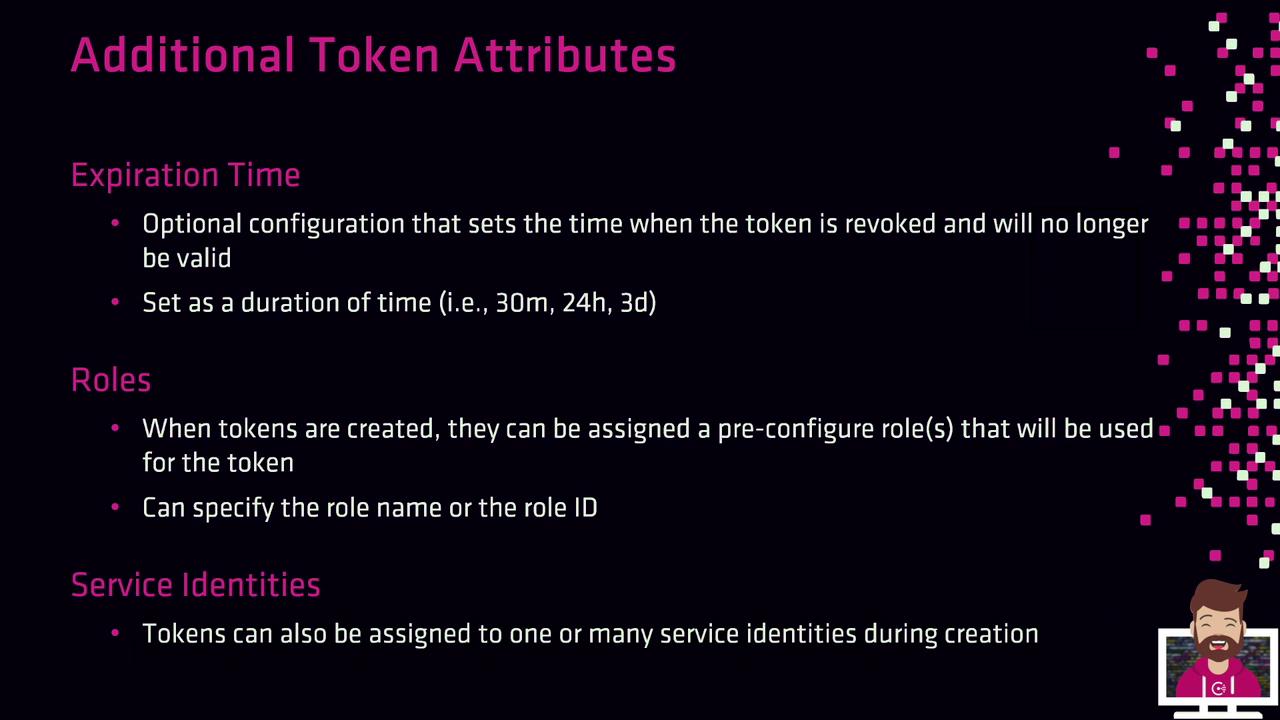
Additional Token Attributes
Tokens can carry extra metadata to fit advanced use cases:| Attribute | Description |
|---|---|
| Expiration Time | Optional TTL after which the token is automatically revoked. |
| Roles | Groups of policies and service identities for easier management. |
| Service Identities | Direct binding of tokens to specific Consul service names. |
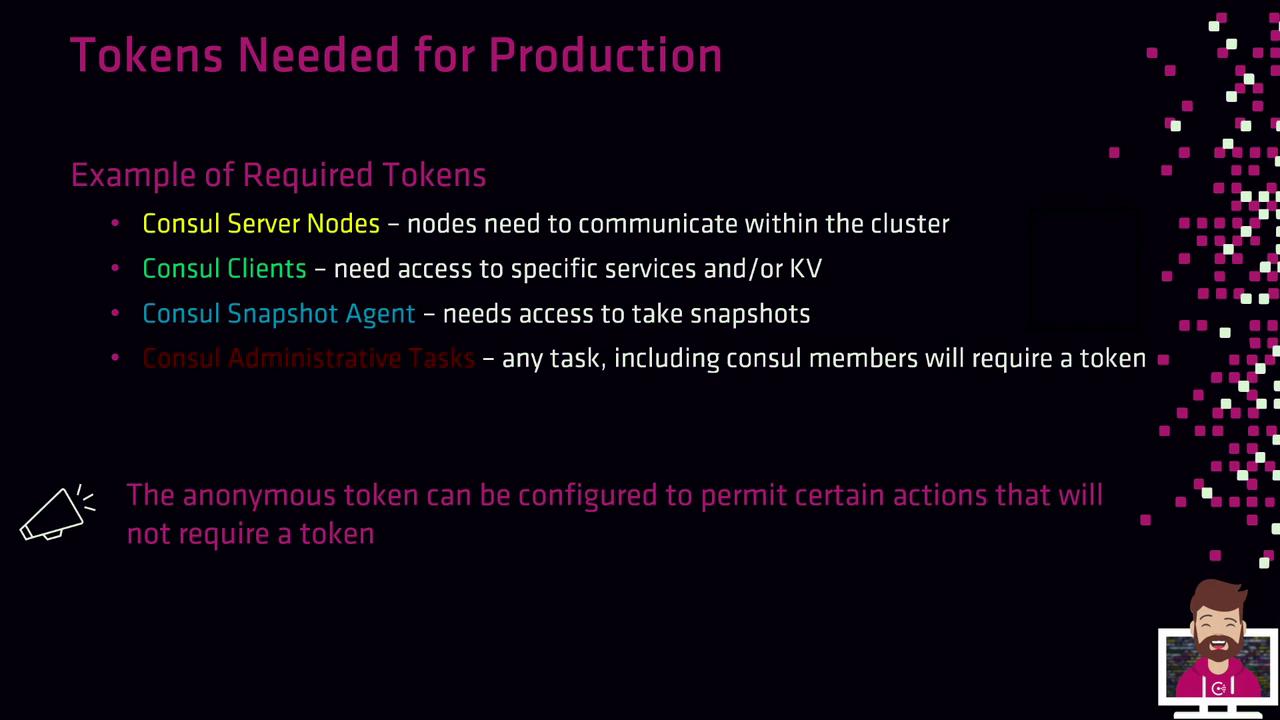
Tokens Needed for Production
In a hardened, production-grade environment, you’ll typically create tokens for:- Consul Server Nodes
Authorize inter-node consensus operations. - Consul Clients
Register and discover services or access the KV store. - Snapshot Agents
Read cluster state and create backups. - Operators & Administrators
Perform management tasks via CLI/API. - Anonymous Access
Fine-tune for read-only service discovery (DNS/API).
Creating Tokens with the CLI
Use theconsul acl token create command to generate a new token. You must specify at least one policy by its name or ID, and it’s best practice to include a description.
Clients must use the SecretID when making API calls. Supplying the AccessorID instead will result in a “permission denied” error.
Creating Tokens via the HTTP API
You can also manage tokens programmatically by sending HTTP requests to the/v1/acl/token endpoint. Ensure you include an existing management token in the X-Consul-Token header if ACLs default to deny.
-
Create a
payload.jsonfile: -
Issue the PUT request:
With these fundamentals and creation methods, you’re ready to jump into the hands-on lab and generate ACL tokens using your predefined policies.