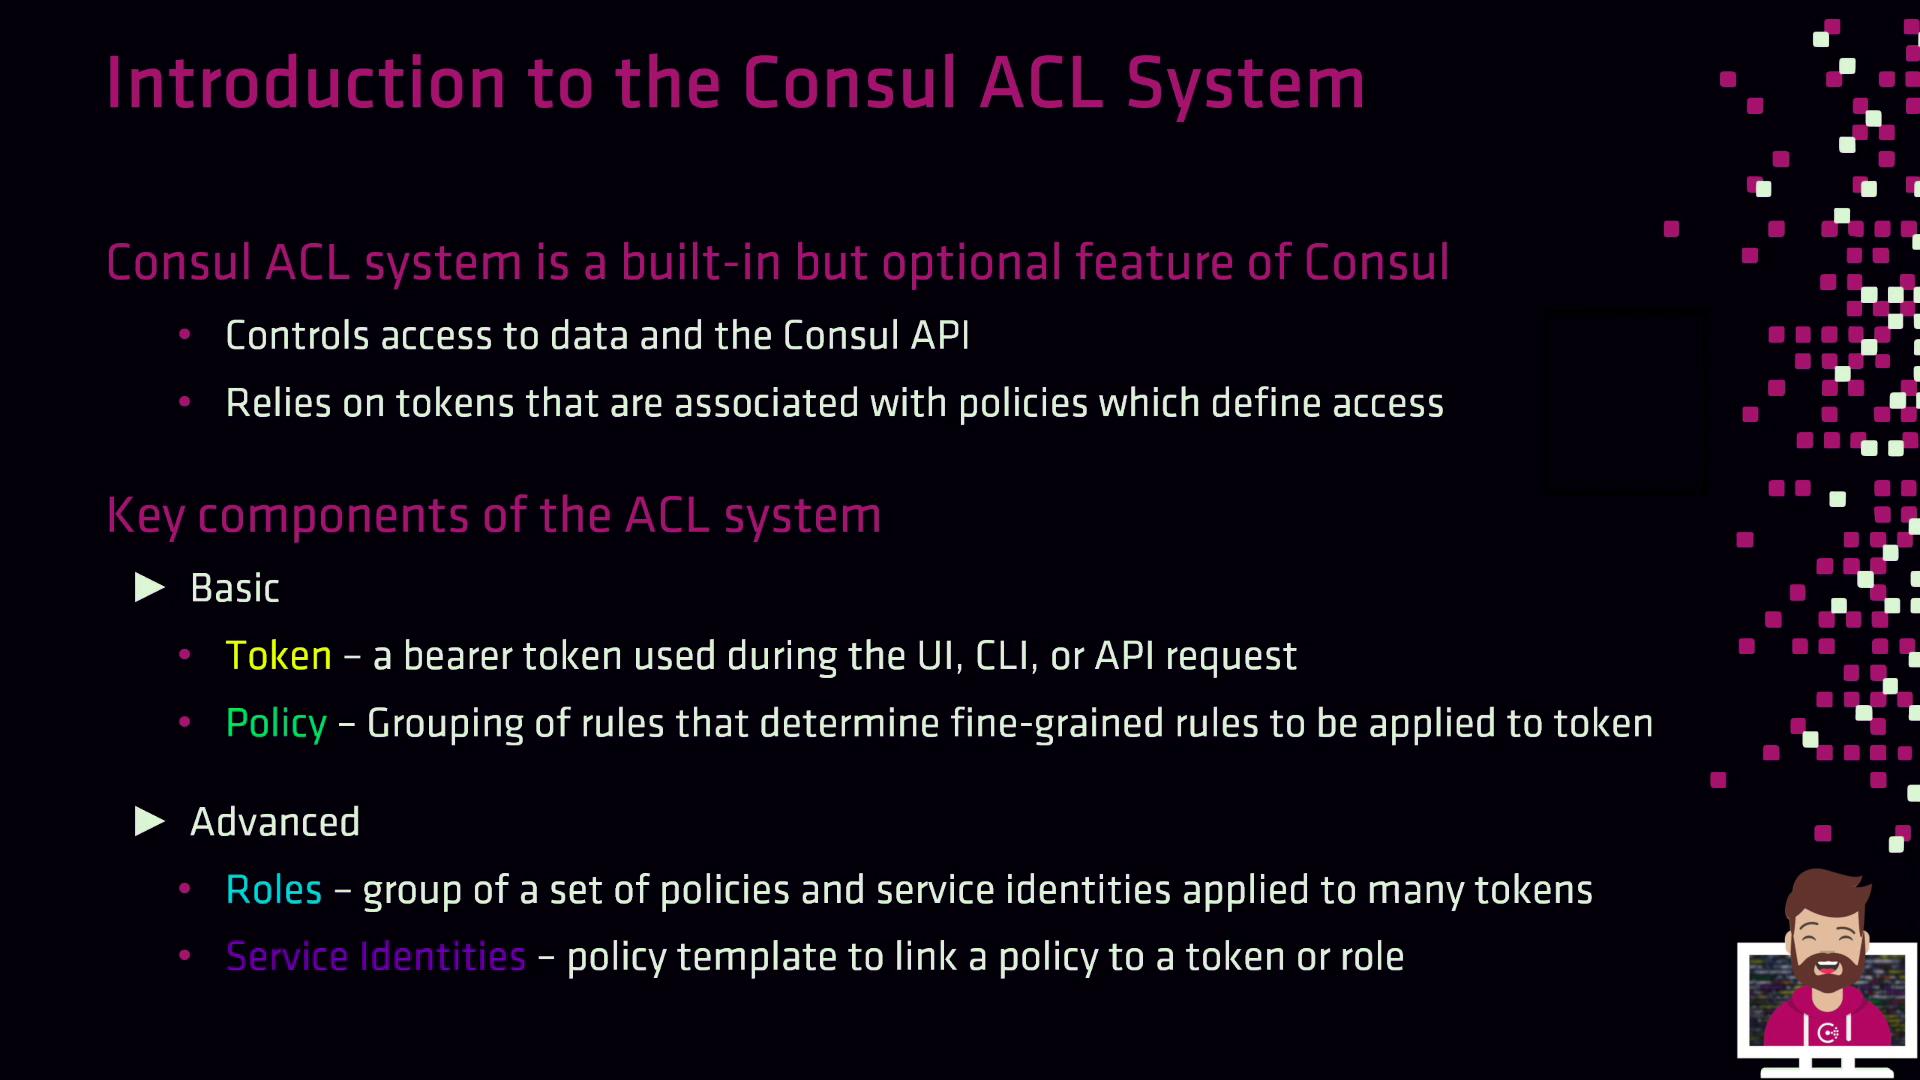
Core Concepts
Consul’s ACL system is built around four primary components. Use the table below as a quick reference for each:| Component | Description | Key Fields |
|---|---|---|
| Token | Bearer token sent with every API request to authenticate and authorize actions. | AccessorID, SecretID, Policies[] |
| Policy | Defines allow/deny rules for operations (e.g., read/write K/V, service registration). | Name, Description, Rules |
| Service Identity | Policy template for Connect-enabled services to automate mTLS and discovery permissions. | Service, Datacenters (optional) |
| Role | Groups multiple policies and service identities; simplifies token permissions management. | ID, Name, Description, Policies[], ServiceIdentities[] |
Tokens and Policies
- Token
A bearer token required on each request. It maps to one or more policies that allow or deny specific operations. - Policy
A set of HCL or JSON rules defining what a token can do, such as reading from a specific K/V path or registering a service. - Association
The link between tokens and policies determines a token’s effective permissions.
Service Identities
Service identities accelerate ACL configuration for service-to-service authentication within a Consul Service Mesh (Connect). They provide a reusable policy template so you don’t need to hand-craft rules for each service.service: The name of your application or sidecar proxy.datacenters(optional): Limits the policy to specific Consul datacenters.
Service identities automatically grant mTLS and discovery permissions for your Connect services. No additional rules are required.
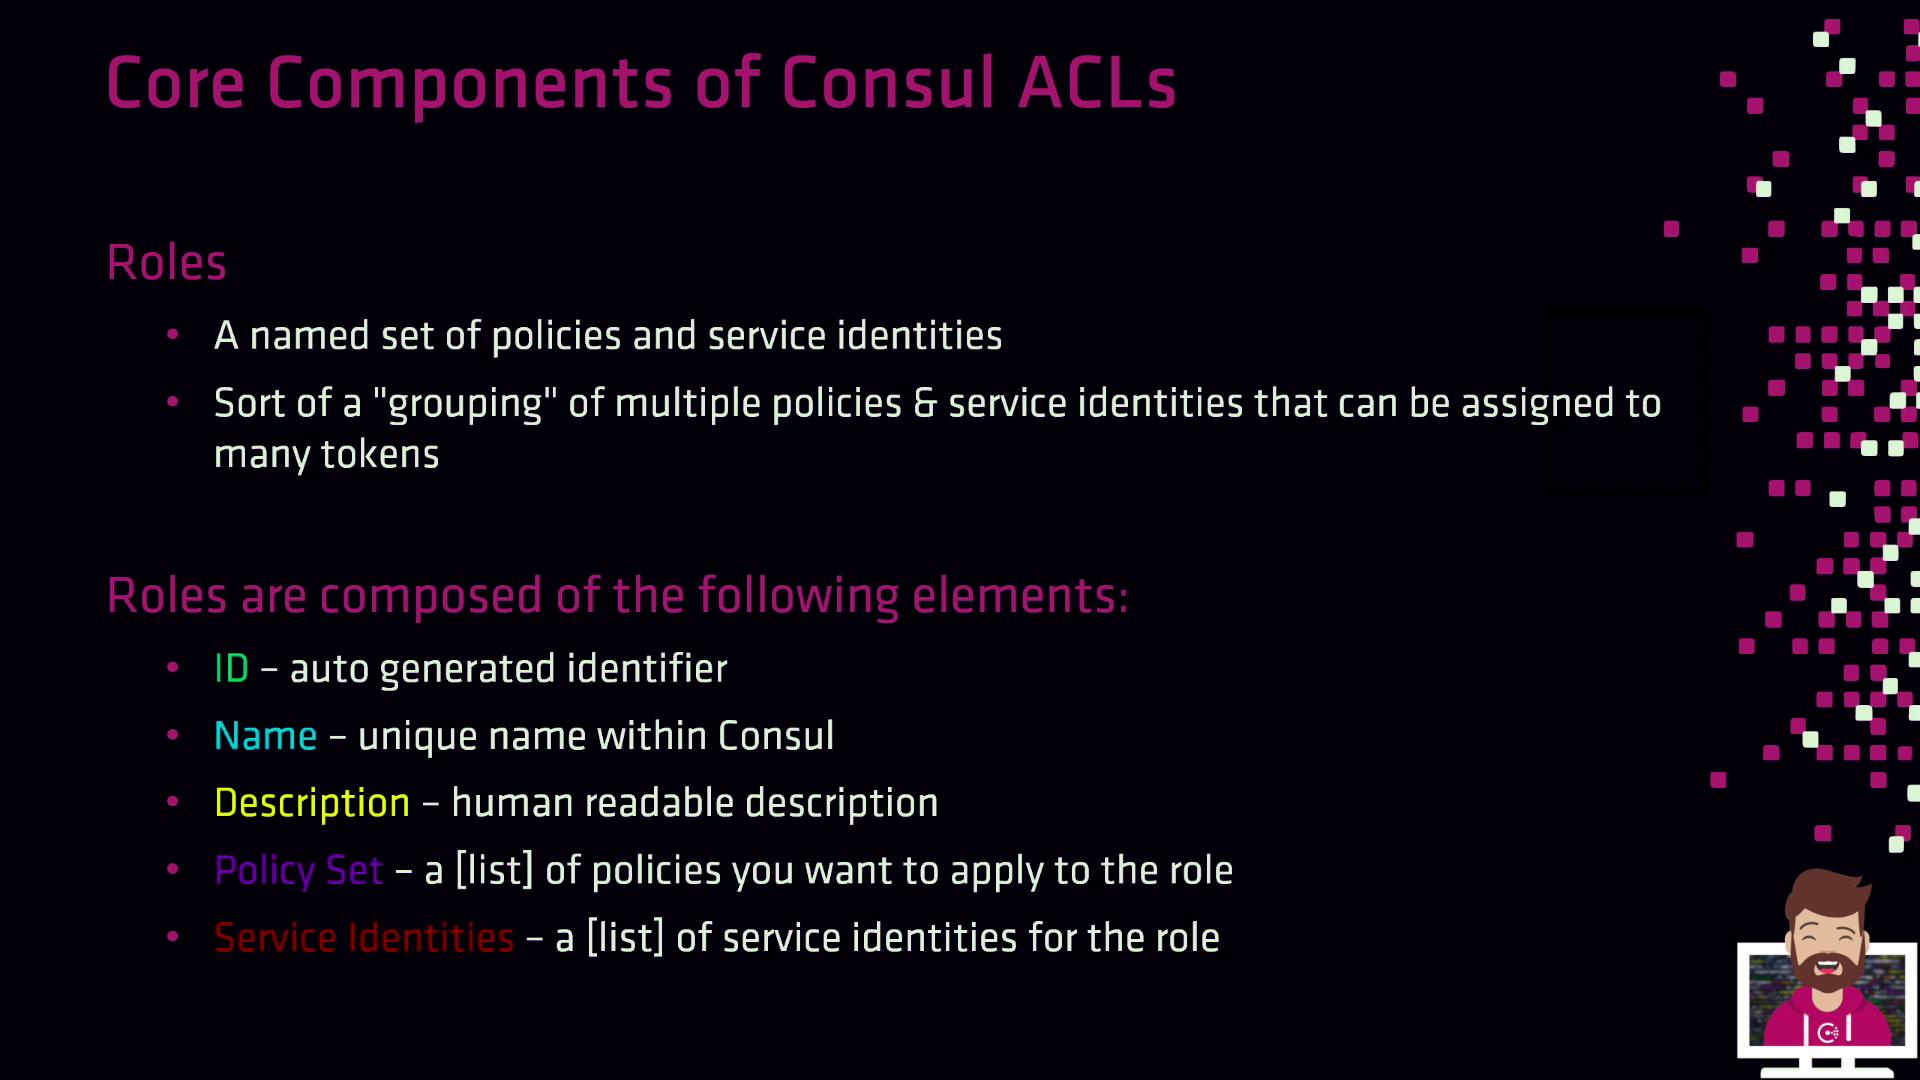
Roles
Roles combine policies and service identities into a single entity, making it easier to manage permissions across many tokens.- ID: Auto-generated unique identifier.
- Name: Unique within your Consul workspace.
- Description: Human-readable summary.
- Policies: List of policy IDs.
- Service Identities: List of service identity templates.
By default, ACL enforcement is turned off. To activate it, update the
acl stanza in both your server and client agent configurations:
| Field | Description |
|---|---|
| enabled | Set to true to turn on ACL enforcement. |
| default_policy | deny (production) or allow (initial setup). |
| down_policy | Behavior when the ACL service is unreachable. extend-cache preserves cached permissions. |
| tokens.agent | Agent token used by Consul for internal communication. |
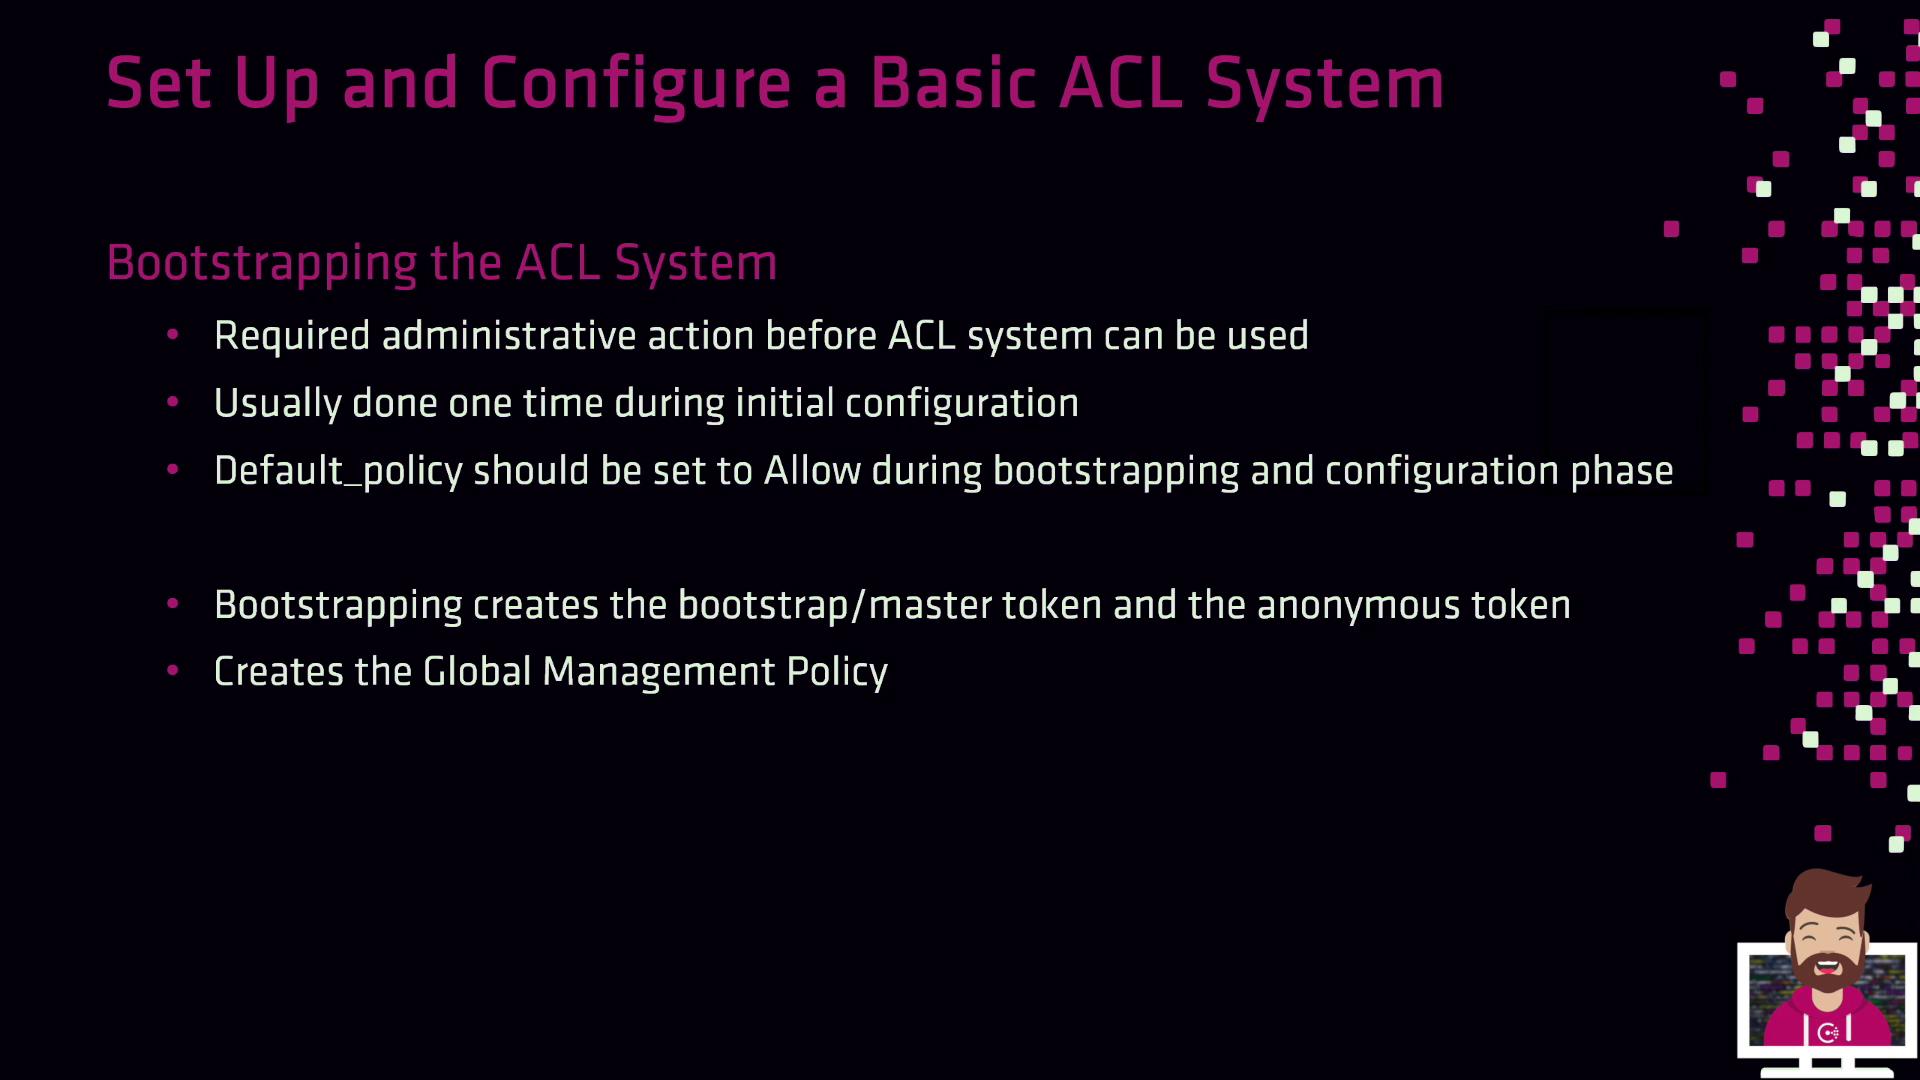
If you set
default_policy to allow during setup, switch it to deny as soon as your policies are in place to avoid accidental exposure.Once ACLs are enabled, the next step is to bootstrap to generate your master tokens and global policy:
- Bootstrap Token: Full administrative privileges (store securely!).
- Anonymous Token: For unauthenticated requests (typically limited to read-only).
- Global Management Policy: Grants unrestricted access to any token that uses it.
The bootstrap token is your “root” credential. Treat it like a database superuser password—store it in a secure vault and rotate it if exposed.
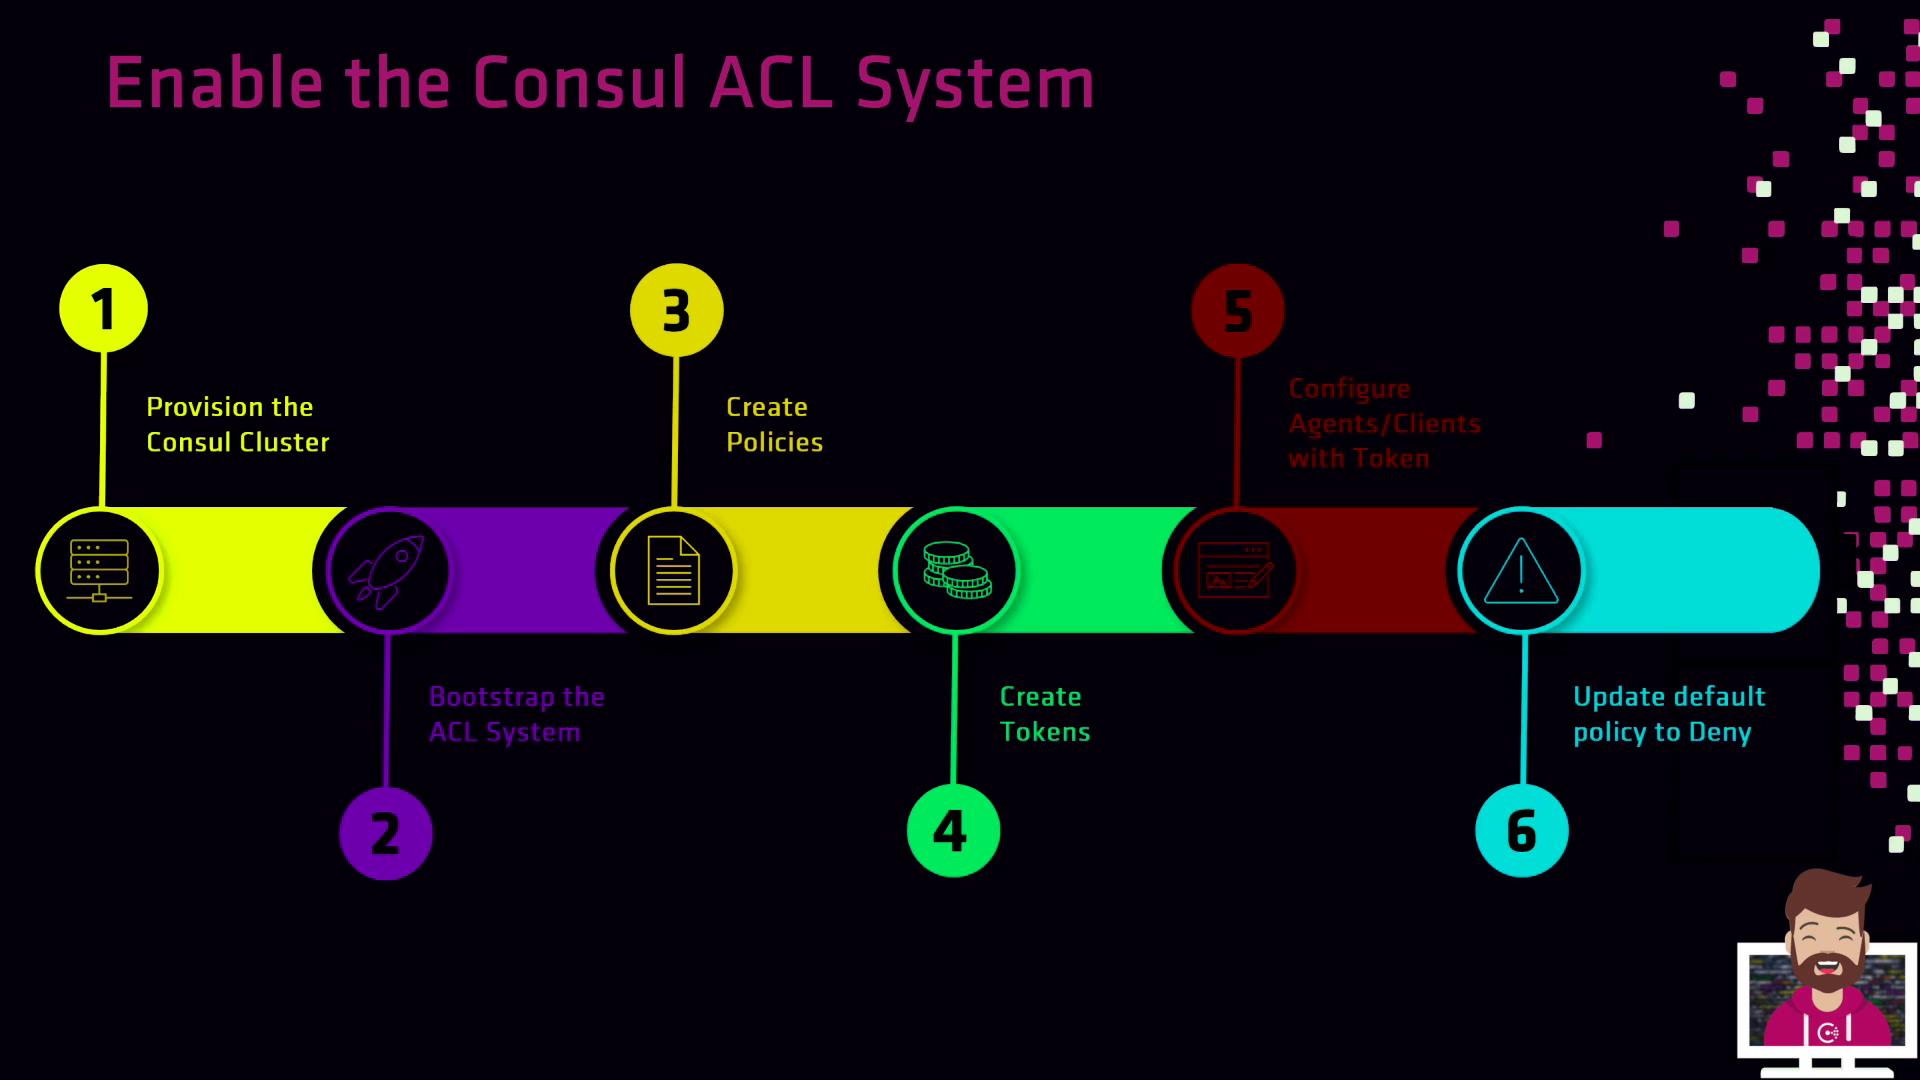
ACL Setup Workflow
- Provision your Consul cluster with ACLs enabled in the agent configurations.
- Bootstrap the ACL system to obtain the bootstrap and anonymous tokens.
- Create Policies that reflect your organization’s security requirements.
- Generate Tokens for servers, clients, and applications—each tied to appropriate policies.
- Configure Agents and services to use their assigned tokens.
- Enforce production mode by setting
default_policytodeny.