Key Considerations for Production Vault
-
Persistent Vault Nodes
Run one or more Vault servers, each loading the sameconfig.hclto ensure consistent configuration. -
Storage Backend
Select a proven, highly available backend such as Consul or Integrated Storage (Raft). Avoid untested solutions in production. -
High Availability (HA)
Form a cluster of Vault nodes to maintain uptime and redundancy if any node fails. -
Proximity to Applications
Host Vault in the same cloud region or data center as your applications to reduce network latency. -
Infrastructure Automation
Leverage tools like Terraform and Packer for repeatable, version-controlled deployments.
1. Starting the Vault Server
Use your custom configuration file to launch Vault:Do not run
vault server interactively in production. Instead, manage it with a service supervisor to automatically start on boot and restart on failure.2. Service Management with systemd
On Linux,systemd is the recommended service manager. Below is a placeholder image linking to production-ready unit files for Vault, Consul server, and Consul client.
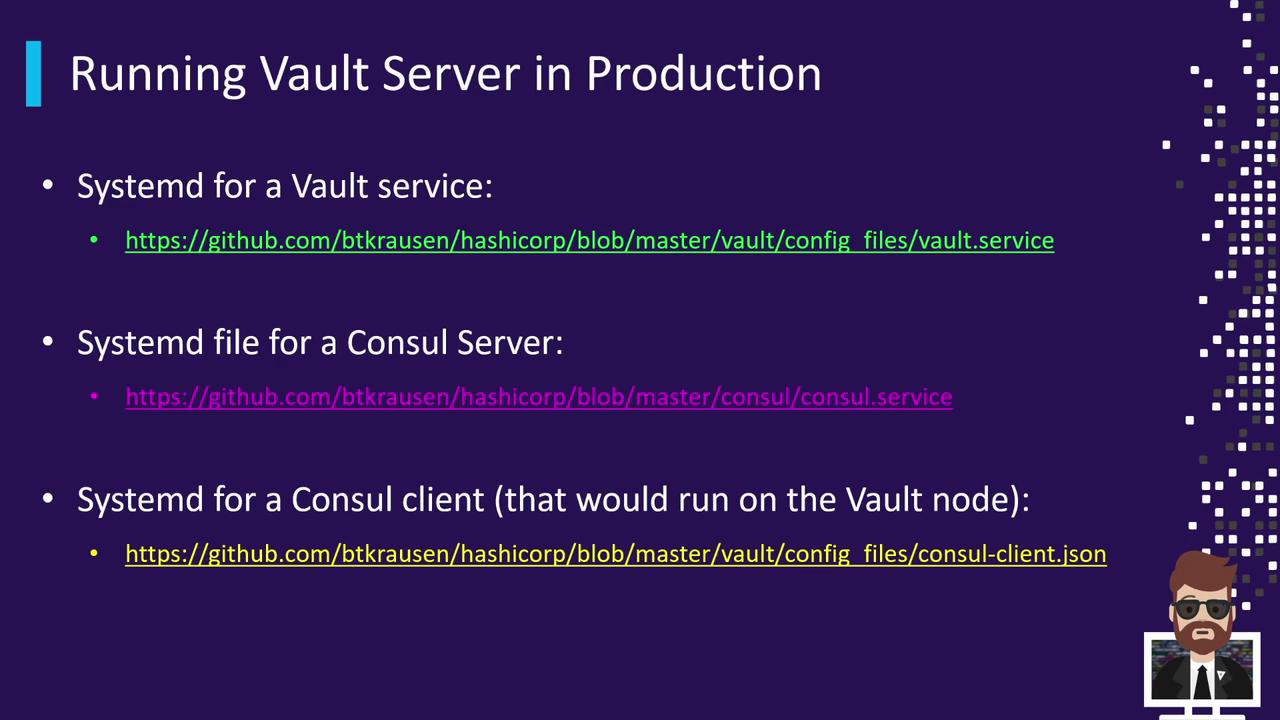
| Service | Description | Sample Unit File |
|---|---|---|
| vault.service | Manages the Vault server process | [vault.service] |
| consul-server.service | Manages the Consul server cluster | [consul-server.service] |
| consul-client.service | Manages the Consul client agent | [consul-client.service] |
3. Storage Backend Comparison
| Backend | High Availability | Native to Vault | Notes |
|---|---|---|---|
| Consul | Yes | No | Enterprise-grade, multi-datacenter support |
| Integrated Storage | Yes (Raft) | Yes | Built-in replication, simpler setup |
4. Deployment Topologies
4.1 Single-Node Deployment
A basic single-server Vault is quick to provision but has no redundancy. If the node fails, Vault is unavailable. Suitable only for non-critical testing.- One Vault node with TLS enabled
- Storage backend configured in
config.hcl
Single-node Vault provides no failover. Use only for evaluation or development.
4.2 Multi-Node Cluster with Integrated Storage
Vault’s Integrated Storage (Raft) allows native data replication across nodes A, B, and C. Each node has its own TLS certificate and configuration.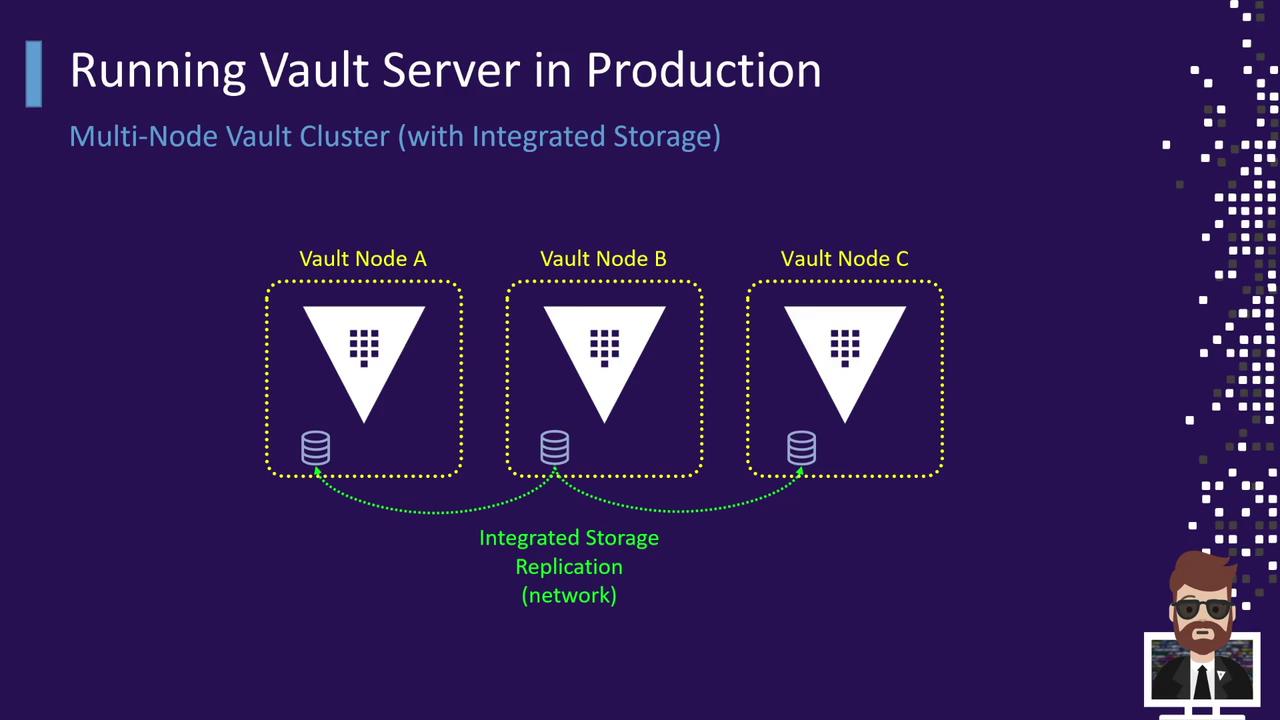
4.3 Multi-Node Cluster with External Storage
For enterprise scenarios, use Consul or another external HA backend. All Vault nodes point to the same storage cluster, ensuring data consistency and availability.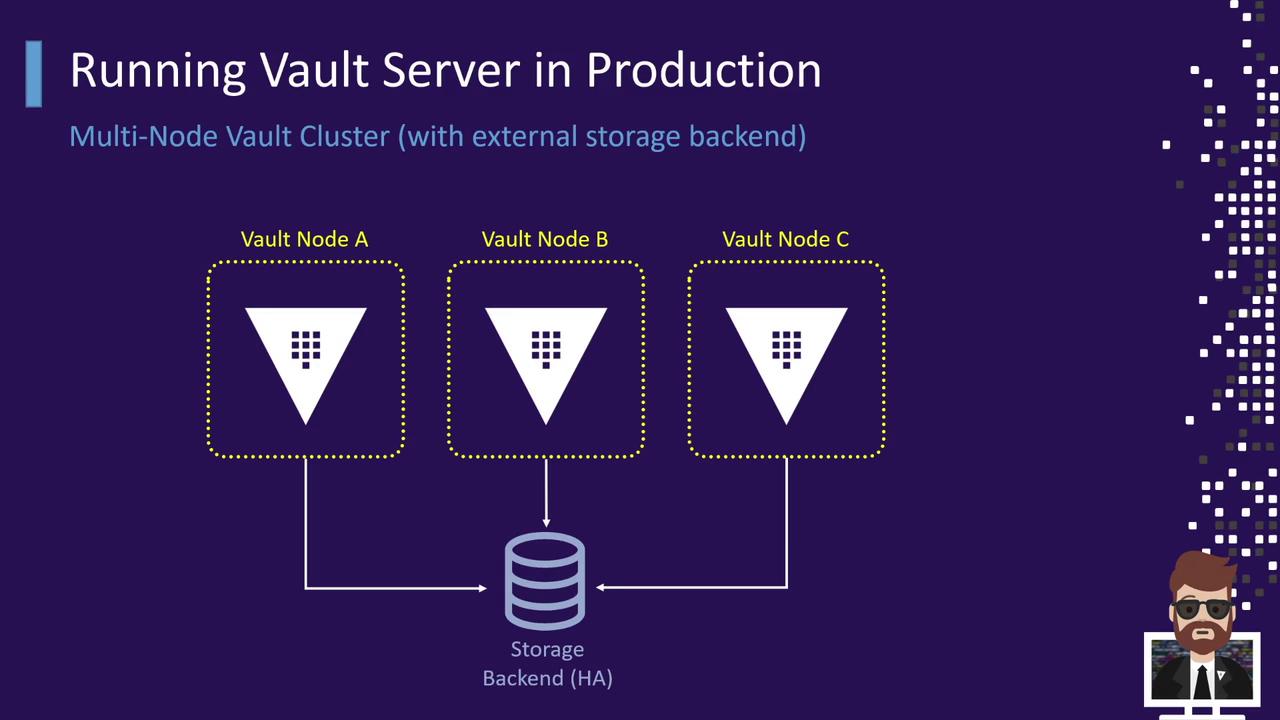
5. Manual Installation Steps
Understanding manual installation helps you automate effectively. Follow these steps on each Vault node:- Download the latest Vault ZIP from Vault Downloads.
- Unzip to a staging directory.
- Move the
vaultbinary to a directory in yourPATH(e.g.,/usr/local/bin). - On Windows, set environment variables accordingly.
- Create or adjust
config.hclfor your chosen storage backend. - Write
systemdservice files for Vault (and Consul if used). - Install and configure Consul and join the cluster.
- Start services and validate cluster health.

After manual validation, codify these steps using your preferred automation tool for consistency and repeatability.