> ## Documentation Index
> Fetch the complete documentation index at: https://notes.kodekloud.com/llms.txt
> Use this file to discover all available pages before exploring further.
# Running Vault Server in Production
> This guide covers best practices for deploying HashiCorp Vault in production environments, including configuration, high availability, and service management.
Deploying HashiCorp Vault in a production environment involves more than just flipping the development mode switch. You need a robust configuration file, a high-availability storage backend, and automation to manage scale and reliability. This guide covers core considerations, deployment topologies, service management, and manual installation steps.
***
## Key Considerations for Production Vault
1. **Persistent Vault Nodes**\
Run one or more Vault servers, each loading the same `config.hcl` to ensure consistent configuration.
2. **Storage Backend**\
Select a proven, highly available backend such as Consul or Integrated Storage (Raft). Avoid untested solutions in production.
3. **High Availability (HA)**\
Form a cluster of Vault nodes to maintain uptime and redundancy if any node fails.
4. **Proximity to Applications**\
Host Vault in the same cloud region or data center as your applications to reduce network latency.
5. **Infrastructure Automation**\
Leverage tools like [Terraform](https://www.terraform.io/) and [Packer](https://www.packer.io/) for repeatable, version-controlled deployments.
***
## 1. Starting the Vault Server
Use your custom configuration file to launch Vault:
```bash theme={null}
vault server -config=/path/to/config.hcl
```
Do not run `vault server` interactively in production. Instead, manage it with a service supervisor to automatically start on boot and restart on failure.
***
## 2. Service Management with systemd
On Linux, `systemd` is the recommended service manager. Below is a placeholder image linking to production-ready unit files for Vault, Consul server, and Consul client.
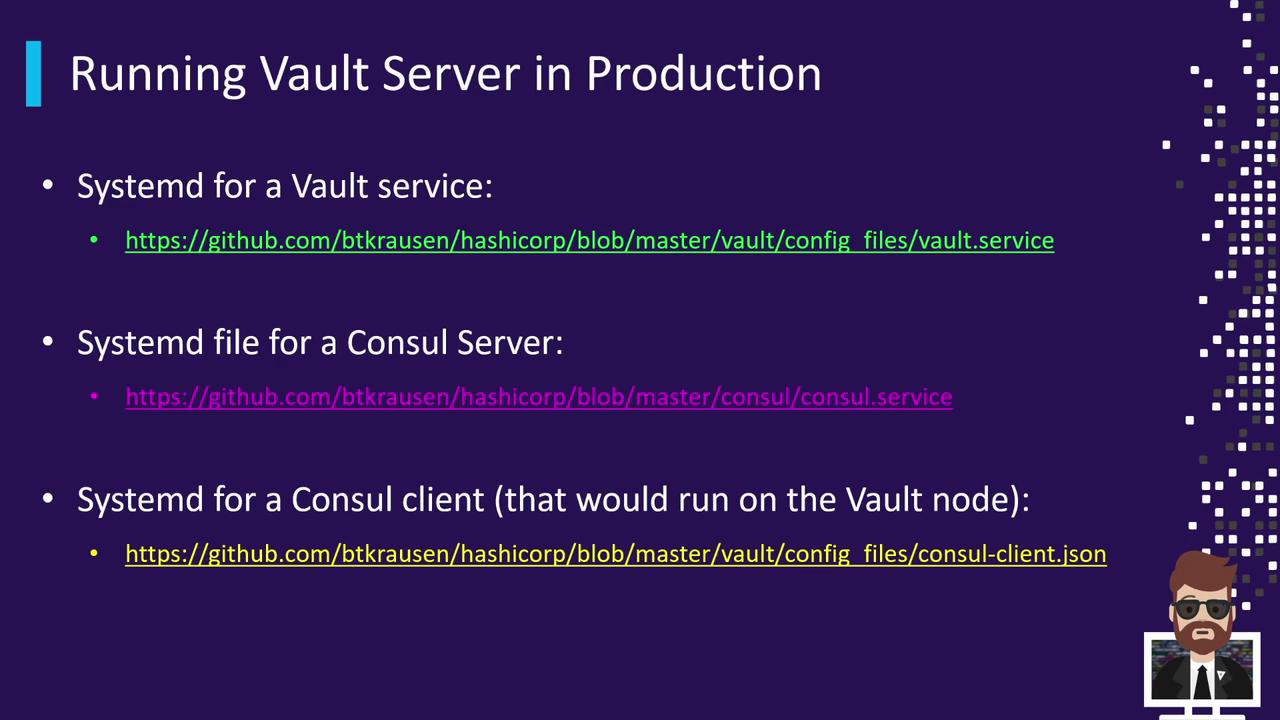
| Service | Description | Sample Unit File |
| --------------------- | --------------------------------- | ------------------------ |
| vault.service | Manages the Vault server process | \[vault.service] |
| consul-server.service | Manages the Consul server cluster | \[consul-server.service] |
| consul-client.service | Manages the Consul client agent | \[consul-client.service] |
***
## 3. Storage Backend Comparison
| Backend | High Availability | Native to Vault | Notes |
| ------------------ | ----------------- | --------------- | ------------------------------------------ |
| Consul | Yes | No | Enterprise-grade, multi-datacenter support |
| Integrated Storage | Yes (Raft) | Yes | Built-in replication, simpler setup |
***
## 4. Deployment Topologies
### 4.1 Single-Node Deployment
A basic single-server Vault is quick to provision but has no redundancy. If the node fails, Vault is unavailable. Suitable only for non-critical testing.
* One Vault node with TLS enabled
* Storage backend configured in `config.hcl`
Single-node Vault provides no failover. Use only for evaluation or development.
### 4.2 Multi-Node Cluster with Integrated Storage
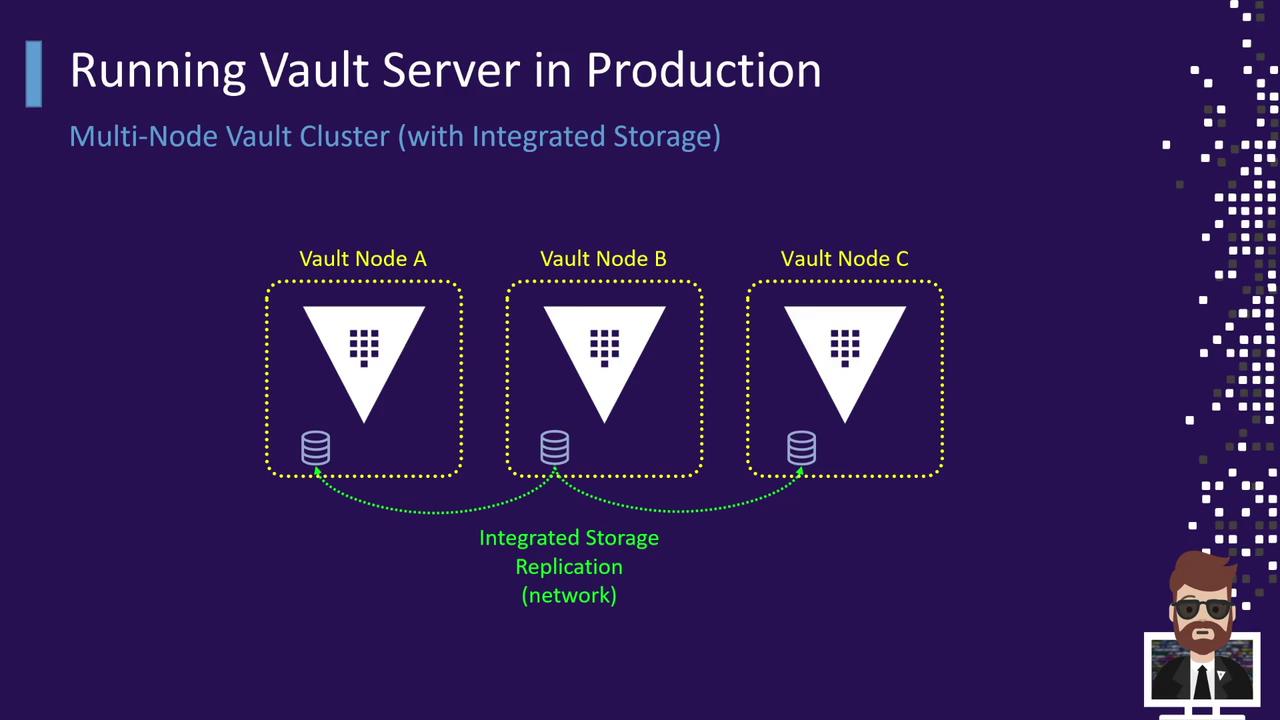
Vault’s Integrated Storage (Raft) allows native data replication across nodes A, B, and C. Each node has its own TLS certificate and configuration.
### 4.3 Multi-Node Cluster with External Storage
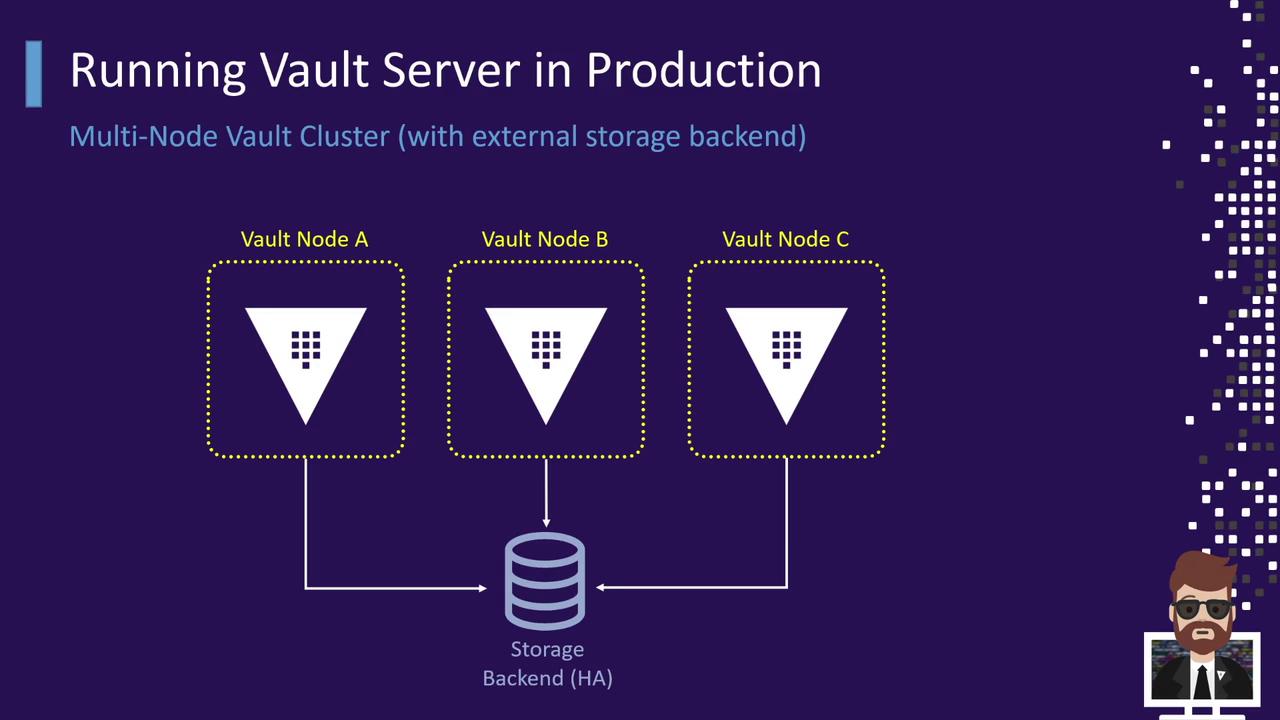
For enterprise scenarios, use Consul or another external HA backend. All Vault nodes point to the same storage cluster, ensuring data consistency and availability.
***
## 5. Manual Installation Steps
Understanding manual installation helps you automate effectively. Follow these steps on each Vault node:
1. Download the latest Vault ZIP from [Vault Downloads](https://www.vaultproject.io/downloads).
2. Unzip to a staging directory.
3. Move the `vault` binary to a directory in your `PATH` (e.g., `/usr/local/bin`).
4. On Windows, set environment variables accordingly.
5. Create or adjust `config.hcl` for your chosen storage backend.
6. Write `systemd` service files for Vault (and Consul if used).
7. Install and configure [Consul](https://www.consul.io/) and join the cluster.
8. Start services and validate cluster health.

After manual validation, codify these steps using your preferred automation tool for consistency and repeatability.
***
## Next Steps
In the next section, we’ll automate the deployment of a three-node Vault cluster on Consul, demonstrating best practices and hands-on configuration.
***
## References
* [Vault Official Documentation](https://www.vaultproject.io/docs/)
* [Consul Official Documentation](https://www.consul.io/docs/)
* [Terraform](https://www.terraform.io/) | [Packer](https://www.packer.io/)
***