> ## Documentation Index
> Fetch the complete documentation index at: https://notes.kodekloud.com/llms.txt
> Use this file to discover all available pages before exploring further.
# Creating an Assistant
> This tutorial guides building, configuring, and testing a custom AI assistant using the OpenAI Assistants API and Assistant Playground.
Welcome to the OpenAI Assistants API guide. In this tutorial, we’ll walk through how to build, configure, and test a custom AI assistant using both the Assistant Playground and the OpenAI API.
## Overview of the Assistants API
The Assistants API (currently in beta) provides a simple way to register and interact with AI assistants. Before you begin, review the official [Assistants API documentation][docs] and explore the [Assistant Playground][playground] for a no-code experience.
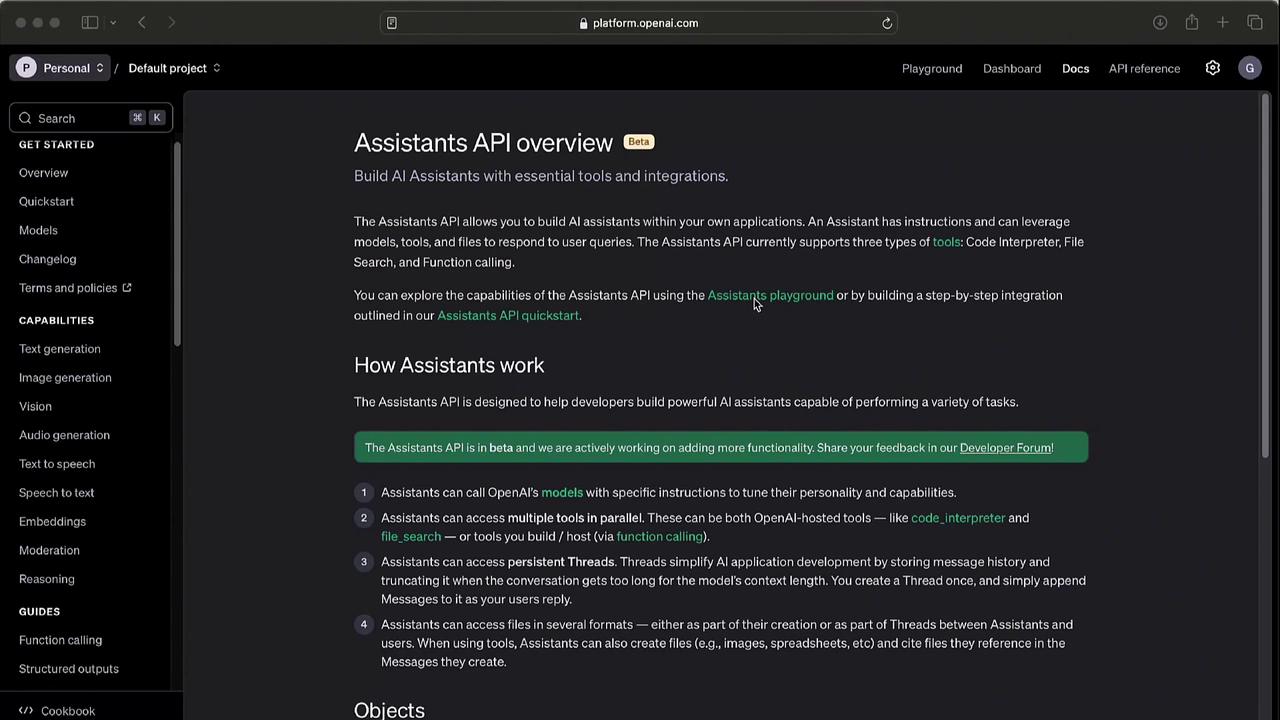
The Assistants API is in **beta**. Endpoints and parameters may change as we improve functionality. Keep your integration up to date by regularly checking the [documentation][docs].
## Using the Assistant Playground
The [Assistant Playground][playground] offers an interactive UI to:
* Configure models and tools
* Set system instructions
* Name your assistant
* Run quick tests
You can instantly see how requests and responses are structured, making it ideal for prototyping before coding.
## Creating an Assistant with Python
To get started programmatically, install the OpenAI Python package and initialize the client:
```bash theme={null}
pip install openai
```
```python theme={null}
from openai import OpenAI
client = OpenAI()
```
Next, register a new assistant:
```python theme={null}
assistant = client.beta.assistants.create(
name="Math Tutor",
instructions="You are a personal math tutor. Write and run Python code to solve math problems step by step.",
tools={"type": "code_interpreter"},
model="gpt-4"
)
```
| Parameter | Description | Example |
| ------------ | ----------------------------------------- | ------------------------------------ |
| name | Friendly assistant name | `"Math Tutor"` |
| instructions | System-level prompt guiding the assistant | `"You are a personal math tutor..."` |
| model | OpenAI model to power the assistant | `"gpt-4"` |
| tools | Enabled integrations or plugins | `{"type": "code_interpreter"}` |
## Handling Streaming Responses
For real-time output, subclass `AssistantEventHandler` and override event methods:
```python theme={null}
from typing_extensions import override
from openai import AssistantEventHandler
class EventHandler(AssistantEventHandler):
@override
def on_text_created(self, text) -> None:
print(text, end="", flush=True)
@override
def on_text_del(self, delta, snapshot):
print(delta.value, end="", flush=True)
@override
def on_tool_call_created(self, tool_call):
print(f"Tool call: {tool_call.type}", flush=True)
@override
def on_tool_call_del(self, delta, snapshot):
if delta.type == "code_interpreter":
if delta.code_interpreter.input:
print(delta.code_interpreter.input, end="", flush=True)
if delta.code_interpreter.outputs:
print("\n\noutput>", end=" ")
for output in delta.code_interpreter.outputs:
if output.type == "logs":
print(f"\noutput.logs = {True}")
```
You can run this handler in any IDE (e.g., [Visual Studio Code][vscode]). Streaming makes the assistant feel more interactive by printing results as they arrive.
## Testing Your Assistant
Let’s test the “Math Tutor” with a sample expression in the Playground or via API calls:
> What is 13 times 5 divided by 6, times 5, plus 100 times 4 to the power of 2?
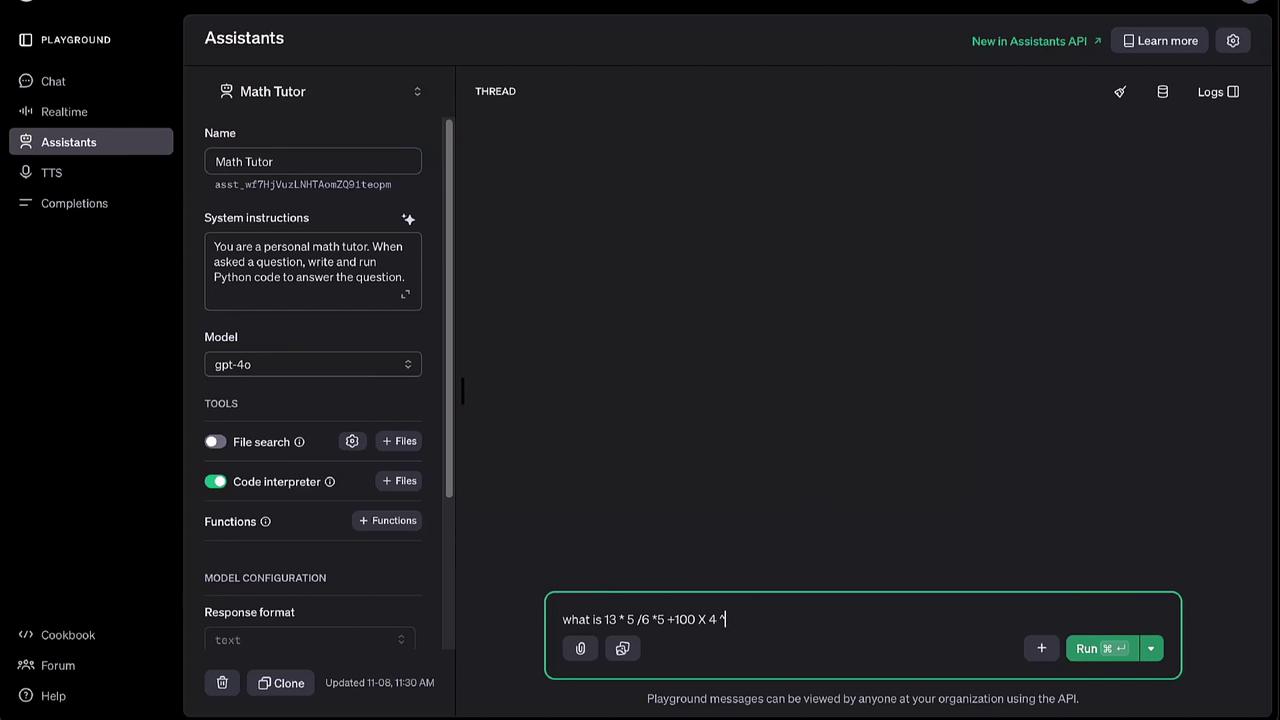
The assistant uses the code interpreter to compute and returns the result (approximately **1654.17**).
## Links and References
* [Assistants API Guide][docs]
* [Assistant Playground][playground]
* [API Quickstart Guide][quickstart]
* [Visual Studio Code][vscode]
[docs]: https://platform.openai.com/docs/guides/assistants-api
[playground]: https://platform.openai.com/playground
[quickstart]: https://platform.openai.com/docs/quickstart
[vscode]: https://code.visualstudio.com/