This article explores exposing services in Istio using Gateways for managing external access to applications.
In this article, we explore how to expose services in Istio using Gateways. After deploying your application and setting up the service mesh, you might wonder how external users can access your services. Our example demonstrates how to allow users to view the product page when they navigate to the URL http://bookinfo.app.
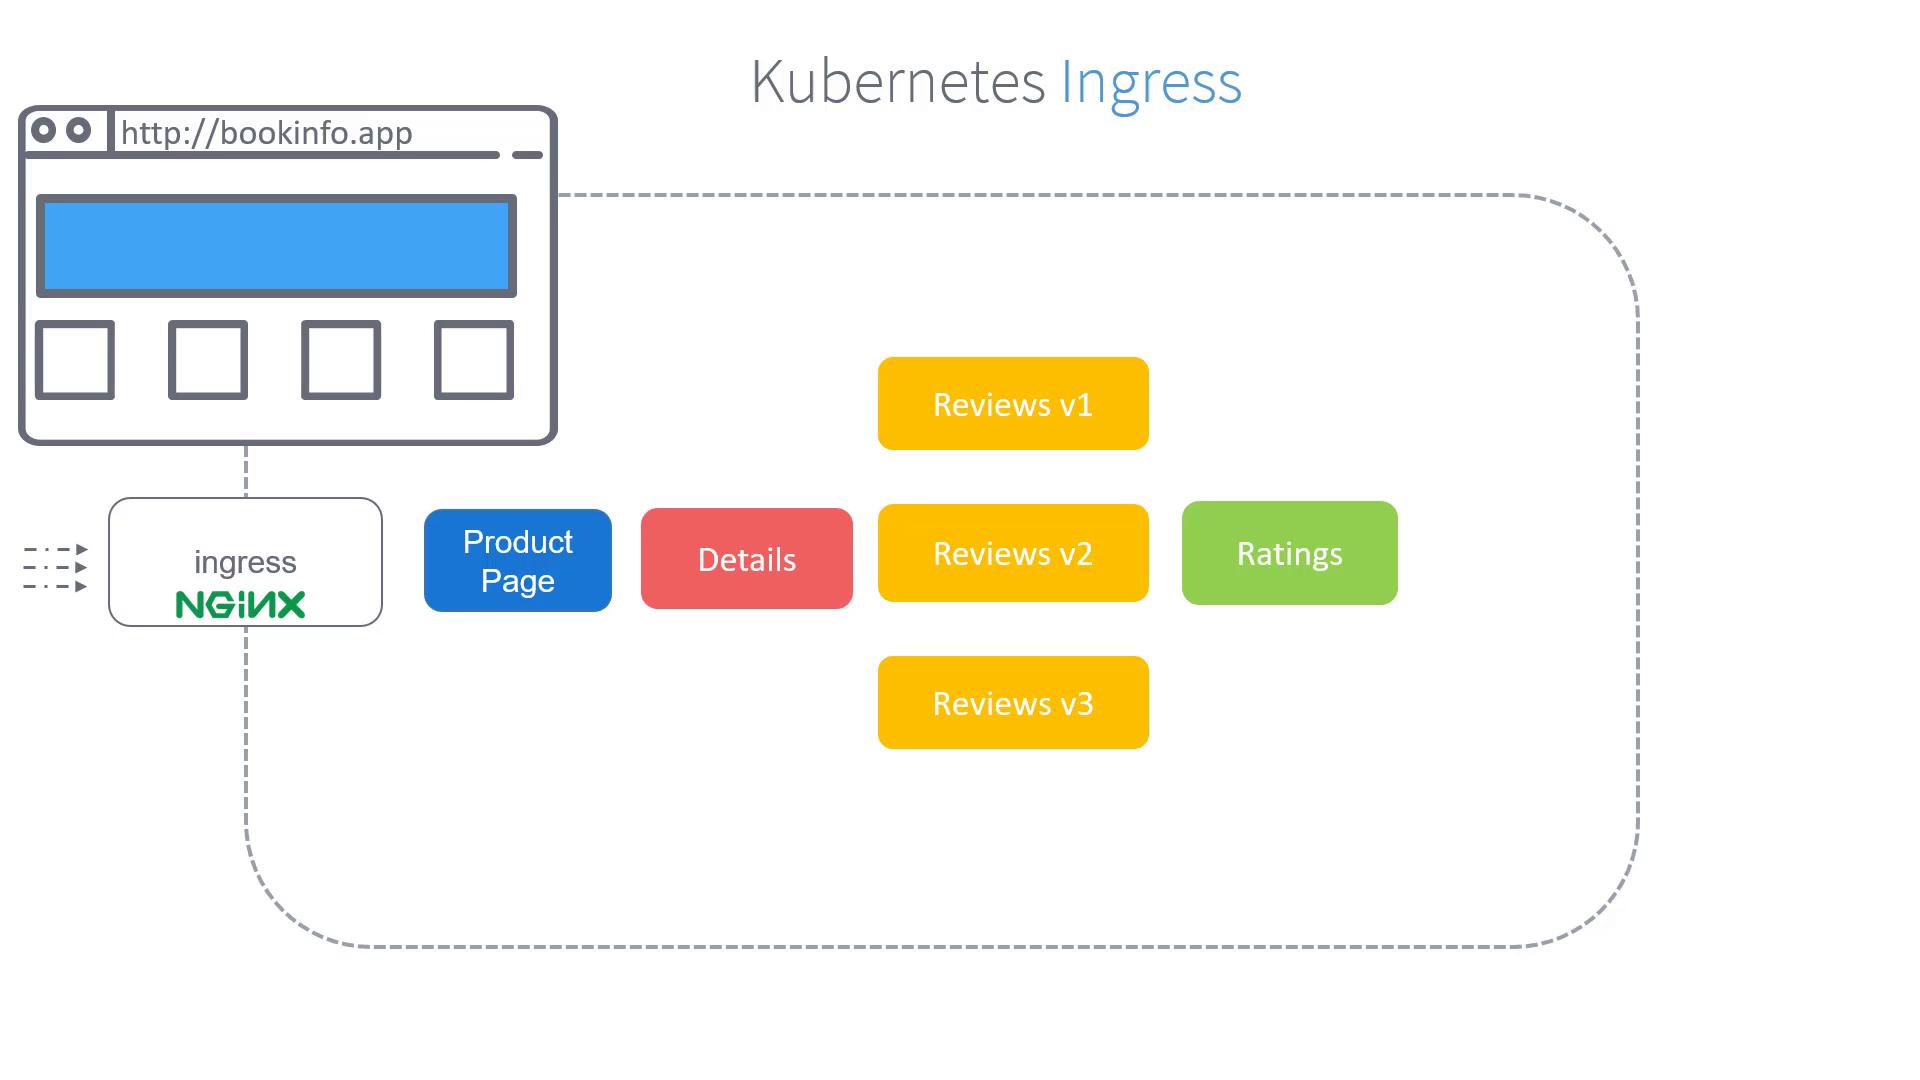
In a traditional Kubernetes setup, an Ingress resource manages incoming traffic by defining specific routing rules. For instance, any traffic arriving with the hostname “bookinfo.app” can be directed to the product service. Below is an example of a Kubernetes Ingress configuration:
Kubernetes Ingress is an effective way to manage incoming traffic. However, Istio enhances monitoring and provides advanced routing capabilities by leveraging its native Gateway features.
Istio Gateways function as load balancers at the edge of the mesh, handling both inbound and outbound traffic. When Istio is deployed on a cluster, it automatically installs both the Istio Ingress Gateway and Istio Egress Gateway.
Unlike Kubernetes Ingress controllers that might use NGINX, the Istio Ingress Gateway intercepts all inbound traffic using Envoy proxies. Every service in the mesh is paired with an Envoy sidecar proxy, while the gateways themselves are standalone proxies positioned at the edge of the mesh.
Our objective is to capture all traffic arriving at the Istio Ingress Gateway for the hostname “bookinfo.app” and forward it to the product page service.
To achieve this, you first create a Gateway object that accepts HTTP traffic on port 80 for the specified hostname. Use the following configuration as a starting point:
To ensure that this configuration applies to the default Istio Ingress Gateway (and not any custom gateways), add a selector that targets the default controller label. The updated configuration is as follows:
At this point, the bookinfo Gateway is configured to capture traffic coming through the default Istio Ingress Gateway for the URL “bookinfo.app”. The following step is to define Virtual Services to correctly route this traffic to the product page service, which will be covered in a subsequent article.