> ## Documentation Index
> Fetch the complete documentation index at: https://notes.kodekloud.com/llms.txt
> Use this file to discover all available pages before exploring further.
# Create Pipeline with Parameters
> This guide demonstrates creating a Jenkins pipeline using parameters for flexible and dynamic job configurations.
In this guide, we demonstrate how to create a Jenkins pipeline that leverages parameters for building flexible and dynamic jobs. A parameterized build in Jenkins lets you pass in custom values when triggering a build, making your CI/CD process more versatile and easily configurable.
Below is an example repository called "parameterized-pipeline-job-init" on GitHub. This repository hosts a simple Java Spring Boot “Hello World” application with two branches—**test** and **main**—where the only difference is the Jenkinsfile. Each branch’s Jenkinsfile defines a different set of stages, which we will review next.
***
## Comparing Jenkinsfiles for Test and Main Branches
### Test Branch Jenkinsfile
In the **test** branch, the Jenkinsfile defines the following stages:
* Maven Version
* Build
* Test
* Local Deployment
* Integration Testing
Below is the initial Jenkinsfile from the test branch:
```groovy theme={null}
pipeline {
agent any
stages {
stage('Maven Version') {
steps {
sh 'echo Print Maven Version'
sh 'mvn -version'
}
}
stage('Build') {
steps {
sh 'mvn clean package -DskipTests=true'
archiveArtifacts 'target/hello-demo-*.jar'
}
}
stage('Test') {
steps {
sh 'mvn test'
junit(testResults: 'target/surefire-reports/TST-*.xml', keepProperties: true, keepTestNames: true)
}
}
}
}
```
To compare the differences between the two Jenkinsfiles, a third-party tool is used. In the comparison, the **test** branch Jenkinsfile appears on the left and the **main** branch Jenkinsfile on the right. Although both use the same pipeline agent and tools, the stages are slightly different. The **test** branch includes the Maven Version, Build, Test stages, and adds local deployment with the `java -jar` command for integration testing. In the test branch, the local deployment stage uses triple double quotes to allow for multiline string construction and pristine whitespace preservation:
```groovy theme={null}
stage('Local Deployment') {
steps {
sh """java -jar target/hello-demo-*.jar > /dev/null &"""
}
}
stage('Integration Testing') {
steps {
sh 'sleep 5s'
sh 'curl -s http://localhost:6767/hello'
}
}
```
This approach runs the Java application in the background (thanks to the ampersand) while redirecting its output to `/dev/null`.
### Main Branch Jenkinsfile
In the **main** branch, the Jenkinsfile is designed to build a production-ready pipeline. Notice that the Maven Version stage is omitted. Instead, the stages include:
* Build
* Test
* Containerization
* Kubernetes Deployment
* Integration Testing
Below is a simplified version of the main branch Jenkinsfile:
```groovy theme={null}
/****** BRANCH - main *****/
pipeline {
agent any
stages {
stage('Build') {
steps {
sh 'mvn clean package -DskipTests=true'
archiveArtifacts 'target/hello-demo-*.jar'
}
}
stage('Test') {
steps {
sh 'mvn test'
junit(testResults: 'target/surefire-reports/TEST-*.xml', keepProperties: true, keepTestNames: true)
}
}
stage('Containerization') {
steps {
sh 'echo Docker Build Image..'
sh 'echo Docker Tag Image....'
sh 'echo Docker Push Image......'
}
}
stage('Kubernetes Deployment') {
steps {
sh 'echo Deploy to Kubernetes using [GitOps with ArgoCD](https://learn.kodekloud.com/user/courses/gitops-with-argocd)'
}
}
stage('Integration Testing') {
steps {
sh 'sleep 10s'
sh 'echo Testing using cURL commands......'
}
}
}
}
```
Here, the containerization stage simulates building, tagging, and pushing a Docker image, whereas the deployment stage simulates deploying to Kubernetes using ArgoCD. The integration testing stage verifies the deployment by pausing for a defined duration (using `sleep`) before issuing a test call.
***
## Configuring a Parameterized Pipeline Job in Jenkins
Parameterizing your pipeline job enables a single job to run across branches and customize build options dynamically. Follow these steps in Jenkins:
### 1. Create a New Pipeline Job
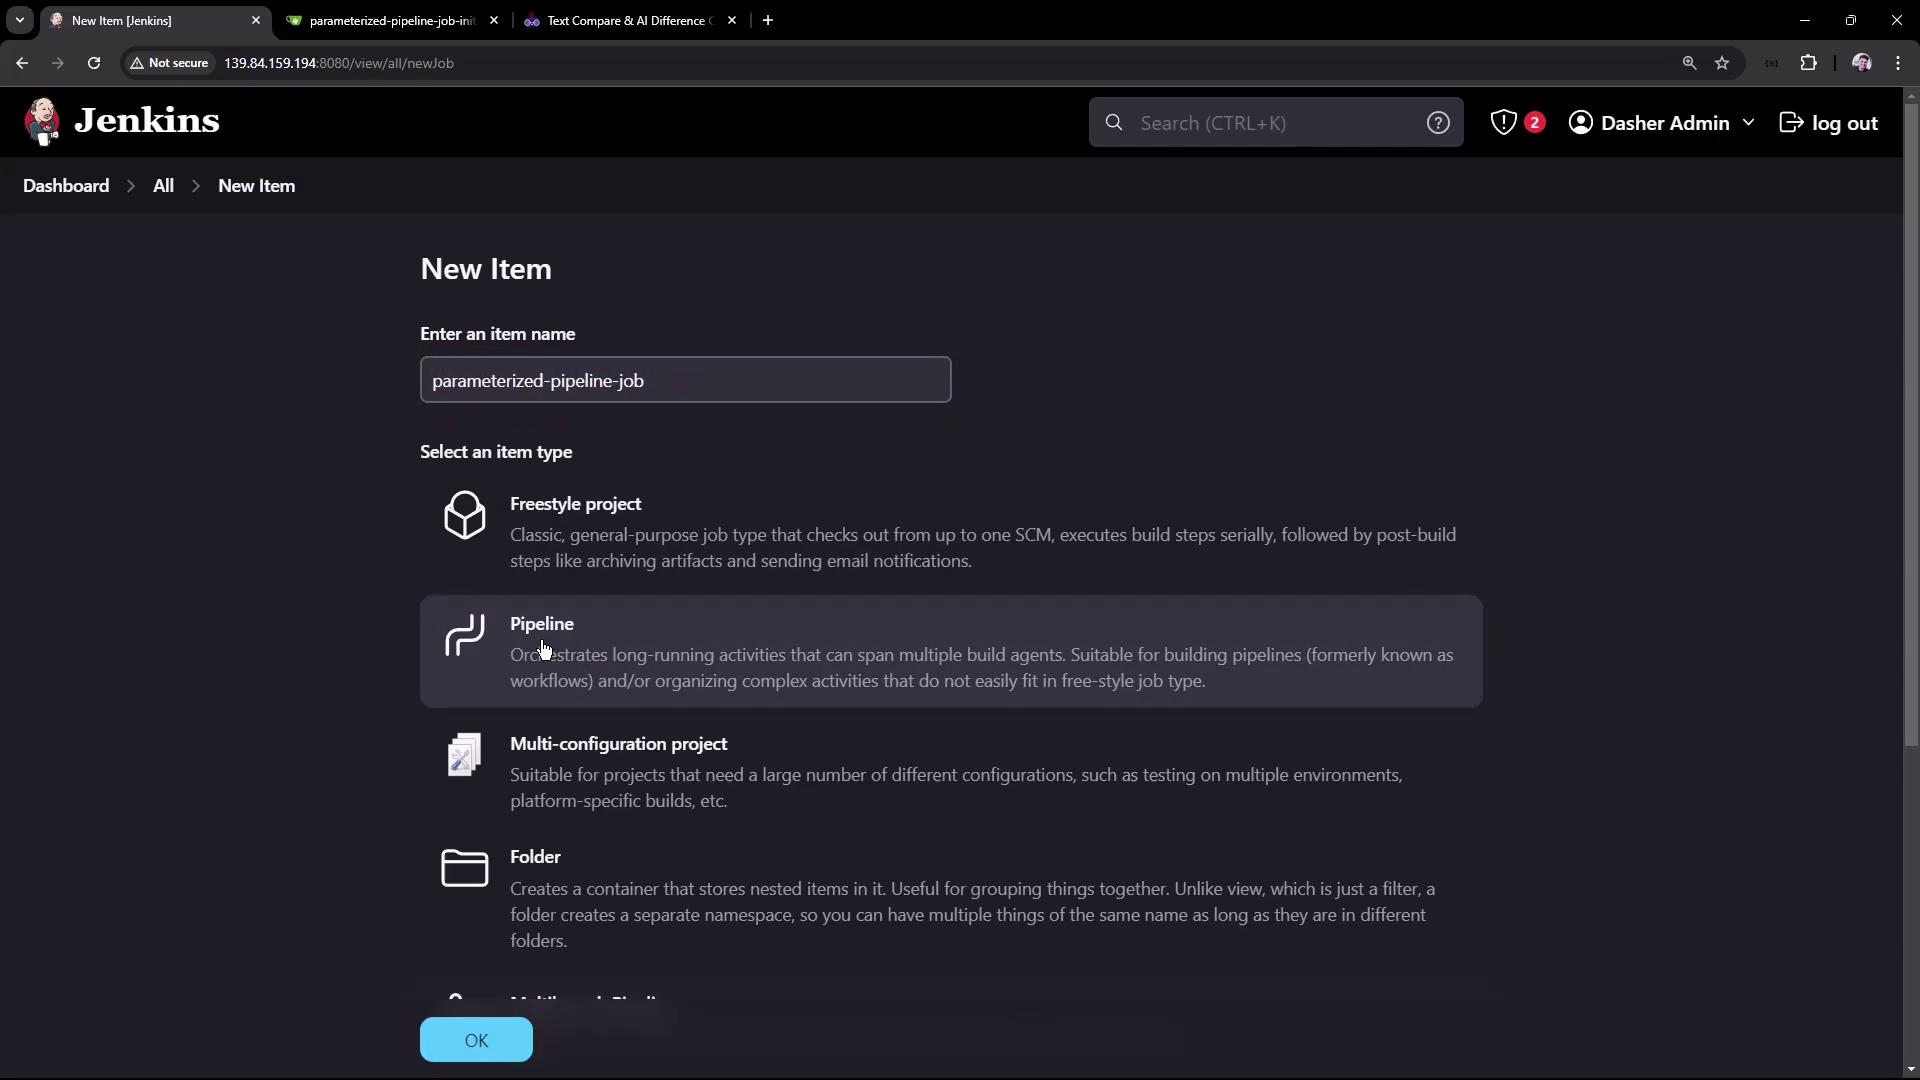
* In Jenkins Classic UI, click **New Item**.
* Name the job (e.g., "parameterized-pipeline-job") and select the **Pipeline** project type.
### 2. Configure Source Control Management (SCM)
* Enter the repository URL for your pipeline script.
* Specify the branch. Initially, use the test branch by setting the script path to `Jenkinsfile`.
### 3. Run a Quick Build
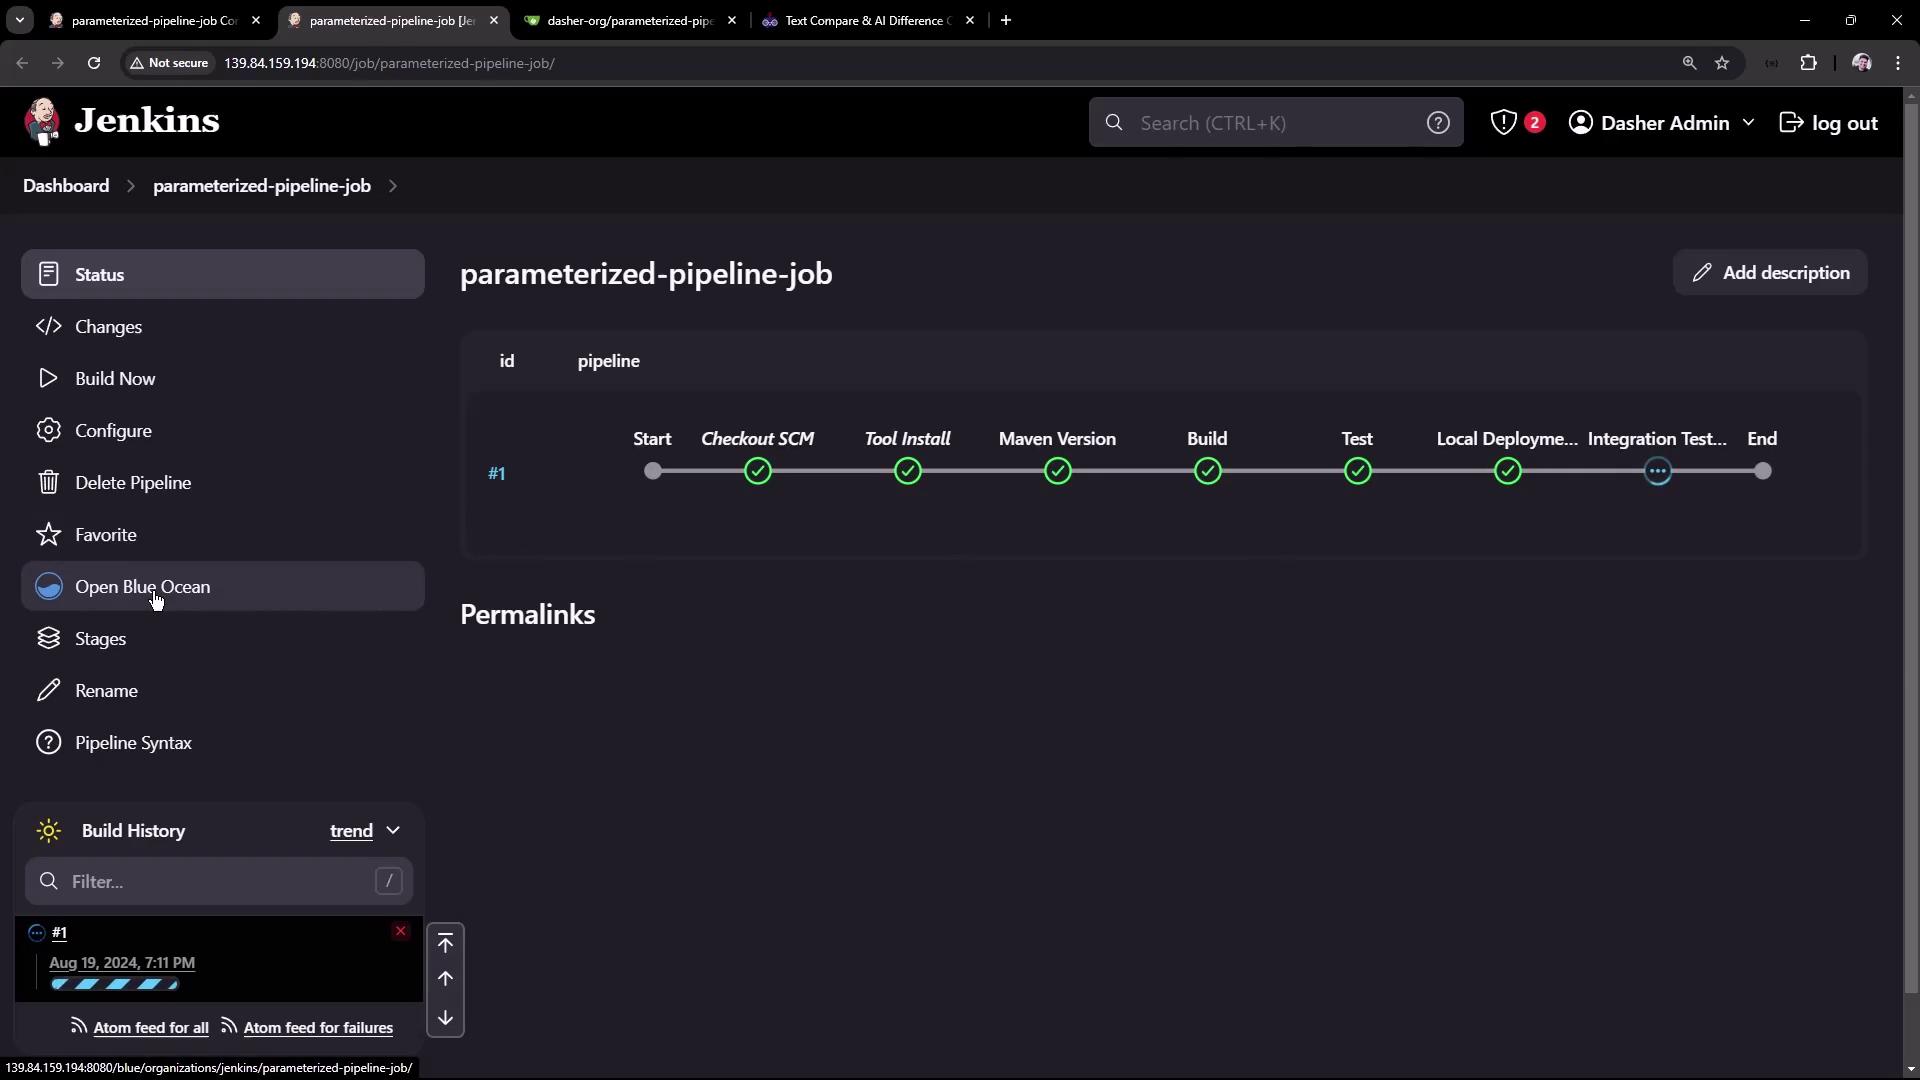
* Click **Apply** and then **Build Now** to validate the configuration.
* The run should display the build and test stages, along with the deployment phase. Use the Blue Ocean interface to view detailed logs.
### 4. Enable Parameterization
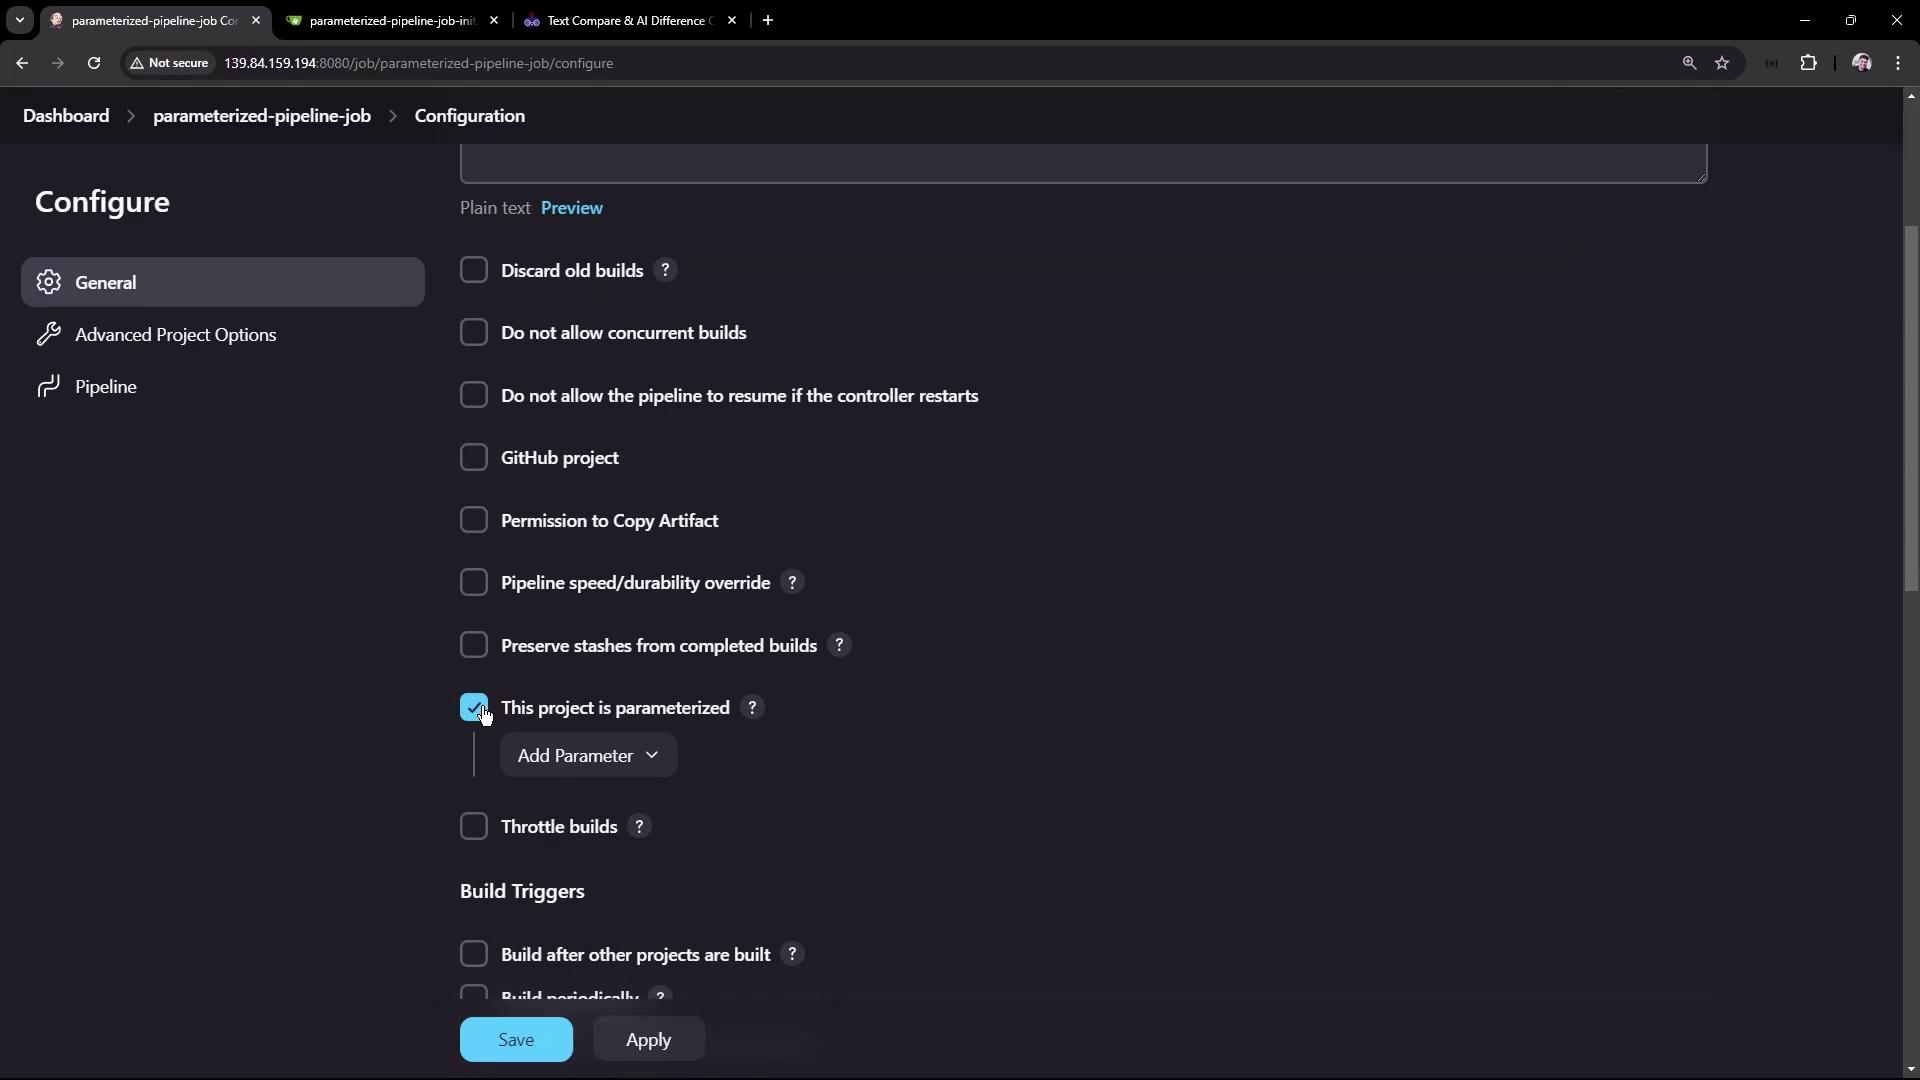
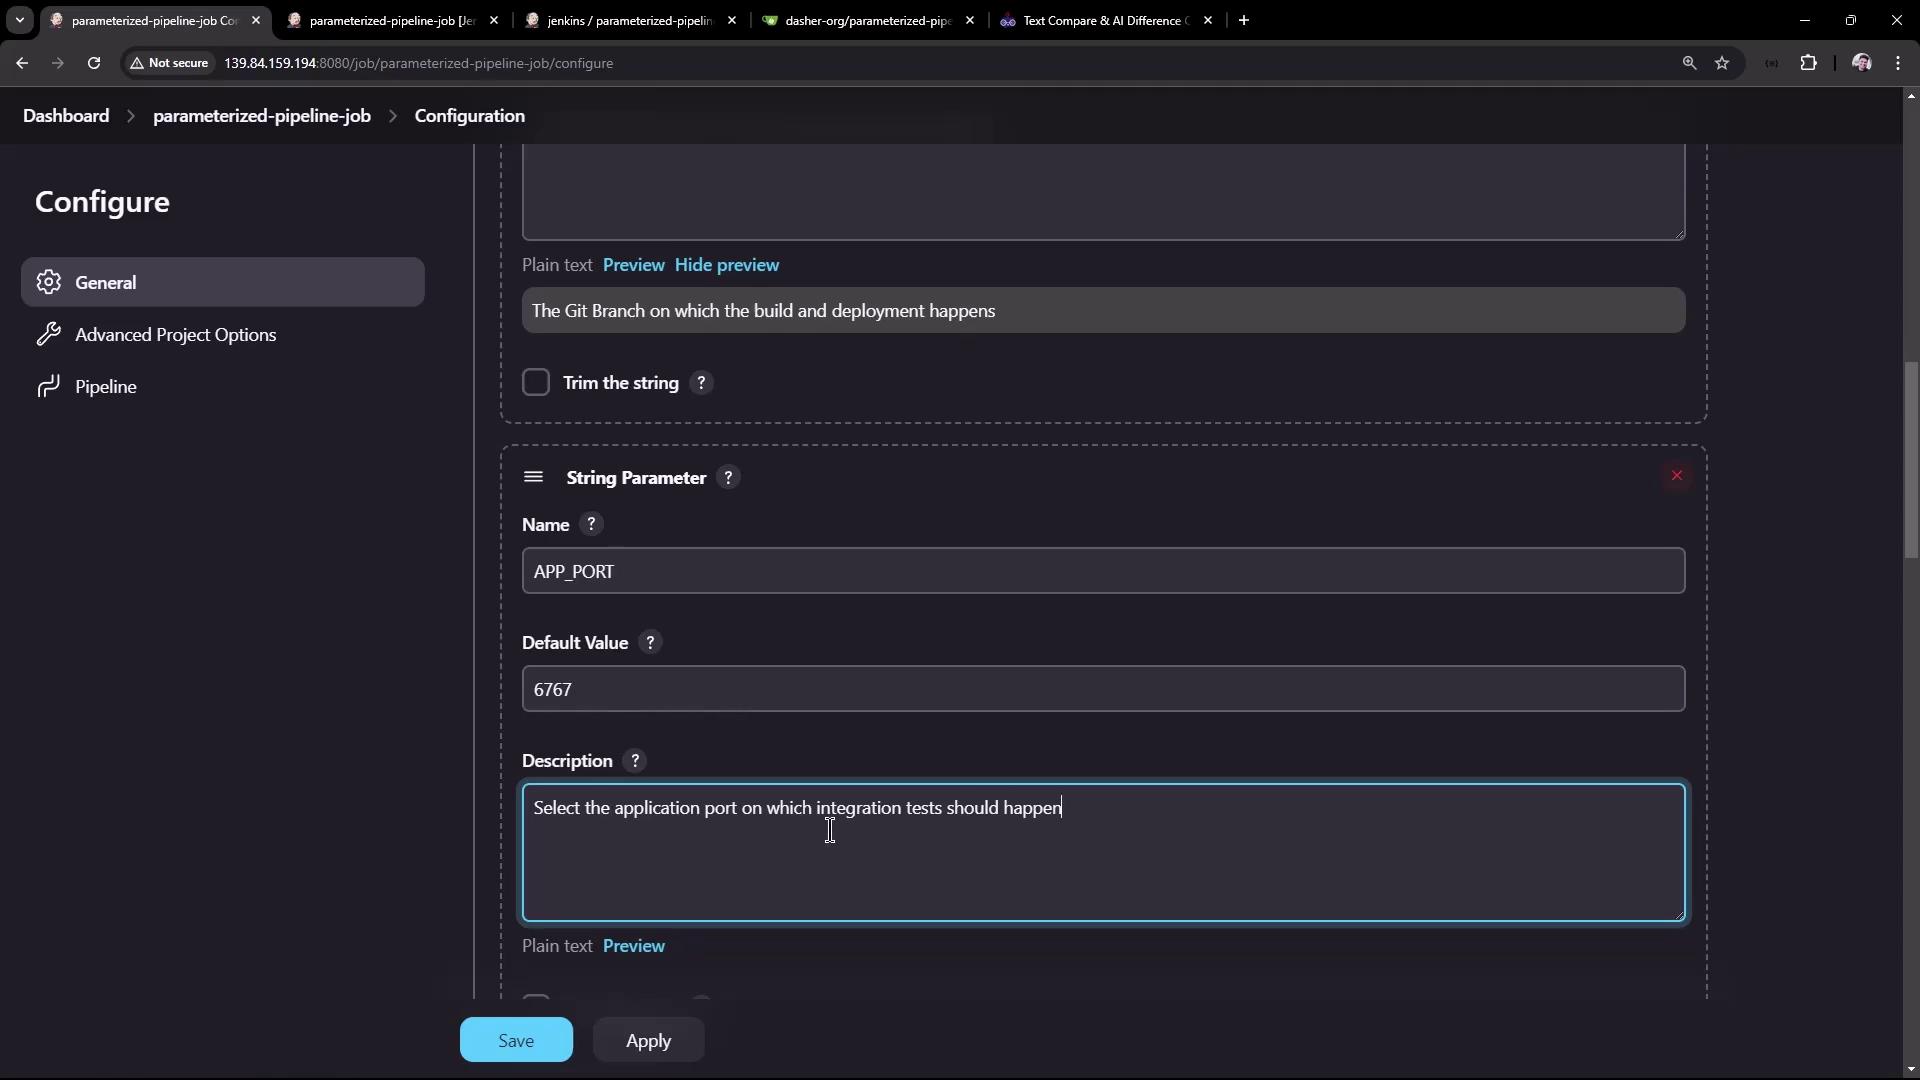
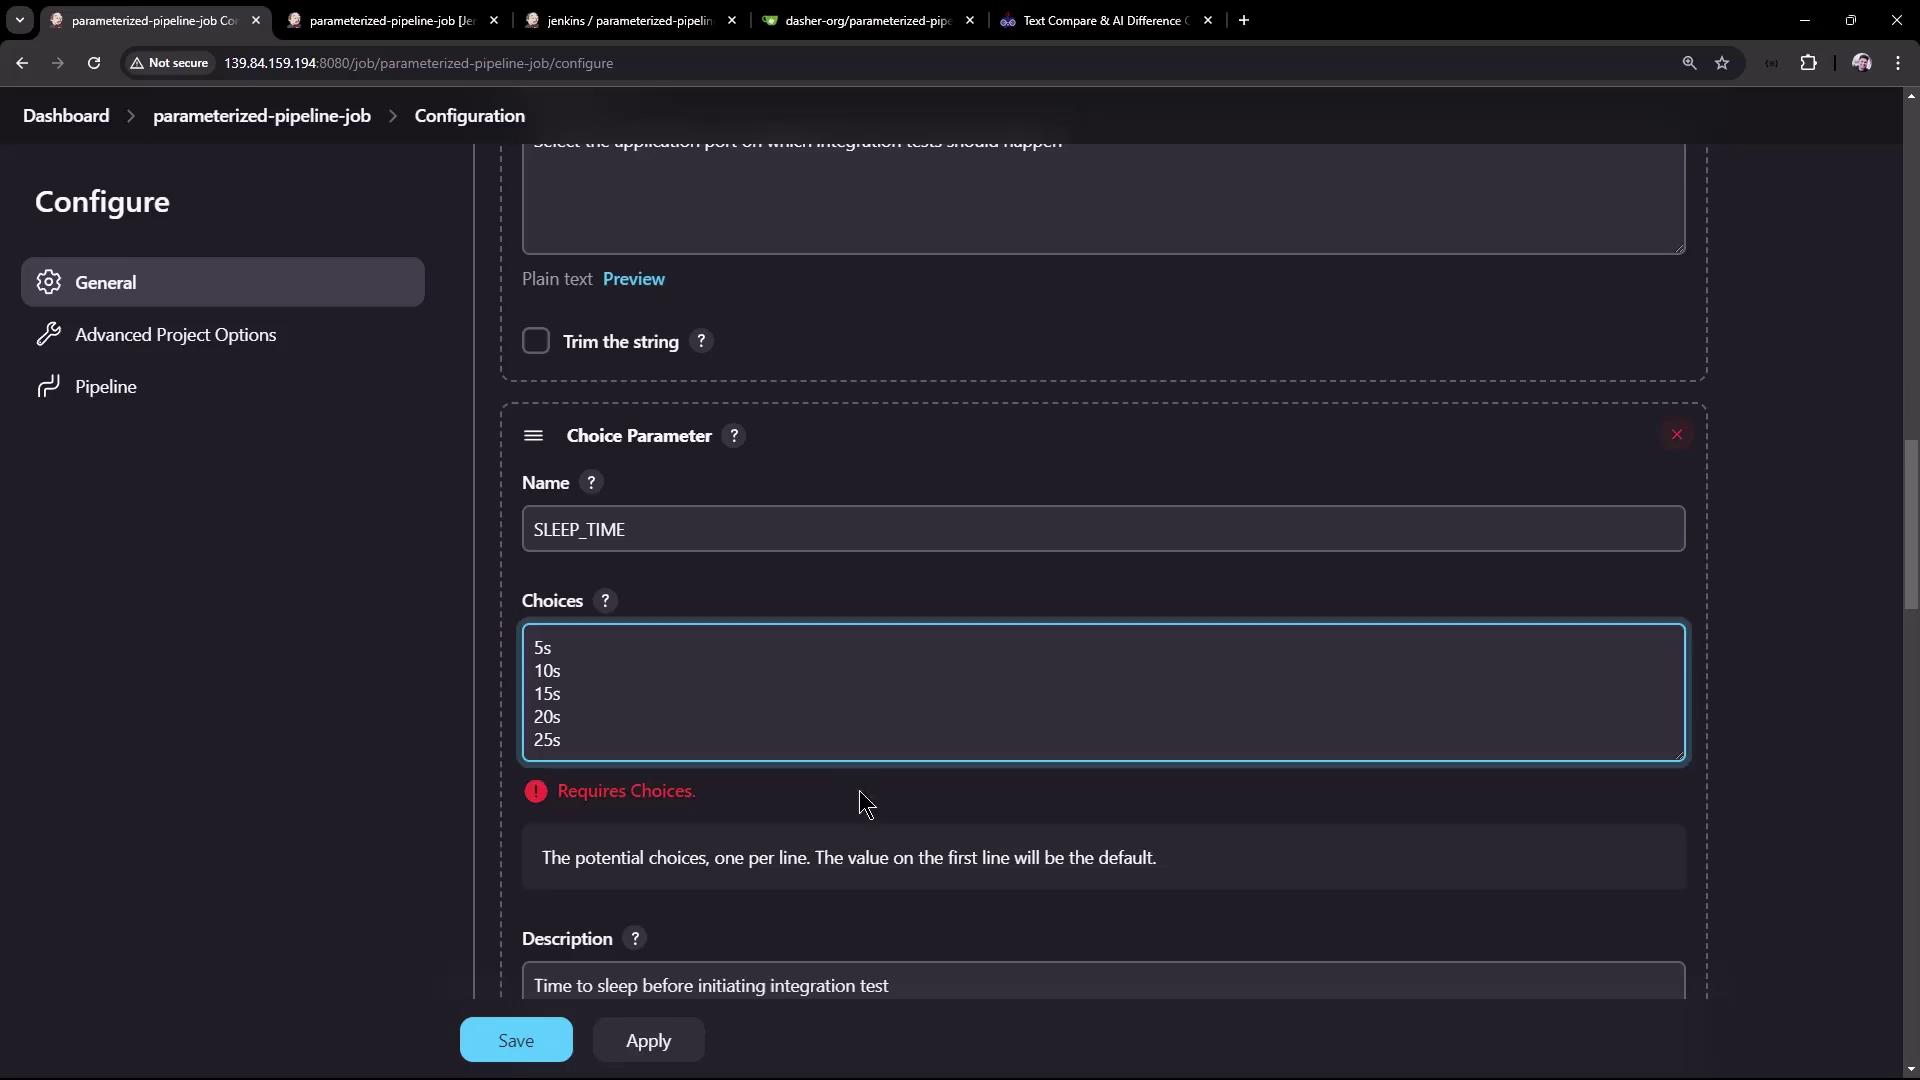
* In the job configuration, enable the **This project is parameterized** option.
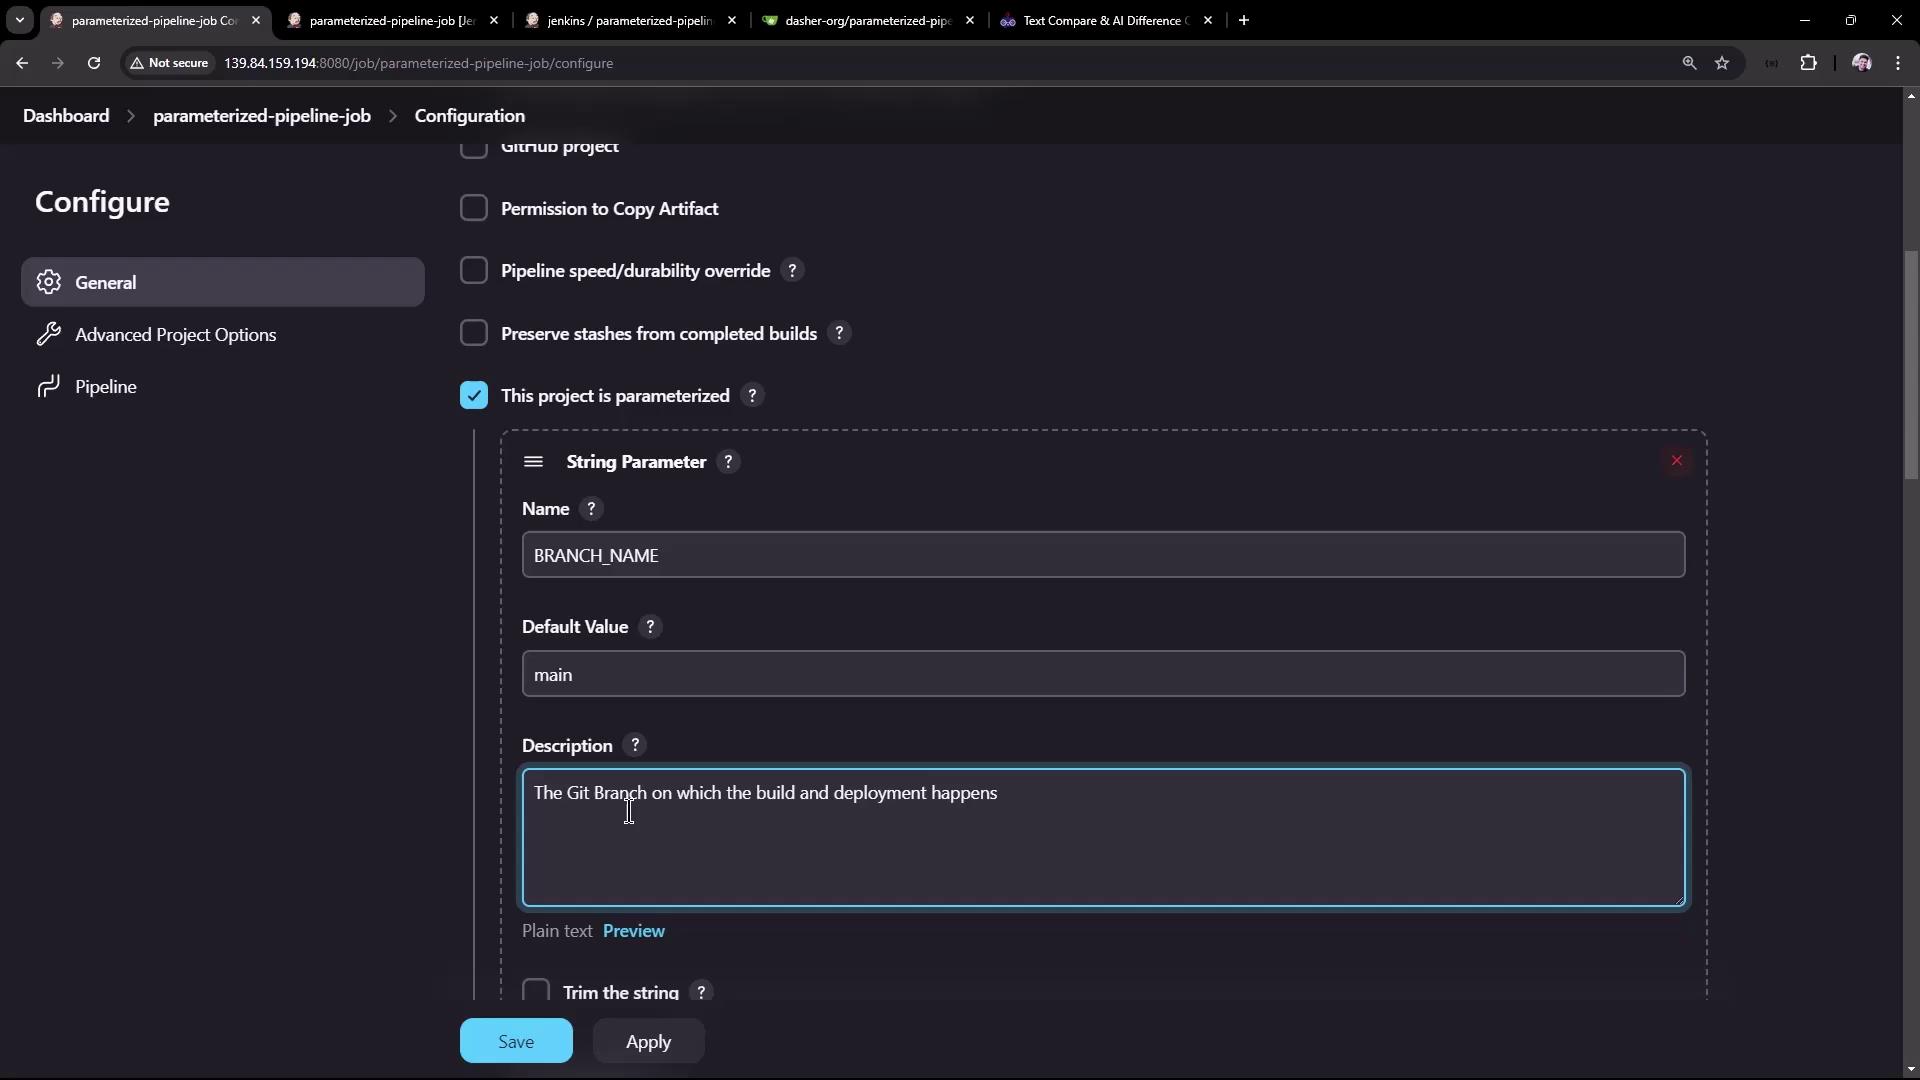
* Add the following parameters to the job:
| Parameter | Type | Default Value | Description |
| ------------ | ------ | ------------- | ------------------------------------------------------------------------------------------------- |
| BRANCH\_NAME | String | main | Specifies which Git branch to build. |
| APP\_PORT | String | 6767 | The port on which the application will run during integration testing. |
| SLEEP\_TIME | Choice | 5s | Sets the sleep duration before the integration test. Choices include: 5s, 10s, 15s, 20s, and 25s. |
### 5. Parameterizing the Pipeline Script
Modify the Jenkinsfile to reference the defined parameters using the syntax `${params.PARAMETER_NAME}`. For example, update the Maven Version stage in the test branch as follows:
```groovy theme={null}
pipeline {
agent any
stages {
stage('Maven Version') {
steps {
sh 'echo Print Maven Version'
sh 'mvn -version'
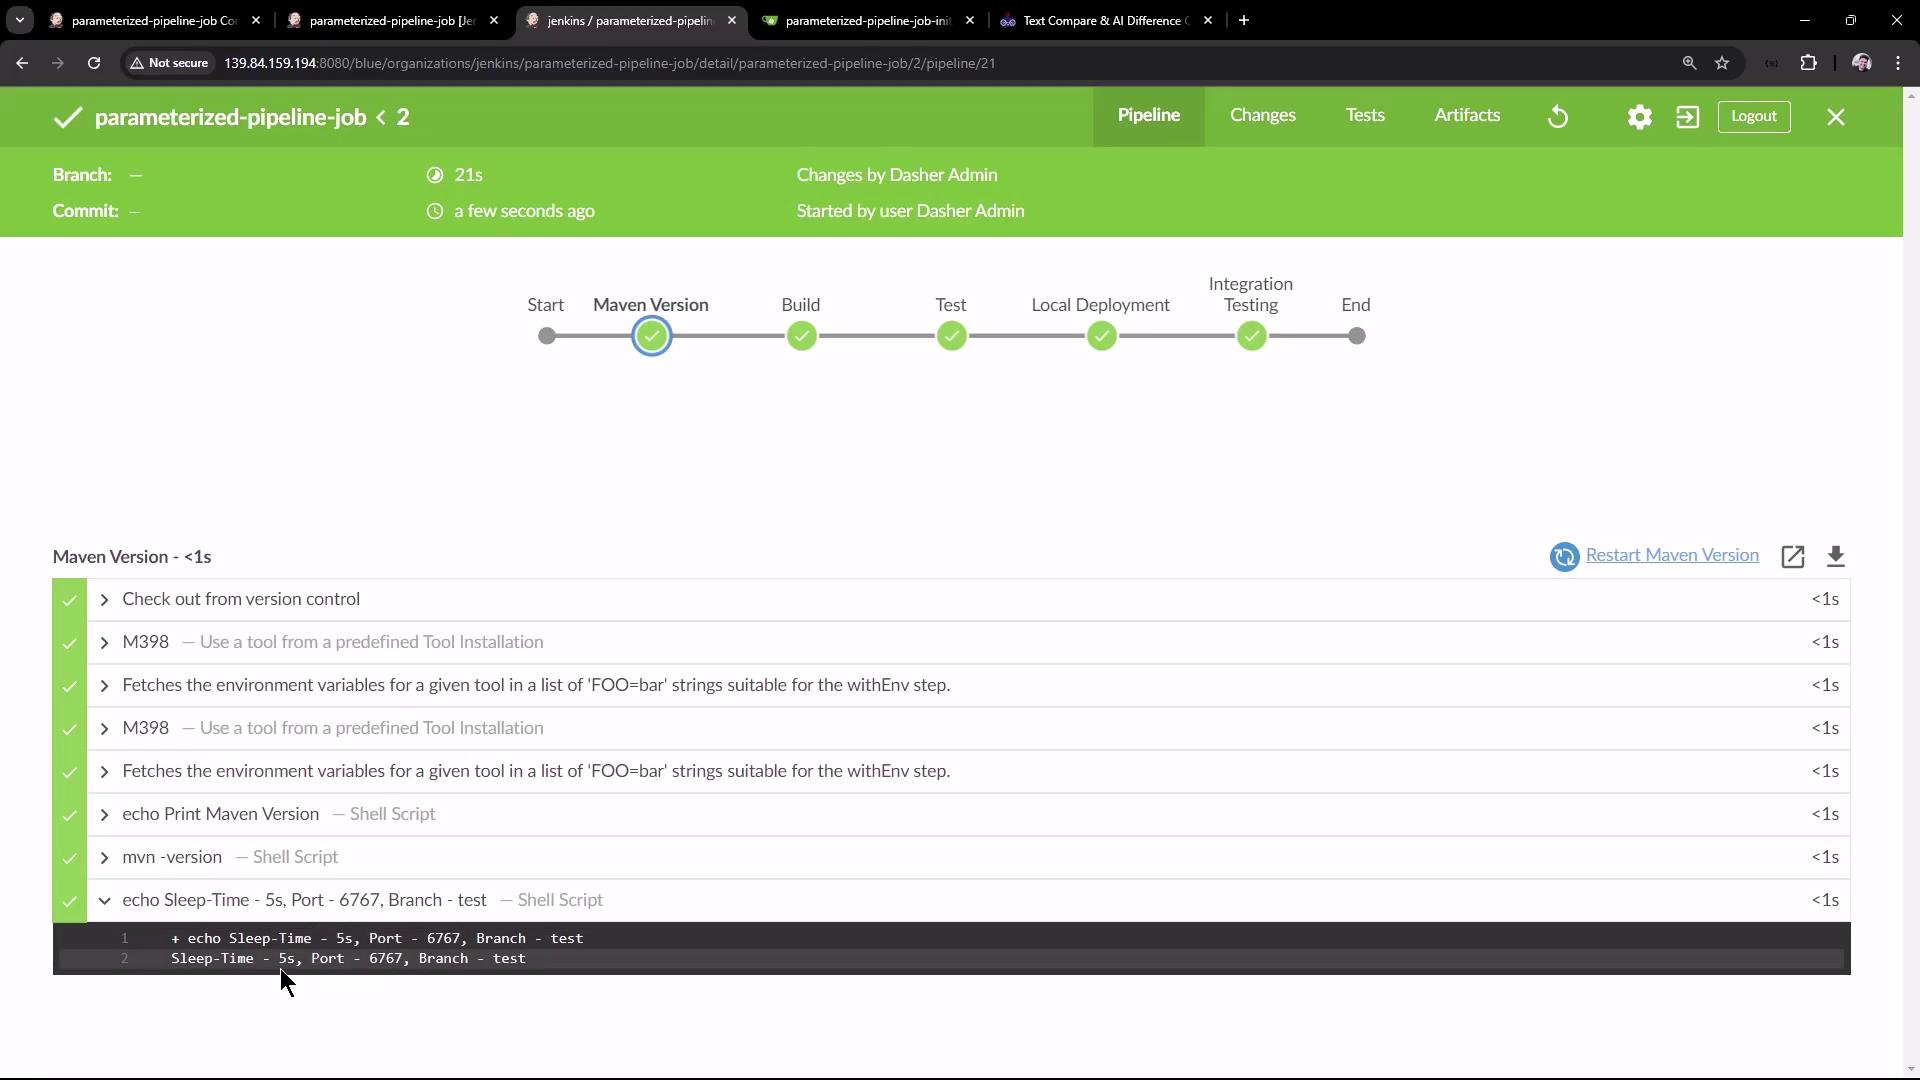
sh "echo Sleep-Time - ${params.SLEEP_TIME}, Port - ${params.APP_PORT}, Branch - ${params.BRANCH_NAME}"
}
}
stage('Build') {
steps {
sh 'mvn clean package -DskipTests=true'
archiveArtifacts 'target/hello-demo-*.jar'
}
}
stage('Test') {
steps {
sh 'mvn test'
junit(testResults: 'target/surefire-reports/TEST-*.xml', keepProperties: true, keepTestNames: true)
}
}
stage('Local Deployment') {
steps {
sh 'java -jar target/hello-demo-*.jar > /dev/null &'
}
}
}
}
```
Ensure that the integration testing stage also utilizes the parameterized sleep duration:
```groovy theme={null}
stage('Integration Testing') {
steps {
sh "sleep ${params.SLEEP_TIME}"
sh 'curl -s http://localhost:6767/hello'
}
}
```
Remember to use double quotes in shell commands when referencing parameters to allow for proper variable substitution.
### 6. Triggering Parameterized Builds
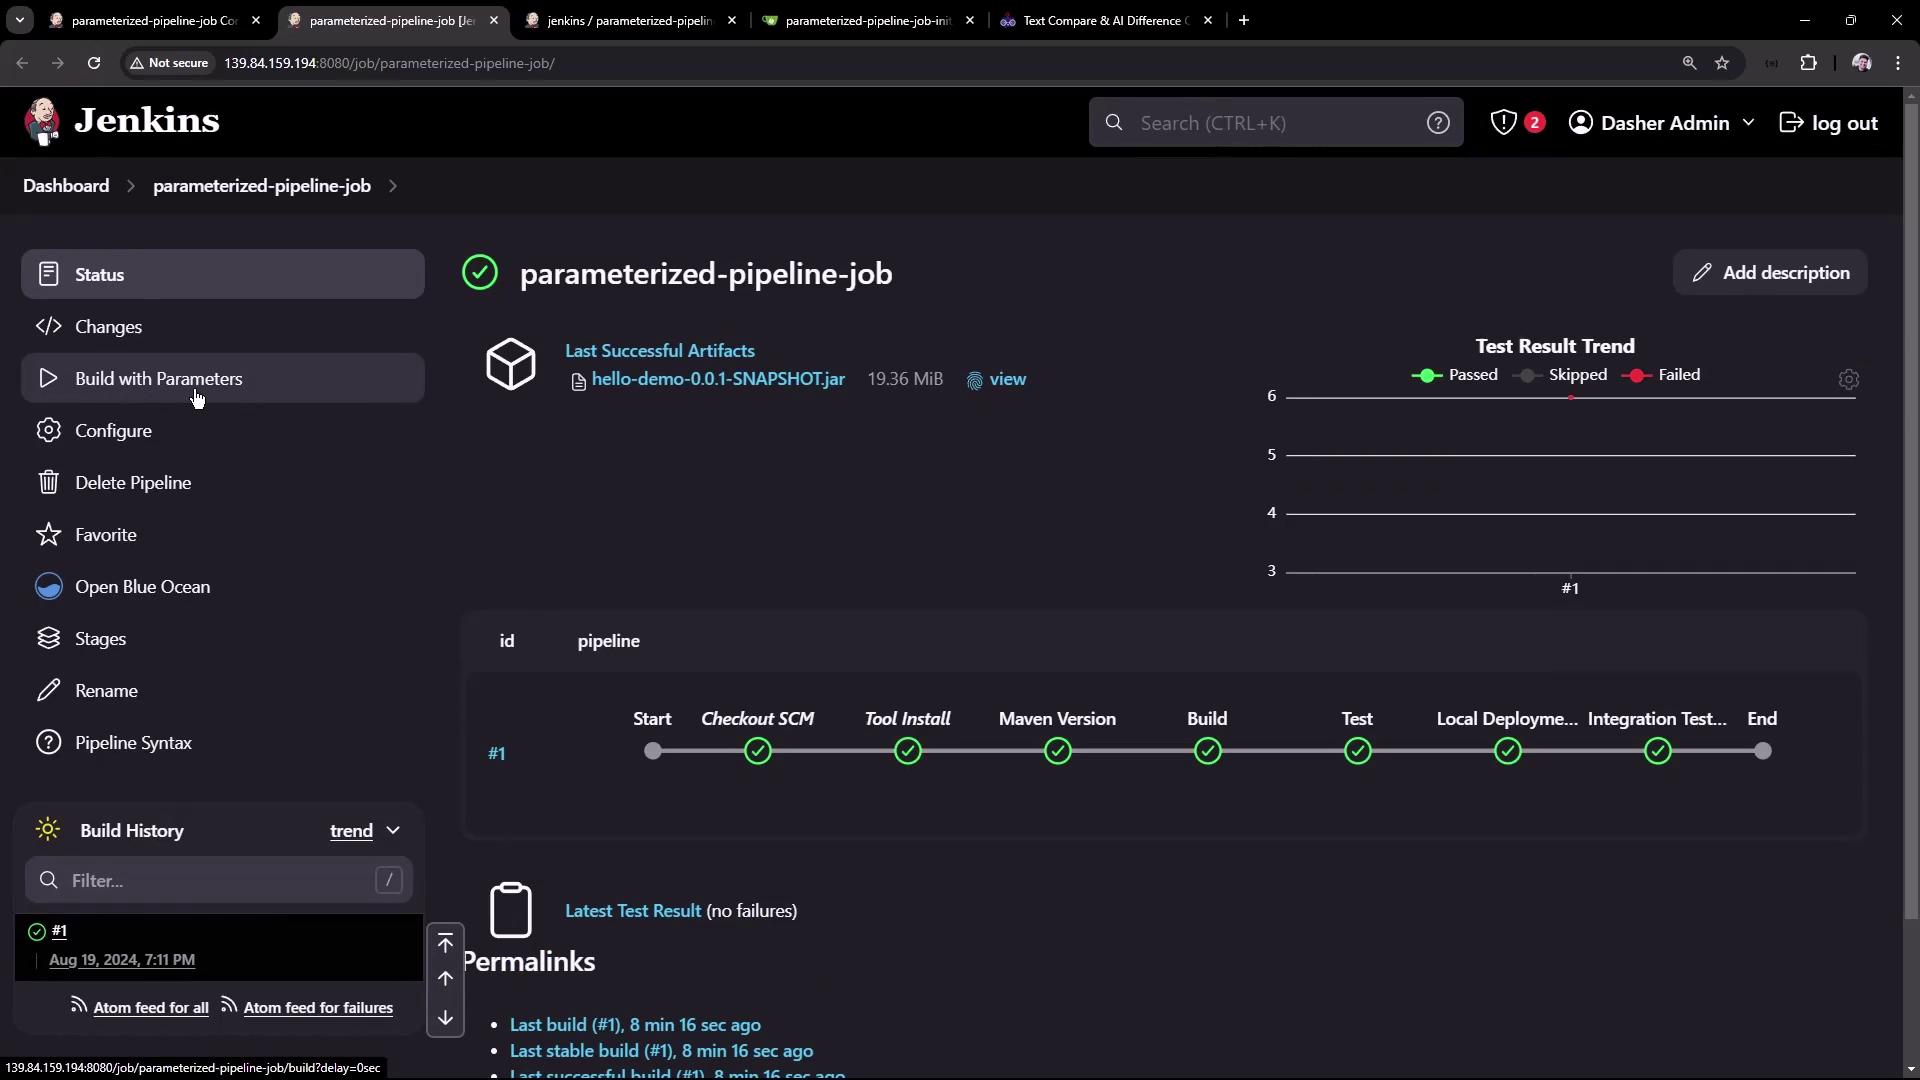
* After committing the changes to the repository (for example, on the test branch), refresh the Jenkins job page. You should now see a **Build with Parameters** option.
* Clicking on **Build with Parameters** allows you to adjust default values (e.g., switching the branch to `test` or setting the sleep time to `5s`) before triggering the build.
* Once the build starts, you can use Blue Ocean to review detailed logs.
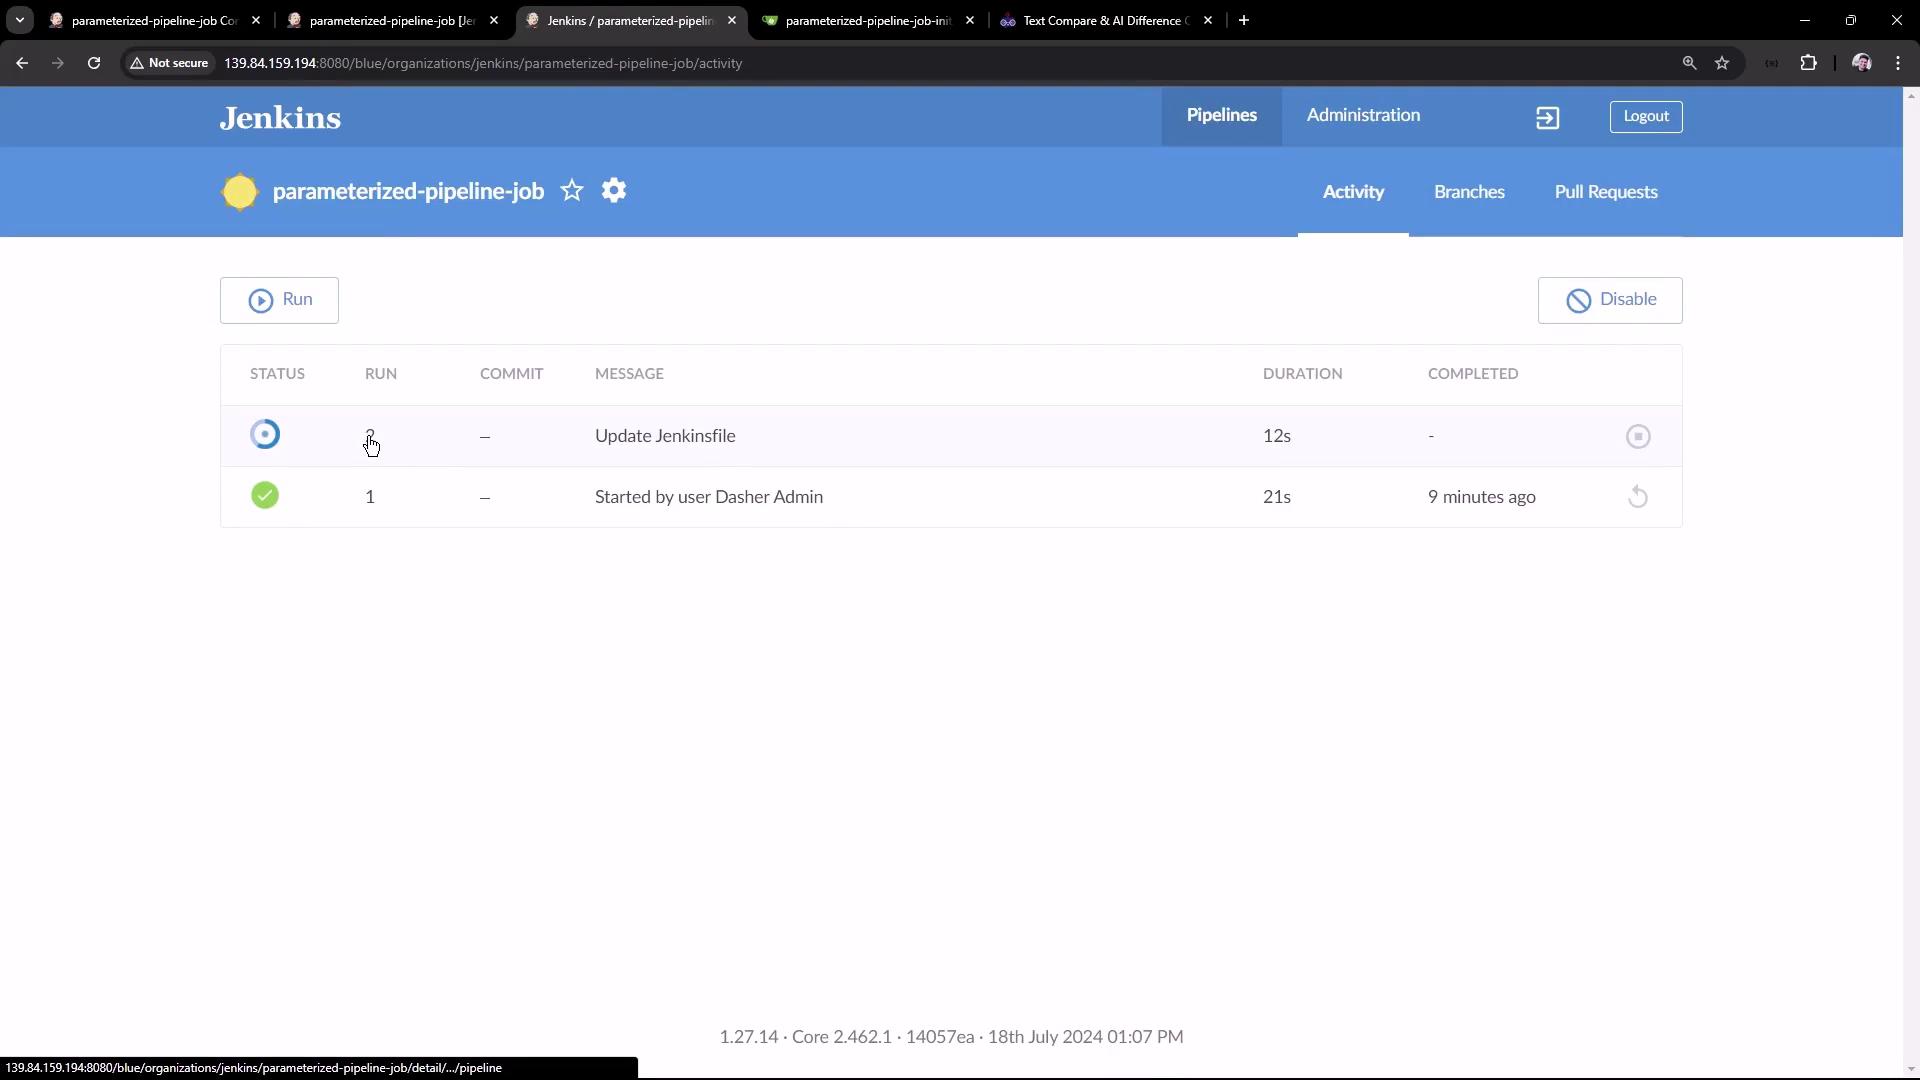
The logs will confirm that the parameters (sleep time, port, branch name) are correctly substituted, as shown below:
```bash theme={null}
+ sleep 5s
+ curl -s http://localhost:6767/hello
Hello, KodeKloud community!
```
### 7. Customizing for the Main Branch
Edit the Jenkinsfile on the **main** branch to incorporate parameters during integration testing:
```groovy theme={null}
pipeline {
agent any
stages {
stage('Test') {
steps {
sh 'mvn test'
junit(testResults: 'target/surefire-reports/TEST-*.xml', keepProperties: true, keepTestNames: true)
}
}
stage('Containerization') {
steps {
sh 'echo Docker Build Image..'
sh 'echo Docker Tag Image....'
sh 'echo Docker Push Image......'
}
}
stage('Kubernetes Deployment') {
steps {
sh 'echo Deploy to Kubernetes using [GitOps with ArgoCD](https://learn.kodekloud.com/user/courses/gitops-with-argocd)'
}
}
stage('Integration Testing') {
steps {
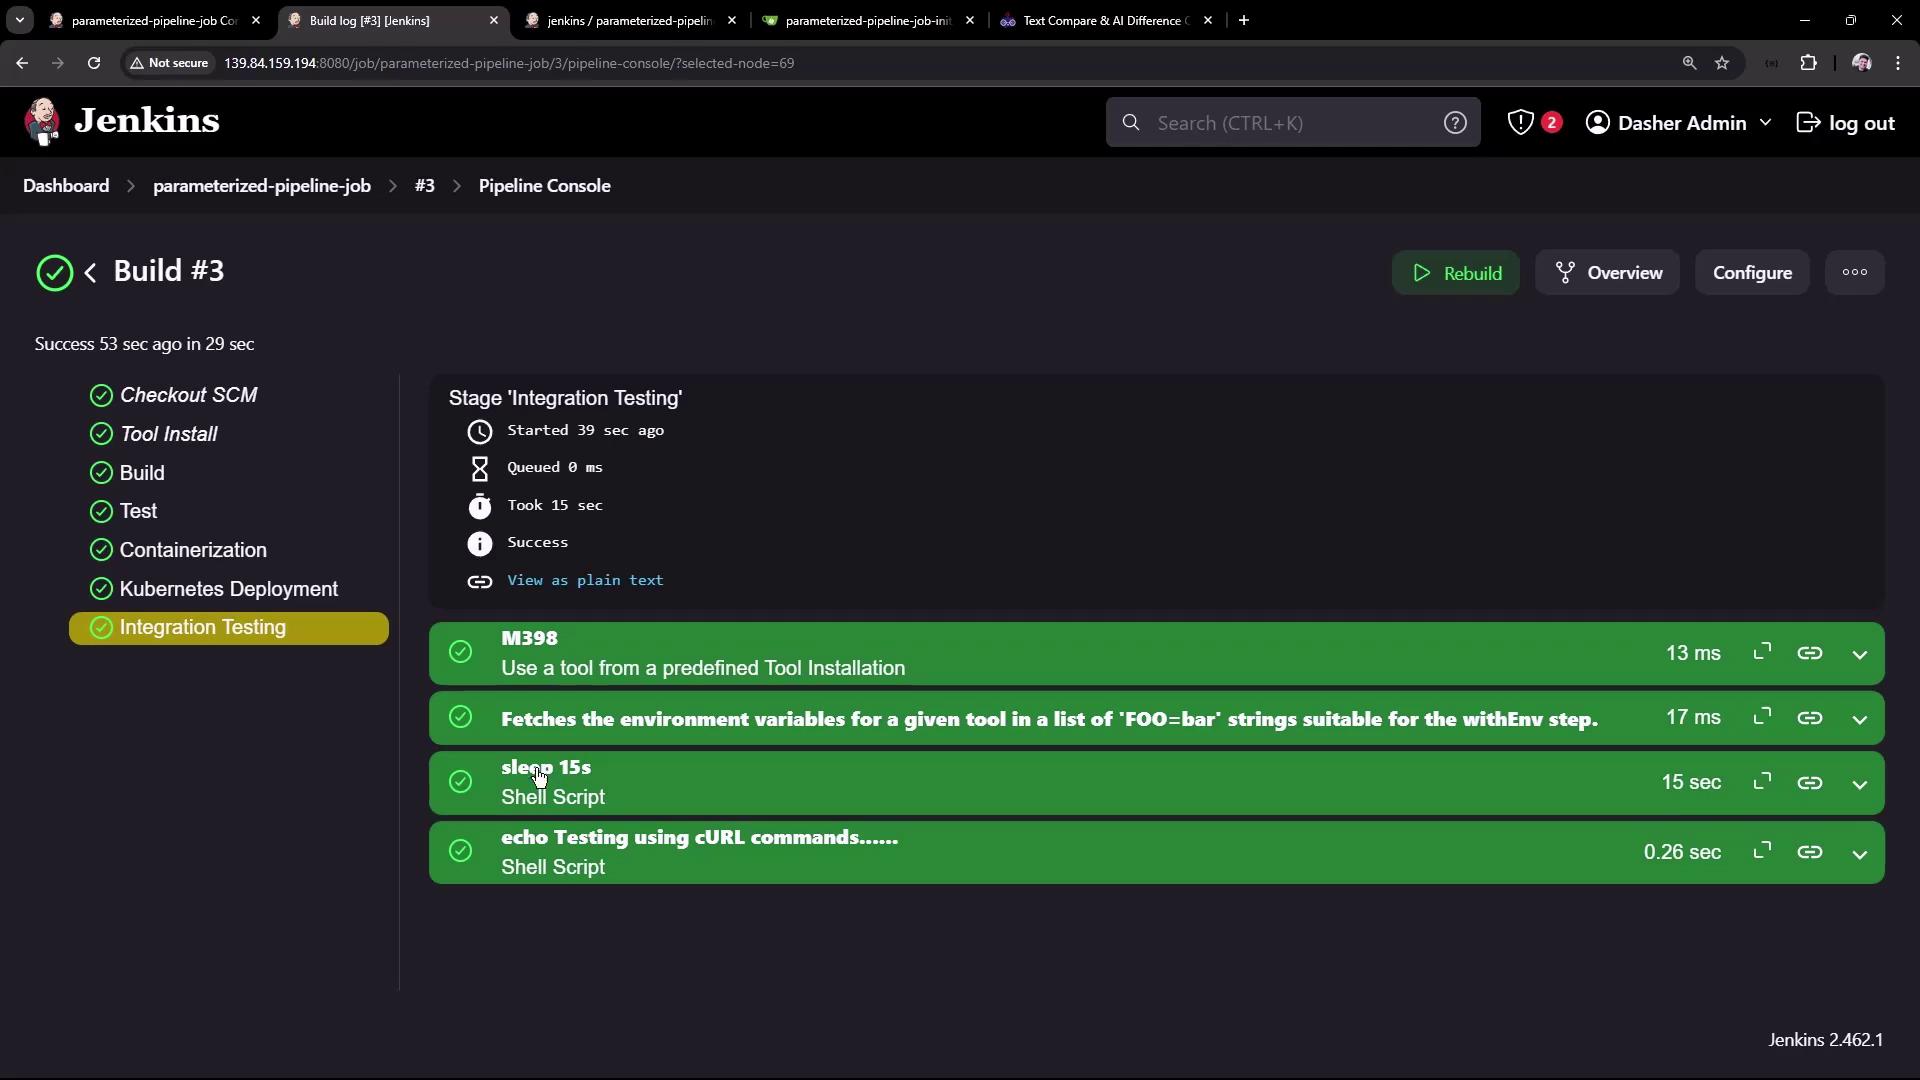
sh "sleep ${params.SLEEP_TIME}"
sh 'echo Testing using CURL commands......'
}
}
}
tools {
maven 'M398'
}
}
```
Commit these changes and trigger a new build, selecting the **main** branch and an appropriate sleep time (for example, `15s`). The build log will reflect the updated parameters, and the integration testing stage will pause for the specified duration before proceeding.
Ensure that you update all necessary areas in your Jenkinsfiles to reflect the new parameterized approach. Missing a reference may lead to build inconsistencies.
***
## Conclusion
By utilizing parameters in your Jenkins pipelines, you can dynamically switch between branches and customize build options—such as sleep time and application port—with ease. This approach allows a single pipeline job to handle different workflows for test and main branches, enhancing the robustness and flexibility of your CI/CD process.
Thank you for reading this article.