This article demonstrates setting up a Jenkins-based release pipeline for automated deployment and versioning in a project.
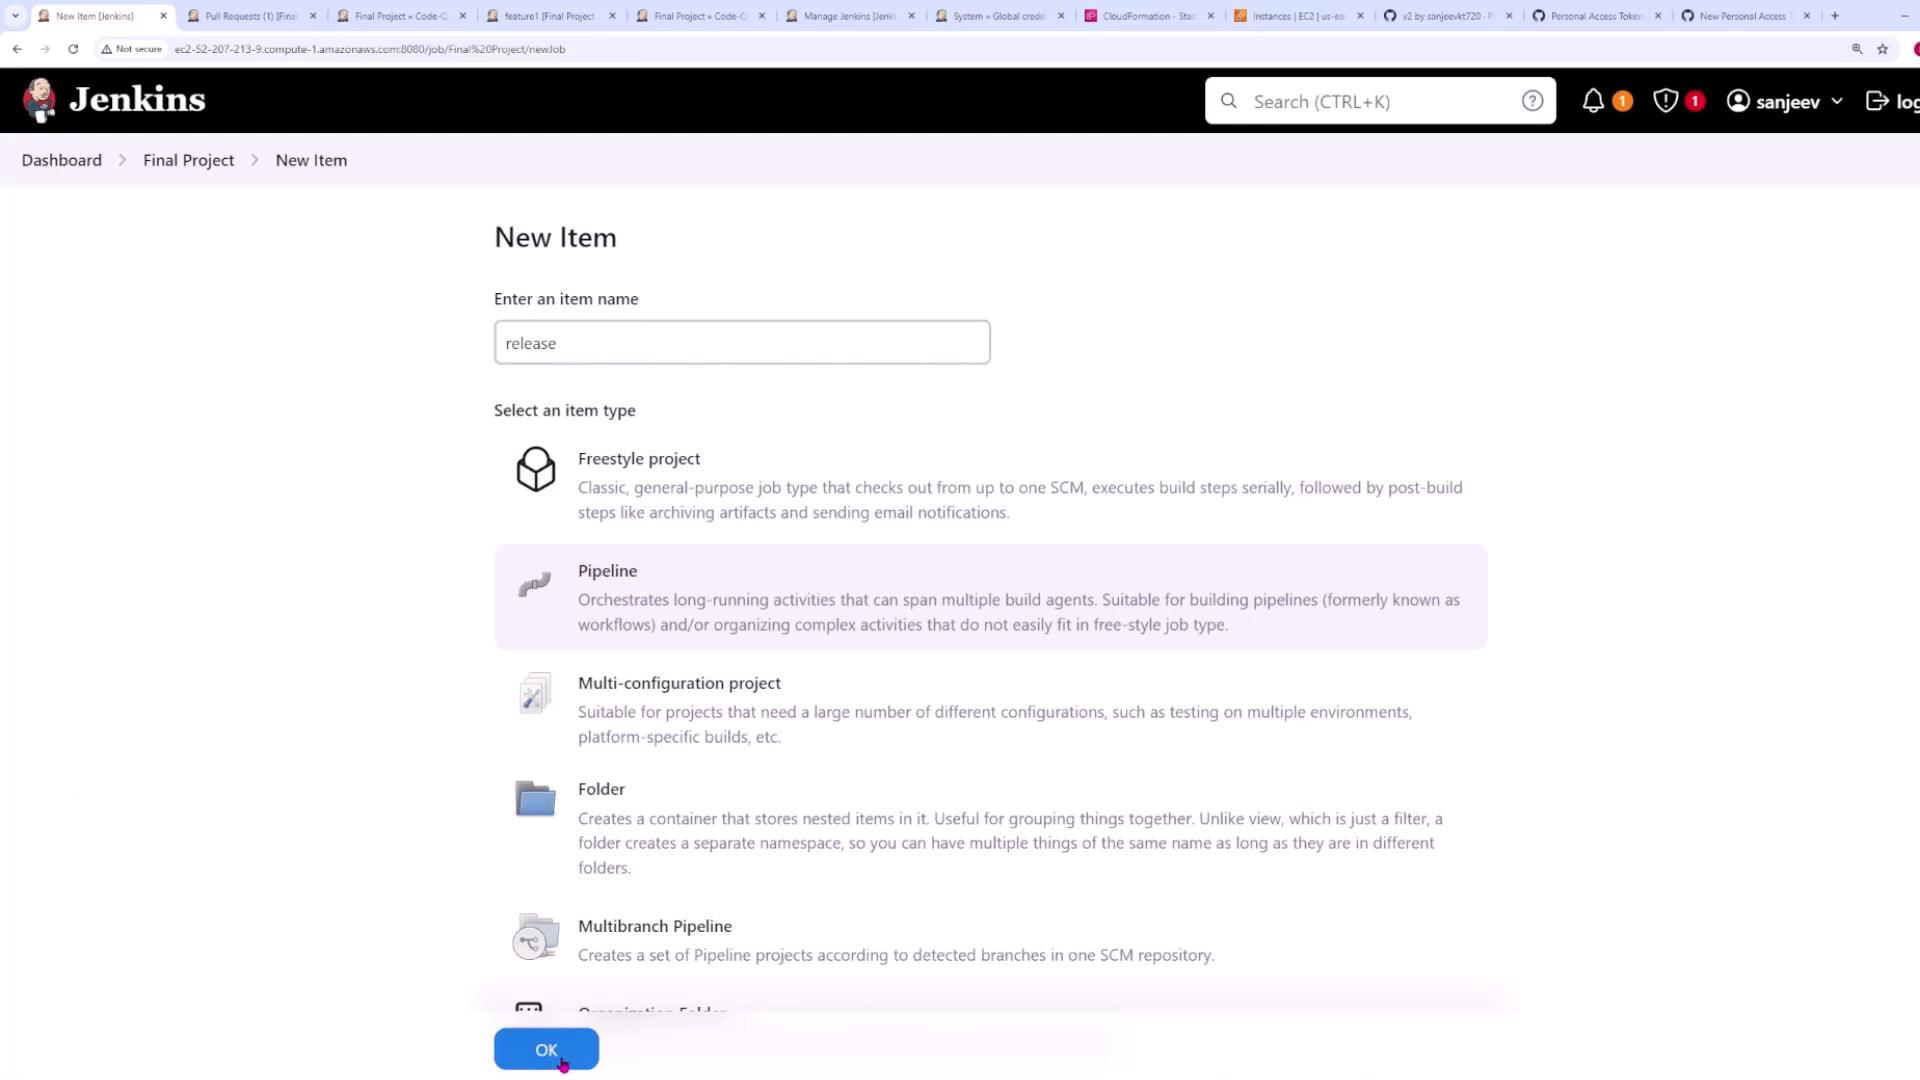
In this lesson, we’ll walk through setting up a Jenkins-based release pipeline in your project directory. We start by creating a new pipeline item named “release” in Jenkins. This item is a standard Jenkins pipeline.In your project directory, click “New Item” and enter the name release. Then, select the project type Pipeline as shown in the image below.
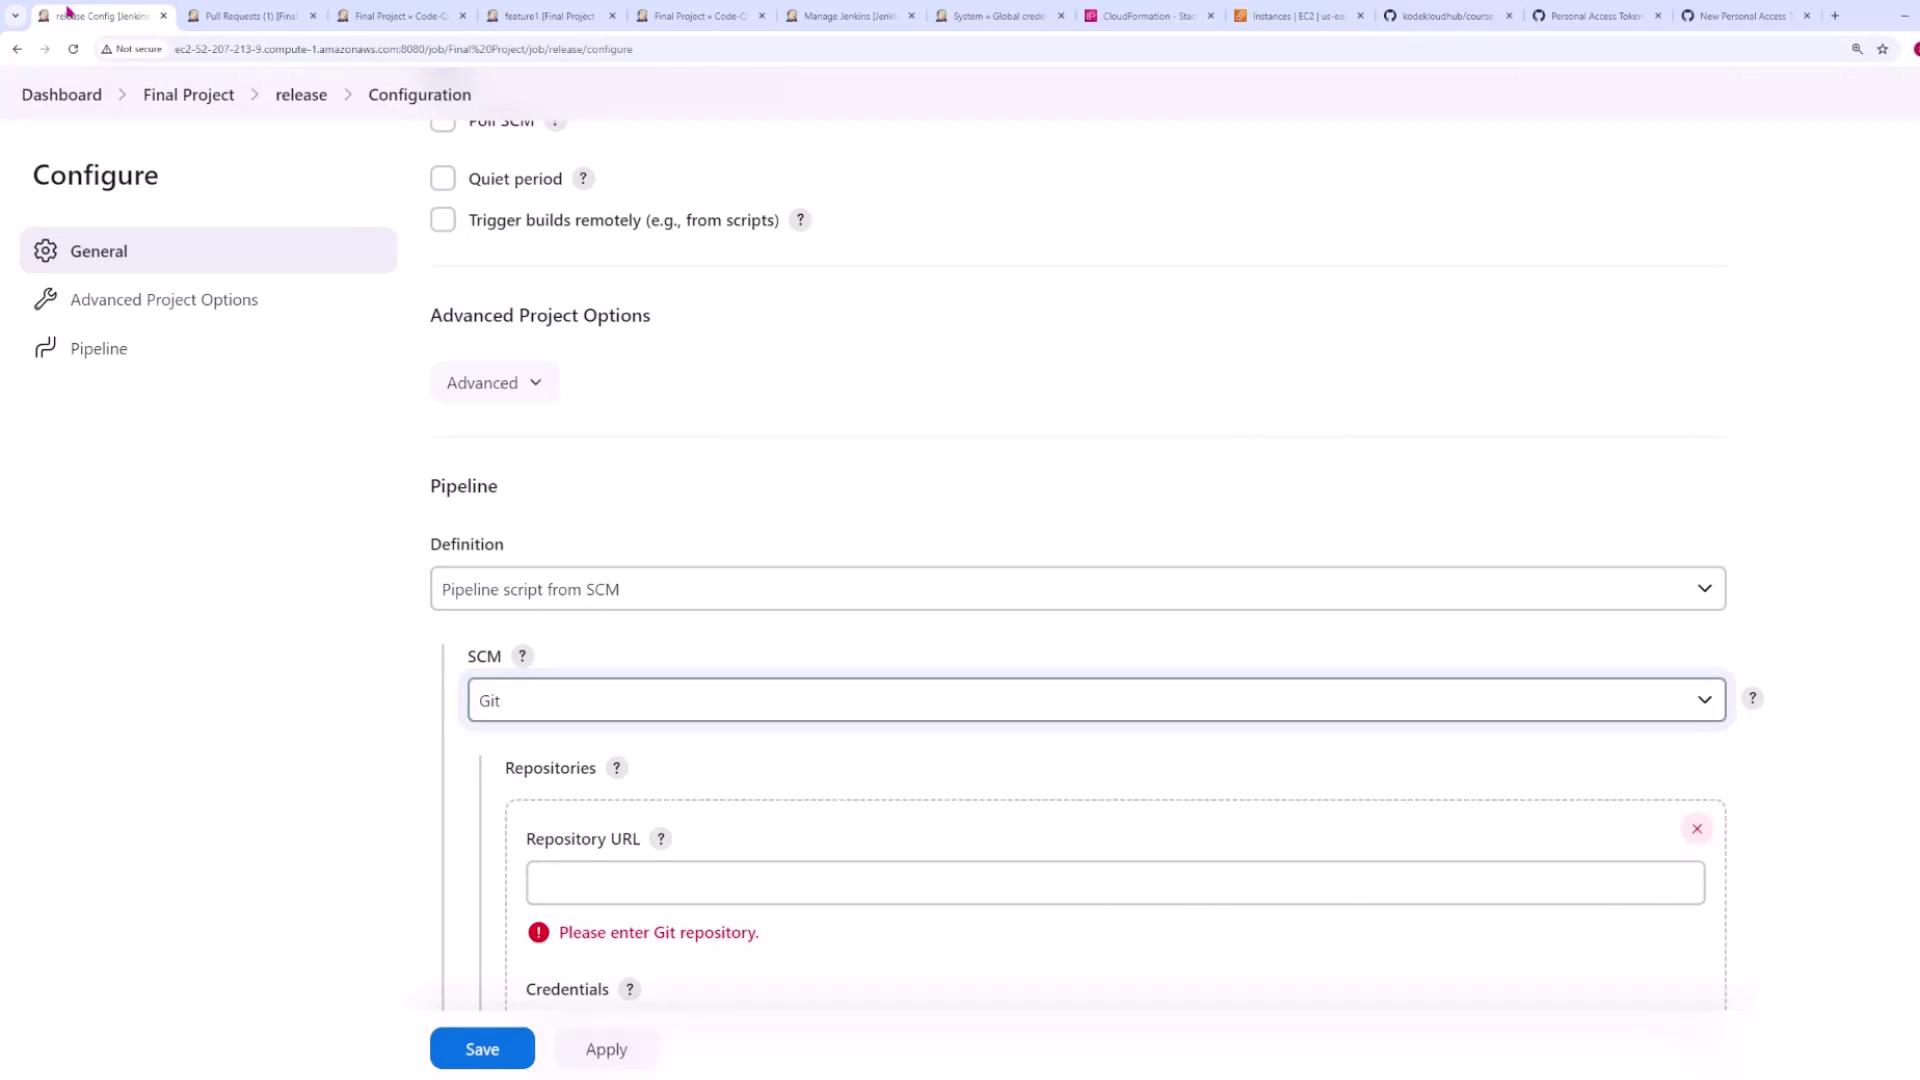
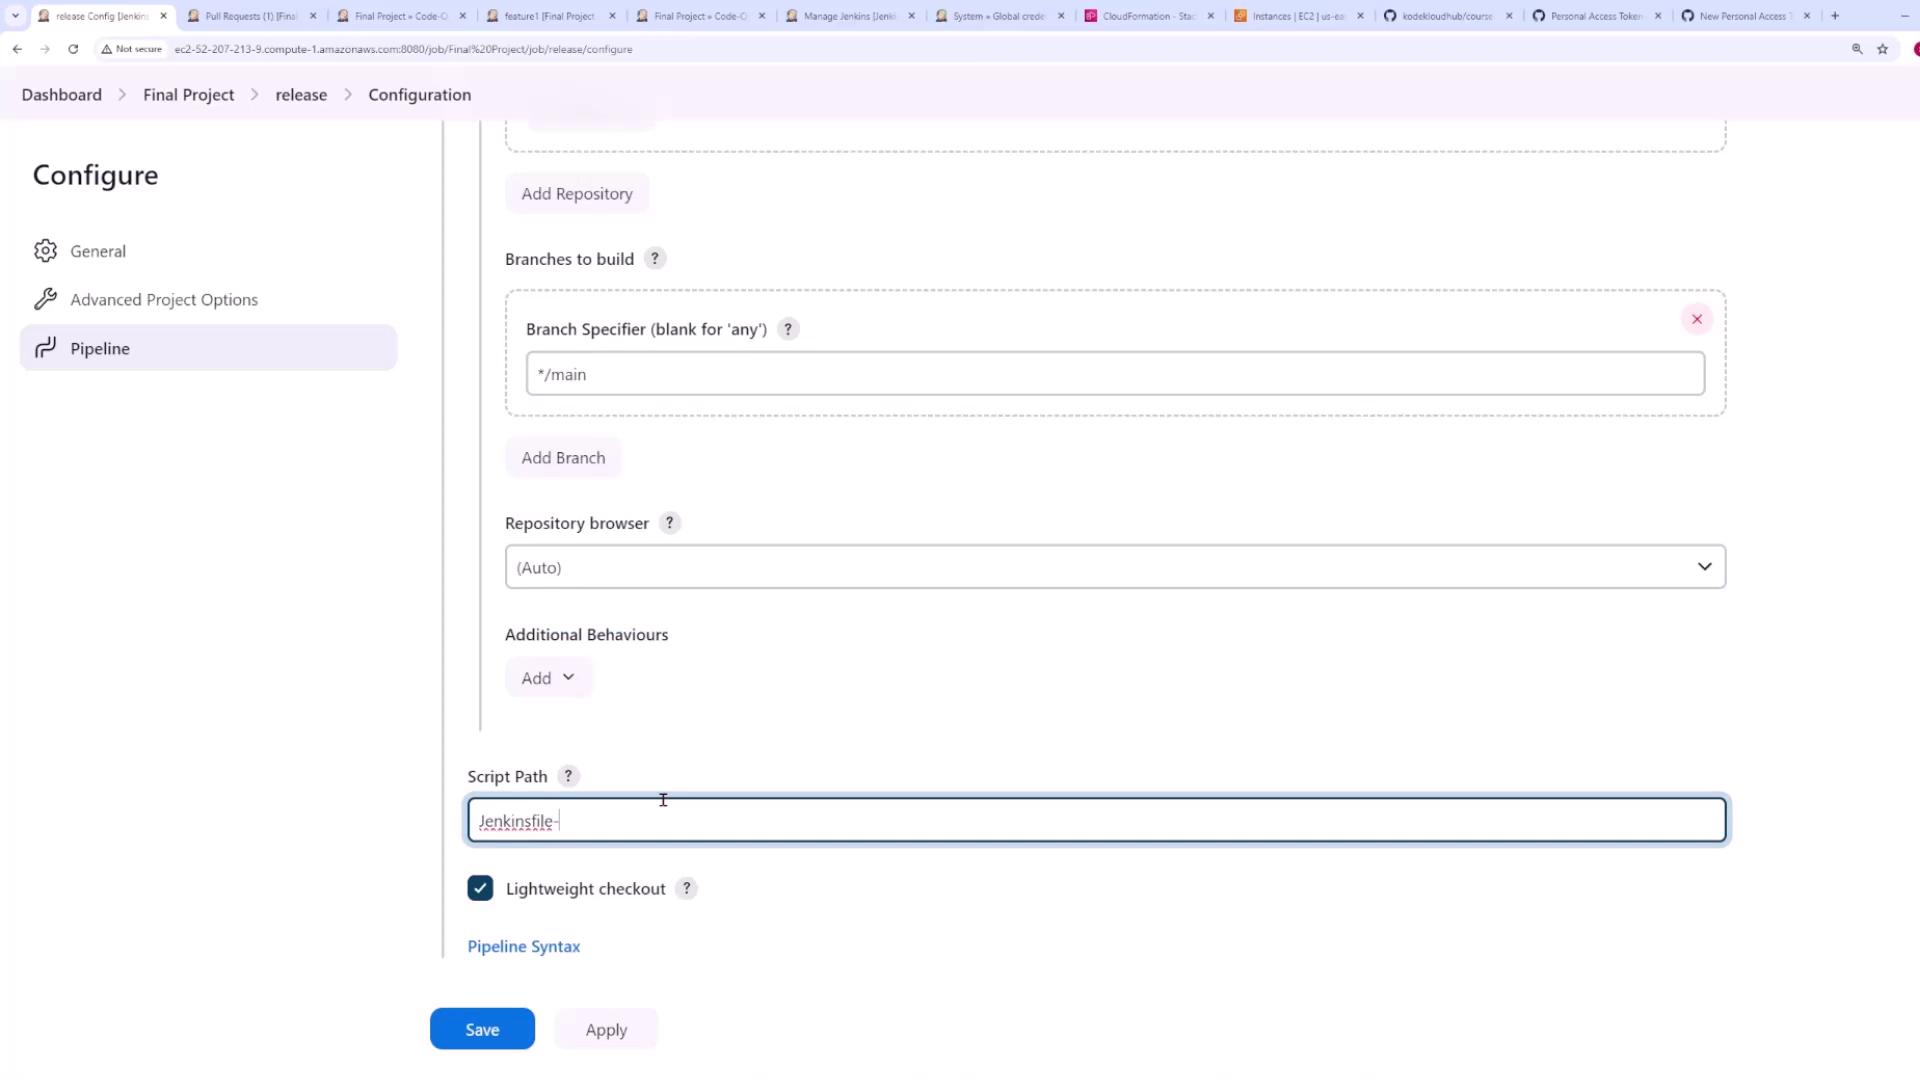
Next, configure the pipeline to trigger on Git SCM polling via a GitHub hook. Set the pipeline script from your Git repository by providing your repository URL, selecting the main branch, and setting the script name (for example, “Jenkinsfile-release”).
Normally, these steps are sufficient. However, a couple of additional configuration adjustments are required due to internal processes within our pipeline.
Below is a simple HTML snippet from our repository that is part of the application’s interface:
Copy
<html> <head> <style> /* Your CSS styles here */ </style> </head> <body> <h1>Todo App: v2</h1> <!-- Add Task Form --> <form method="post"> <input type="text" name="task_content" placeholder="Enter a new task" /> <input type="submit" name="add_task" value="Add Task" /> </form> <!-- Display Tasks --> </body></html>
Below is an example of the Git log output generated when creating a new branch and initiating a pull request:
Copy
remote: Create a pull request for 'feature1' on GitHub by visiting:remote: https://github.com/kodekloudhub/course-jenkins-project/pull/new/feature1remote: GitHub found 7 vulnerabilities on kodekloudhub/course-jenkins-project's default branch (1 high, 4 moderate, 2 low). To find out more, visit: https://github.com/kodekloudhub/course-jenkins-project/security/dependabotremote: To https://github.com/kodekloudhub/course-jenkins-project * [new branch] feature1 -> feature1Jenkins-demo on 🐳 feature1 [$] via desktop-linux is v2.20.0 via v20.12.1 via @ v3.9.0 on (us-east-1)
The pipeline script handles several key tasks, starting with checking for a Git tag. When a commit occurs, the pipeline executes a command that checks if the commit is associated with a tag. The logic is similar to the following:
Copy
pipeline { environment { DOCKER_CLI_EXEC = credentials('kubeconfig-credentials-id') AWS_ACCESS_KEY_ID = credentials('aws-access-key') AWS_SECRET_ACCESS_KEY = credentials('aws-secret-key') GH_TOKEN = credentials('github-access-token') } stages { stage("Check for Git Tag") { steps { script { def tag = sh(returnStdout: true, script: "git tag --contains").trim() if (tag) { env.GIT_TAG = tag } else { env.GIT_TAG = '' } echo "GIT_TAG is set to: ${env.GIT_TAG}" env.IMAGE_TAG_RELEASE = "${IMAGE_NAME}:${GIT_TAG}" } } } }}
When you run the command git tag --contains locally, it returns the tag if one is present or it returns empty. This ensures that we deploy to production only when a tag is present.
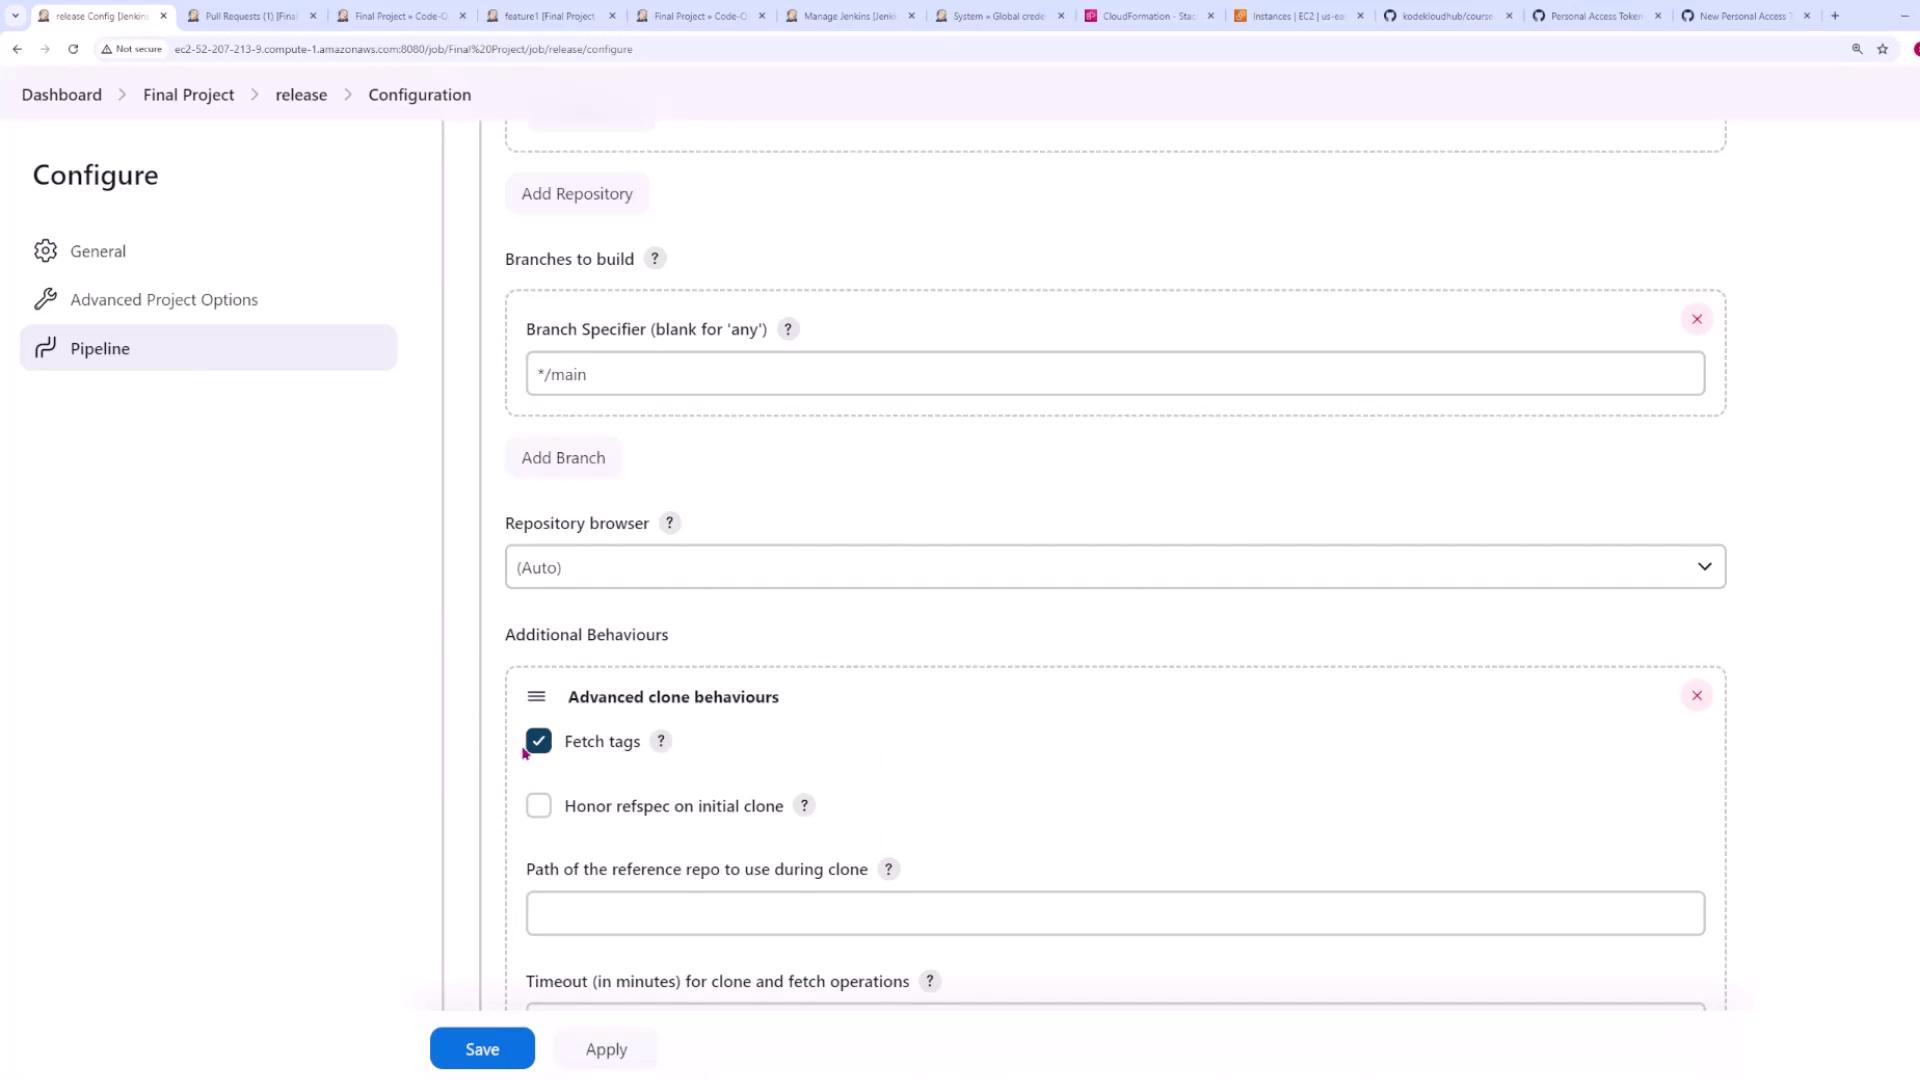
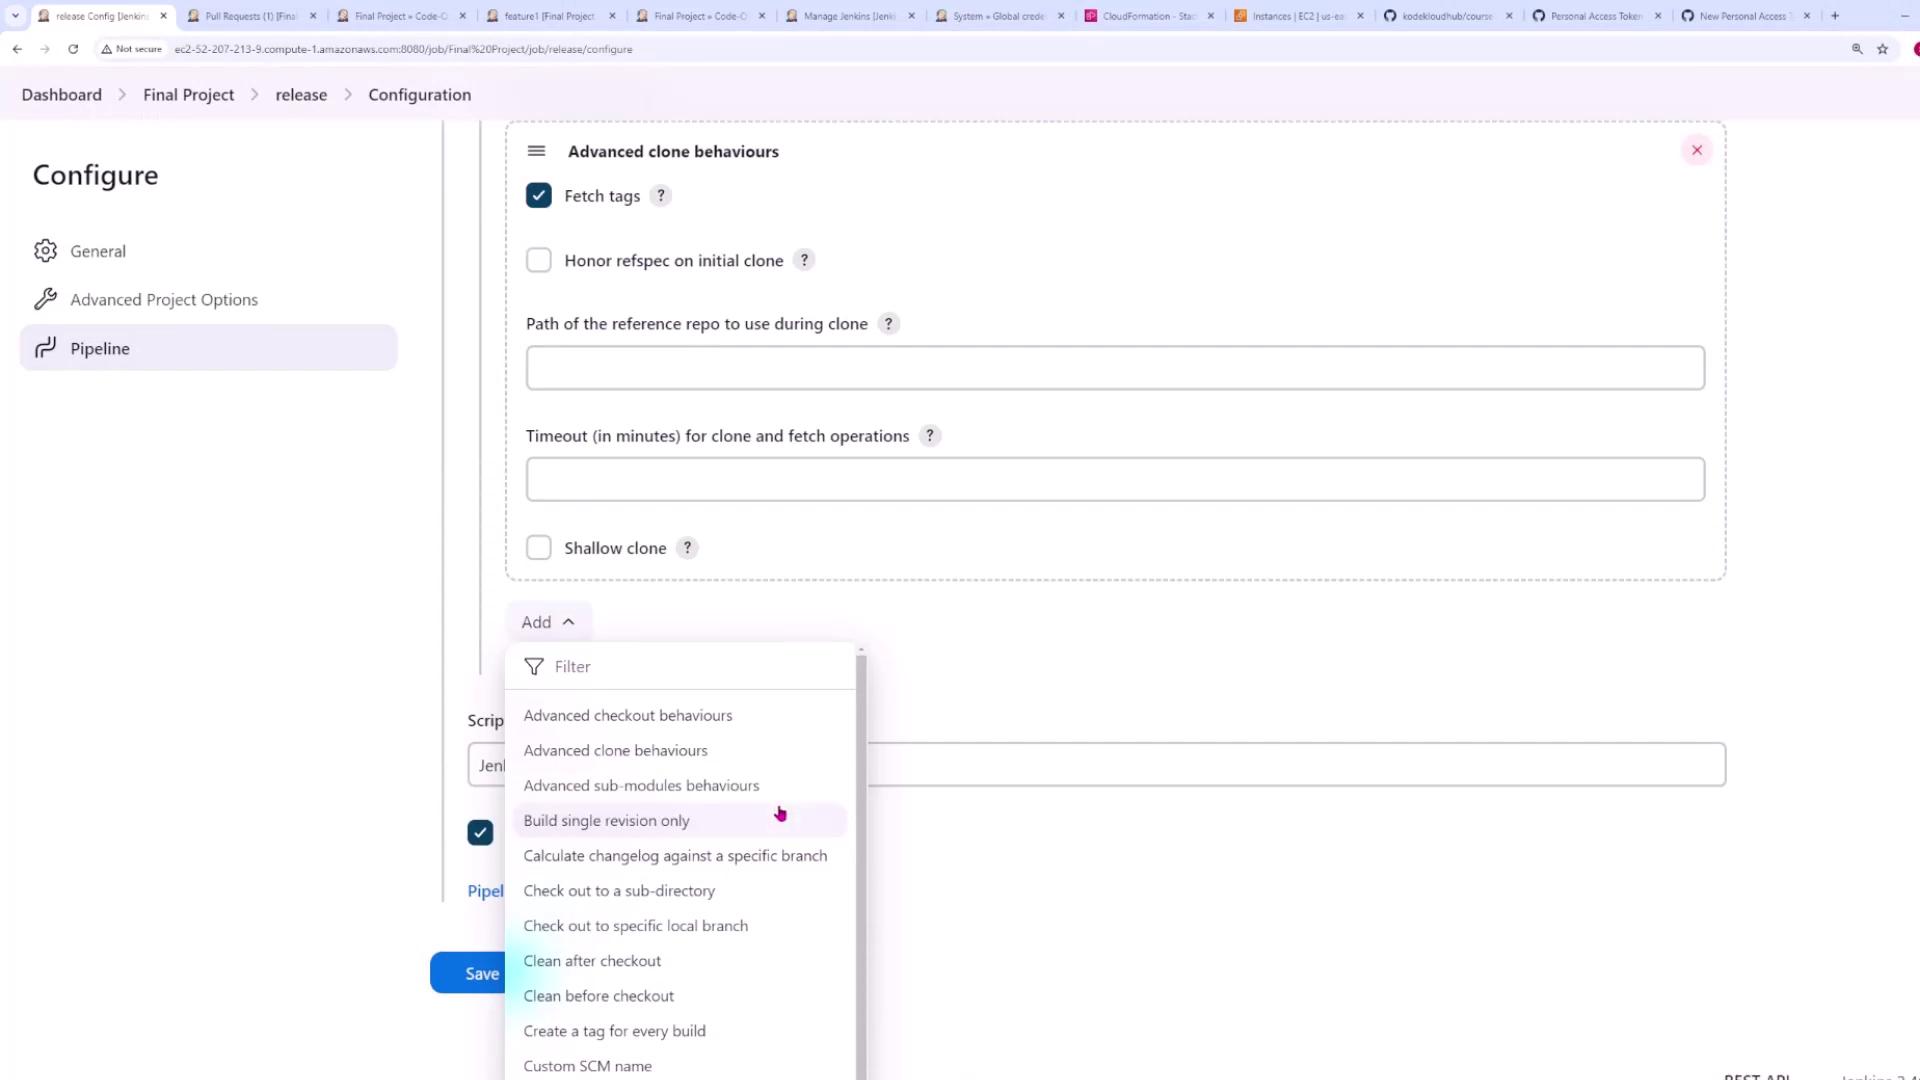
By default, Jenkins does not fetch tag information. To enable it, navigate to Additional Behaviors in your Git SCM configuration, choose Advanced clone behaviors, and check Fetch tags.
After the pipeline checks for a Git tag, further actions depend on whether a tag was detected. If no tag is found, the pipeline installs dependencies and creates a new release. The following snippet illustrates this logic:
Copy
pipeline { stages { stage('Setup') { steps { script { sh "poetry install --with dev" } } } stage('Create Release') { when { expression { return env.GIT_TAG == "" // Only run if GIT_TAG is not set } } steps { script { sh 'printenv' def tag = sh(returnStdout: true, script: "poetry run semantic-release version").trim() echo "${tag}" sh "poetry run semantic-release publish" } } } }}
When this stage runs (because no tag was detected), the pipeline uses the command poetry run semantic-release version to determine the new version (for example, updating from 2.20.0 to 2.21.0) and then publishes the release with poetry run semantic-release publish. This creates a new commit with a tag in your GitHub repository, triggering a subsequent pipeline run. In that run, the presence of a Git tag causes the pipeline to bypass the release creation and continue with the build and deploy stages.For builds with an existing tag, the pipeline executes the following stages: Docker login, pushing the Docker image, and deploying to the Kubernetes cluster:
Copy
pipeline { stages { stage("Build and Deploy") { when { expression { return env.GIT_TAG != "" // Only run if GIT_TAG is set } } stages { stage('Docker Login') { steps { withCredentials([usernamePassword(credentialsId: 'docker-creds', usernameVariable: 'USERNAME', passwordVariable: 'PASSWORD')]) { sh 'echo ${PASSWORD} | docker login -u ${USERNAME} --password-stdin' echo 'Login successfully' } } } stage('Push Image') { steps { sh 'docker push --all-tags ${IMAGE_NAME}' echo "Docker image pushed successfully" } } stage('Deploy') { steps { sh 'kubectl config use-context user@prod.us-east-1.eksctl.io' sh 'kubectl config current-context' sh "kubectl set image deployment/flask-app flask-app=${IMAGE_TAG_RELEASE}" } } } } }}
Jenkins checks out code in a detached HEAD state by default. To ensure the pipeline uses the main branch, adjust your repository’s configuration under Additional Behaviors by selecting the option to check out a specified local branch (e.g., main).
After configuring the release pipeline, switch back to your main branch and create a new feature branch. For example:
Copy
git checkout -b feature2
Update your code by modifying the HTML to reflect new changes. For instance, update the heading to indicate “v2 with feature2 changes”:
Copy
<html> <head> <style> /* Your CSS styles here */ </style> </head> <body> <h1>Todo App: v2 with feature2 changes</h1> <!-- Add Task Form --> <form method="post"> <input type="text" name="task_content" placeholder="Enter a new task" /> <input type="submit" name="add_task" value="Add Task" /> </form> <!-- Display Tasks --> </body></html>
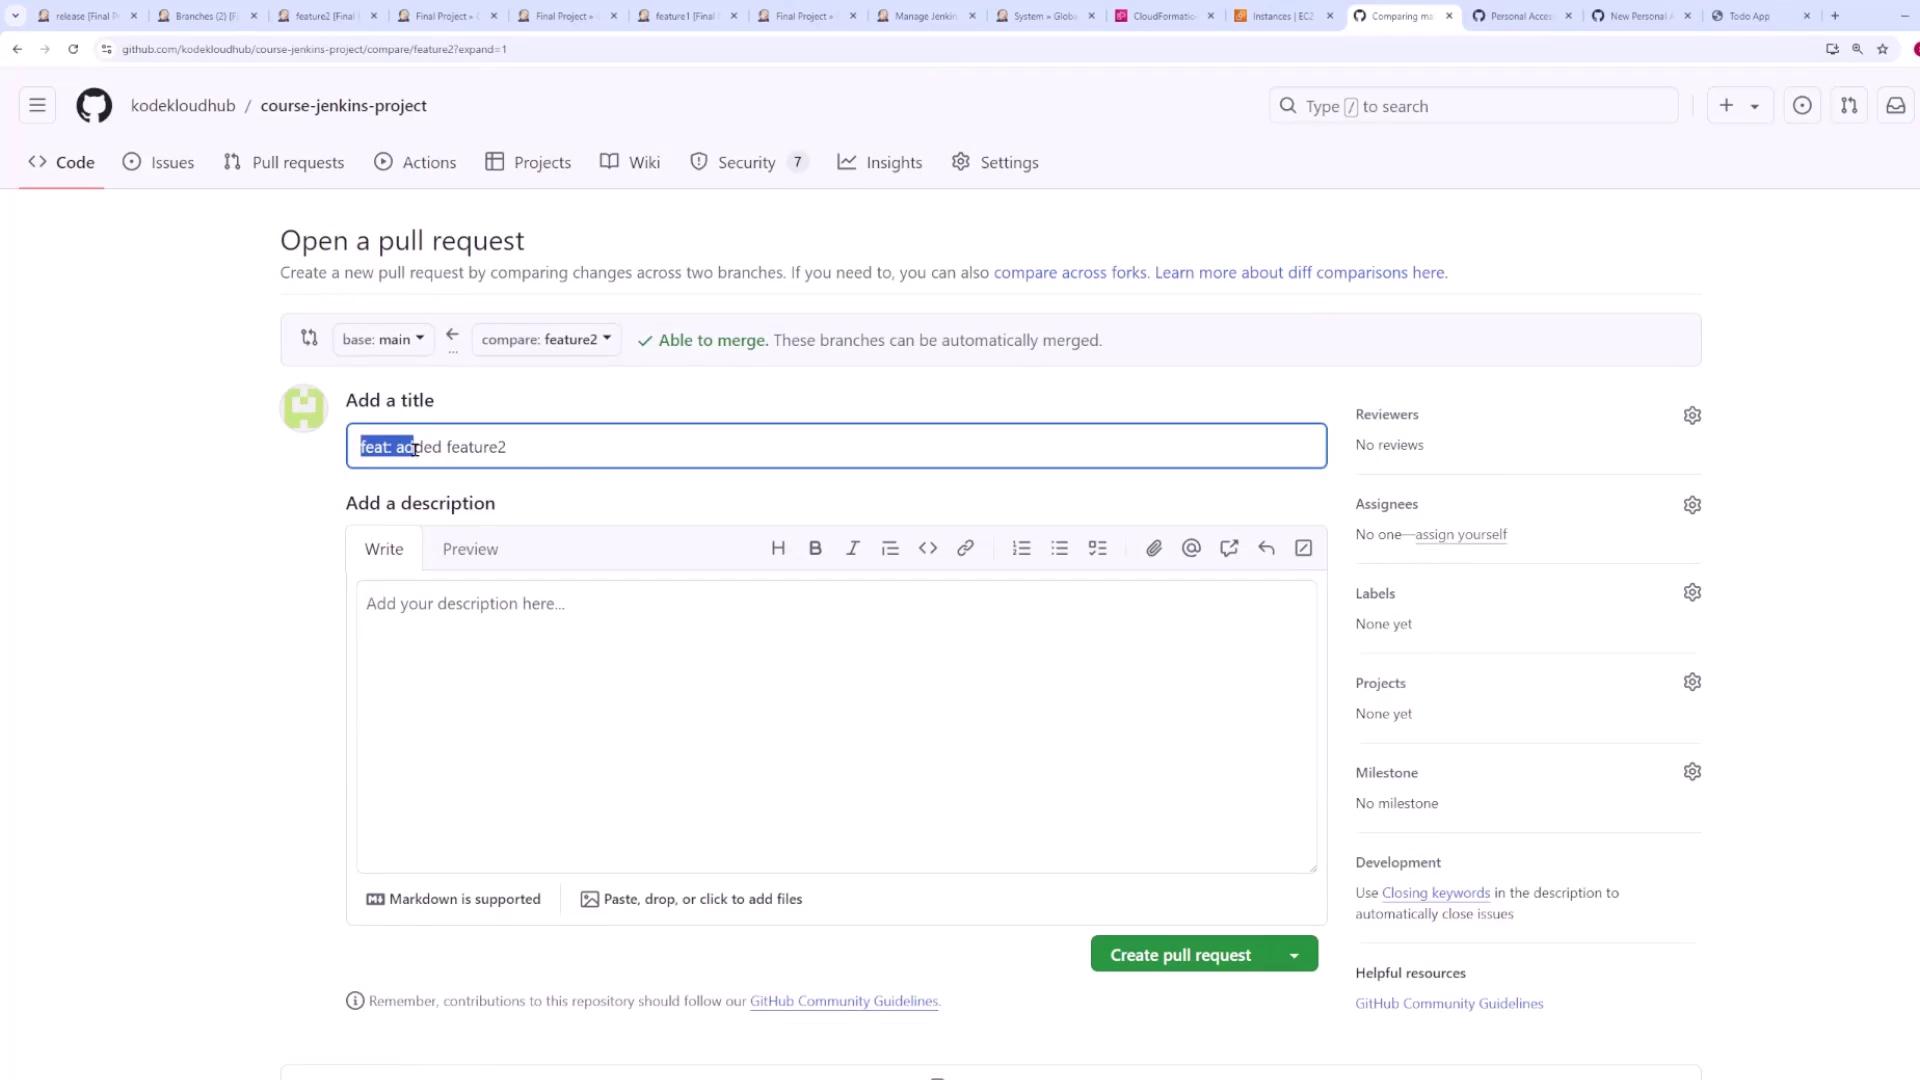
Next, stage and commit your changes (using a conventional commit message such as “feat: added feature two”) and then push the branch to the remote repository:
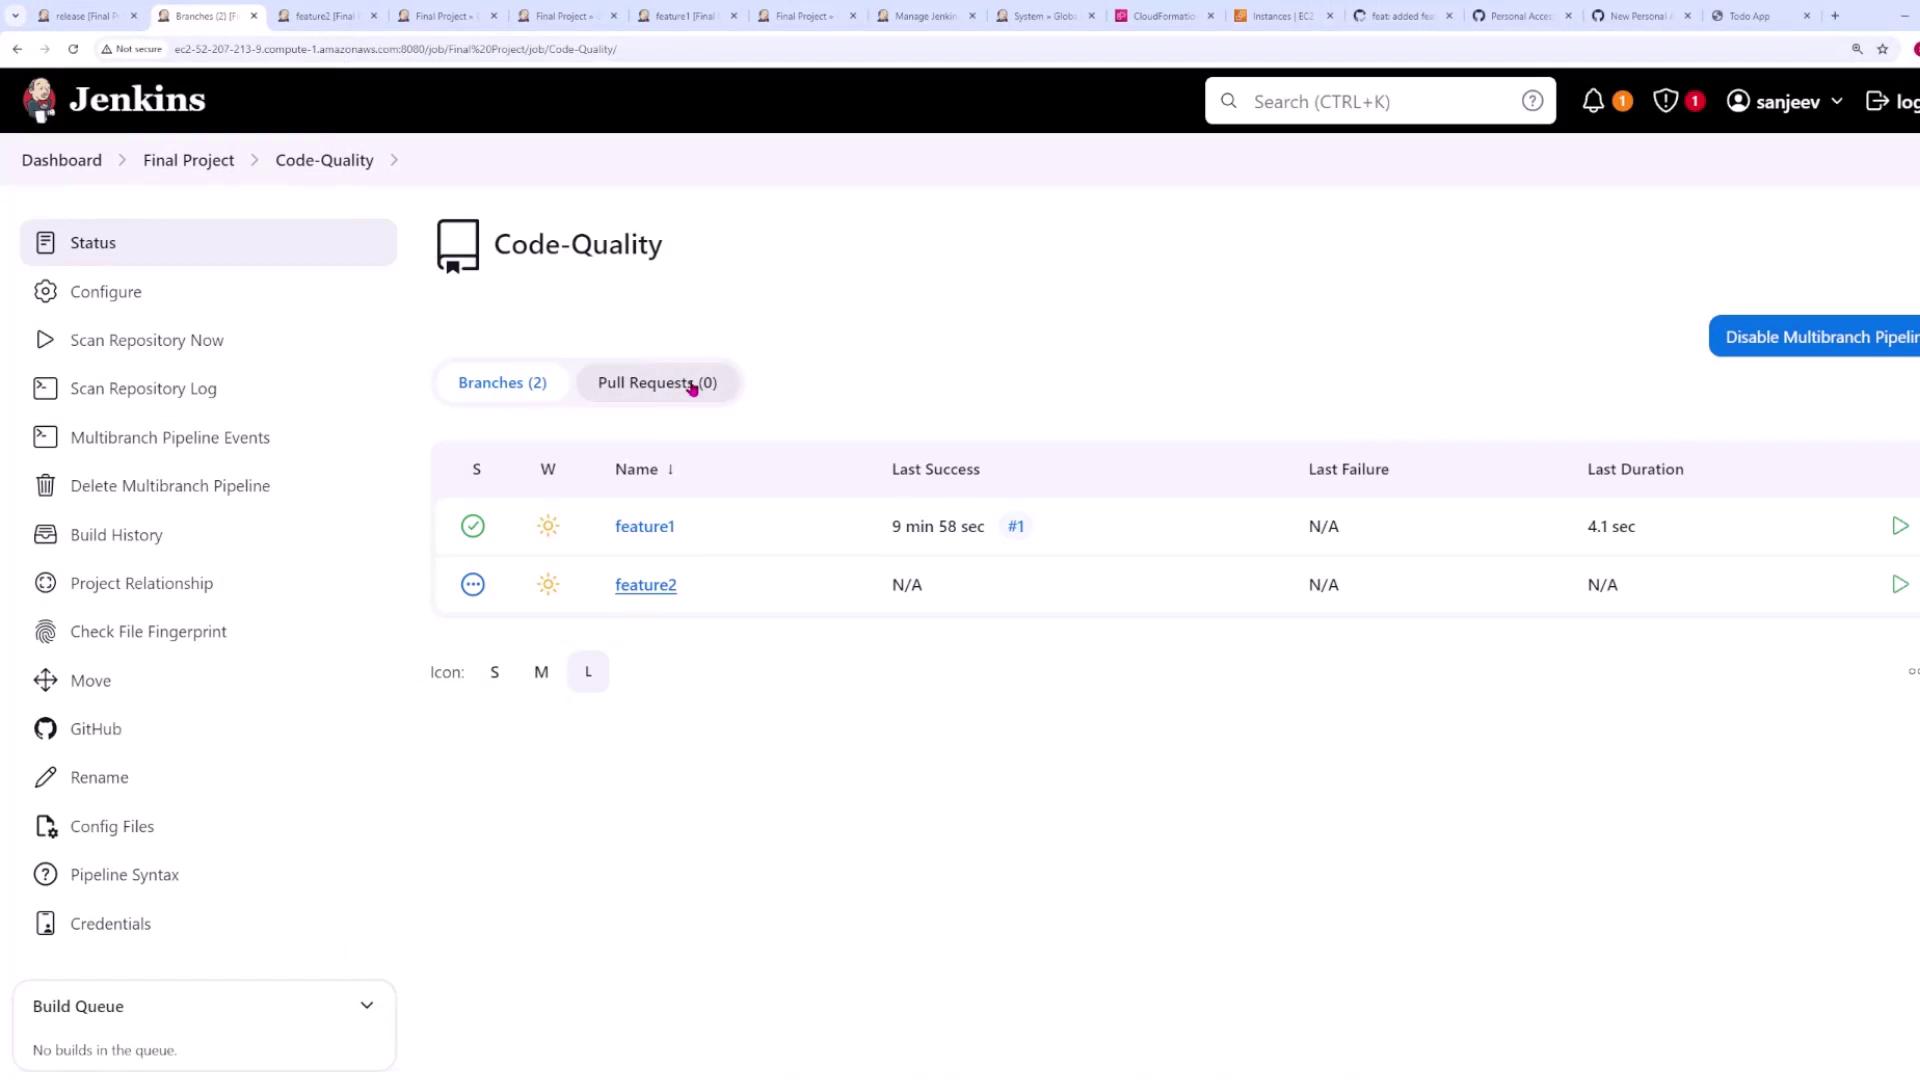
Pushing the new branch triggers a code quality pipeline. In your Jenkins dashboard under Branches, you’ll see the build status for feature2:
Once dependencies are installed and tests pass, open a pull request on GitHub:
According to semantic-release rules, merging a feature with conventional commits will bump the version (e.g., from 2.20.0 to 2.21.0). Jenkins detects the merge commit on the main branch and triggers the release pipeline again.You can monitor branch builds via the Jenkins dashboard:
When the pull request is merged, Jenkins follows these steps:
Initial Build Trigger:
The merge commit triggers a build where the pipeline first checks for a Git tag. Since no tag is present at first, it runs the Setup stage and then the Create Release stage. This stage installs dependencies and executes a command similar to:
Copy
poetry run semantic-release version
This command determines the next version (for example, 2.21.0) and then publishes the new release using:
Copy
poetry run semantic-release publish
As a result, a new commit with the tag (e.g., 2.21.0) is created, triggering another pipeline run.
Subsequent Build:
In the following build, the pipeline detects the Git tag (e.g., 2.21.0) and skips the release creation. Instead, it proceeds to the Build and Deploy stages. These stages include:
Docker Login: Authenticate using Docker credentials.
Push Image: Push the new Docker image to the repository.
Deploy: Deploy the updated image to the Kubernetes cluster.
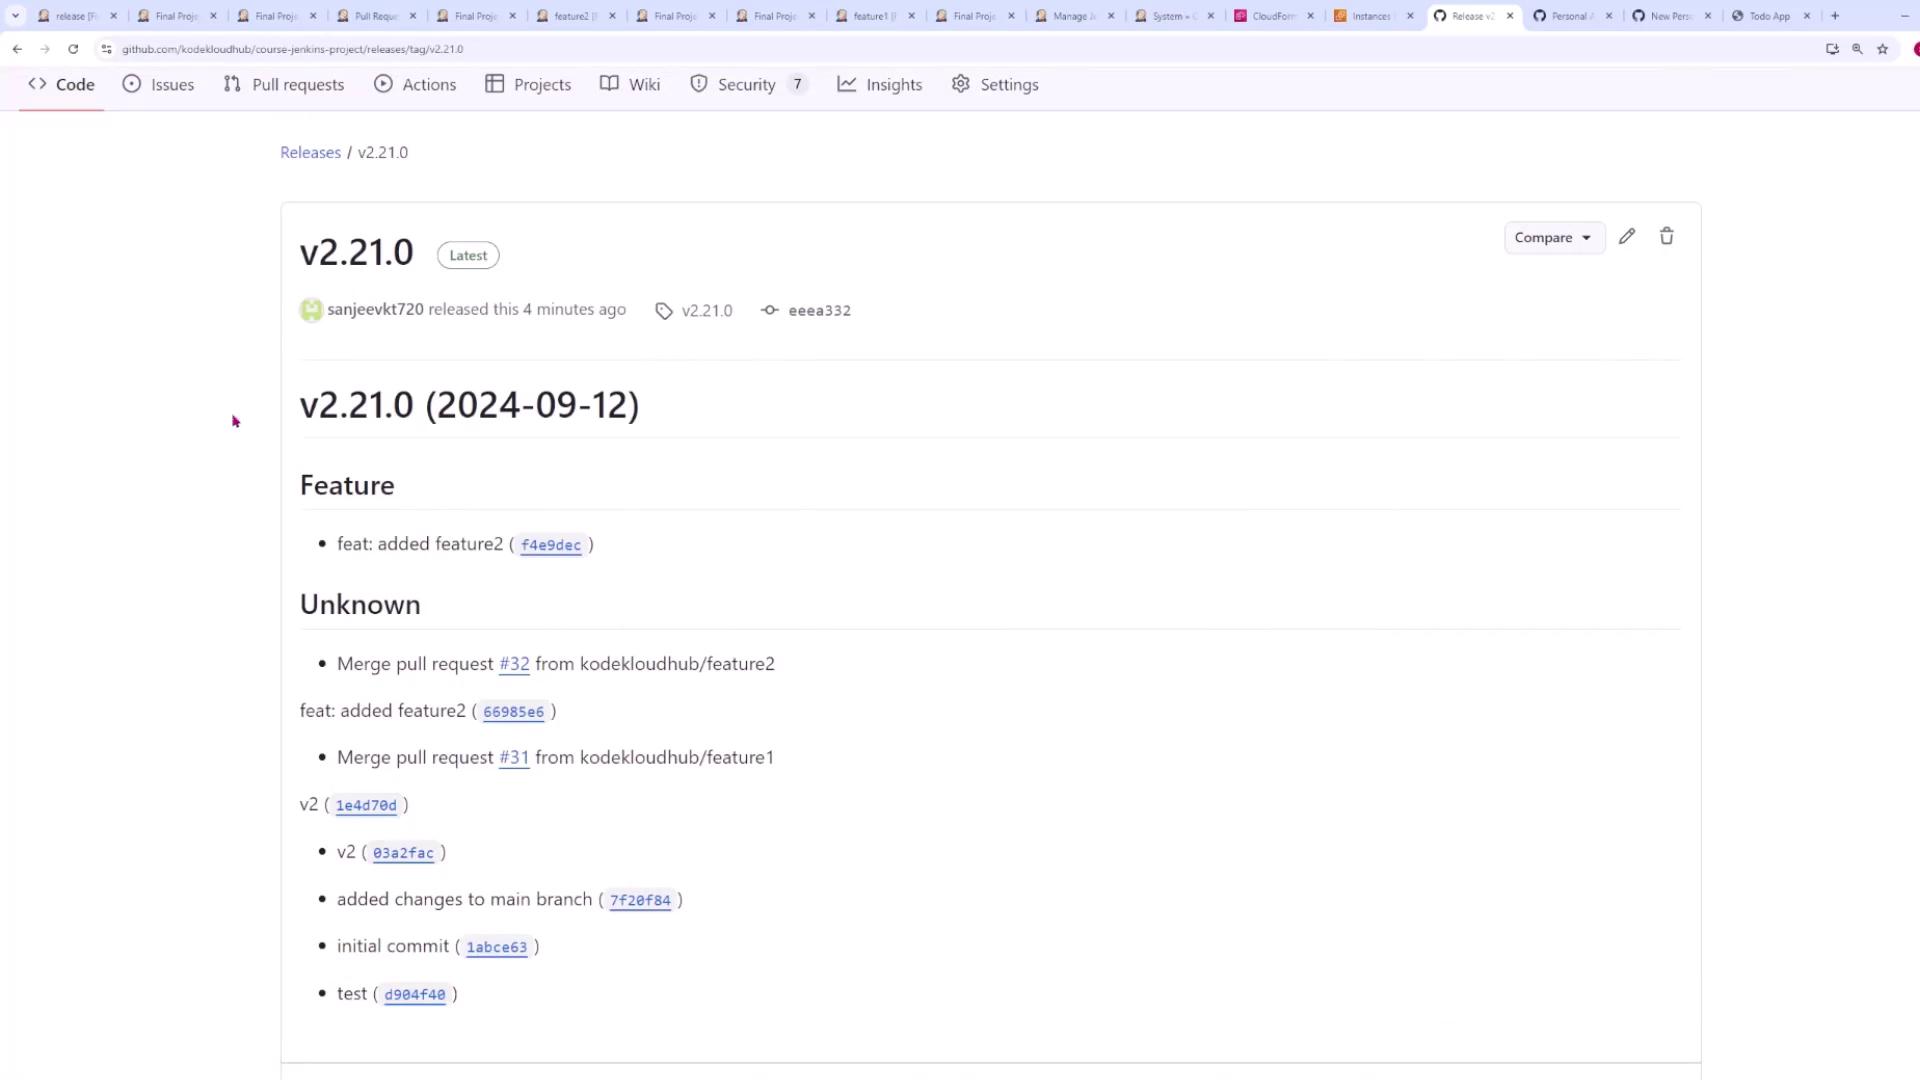
You can verify the release information on GitHub:
Review the Jenkins console output to verify that tests have passed, a new tag was created, and the deployment steps executed successfully. An example output might look like:
Copy
+ ls -la...+ poetry run semantic-release versionThe next version is: 2.21.0!No build command specified, skipping+ poetry run semantic-release publishPublished new tag: 2.21.0...
Because a new commit is generated (with the new tag), the pipeline runs a second time to execute Docker login, image push, and the Kubernetes deployment.
In this lesson, we demonstrated how to construct a sophisticated CI/CD pipeline with Jenkins by clearly separating code quality and release processes. The pipeline leverages Git tags to intelligently determine whether to create a new release or to build and deploy the updated application. With this setup, committing and merging changes to the main branch will automatically create a new release and deploy the updated application to production.Happy deploying!