> ## Documentation Index
> Fetch the complete documentation index at: https://notes.kodekloud.com/llms.txt
> Use this file to discover all available pages before exploring further.
# Using an Ubuntu Server as a Build Agent
> This guide explains how to configure an Ubuntu server as a Jenkins build agent, including user creation, credential setup, node configuration, and connection verification.
This guide walks you through configuring an Ubuntu server as a Jenkins build agent. The setup process is similar to a standard Jenkins installation, with a focus on preparing a dedicated build agent. Ensure that Jenkins is already installed and operational on your main server before proceeding.
Before you begin, verify that your Jenkins master is functioning properly. This ensures a smooth integration with the new build agent.
## Step 1: Create a New User for the Jenkins Agent
On your Ubuntu server, create a new user account dedicated to running your Jenkins build agent. Open your terminal and execute the following commands (replace `newuser` with your preferred username):
```bash theme={null}
sudo adduser newuser
sudo usermod -aG sudo newuser
```
The first command creates the user, and the second command grants the user administrative privileges by adding them to the sudo group.
You can confirm the user's group memberships using:
```bash theme={null}
groups newuser
```
Expected output:
```bash theme={null}
newuser : newuser sudo
```
## Step 2: Add Credentials in Jenkins
Log into your Jenkins dashboard and navigate to:
* Manage Jenkins → Manage Credentials
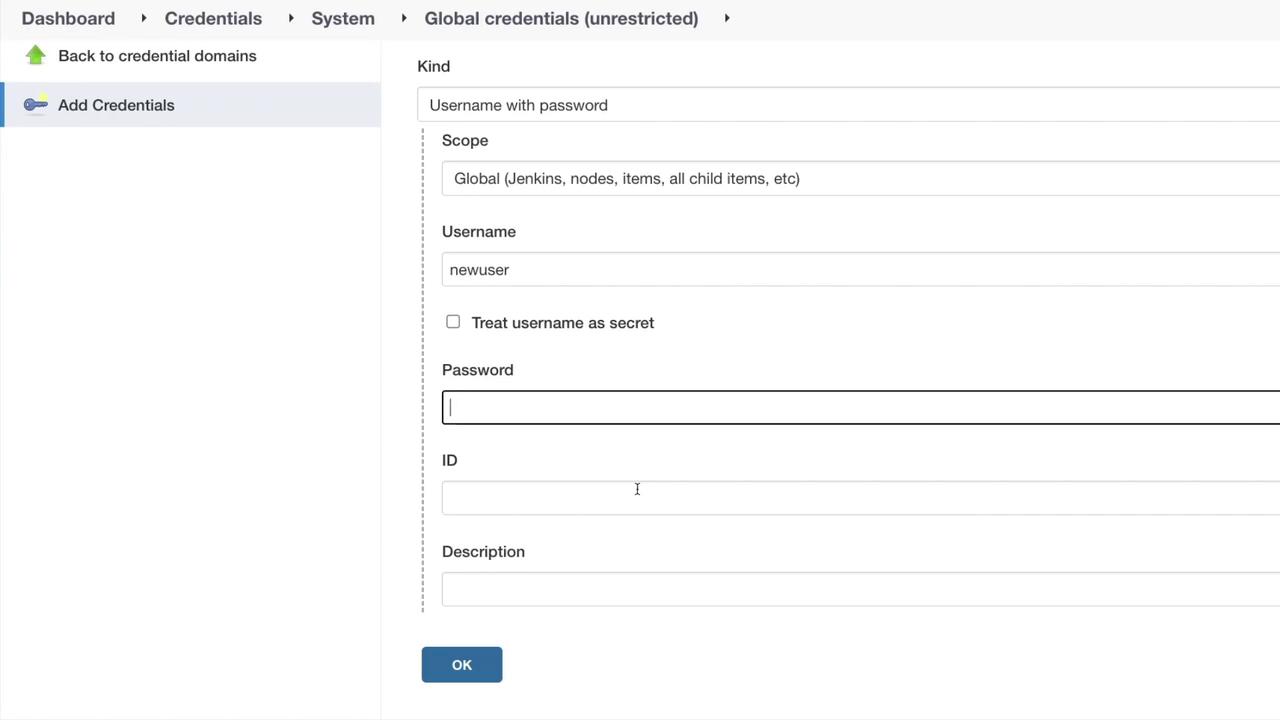
Select "Jenkins" under Global credentials (if necessary), then click on **Add credential**. Choose the **Username with password** type and provide the credentials of the new user you just created. The password is the one you set up during the user creation process.
## Step 3: Configure the Jenkins Node
Next, set up the build agent node by going to:
* Manage Jenkins → Manage Nodes and Clouds
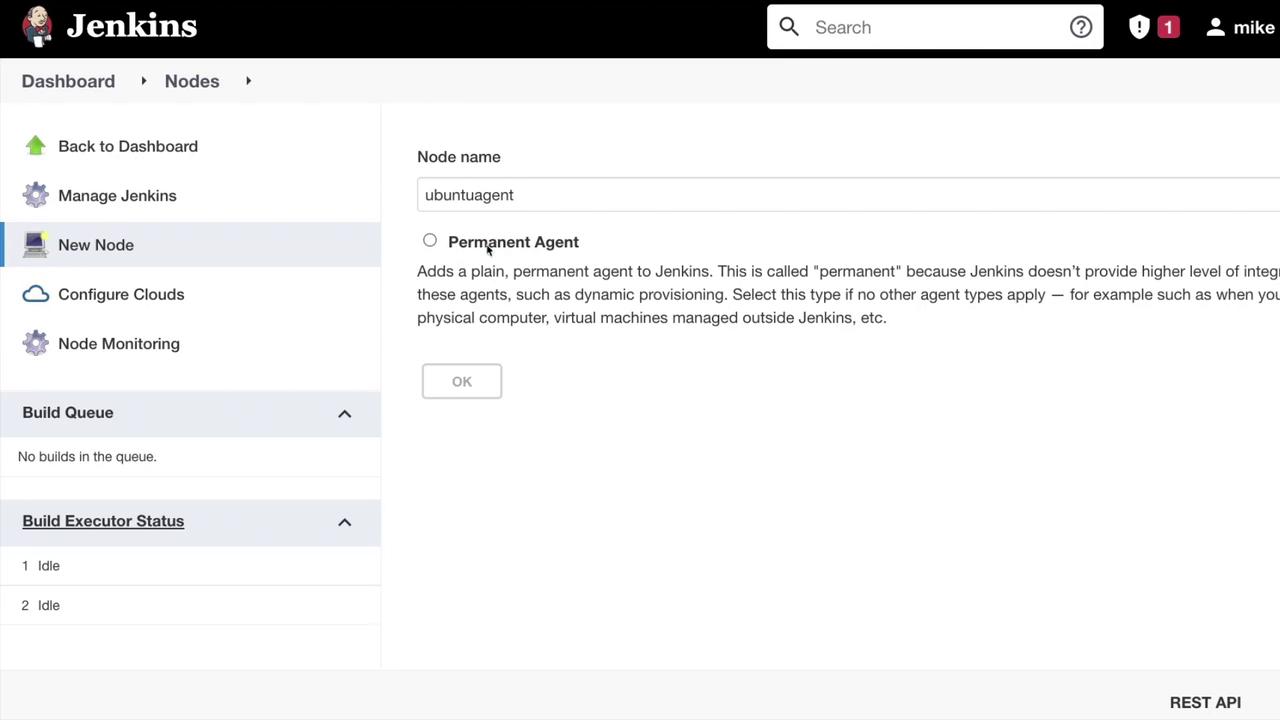
Click **New Node** to create a new build agent. In the popup window, assign a name (for example, "Ubuntu agent") and select **Permanent Agent**. This setting allows the agent to handle any assigned job without interruption.
Fill in the required details on the node configuration page:
* **Description:** e.g., "Jenkins agent running on Azure"
* **Executors:** Define the number of concurrent builds (typically one per agent)
* **Remote Root Directory:** Set this to the new user's home directory (e.g., `/home/newuser`)
* **Usage:** Select "Use this node as much as possible"
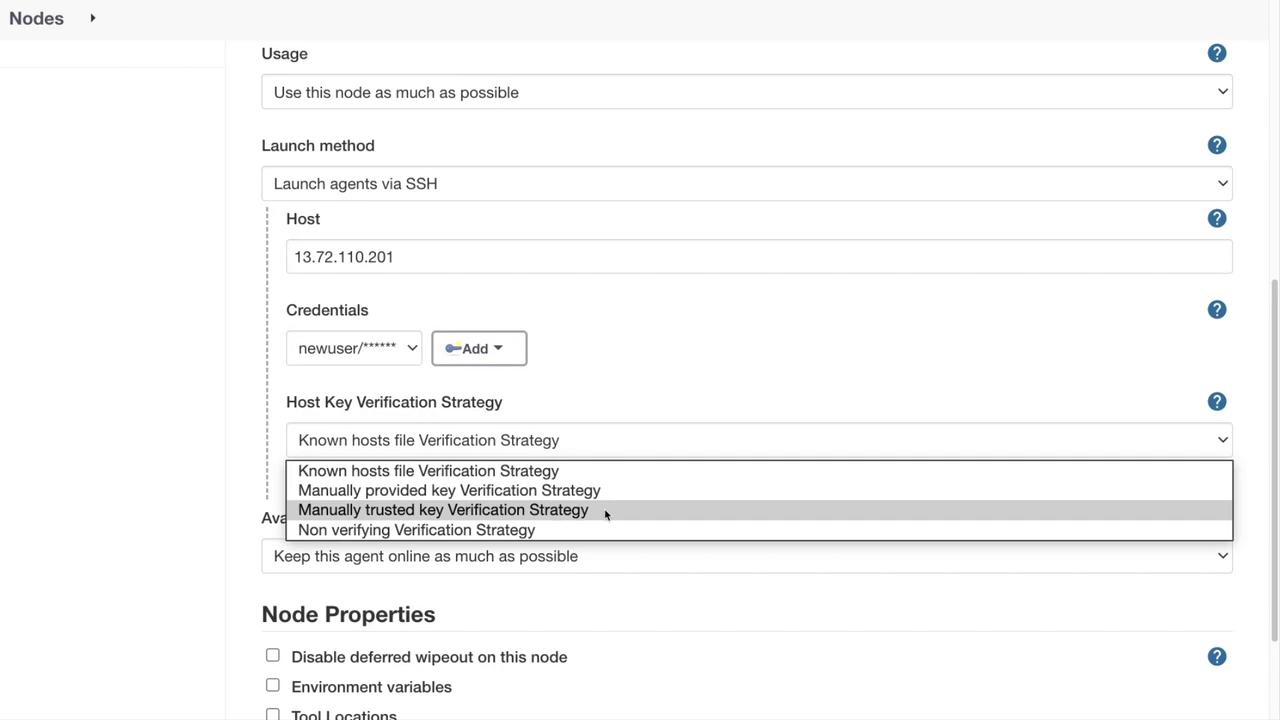
* **Launch Method:** Choose "Launch agents via SSH"
For the SSH settings, provide the following:
* **Host:** Enter the public IP address (or DNS name) of your Ubuntu agent
* **Credentials:** Select the credentials you added in the previous step
* **Host Key Verification Strategy:** Choose "Manually trusted key verification strategy"
Click **Save** to store your configuration.
## Step 4: Verify the Agent Connection
After saving the node configuration, Jenkins will try to establish an SSH connection to your Ubuntu agent. You can follow the connection status and logs directly in Jenkins. These logs include details such as the host IP, port, credentials, and an authentication confirmation.
Below is an example of an SSH log excerpt:
```bash theme={null}
SSHLauncher{host='13.72.110.201', port=22, credentialsId='2cd62056-241f-429c-b94a-b76634cab6da', jvmOptions='', javaPath='',
prefixStartSlaveCmd='', suffixStartSlaveCmd='', launchTimeoutSeconds=60, maxNumRetries=10,
sshHostKeyVerificationStrategy=hudson.plugins.sshslaves.verifiers.ManuallyTrustedKeyVerificationStrategy,
tcpNoDelay=true, trackCredentials=true}
[01/18/22 13:06:13] [SSH] Opening SSH connection to 13.72.110.201:22.
[01/18/22 13:06:13] [SSH] The SSH key with fingerprint c4:5a:eb:c3:3f:be:ad:32:2e:34:c1:46:10:c9:c0:ae has been
automatically trusted for connections to this machine.
[01/18/22 13:06:13] [SSH] Authentication successful.
[01/18/22 13:06:14] [SSH] The remote user's environment is:
BASH=/usr/bin/bash
BASHOPTS=checkwinsize:cmdhist:complete_fulldots:extquote:forcefignore:globasciiranges:hostcomplete:interactive_c...
...
```
The log will also detail the Java version checking process and the startup of the remoting jar:
```bash theme={null}
PATH=/usr/local/sbin:/usr/local/bin:/usr/sbin:/usr/bin:/usr/games:/usr/local/games:/snap/bin
...
[01/18/22 13:06:14] [SSH] Checking java version of java
[01/18/22 13:06:14] [SSH] java -version returned 11.0.13.
[01/18/22 13:06:14] [SSH] Starting sftp client...
[01/18/22 13:06:14] [SSH] Copying latest remoting.jar...
Source agent hash is 0ECC112158D161E4017A98119D137D68
```
Scroll through these logs to ensure that Jenkins has successfully connected the agent and that its status is listed as online in the **Nodes** section.
## Conclusion
Your Ubuntu build agent is now configured and ready to execute Jenkins jobs. This article detailed the steps for creating a new user, adding user credentials in Jenkins, configuring a new node, and verifying the SSH connection along with environment initialization.
We hope this guide has been helpful. Keep exploring to further optimize your Jenkins environment!