> ## Documentation Index
> Fetch the complete documentation index at: https://notes.kodekloud.com/llms.txt
> Use this file to discover all available pages before exploring further.
# Using Jenkins CLI
> Learn to manage your Jenkins instance using the CLI, covering installation, authentication, job listing, and job building.
Learn how to leverage the Jenkins CLI to manage your Jenkins instance step by step. This guide covers downloading the CLI, authenticating using an API token, listing jobs, and building a job.
## Getting Started with Jenkins CLI
To begin, log into your Jenkins portal and navigate to **Manage Jenkins**. Scroll down to the **Tools and Actions** section and click on **Jenkins CLI**.
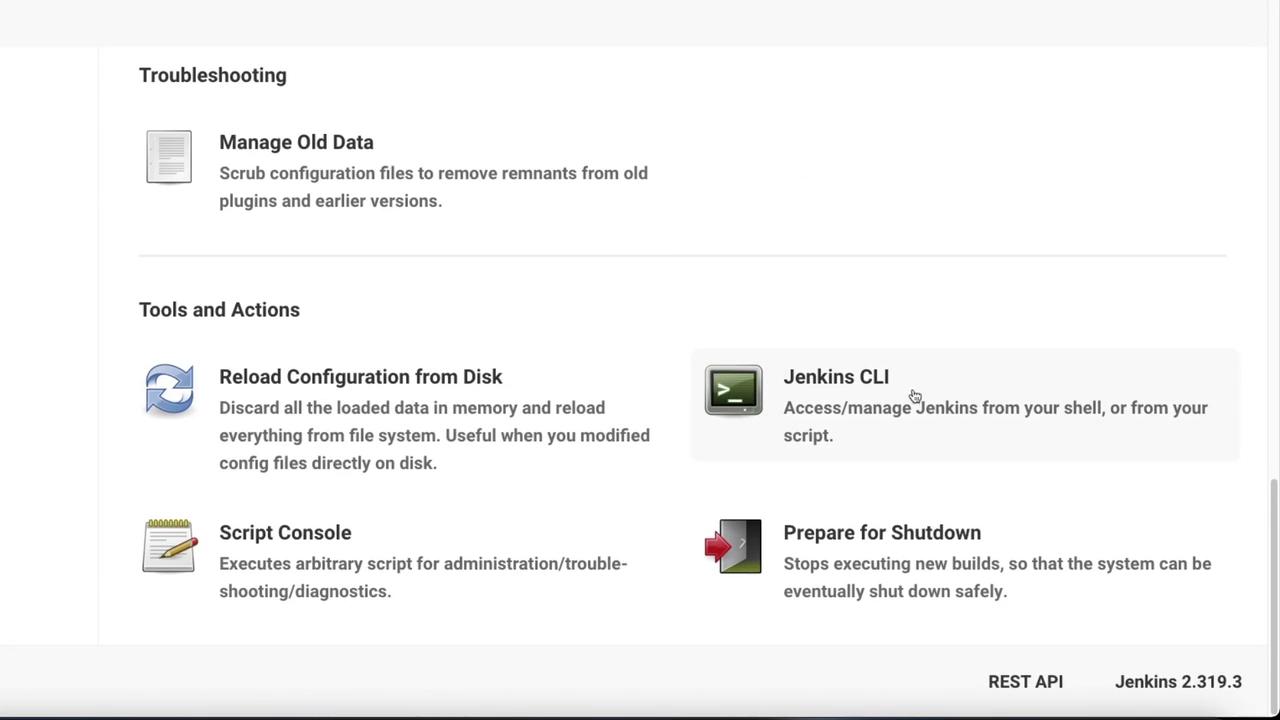
The displayed page includes documentation for getting started. Next, we will focus on the authentication process.
### Displaying CLI Help
Use the following command to display the Jenkins CLI help information:
```bash theme={null}
java -jar jenkins-cli.jar -s http://20.127.124.114:8080/ -webSocket help
```
## Installing the Jenkins CLI
On your Jenkins host, open a terminal and download the Jenkins CLI JAR with the command below:
```bash theme={null}
mike@jenkinshost01:$ wget http://20.127.124.114:8080/jnlpJars/jenkins-cli.jar
--2022-02-24 15:36:50-- http://20.127.124.114:8080/jnlpJars/jenkins-cli.jar
Connecting to 20.127.124.114:8080... connected.
HTTP request sent, awaiting response... 200 OK
Length: 3518623 (3.4M) [application/java-archive]
Saving to: ‘jenkins-cli.jar’
jenkins-cli.jar 100%[==================================================>] 3.36M --.-KB/s in 0.03s
2022-02-24 15:36:50 (114 MB/s) - ‘jenkins-cli.jar’ saved [3518623/3518623]
mike@jenkinshost01:~$ ls
jenkins-cli.jar
mike@jenkinshost01:~$
```
Even though you are operating directly on the Jenkins host, authentication is still required for CLI operations.
## Authenticating with Jenkins
To authenticate via the CLI, follow these steps:
1. Log in to your Jenkins portal.
2. Click on your username and select **Configure**.
3. Scroll down to **API Tokens**.
4. If you do not have an API token, click **Add New Token** to generate one.
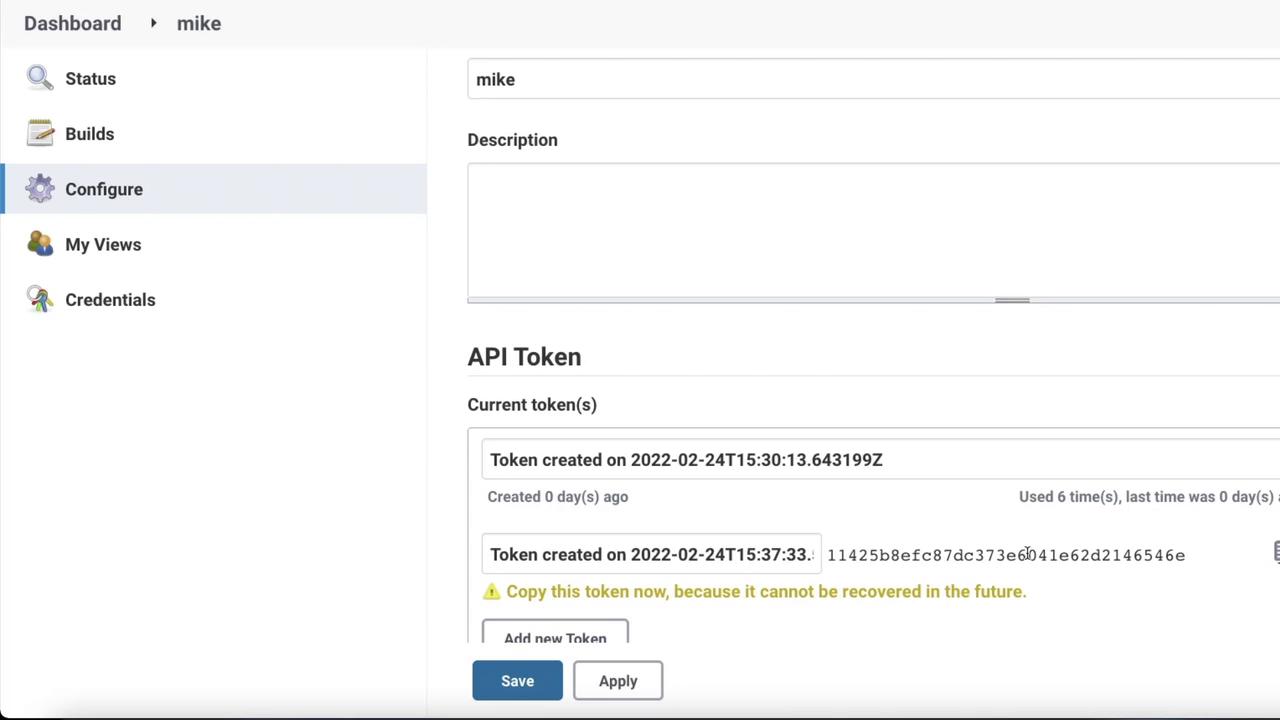
Once you have your API token, authenticate with the CLI by executing:
```bash theme={null}
mike@jenkinshost01:~$ java -jar jenkins-cli.jar -s http://20.127.124.114:8080/ -auth mike:11f2ac3217dc7c01abe3a9d3c4bababe5d
```
Successful authentication will display a list of available commands.
## Working with Jobs Using the CLI
### Listing Jobs
To see the available jobs, run:
```bash theme={null}
mike@jenkinshost01:~$ java -jar jenkins-cli.jar -s http://20.127.124.114:8080/ -auth mike:11f2ac3217dc7c01abe3a9d3c4bababe5d -webSocket list-jobs
```
At this stage, you might see a single job, such as `test1`. To further explore, let’s create a new job.
### Creating a New Job
1. In the Jenkins portal, create a new CI/CD pipeline job. For example, name it **Test2**.
2. Select the **Pipeline** option and click **OK**.
3. In the job configuration, scroll down and click **Try Sample Pipeline**, then choose **Hello World**.
4. Click **Save** to finalize the setup.
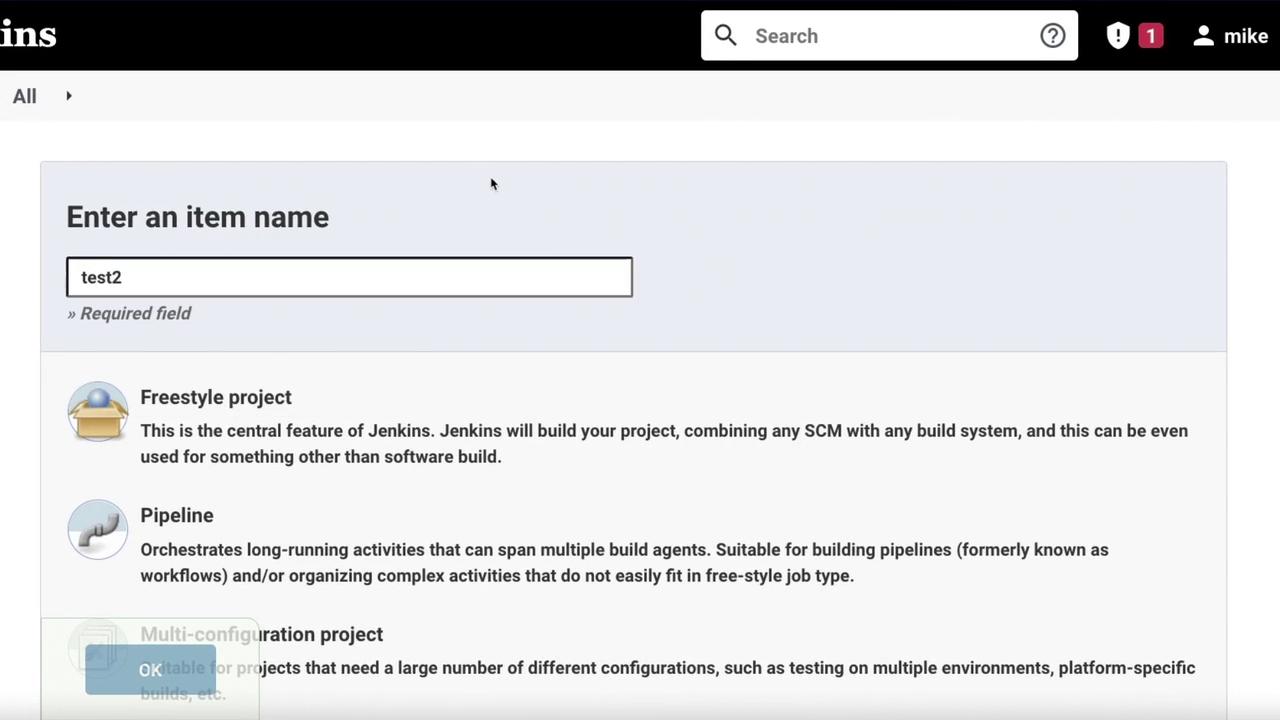
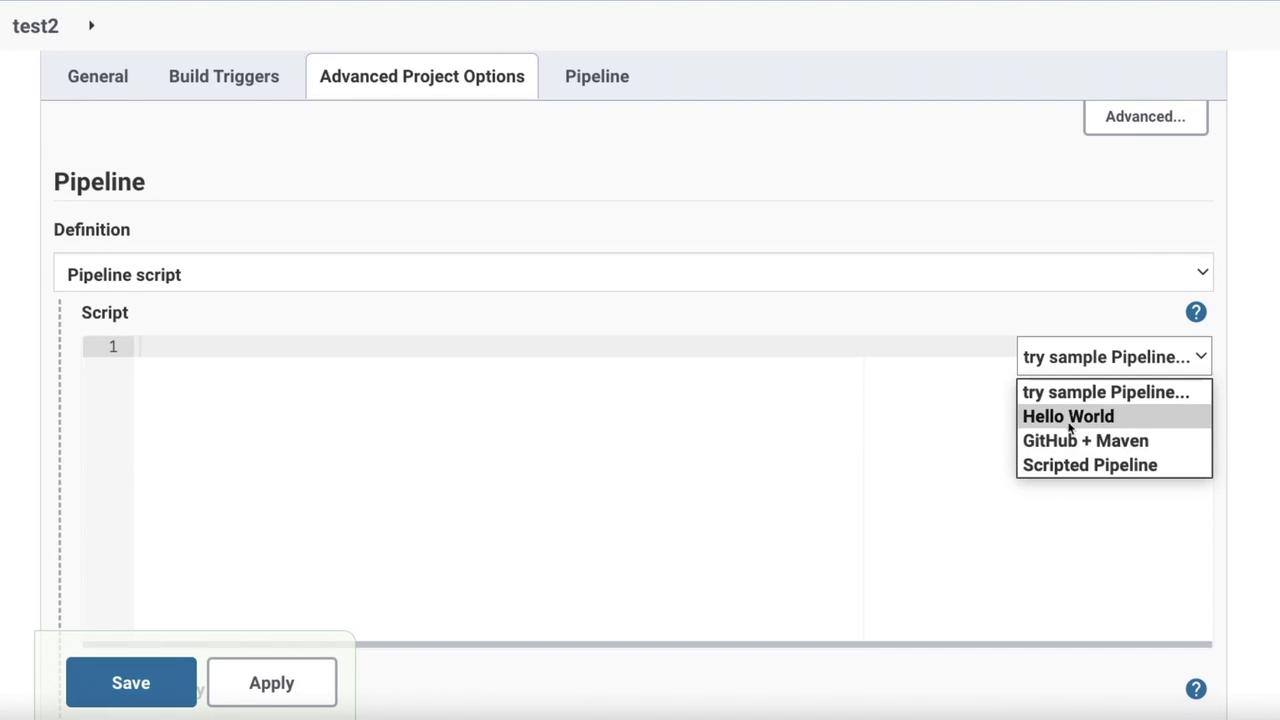
Return to your terminal, clear the screen as needed, and run the list-jobs command once more:
```bash theme={null}
mike@jenkinshost01:~$ java -jar jenkins-cli.jar -s http://20.127.124.114:8080/ -auth mike:11f2ac3217dc7c01abe3a9d3c4bababe5d -webSocket list-jobs
test1
test2
```
### Building a Job
Now, build the newly created job using:
```bash theme={null}
mike@jenkinshost01:~$ java -jar jenkins-cli.jar -s http://20.127.124.114:8080/ -auth mike:11f2ac3217dc7c01abe3a9d3c4bababe5d -webSocket build test2
```
After executing the build command, verify in the Jenkins portal that the job has been built successfully.
Ensure that you monitor the Jenkins job status in the portal to troubleshoot any issues with job execution.
## Summary
This guide demonstrated how to:
* Download and install the Jenkins CLI.
* Authenticate to Jenkins using an API token.
* List available jobs and build a specific job using CLI commands.
By practicing these commands, you will gain proficiency in Jenkins automation tasks and streamline your CI/CD workflows. Happy automating!
## Additional Resources
* [Jenkins Documentation](https://www.jenkins.io/doc/)
* [Jenkins CLI Overview](https://www.jenkins.io/doc/book/managing/cli/)