This article demonstrates how to set up a sample Jenkins pipeline before building a full Go application pipeline.
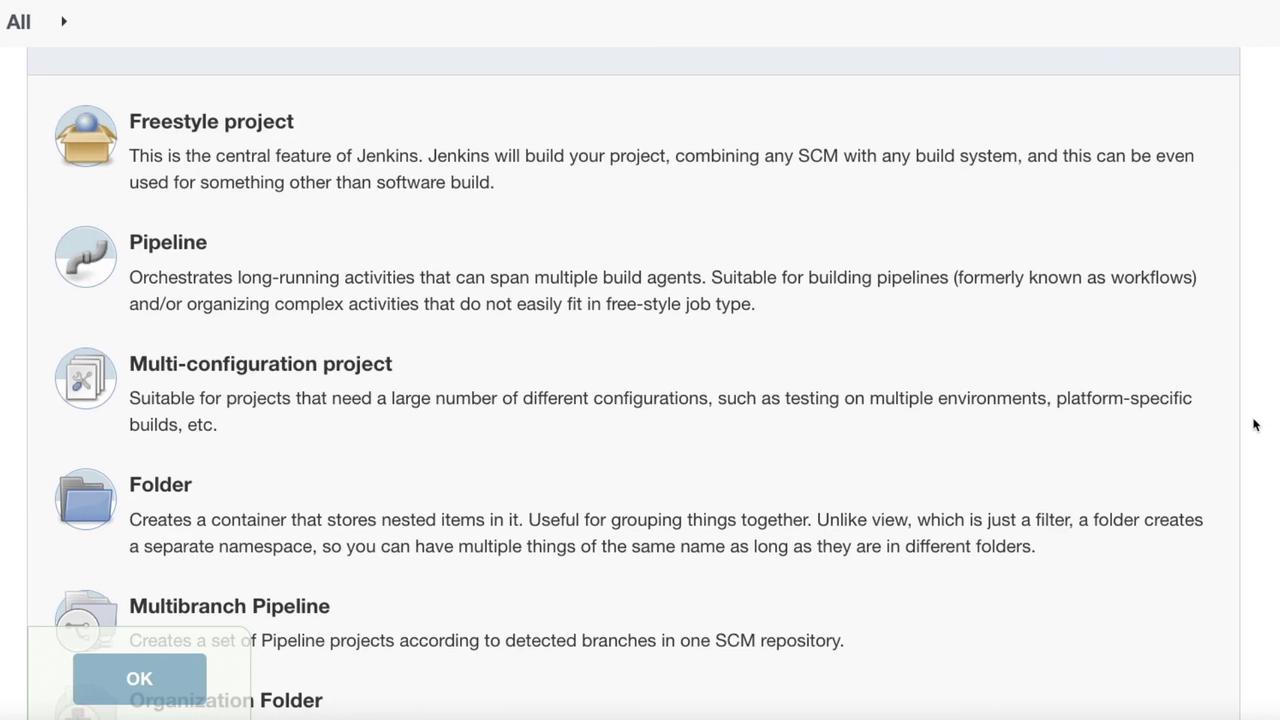
Before constructing our full pipeline—which will eventually push and build our Go application—this lesson demonstrates how to set up a sample Jenkins pipeline. Starting with a sample pipeline is an excellent way to grasp the basics before transitioning to a production-ready setup.In the Jenkins dashboard, click on New Item and assign your pipeline a name. For this example, let’s name it “test four”. Once you provide a name, you will see several project options:
Freestyle Project:
A core Jenkins feature that can build the project using any SCM or build system. It is not restricted to software applications.
Pipeline:
This option enables you to create a pipeline project, which is typically the preferred choice for modern implementations.
Multi-configuration Project:
Ideal for scenarios that require multiple configurations, such as managing development and UAT stages.
Folder:
Creates a container to group nested projects for better organization and management.
Multibranch Pipeline:
Sets up a pipeline project across different repositories, such as various GitHub repositories.
Organization Folder:
Automatically creates a multi-branch project for all subfolders, making it easier to organize numerous projects.
For this lesson, select Pipeline and click OK.Once you choose the Pipeline option, several configuration settings become available. Begin by providing a descriptive text such as “Deploy our sample pipeline to test out Jenkins” to clearly communicate the pipeline’s purpose.Below are some of the key configuration options you might consider:
Discard Old Builds:
Prevents Jenkins from indefinitely keeping old builds. This is particularly useful if you prefer to maintain builds only for a certain duration (e.g., a few weeks) unless needed for troubleshooting.
Do Not Allow Concurrent Builds:
Ensures that multiple instances of the build do not run simultaneously. While this is useful in some scenarios, it may not be suitable for larger environments with multiple teams.
Do Not Allow the Pipeline to Resume if the Controller Restarts:
Ensures that if the Jenkins server restarts, an in-progress build will not resume automatically.
GitHub Project:
Allows you to enter the project URL along with additional configurations such as pipeline durability, override settings, and preserving stashes from completed builds.
Parameterized Project:
Prompts users to input one or more parameters at build time—ideal when variables need to be passed into the pipeline dynamically.
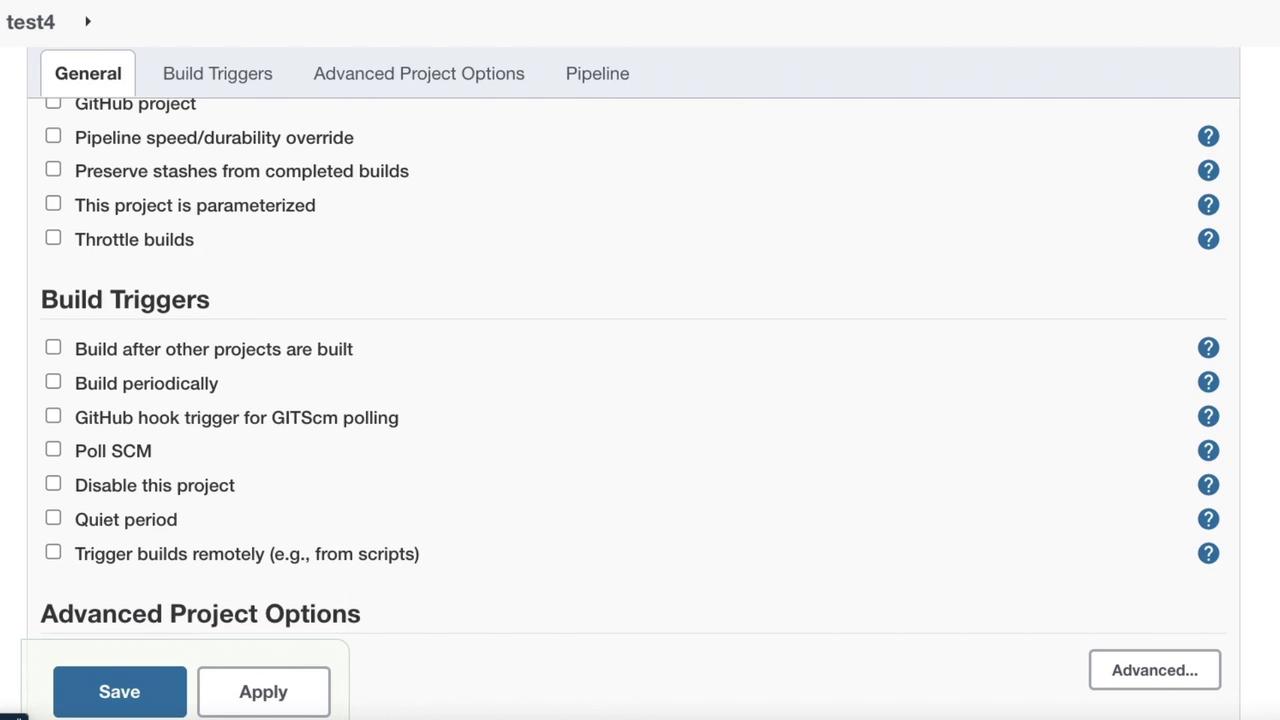
Throttle Builds:
Enforces a minimum interval between builds. This is useful in slower systems or while scaling resources gradually. Unlike preventing concurrent builds, throttling allows controlled concurrent builds.
Next, configure the build triggers:
The available build triggers include:
Build after other projects have been built: Similar to throttling builds.
Build periodically: Operates like a cron job (for example, run every day at 2 AM).
GitHub hook trigger for Git SCM polling: Functions as a push hook to trigger the build.
Poll SCM: Regularly checks for source code changes.
Disable this project: Prevents the project from being built.
Quiet period: Queues the build and triggers it remotely, which is useful when triggering via a predefined URL.
Scroll down to the advanced project options. Typically, the only configurable option here is setting a display name.Finally, configure the actual pipeline script. Jenkins offers several sample pipeline options, such as “Hello World,” a GitHub plus Maven example, and a scripted pipeline example. Below is a scripted pipeline example:
Copy
node { def mvnHome stage('Preparation') { // for display purposes // Get some code from a GitHub repository git 'https://github.com/jglick/simple-maven-project-with-tests.git' // Get the Maven tool. // <Callout icon="lightbulb" color="#1CB2FE">// **NOTE:** This 'M3' Maven tool must be configured in Jenkins' global configuration. //</Callout> mvnHome = tool 'M3' } stage('Build') { // Run the Maven build withEnv(["MVN_HOME=$mvnHome"]) { if (isUnix()) { sh "$MVN_HOME/bin/mvn -Dmaven.test.failure.ignore clean package" } } }}
This example demonstrates a build stage that executes multiple commands in a Unix-like environment. For simplicity, we’ll choose the Hello World pipeline option and review the following Groovy code snippet:
Copy
// Run the maven buildwithEnv(["MVN_HOME=$mvnHome"]) { if (isUnix()) { sh "$MVN_HOME/bin/mvn -Dmaven.test.failure.ignore clean package" } else { bat "%MVN_HOME%\\bin\\mvn -Dmaven.test.failure.ignore clean package" }}stage('Results') { junit '**/target/surefire-reports/TEST-*.xml' archiveArtifacts 'target/*.jar'}
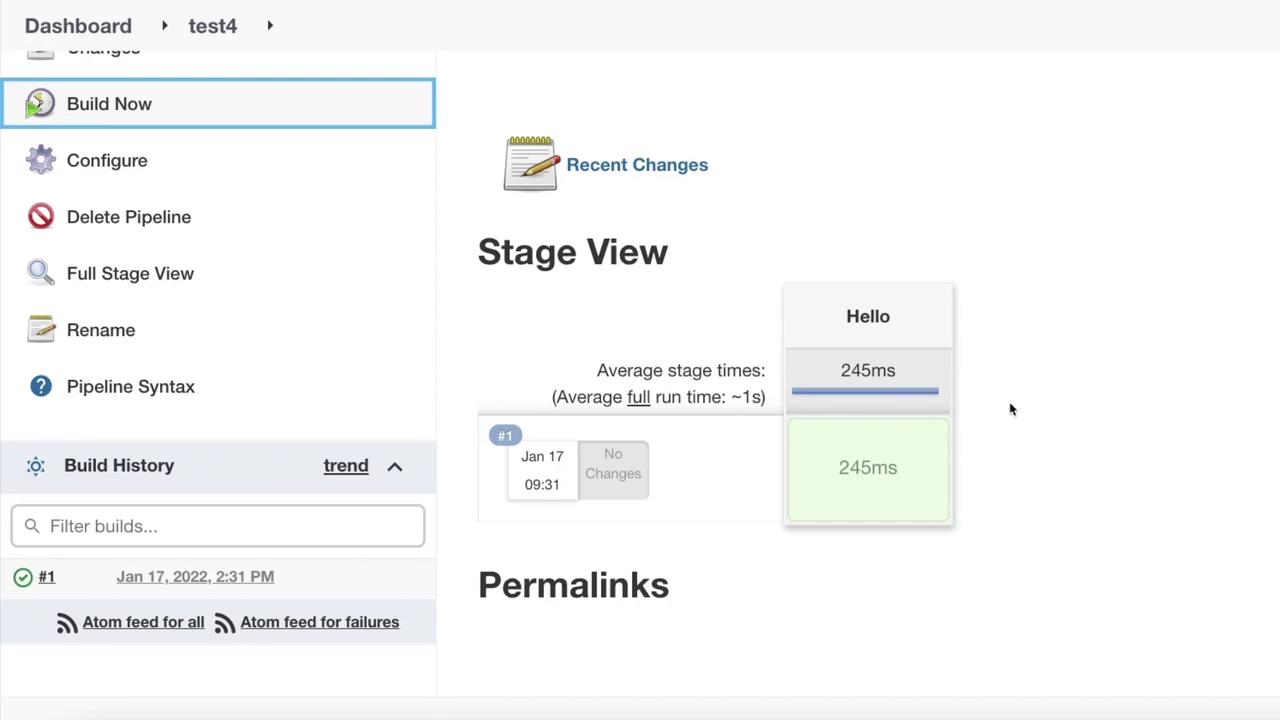
The pipeline utilizes the Groovy sandbox environment. Groovy is a powerful scripting language built on top of Java, providing extensive capabilities similar to Java.Click Save to store your configuration. You can now trigger a build by clicking Build Now. The build will be scheduled and executed in a matter of seconds.
After the initial build completes, you can modify the configuration as needed. For example, to change the stage name, click on Configure again and update the stage section with the following configuration to rename the stage to “Dev”: