> ## Documentation Index
> Fetch the complete documentation index at: https://notes.kodekloud.com/llms.txt
> Use this file to discover all available pages before exploring further.
# Run a Sample Pipeline
> This article demonstrates how to set up a sample Jenkins pipeline before building a full Go application pipeline.
Before constructing our full pipeline—which will eventually push and build our Go application—this lesson demonstrates how to set up a sample Jenkins pipeline. Starting with a sample pipeline is an excellent way to grasp the basics before transitioning to a production-ready setup.
In the Jenkins dashboard, click on **New Item** and assign your pipeline a name. For this example, let's name it "test four". Once you provide a name, you will see several project options:
* **Freestyle Project:**\
A core Jenkins feature that can build the project using any SCM or build system. It is not restricted to software applications.
* **Pipeline:**\
This option enables you to create a pipeline project, which is typically the preferred choice for modern implementations.
* **Multi-configuration Project:**\
Ideal for scenarios that require multiple configurations, such as managing development and UAT stages.
* **Folder:**\
Creates a container to group nested projects for better organization and management.
* **Multibranch Pipeline:**\
Sets up a pipeline project across different repositories, such as various GitHub repositories.
* **Organization Folder:**\
Automatically creates a multi-branch project for all subfolders, making it easier to organize numerous projects.
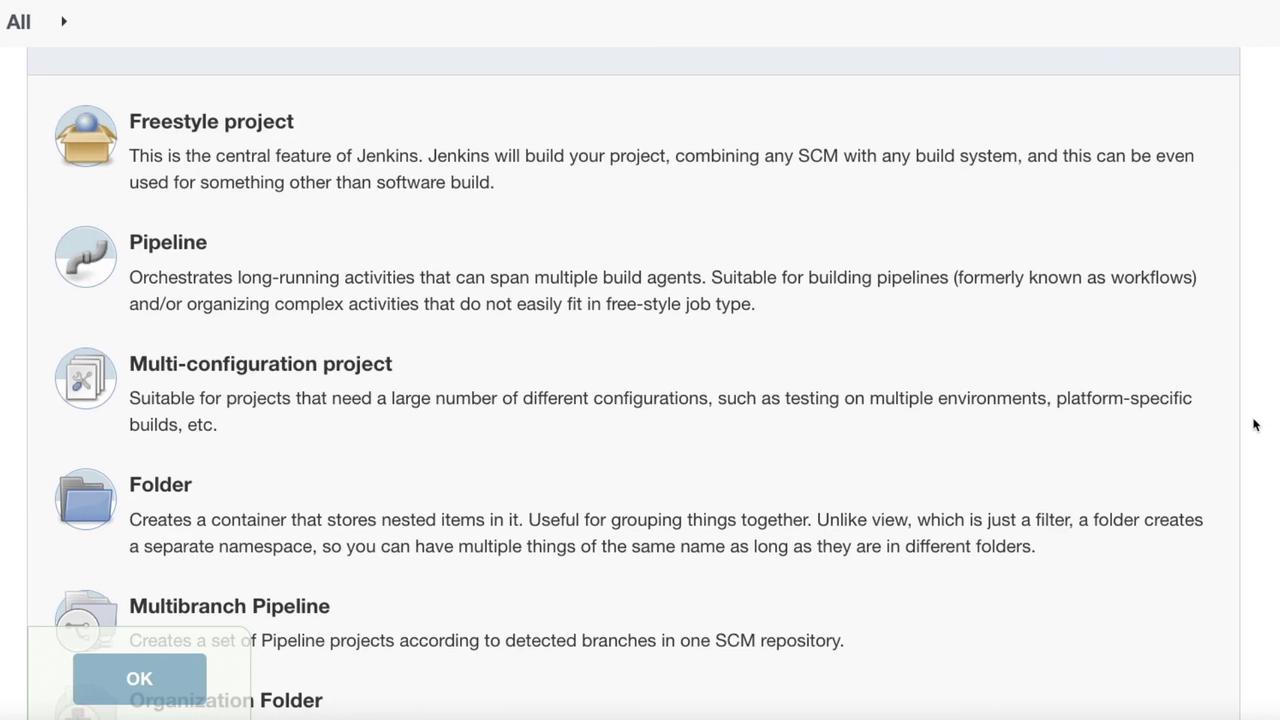
For this lesson, select **Pipeline** and click **OK**.
Once you choose the Pipeline option, several configuration settings become available. Begin by providing a descriptive text such as "Deploy our sample pipeline to test out Jenkins" to clearly communicate the pipeline's purpose.
Below are some of the key configuration options you might consider:
* **Discard Old Builds:**\
Prevents Jenkins from indefinitely keeping old builds. This is particularly useful if you prefer to maintain builds only for a certain duration (e.g., a few weeks) unless needed for troubleshooting.
* **Do Not Allow Concurrent Builds:**\
Ensures that multiple instances of the build do not run simultaneously. While this is useful in some scenarios, it may not be suitable for larger environments with multiple teams.
* **Do Not Allow the Pipeline to Resume if the Controller Restarts:**\
Ensures that if the Jenkins server restarts, an in-progress build will not resume automatically.
* **GitHub Project:**\
Allows you to enter the project URL along with additional configurations such as pipeline durability, override settings, and preserving stashes from completed builds.
* **Parameterized Project:**\
Prompts users to input one or more parameters at build time—ideal when variables need to be passed into the pipeline dynamically.
* **Throttle Builds:**\
Enforces a minimum interval between builds. This is useful in slower systems or while scaling resources gradually. Unlike preventing concurrent builds, throttling allows controlled concurrent builds.
Next, configure the build triggers:
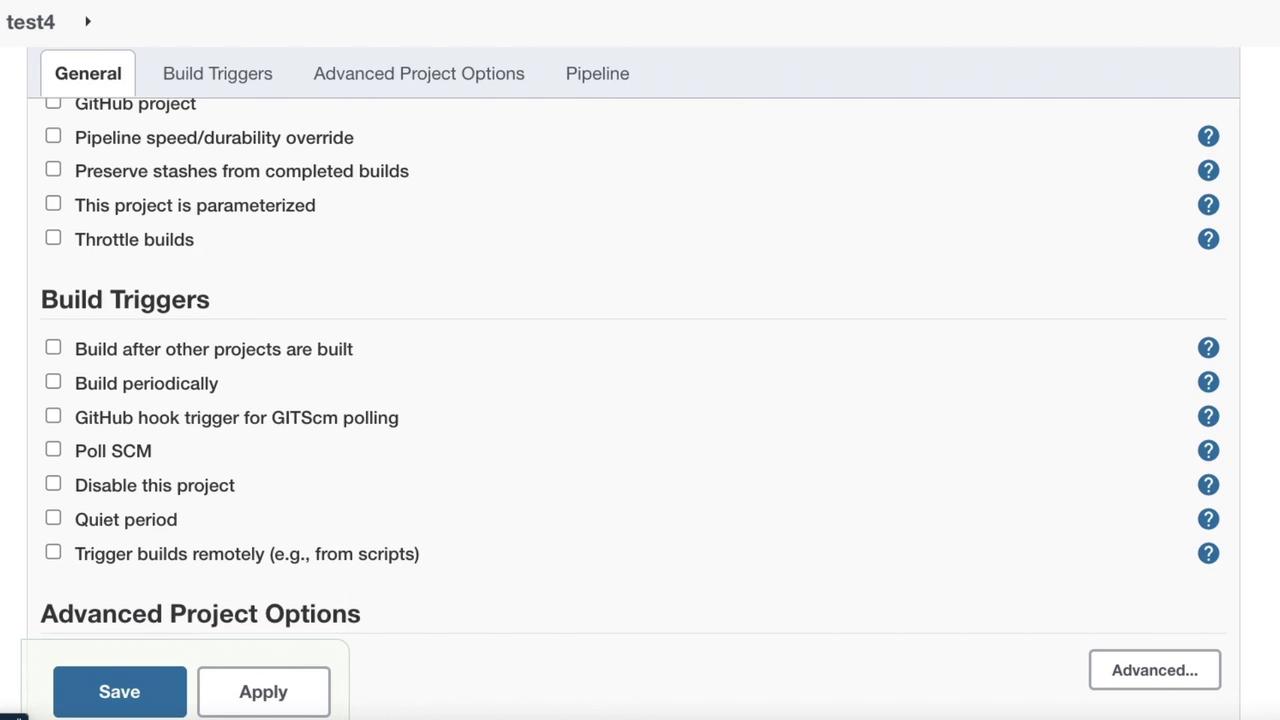
The available build triggers include:
* **Build after other projects have been built:** Similar to throttling builds.
* **Build periodically:** Operates like a cron job (for example, run every day at 2 AM).
* **GitHub hook trigger for Git SCM polling:** Functions as a push hook to trigger the build.
* **Poll SCM:** Regularly checks for source code changes.
* **Disable this project:** Prevents the project from being built.
* **Quiet period:** Queues the build and triggers it remotely, which is useful when triggering via a predefined URL.
Scroll down to the advanced project options. Typically, the only configurable option here is setting a display name.
Finally, configure the actual pipeline script. Jenkins offers several sample pipeline options, such as "Hello World," a GitHub plus Maven example, and a scripted pipeline example. Below is a scripted pipeline example:
```groovy theme={null}
node {
def mvnHome
stage('Preparation') { // for display purposes
// Get some code from a GitHub repository
git 'https://github.com/jglick/simple-maven-project-with-tests.git'
// Get the Maven tool.
//
// **NOTE:** This 'M3' Maven tool must be configured in Jenkins' global configuration.
//
mvnHome = tool 'M3'
}
stage('Build') {
// Run the Maven build
withEnv(["MVN_HOME=$mvnHome"]) {
if (isUnix()) {
sh "$MVN_HOME/bin/mvn -Dmaven.test.failure.ignore clean package"
}
}
}
}
```
This example demonstrates a build stage that executes multiple commands in a Unix-like environment. For simplicity, we'll choose the **Hello World** pipeline option and review the following Groovy code snippet:
```groovy theme={null}
// Run the maven build
withEnv(["MVN_HOME=$mvnHome"]) {
if (isUnix()) {
sh "$MVN_HOME/bin/mvn -Dmaven.test.failure.ignore clean package"
} else {
bat "%MVN_HOME%\\bin\\mvn -Dmaven.test.failure.ignore clean package"
}
}
stage('Results') {
junit '**/target/surefire-reports/TEST-*.xml'
archiveArtifacts 'target/*.jar'
}
```
The pipeline utilizes the Groovy sandbox environment. Groovy is a powerful scripting language built on top of Java, providing extensive capabilities similar to Java.
Click **Save** to store your configuration. You can now trigger a build by clicking **Build Now**. The build will be scheduled and executed in a matter of seconds.
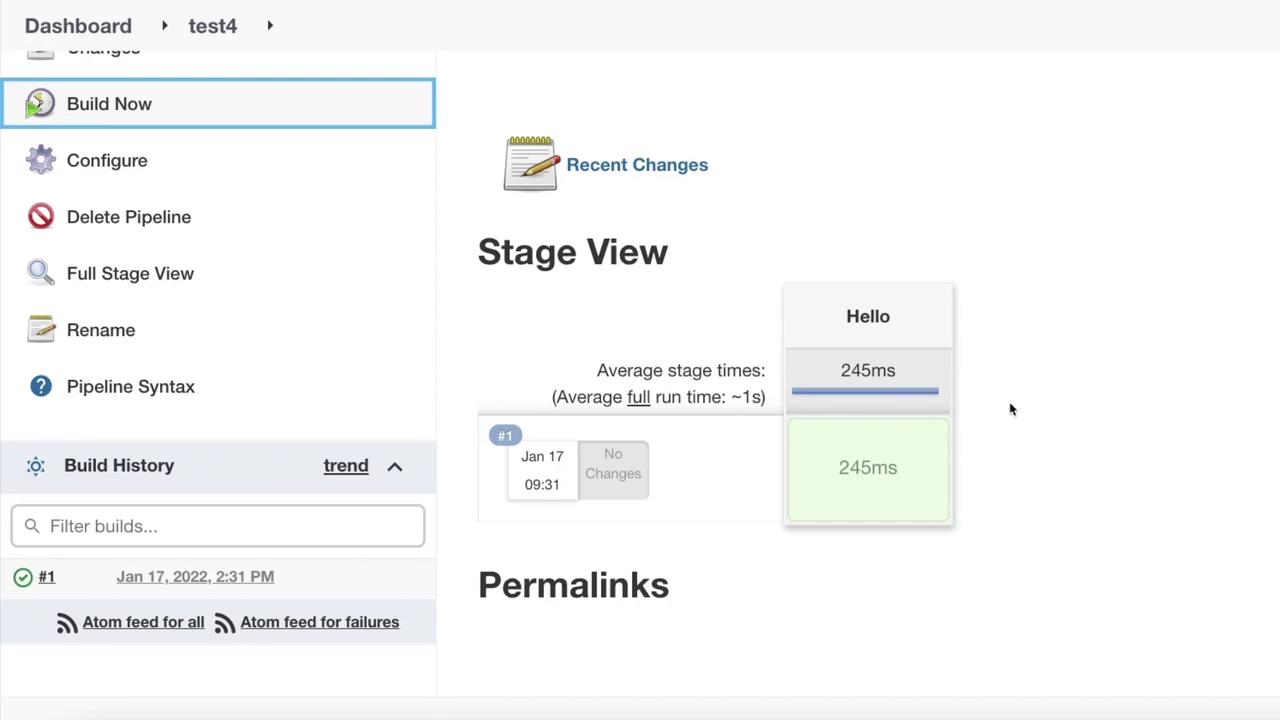
After the initial build completes, you can modify the configuration as needed. For example, to change the stage name, click on **Configure** again and update the stage section with the following configuration to rename the stage to "Dev":
```groovy theme={null}
pipeline {
agent any
stages {
stage('Dev') {
steps {
echo 'Hello World'
}
}
}
}
```
Click **Save** and then **Build Now**. The build will run again, and you will see that the stage name has been updated to "Dev".
This concludes our lesson on setting up a sample pipeline in Jenkins. Experiment with different configurations to further optimize your deployments.